Pink Cord
Pink Corduroy takes Flight
Okay, for real, for real. This isn’t ya girls first jumpsuit and it won’t be the last. It is however, my first flight-suit, so let’s get into it!
If you’ve been following my IG then you know I am no stranger to corduroy. Over the past two years I have created 5 makes with corduroy you can check out one I actually blogged about here.

GET INTO IT
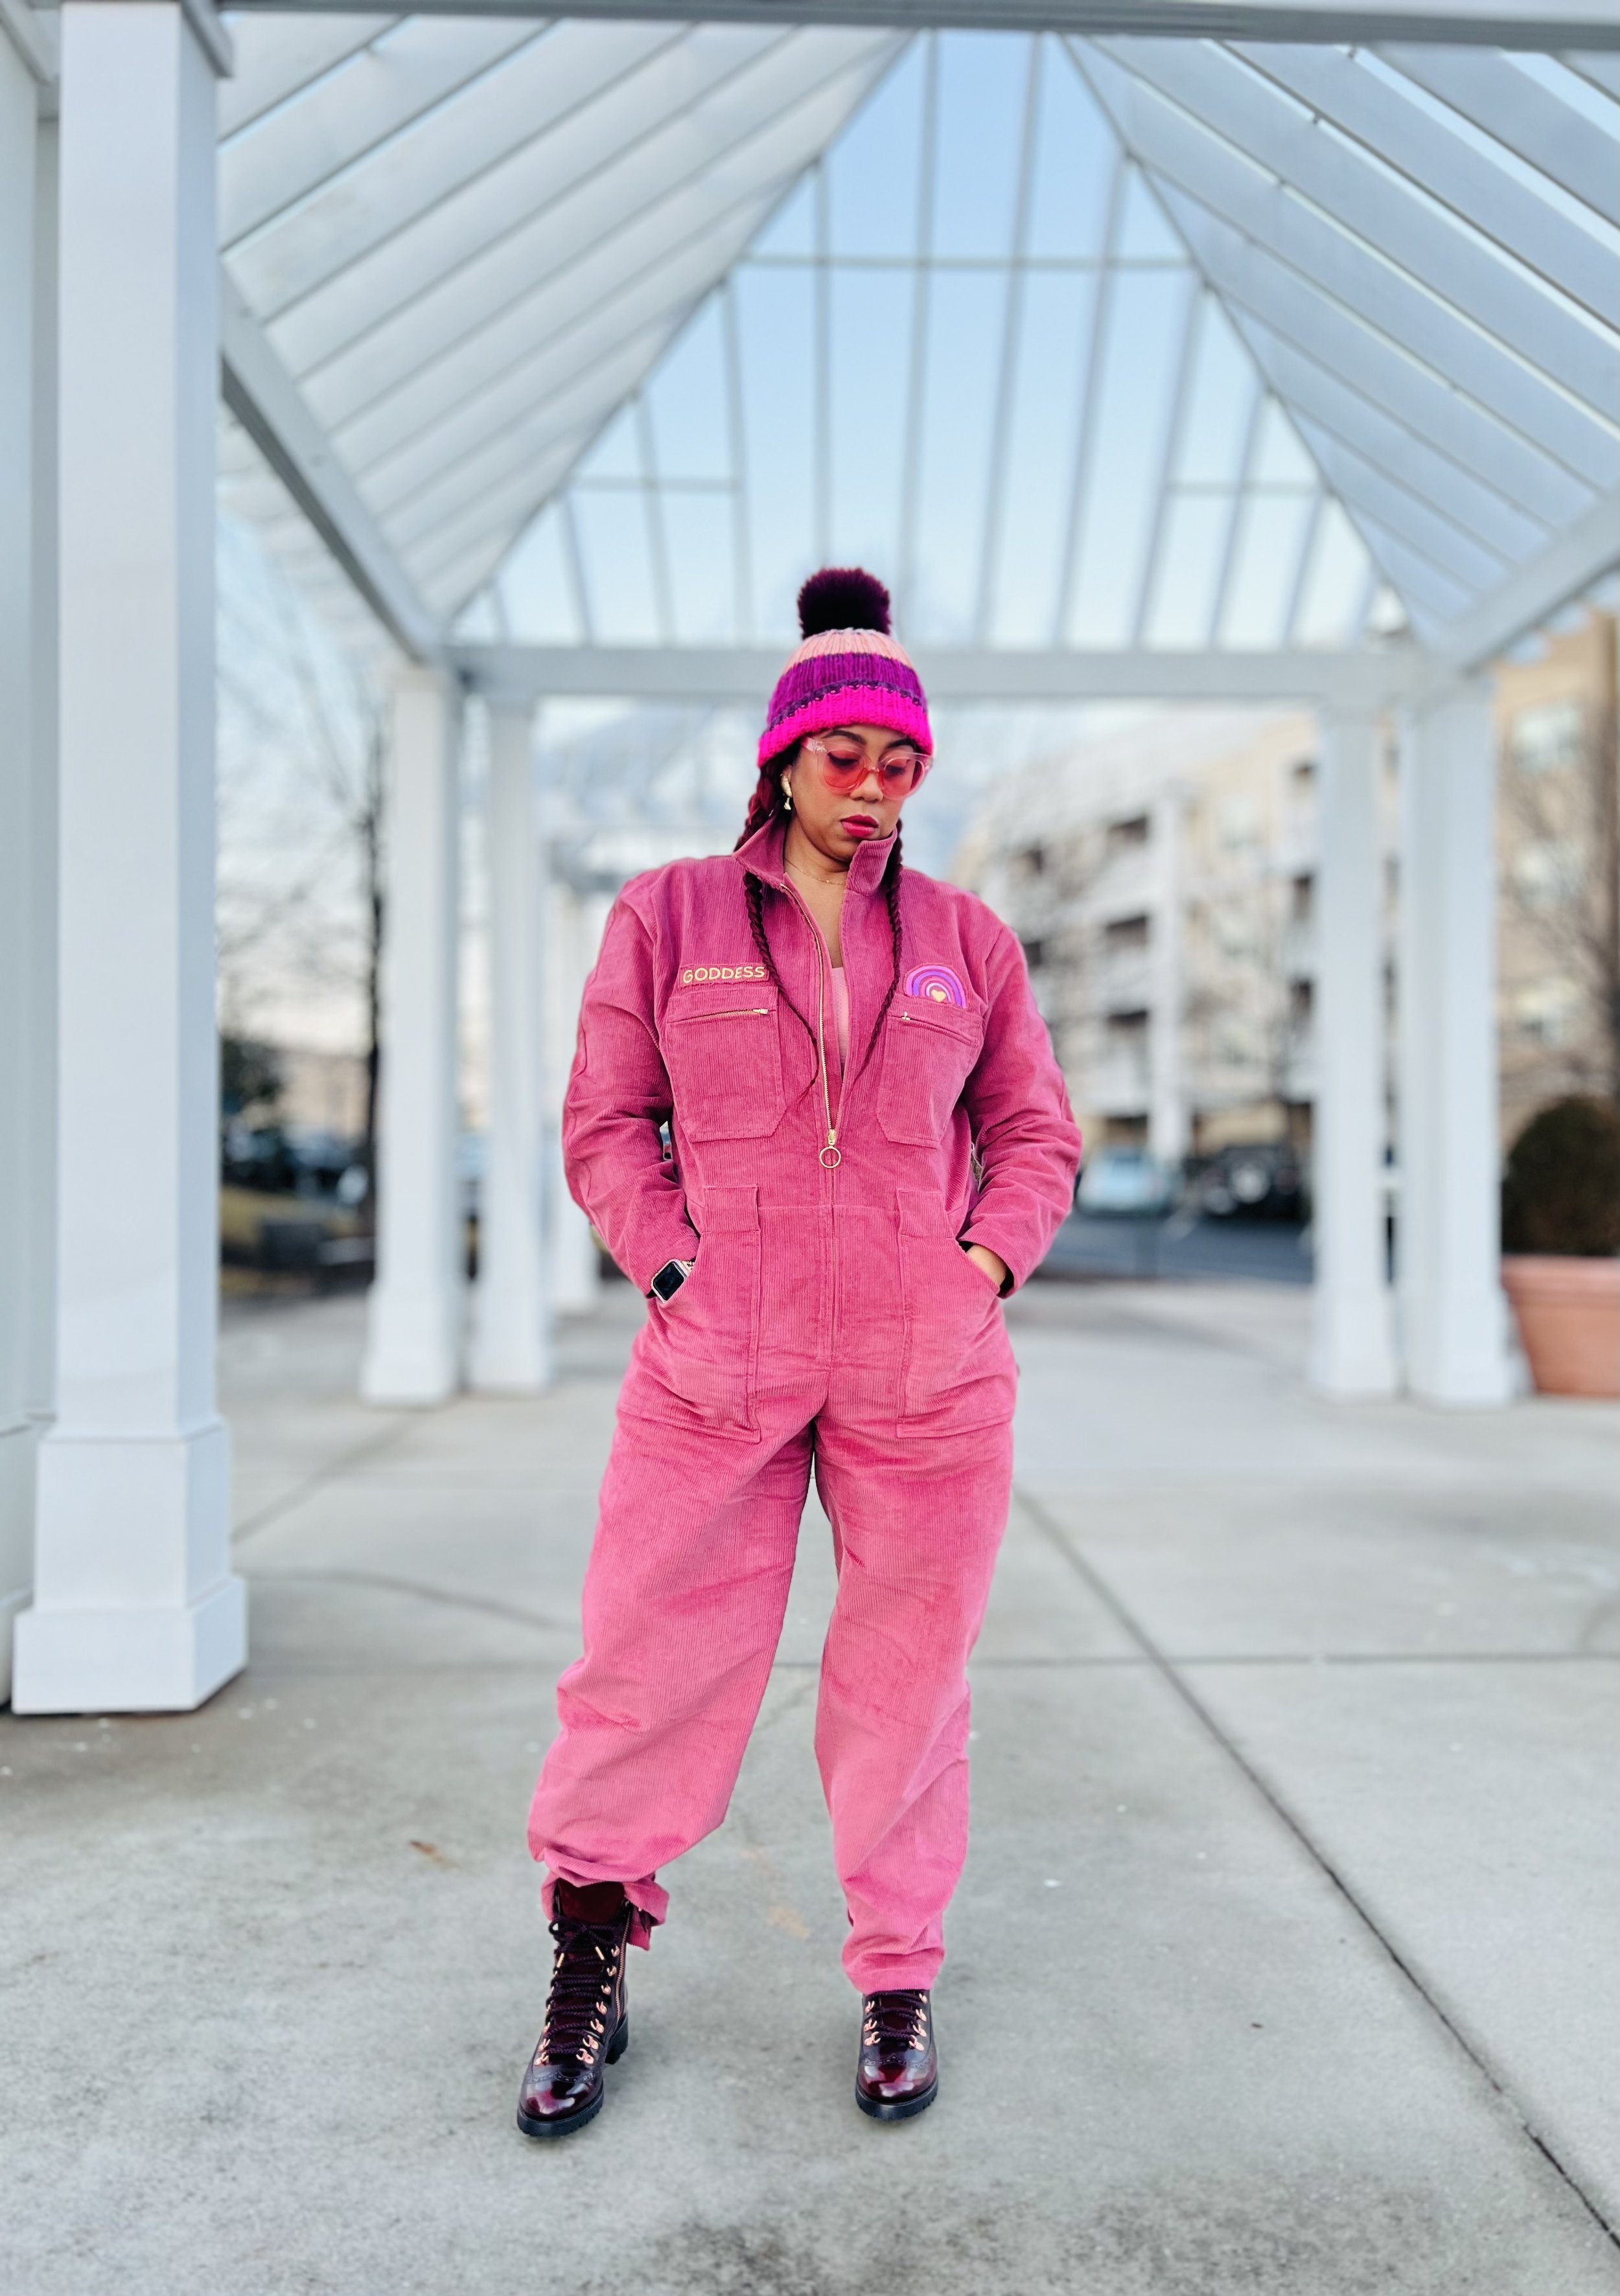
I decided to use the Blanca Flight Suit by Closet Core Patterns. I have had this pattern for at least a year and it has been a year too long. I’ve made other jumpsuits but this flight suit is by far my favorite fit! While I choose a baggy fit for sizing this pattern, it would also be perfect for a more fitted jumpsuit.
FABRIC AND CARE
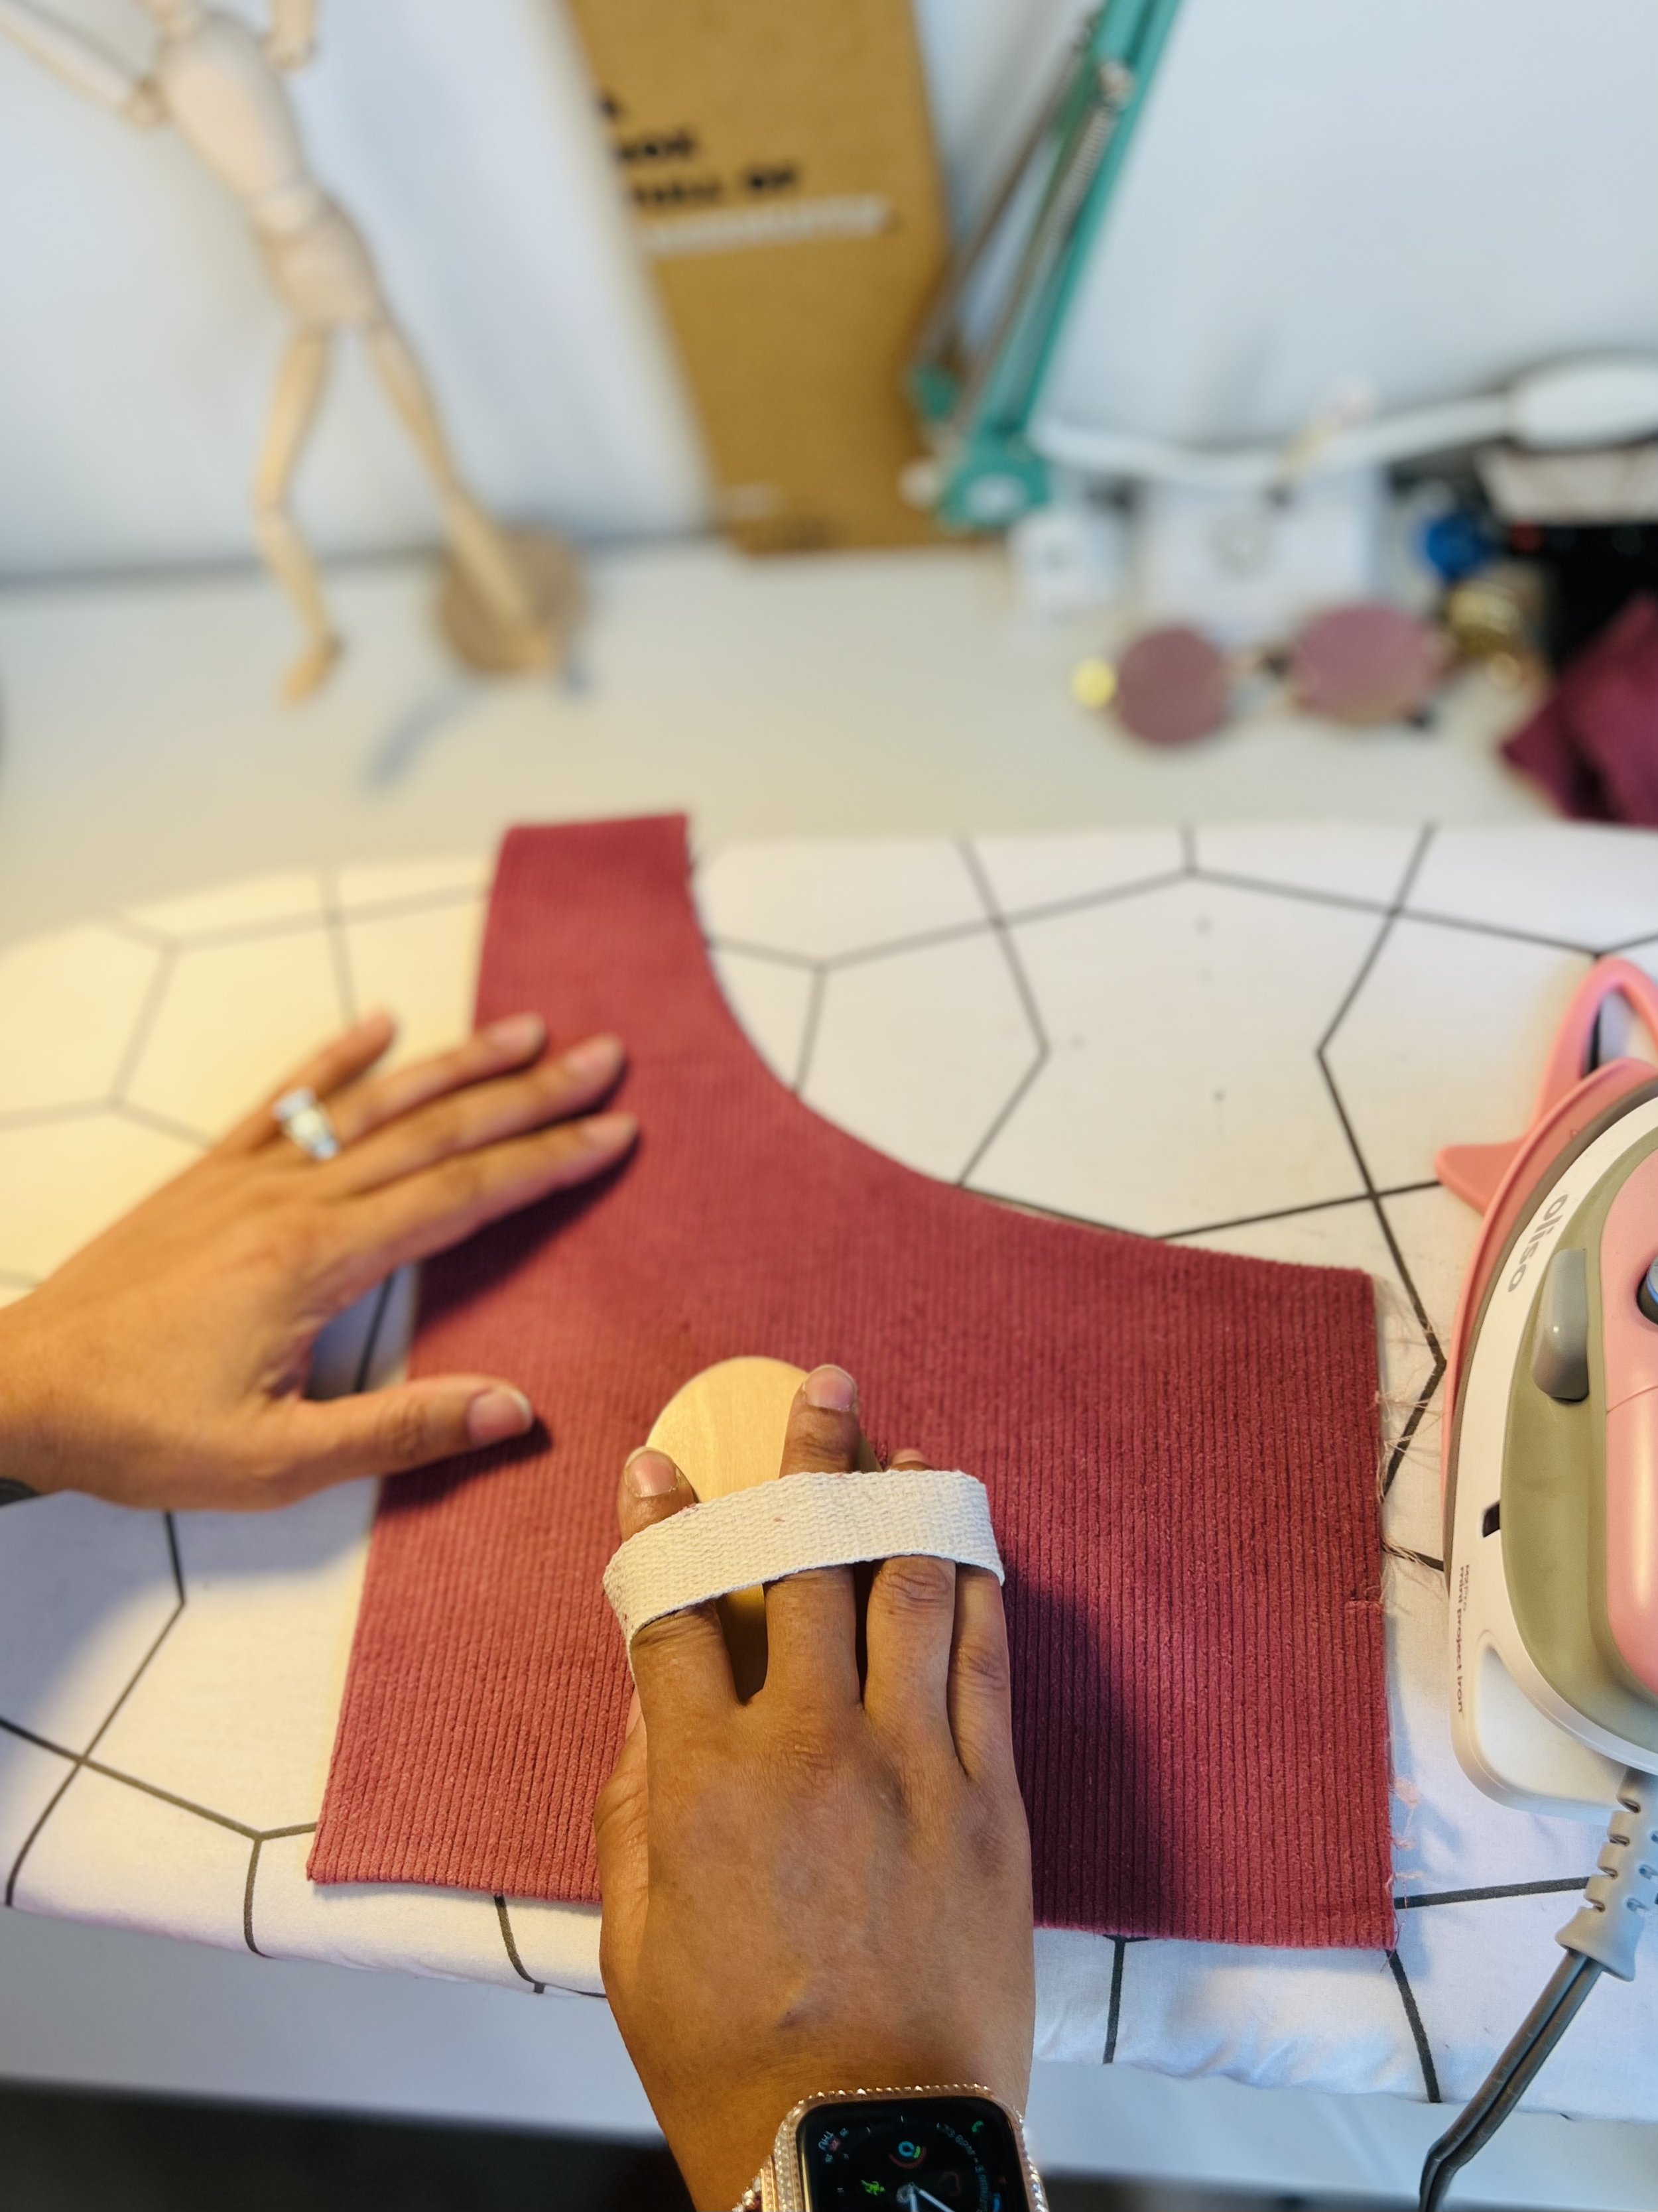
I found this pink corduroy at Hobby Lobby. It has a slight stretch to it and man can it hold some lint, lol. I’m sure there are proper corduroy pile brushes out there but I settled for a skin dry brushing brush I had on hand. If you’re not already aware, when sewing with and caring for corduroy, you shouldn’t press directly on the pile (you can smash it and that doesn’t look good and you can’t get it back). I press on the wrong side only and refrain from using a hot heat setting.
Pattern options
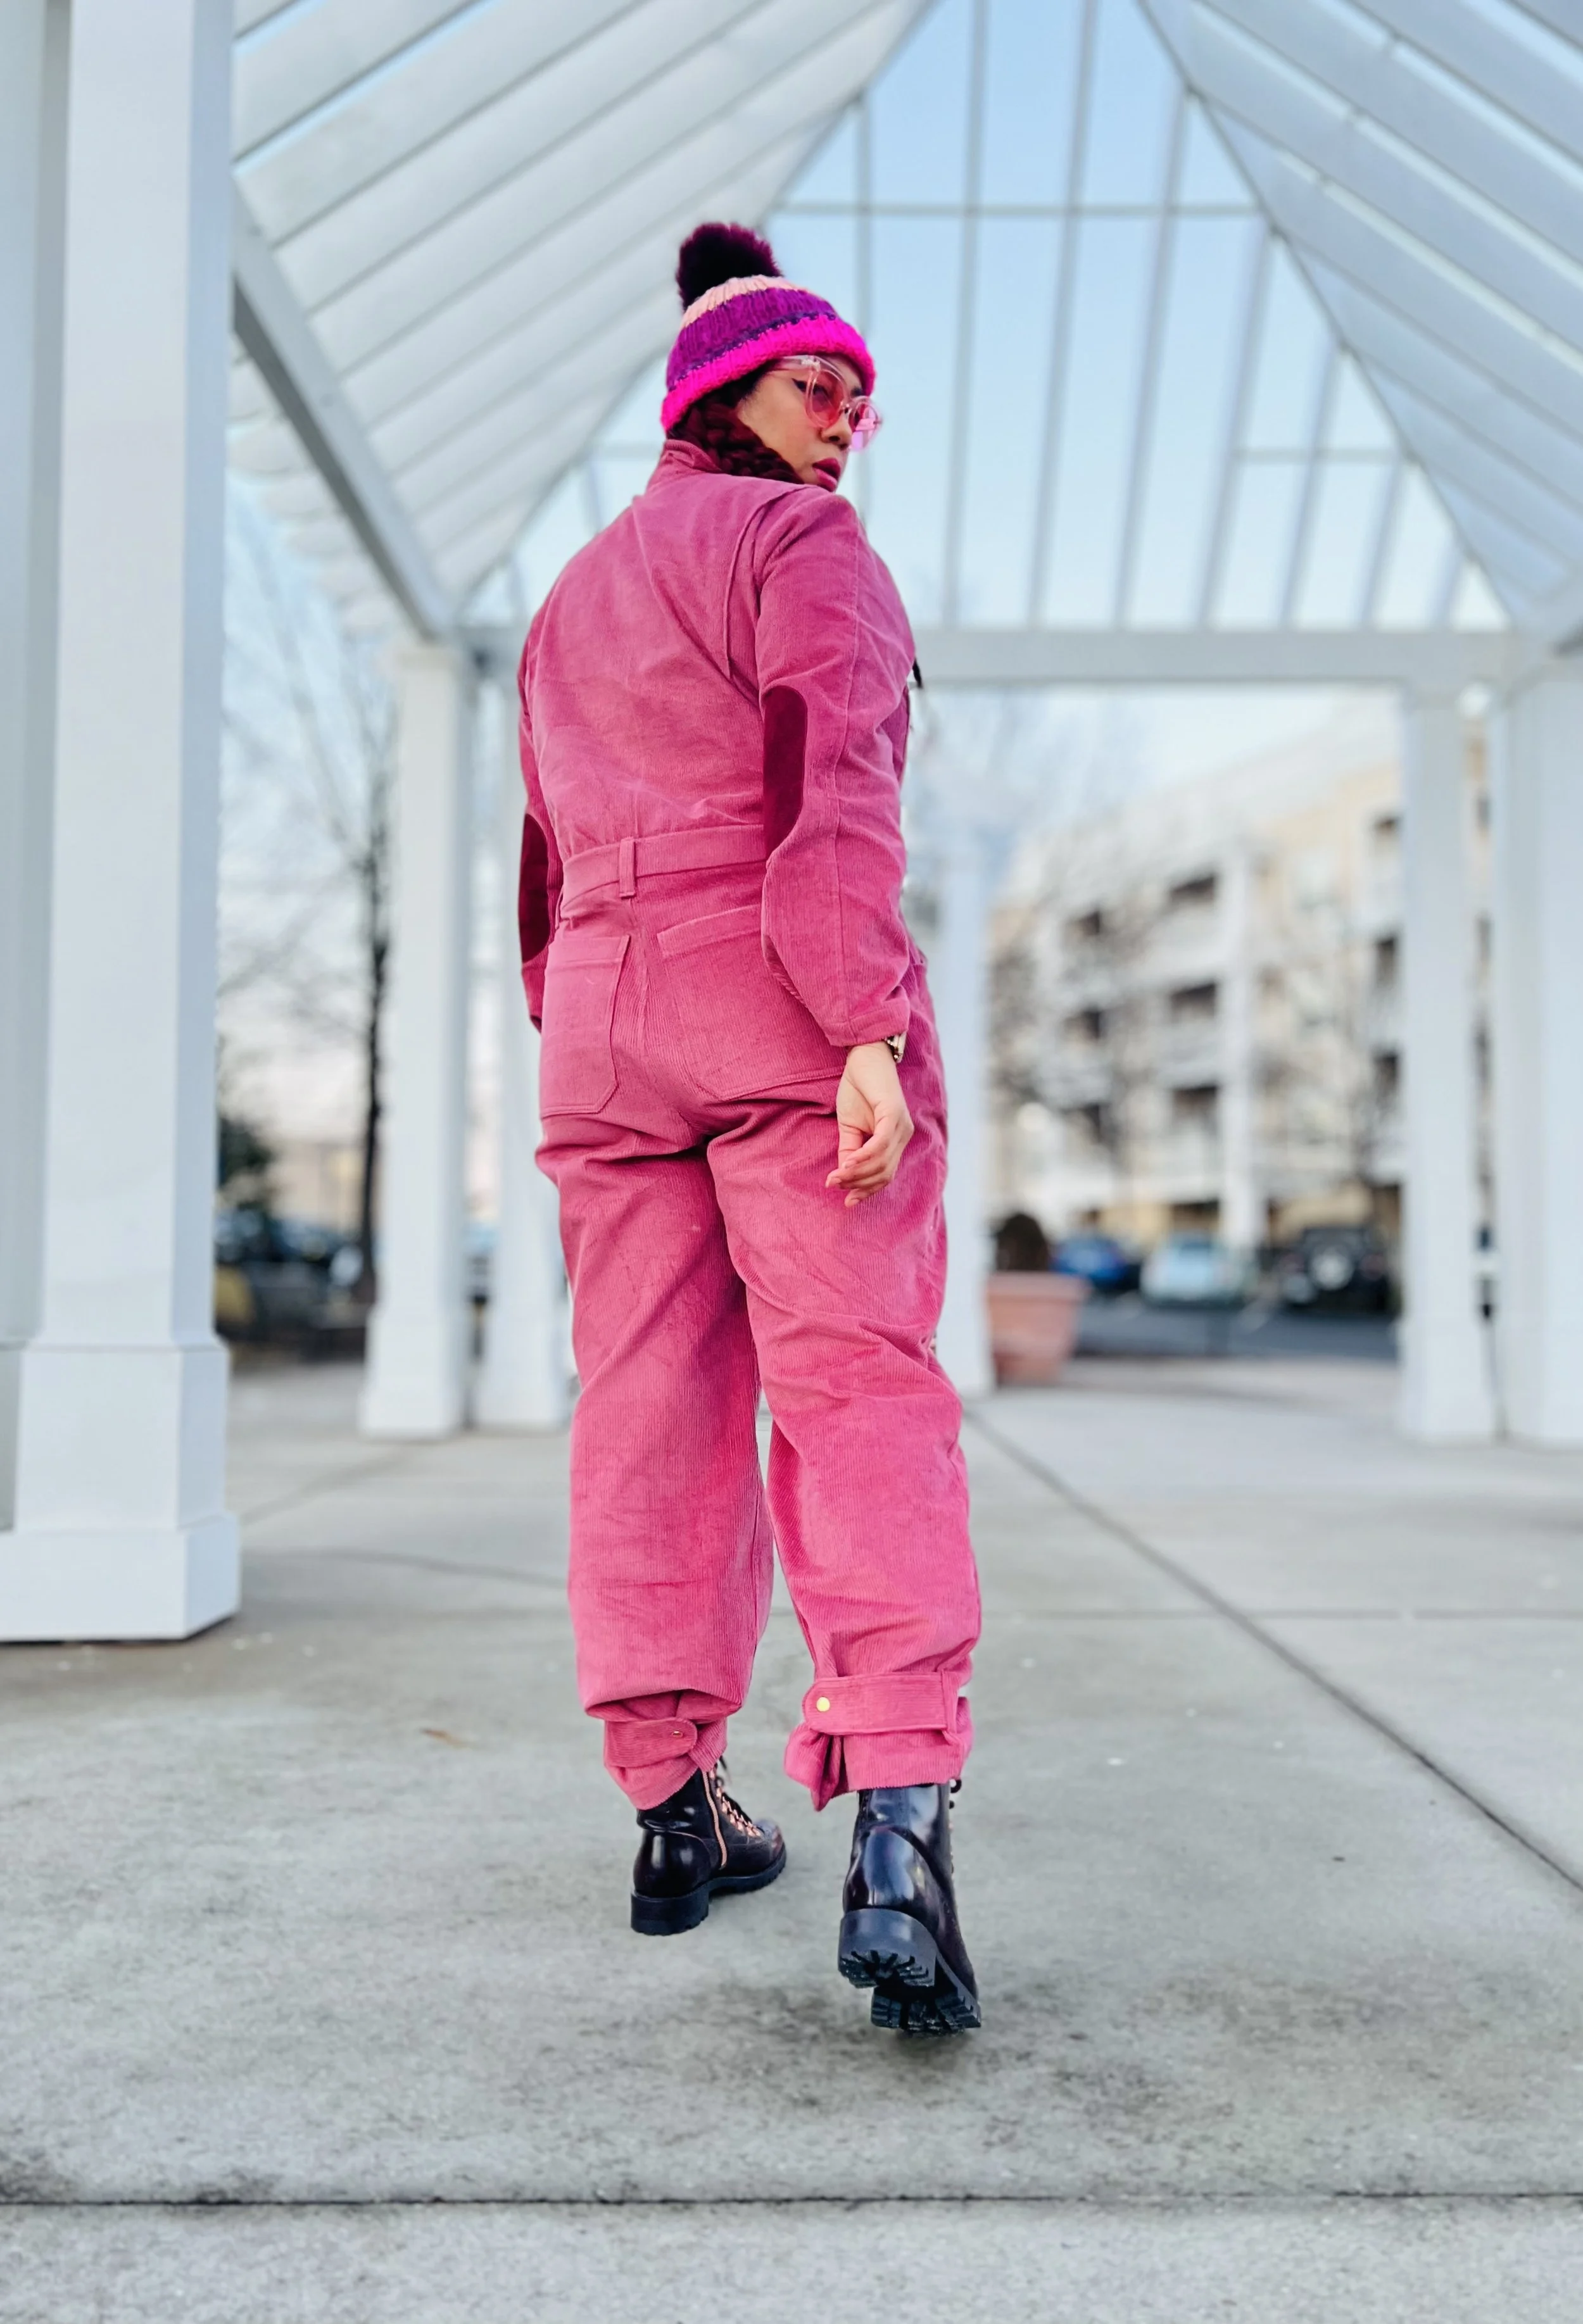
The Blanca has a few options you can choose from like zipper chest pockets, snaps on the sleeves, and tapered legs. I decided to add all three options. If you are on the fence and have never done these types of add-ons don’t fear, the pattern has instructions for them as well. There is a zipper facing on one side but I feel a front facing on both sides and zipper facing is a nice touch. You can opt out of front facing on both sides and simply add binding on the edge of the zipper for nice clean insides.


Customizing Your Flightsuit
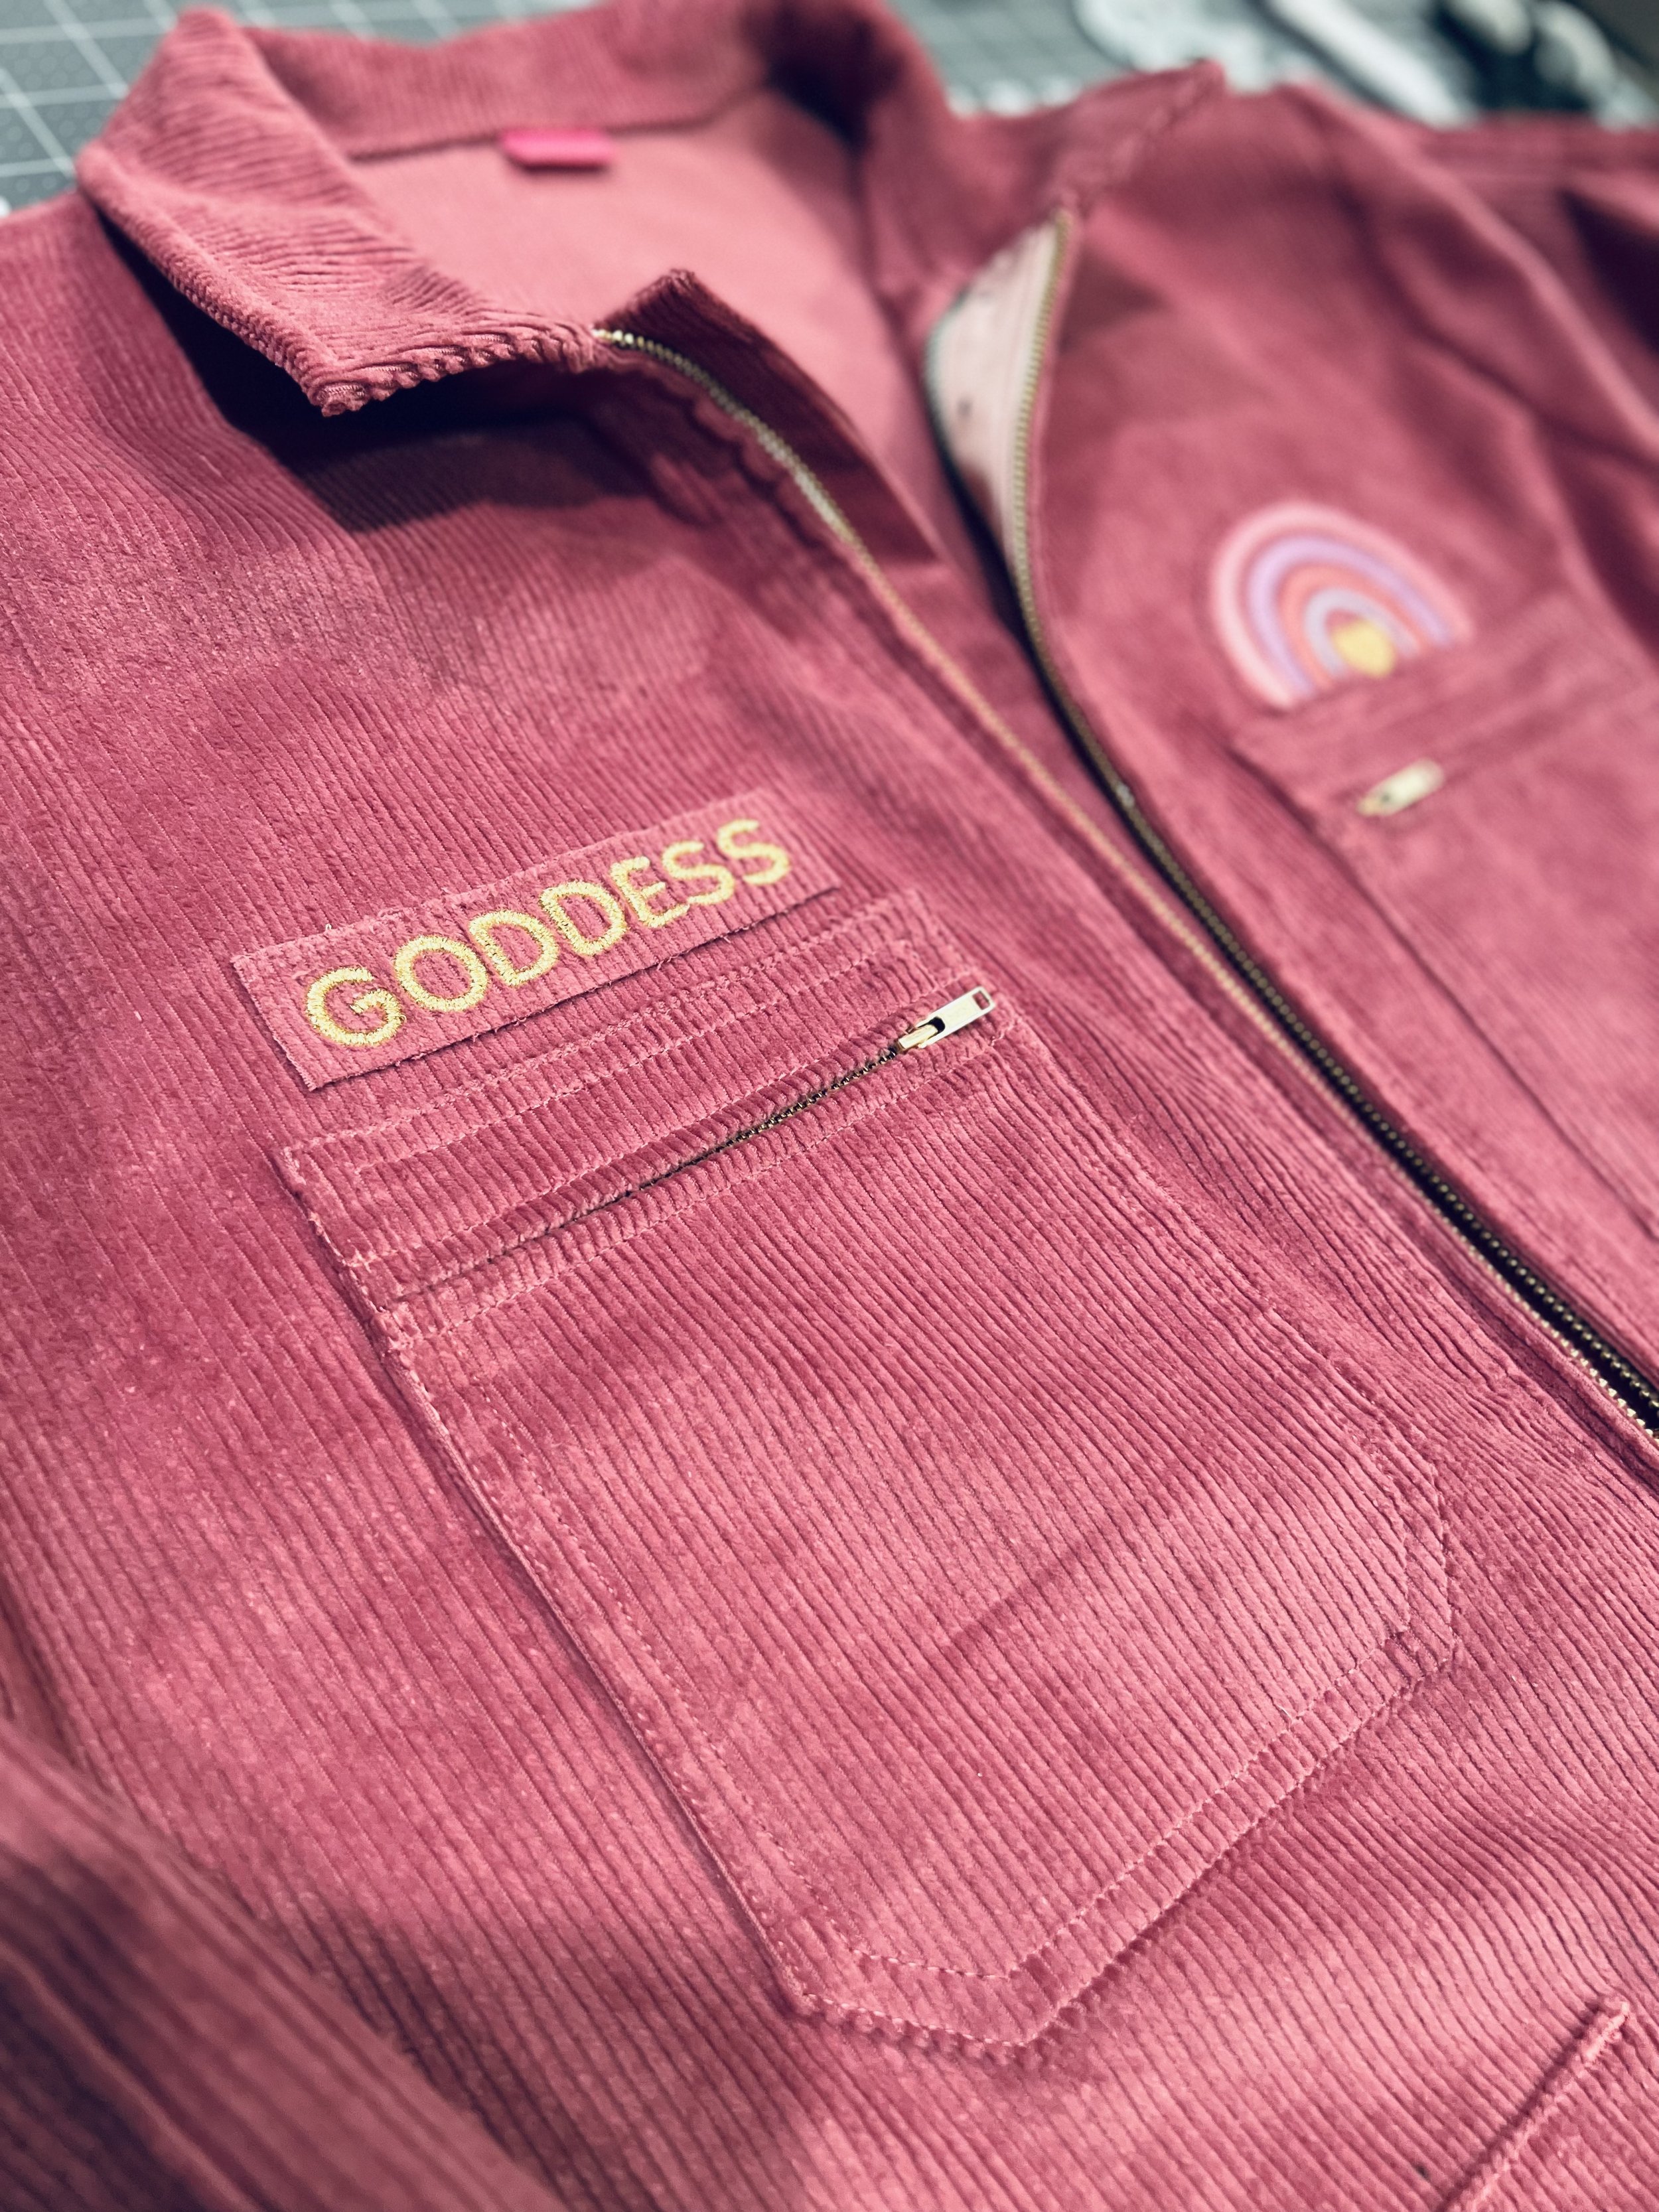
Patches are a given when I think of flightsuits. When I thought about the amount of patches and flare I wanted on my corduroy jumpsuit I decided less is more. Trust me, I could’ve went overboard here. There’s no right or wrong way to the amount of patches you add to your flightsuit but for me, I wanted the flare to be subtle.
I purchased the rainbow embroidery design file from Etsy and I played with the sizing on my BERNINA. I wanted to stick with the patch look so I used scrap pieces of the corduroy to create both the rainbow and the goddess patches. For the goddess patch, I simply used one of the fonts on my 880 and sized to fit above the chest pockets. The patches have a slight fray which is the look I was going for.
If you are interested in seeing more behind the seams with my embroidery projects let me know in the comment section.


I used the hardware from an old belt and spray painted gold. You can check that out on my TikTok below!


Overall
Do I recommend this pattern? Absolutely! Difficulty? Advanced. Wearability? Until the end of time, lol!
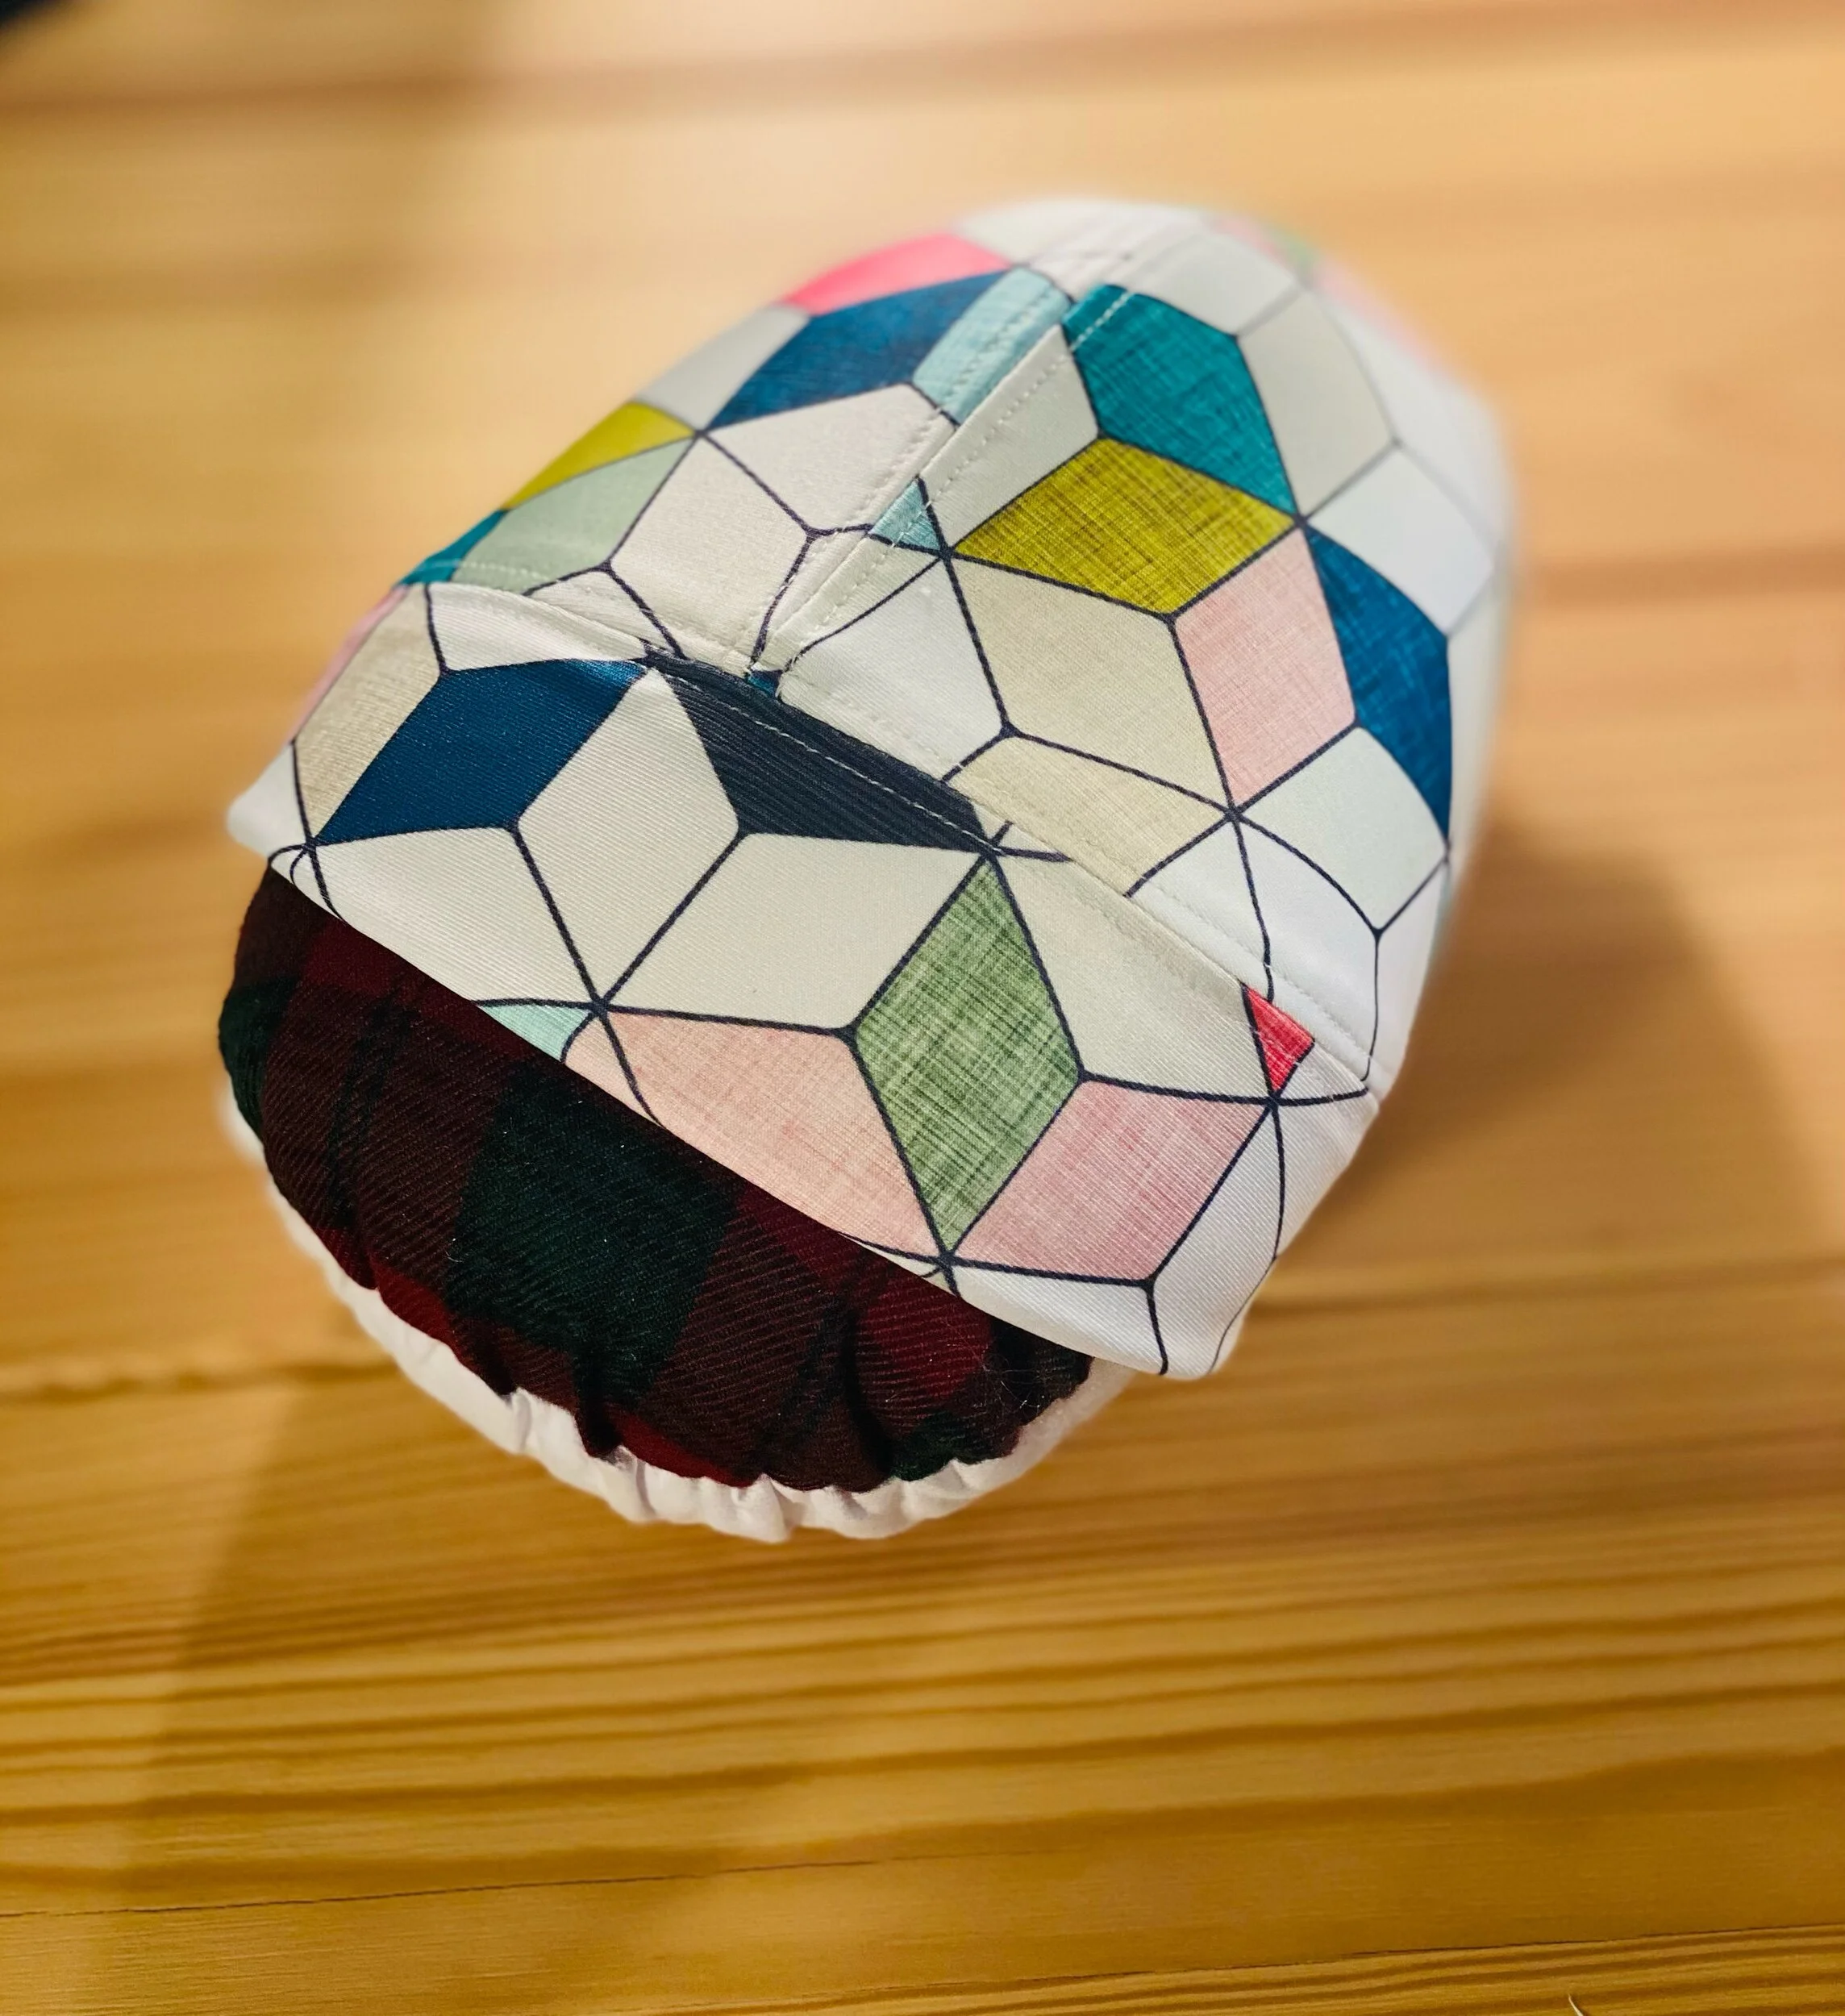
I also knitted for the first time and made this hat but I will save that for another blog. Stay tuned and let me know what you think about my Pink Corduroy Flightsuit in the comments!
until next time,
Peace & Blessings

HEXY SET
What’s better than one? Two!
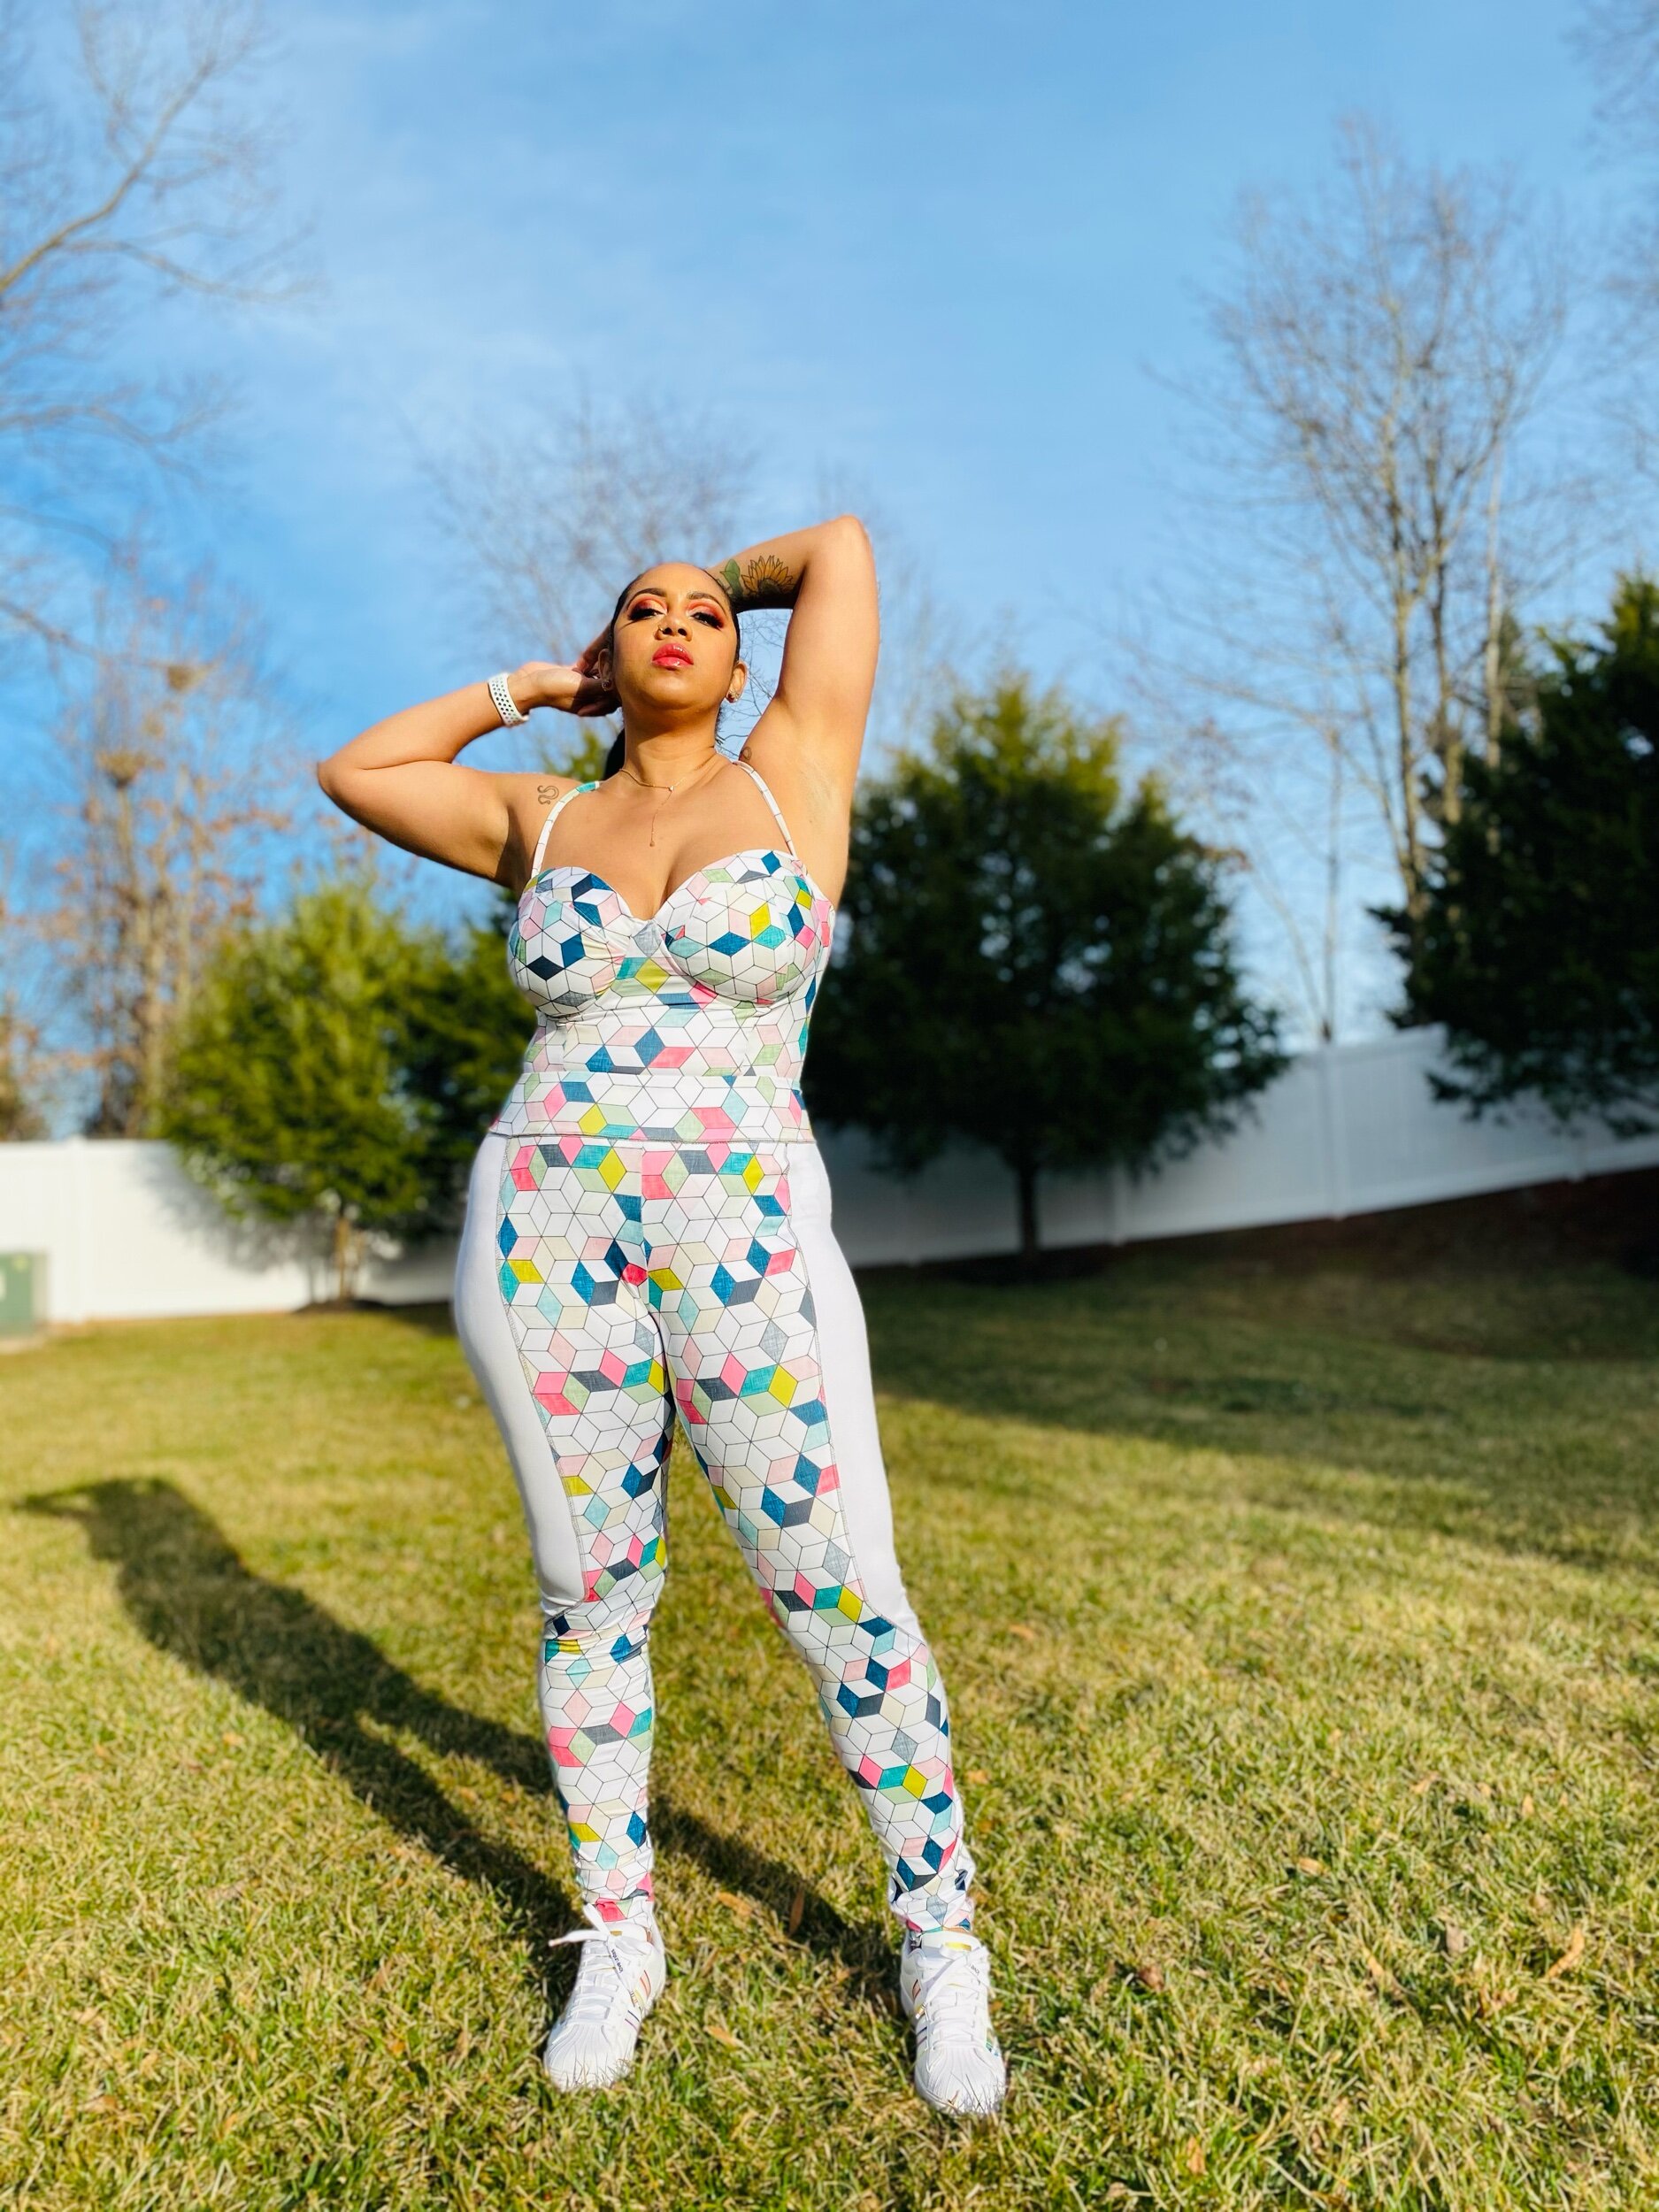
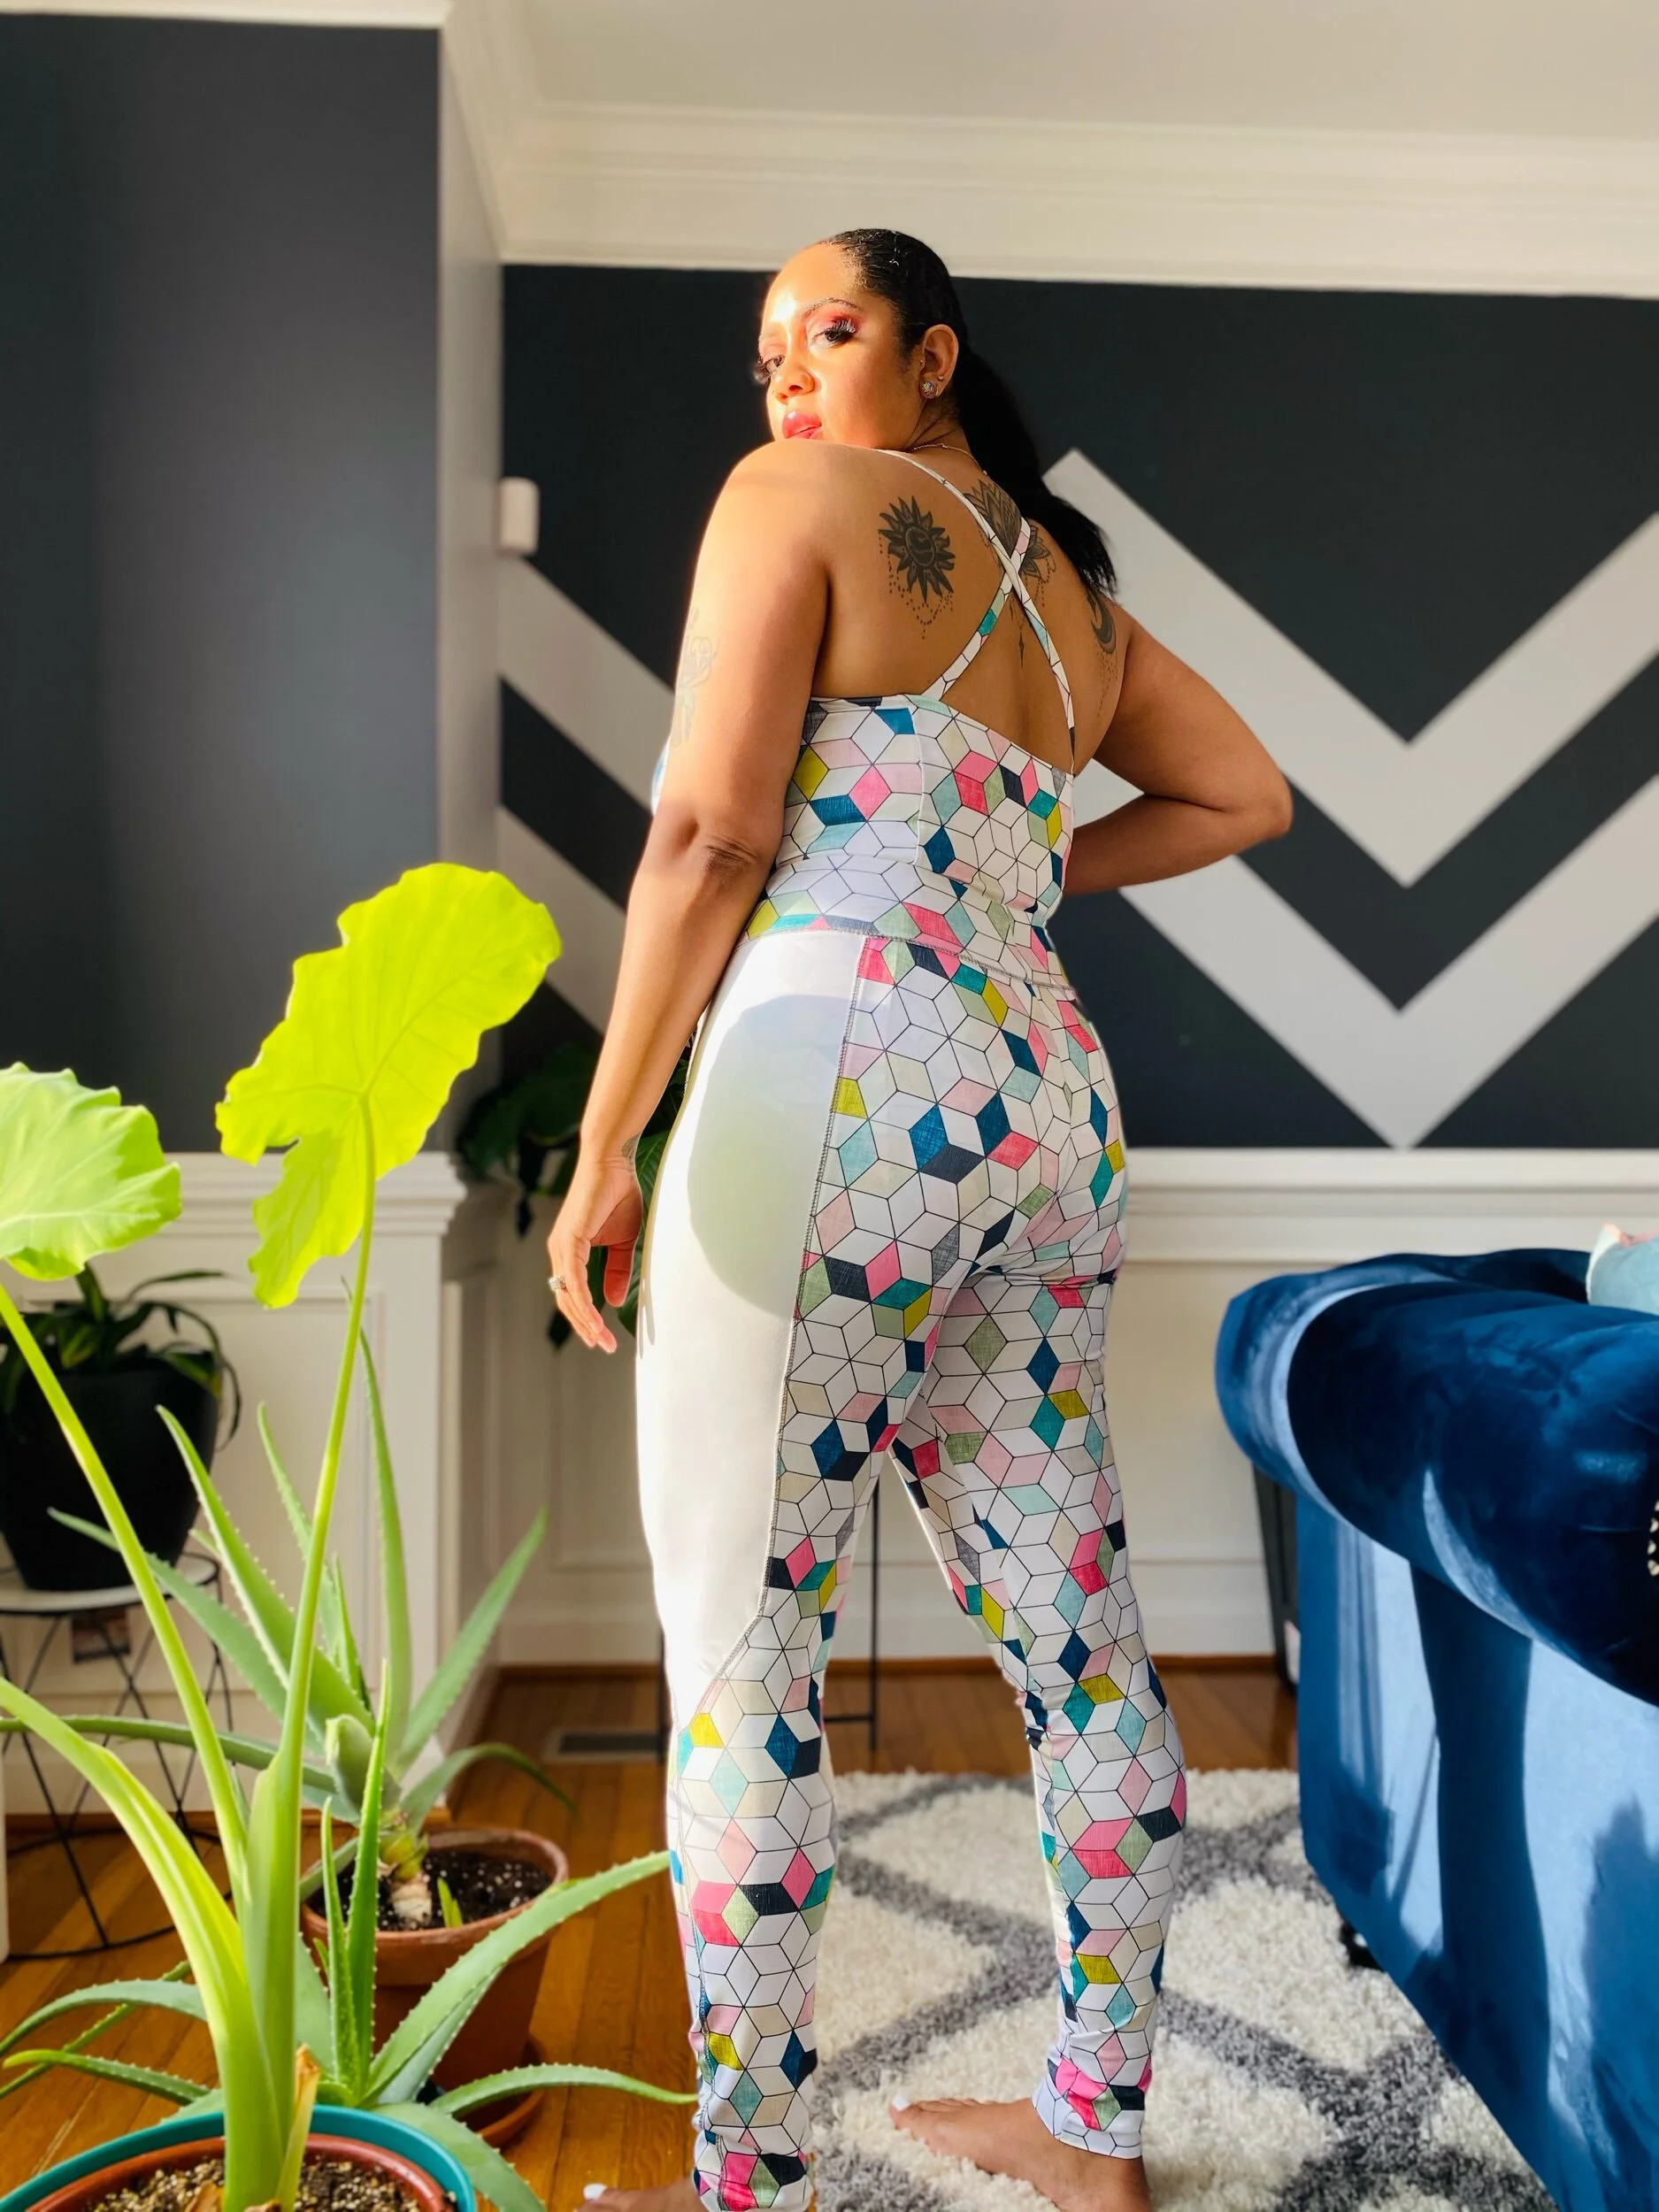
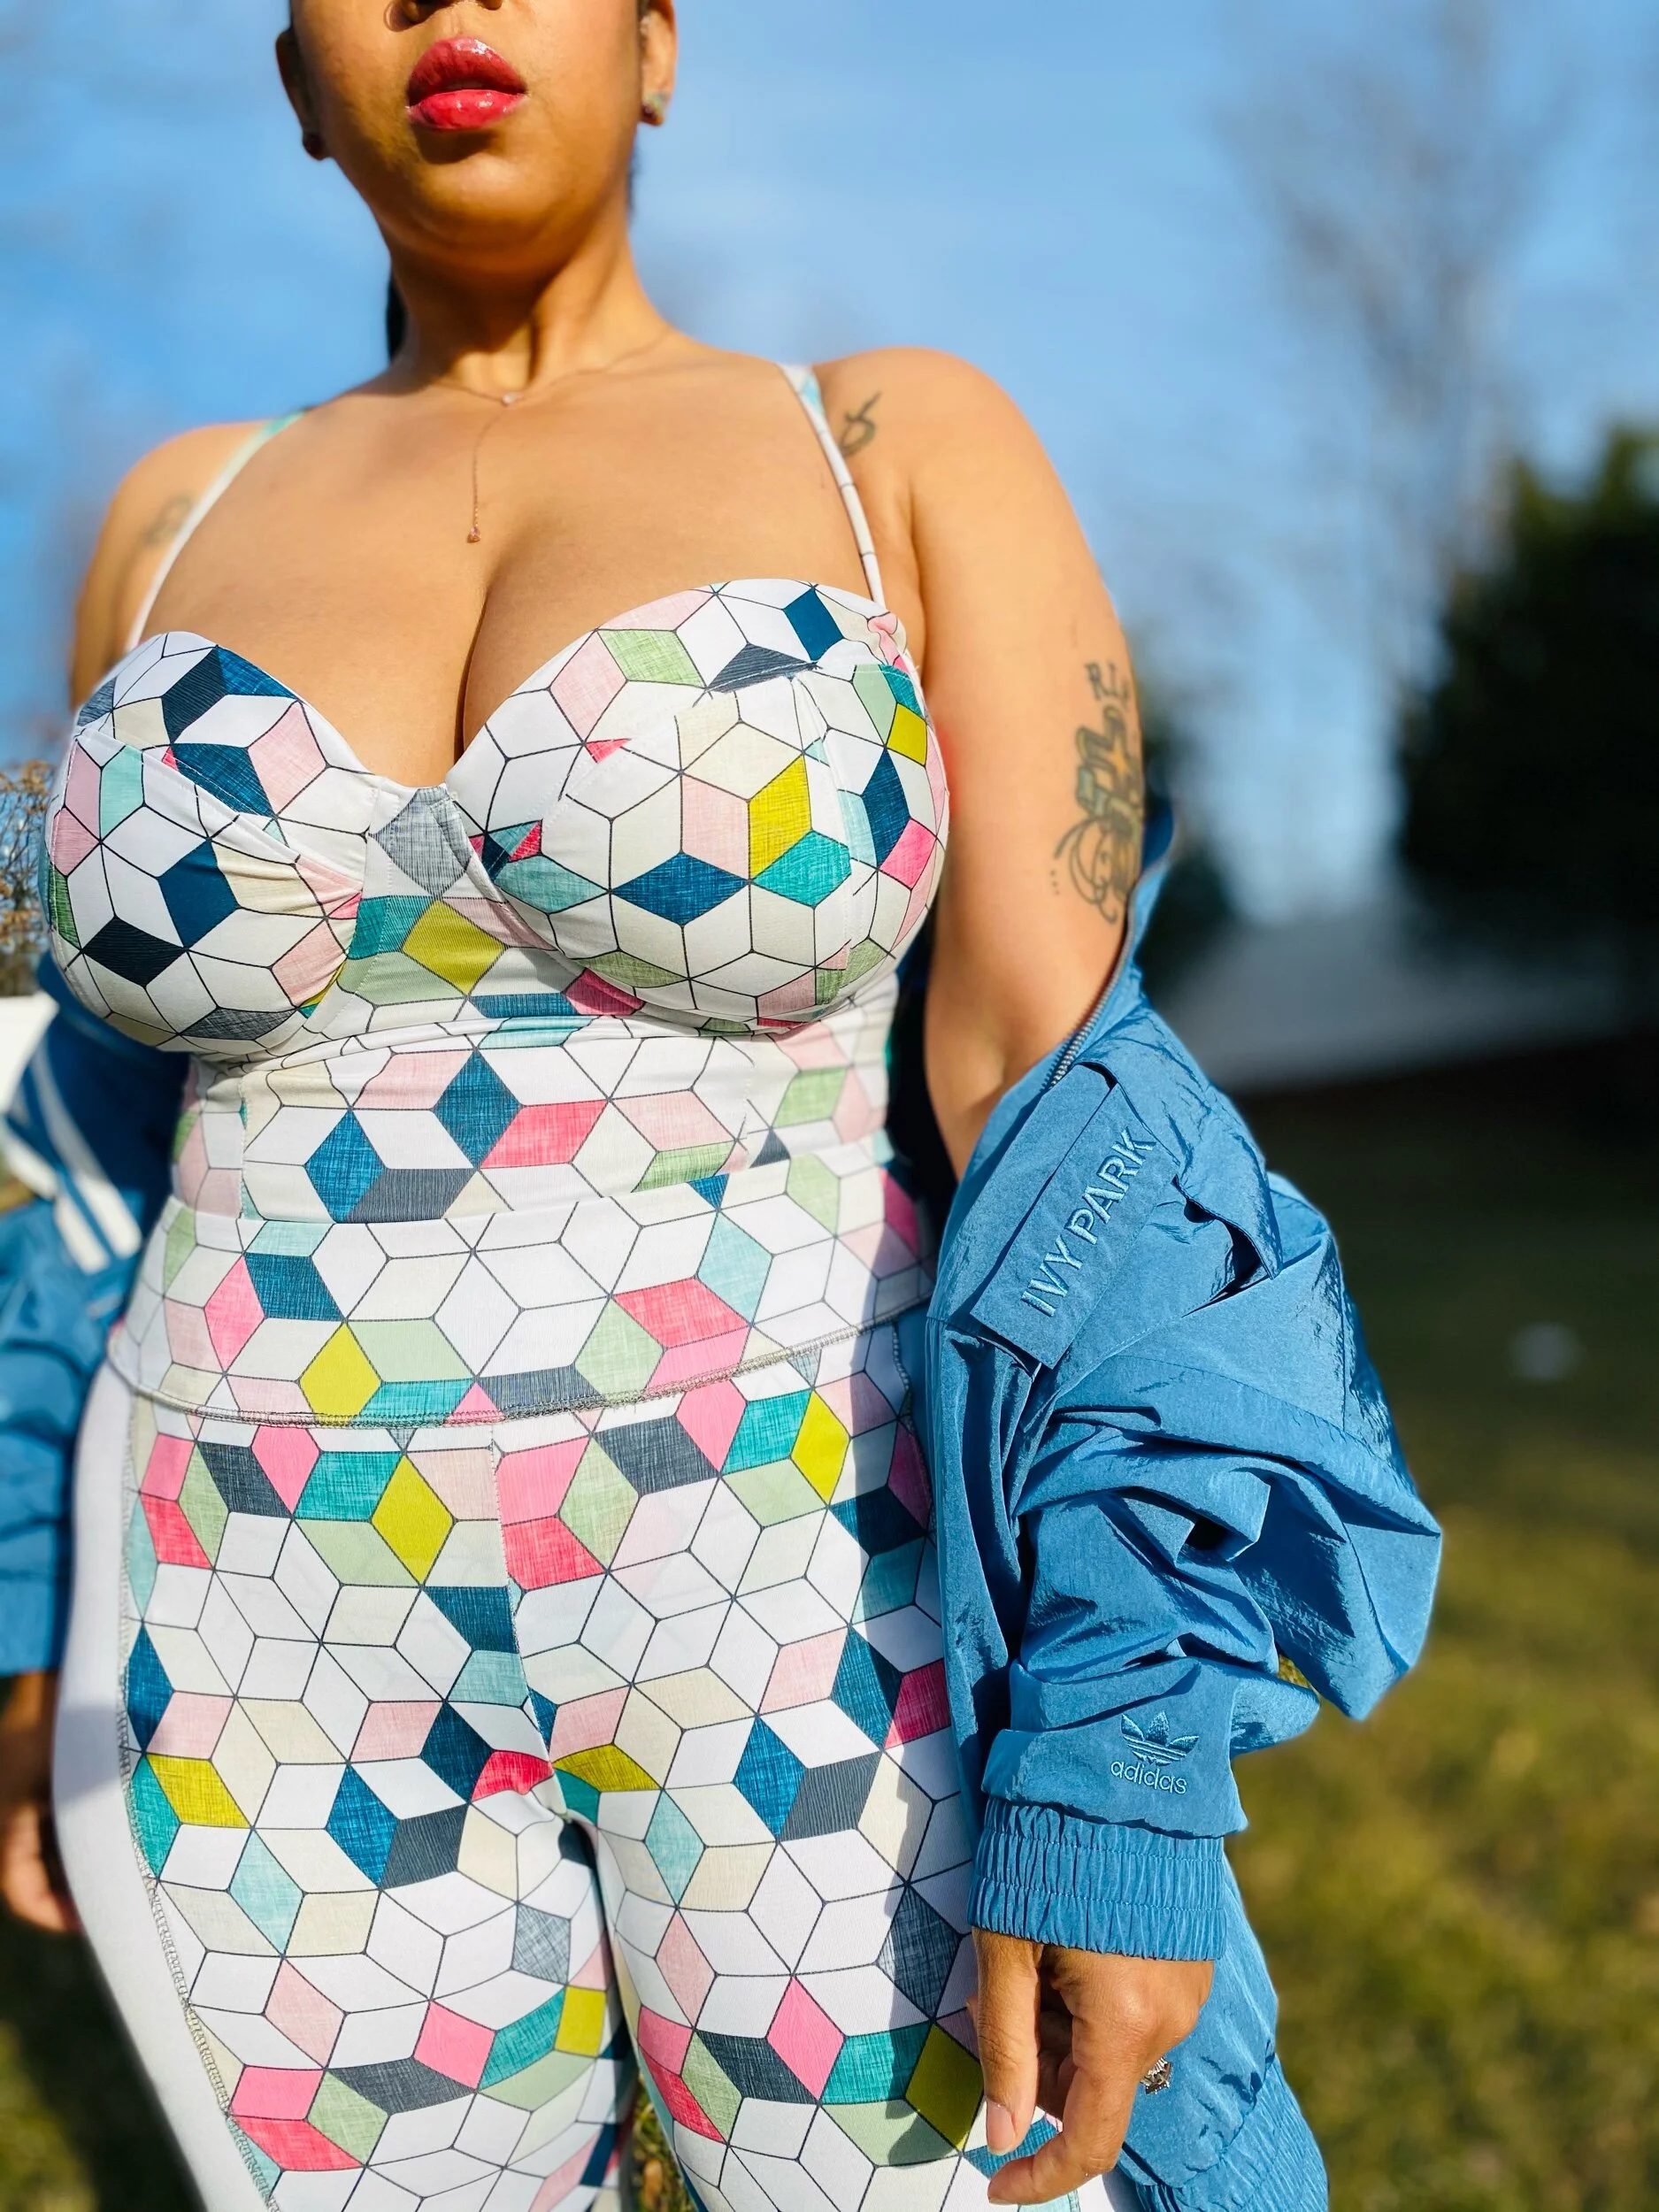
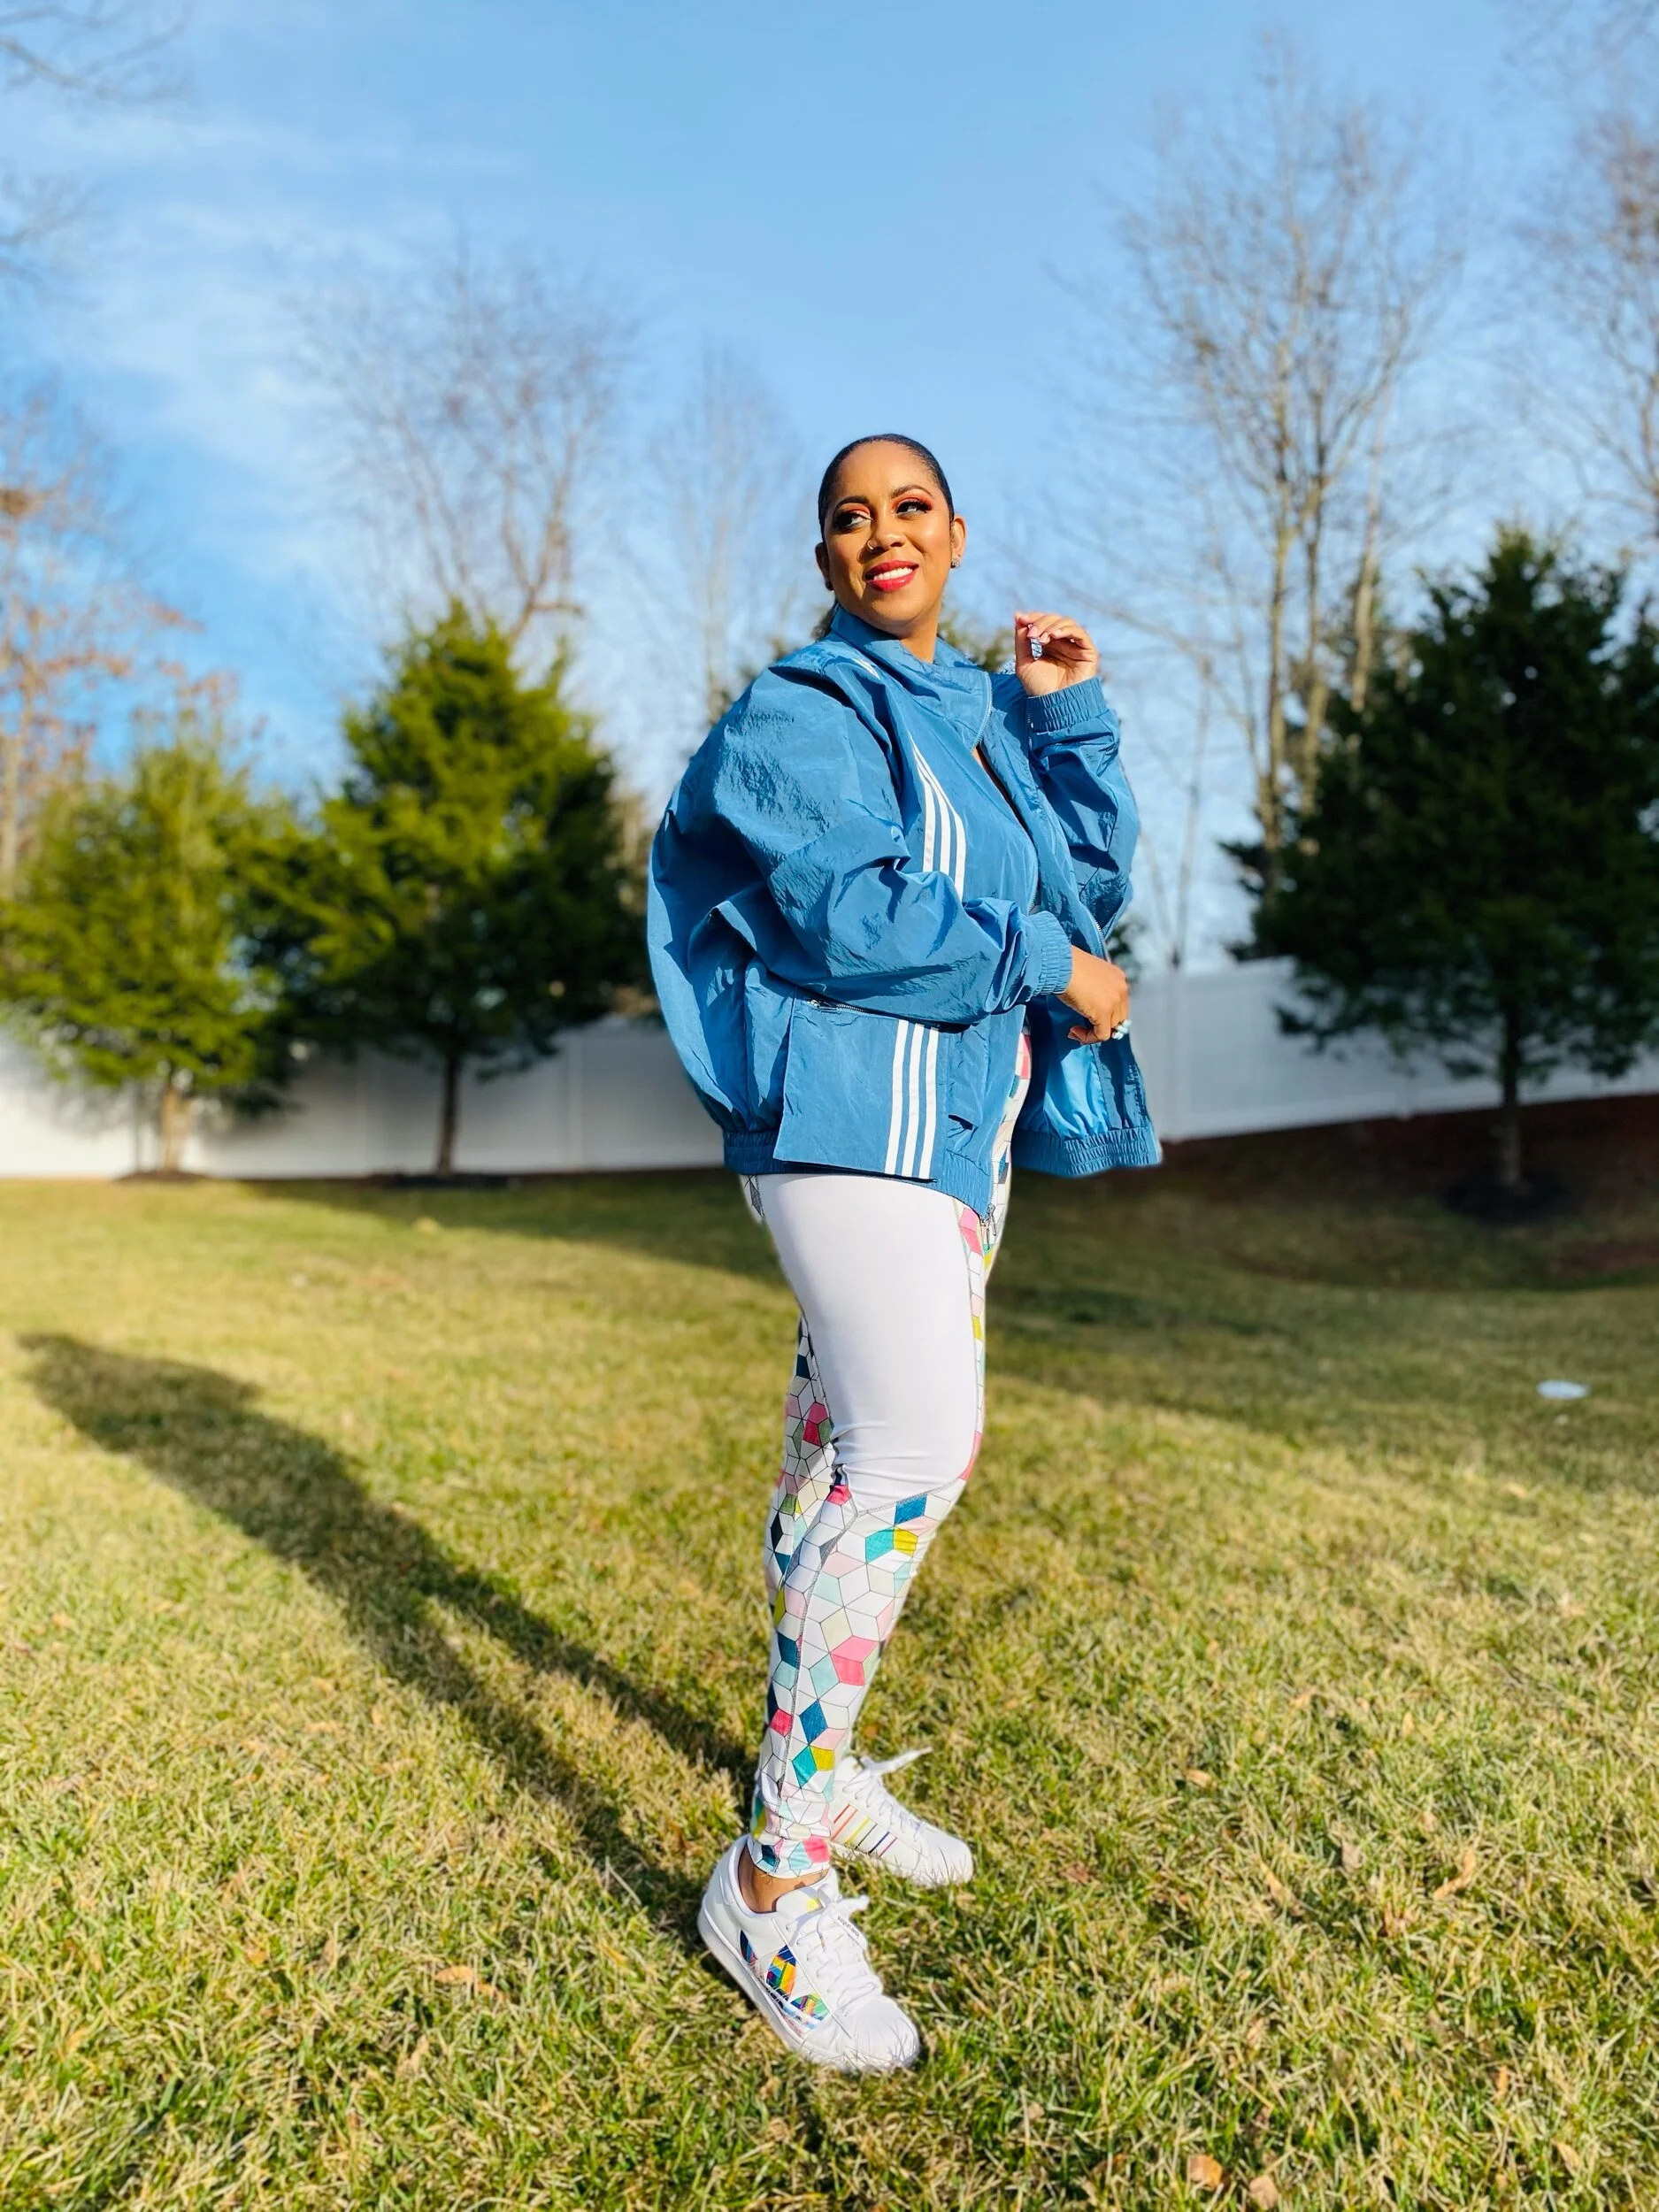
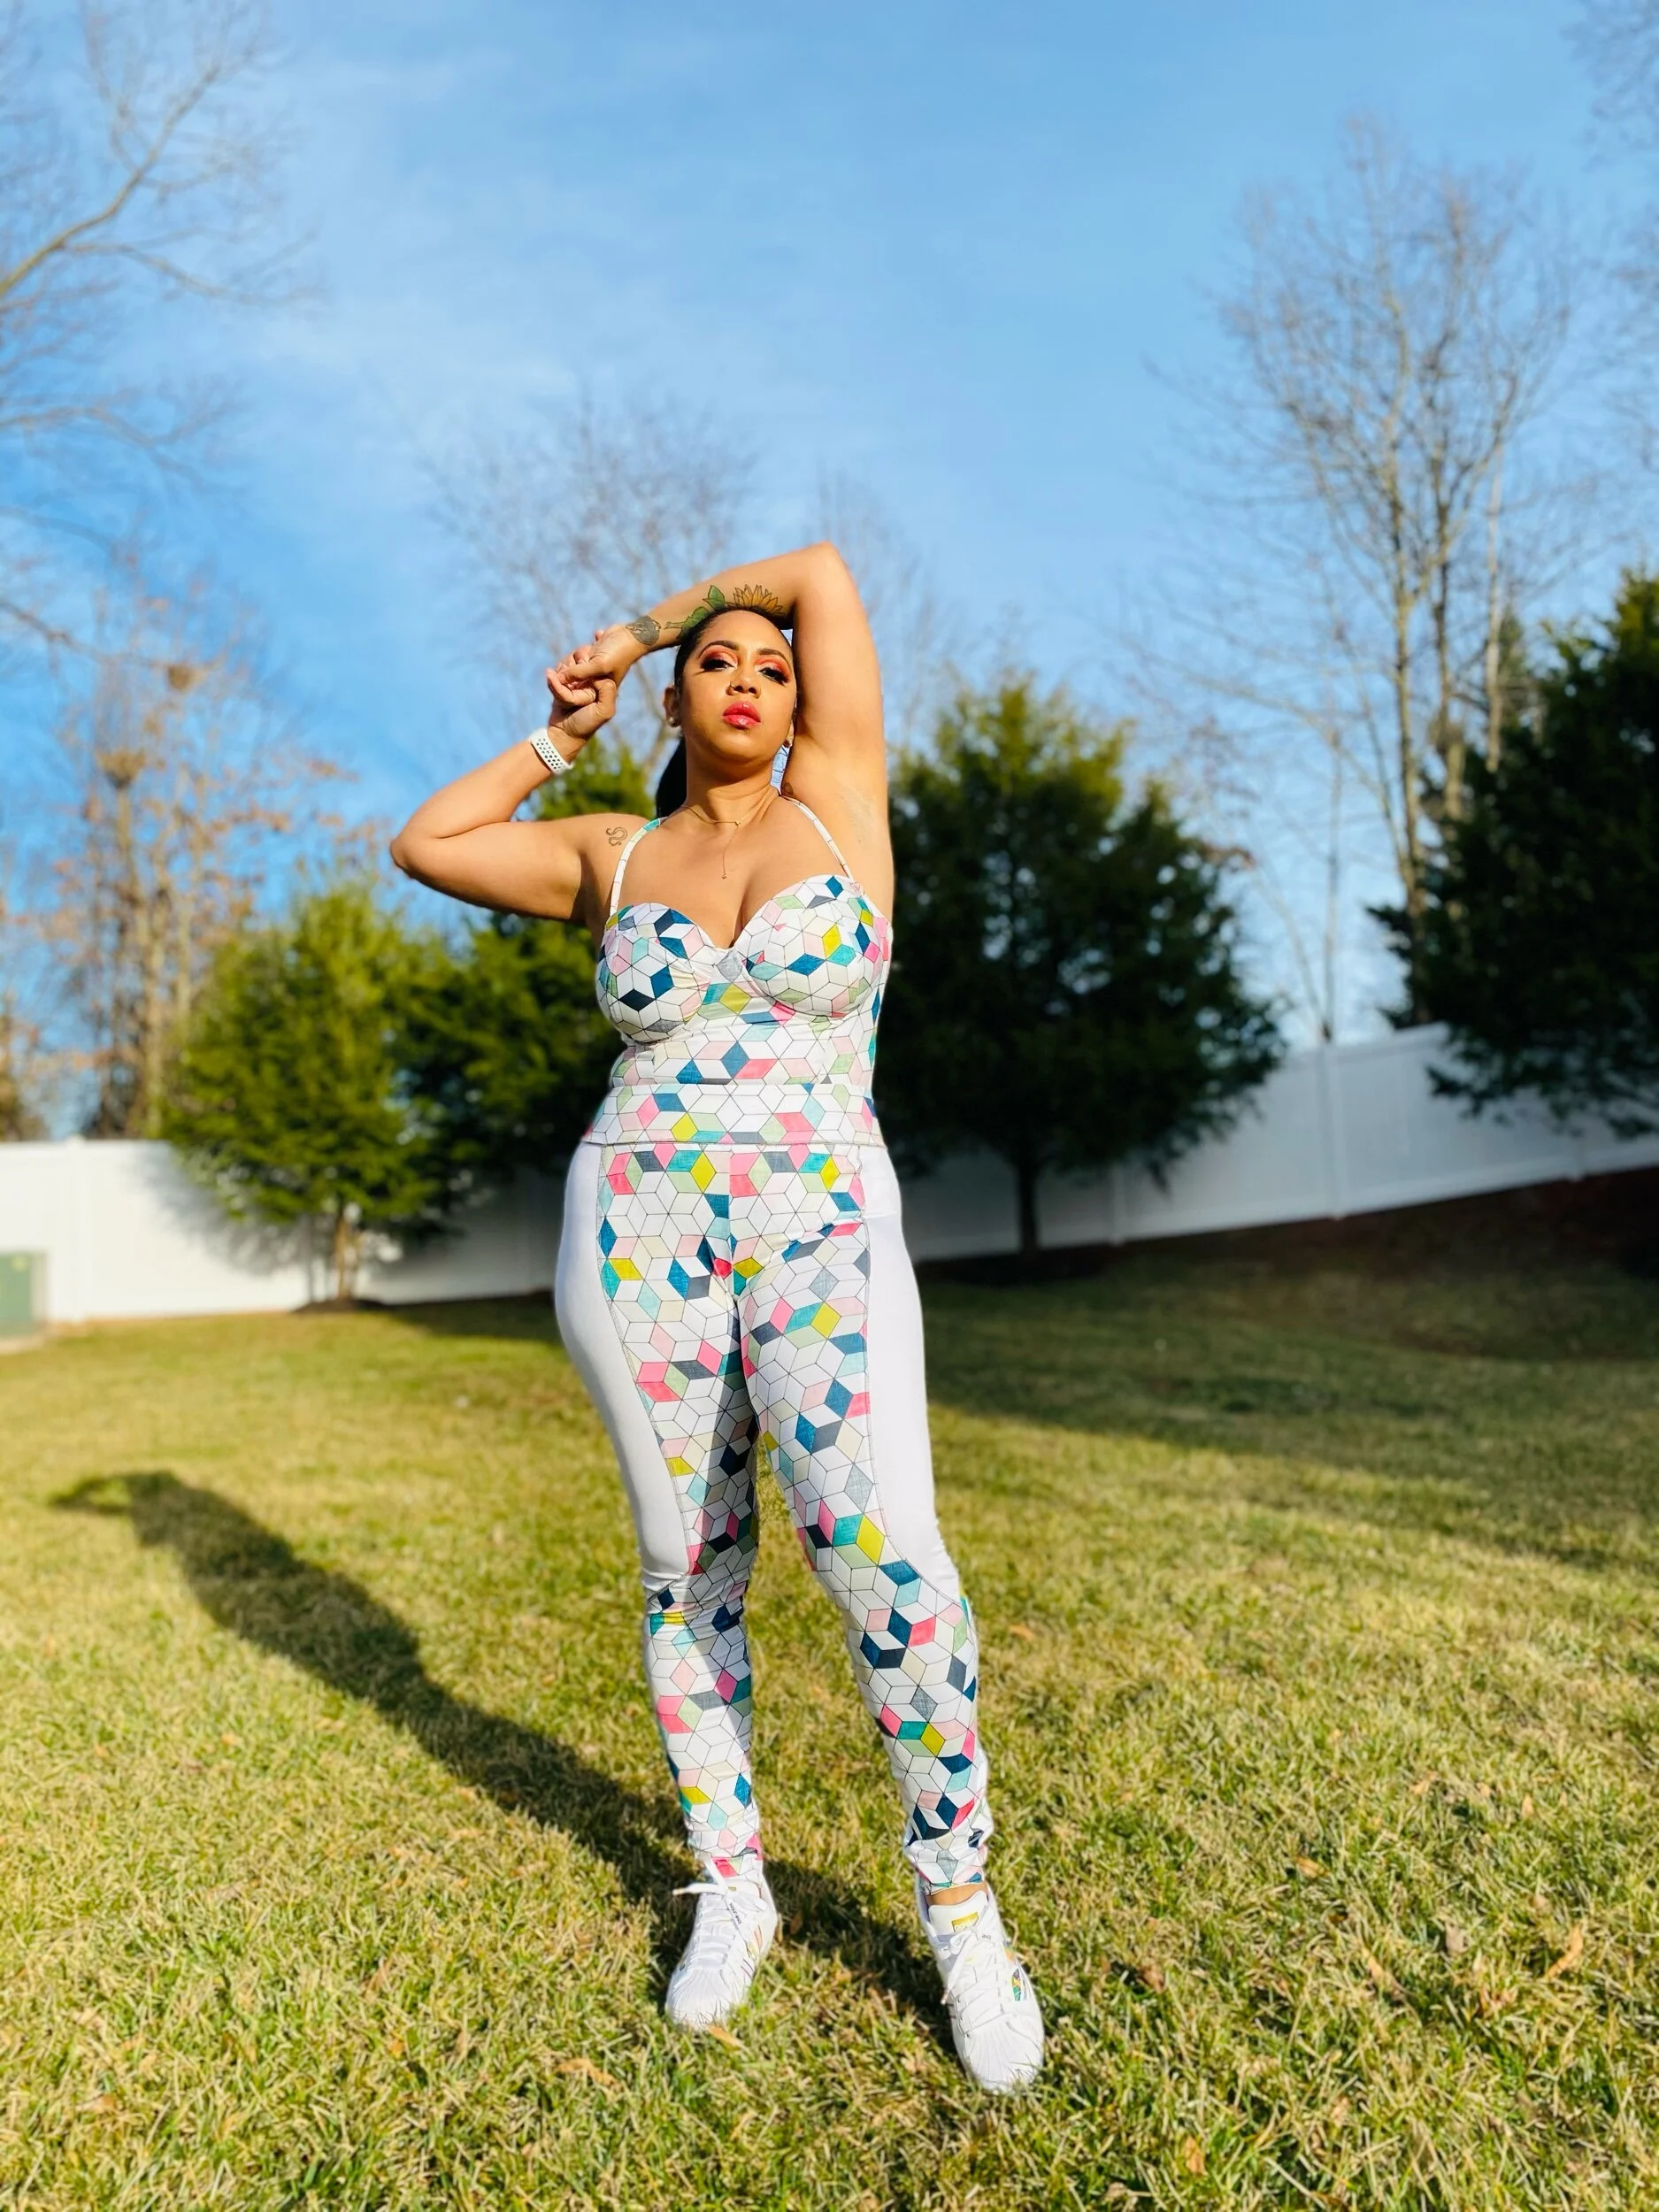
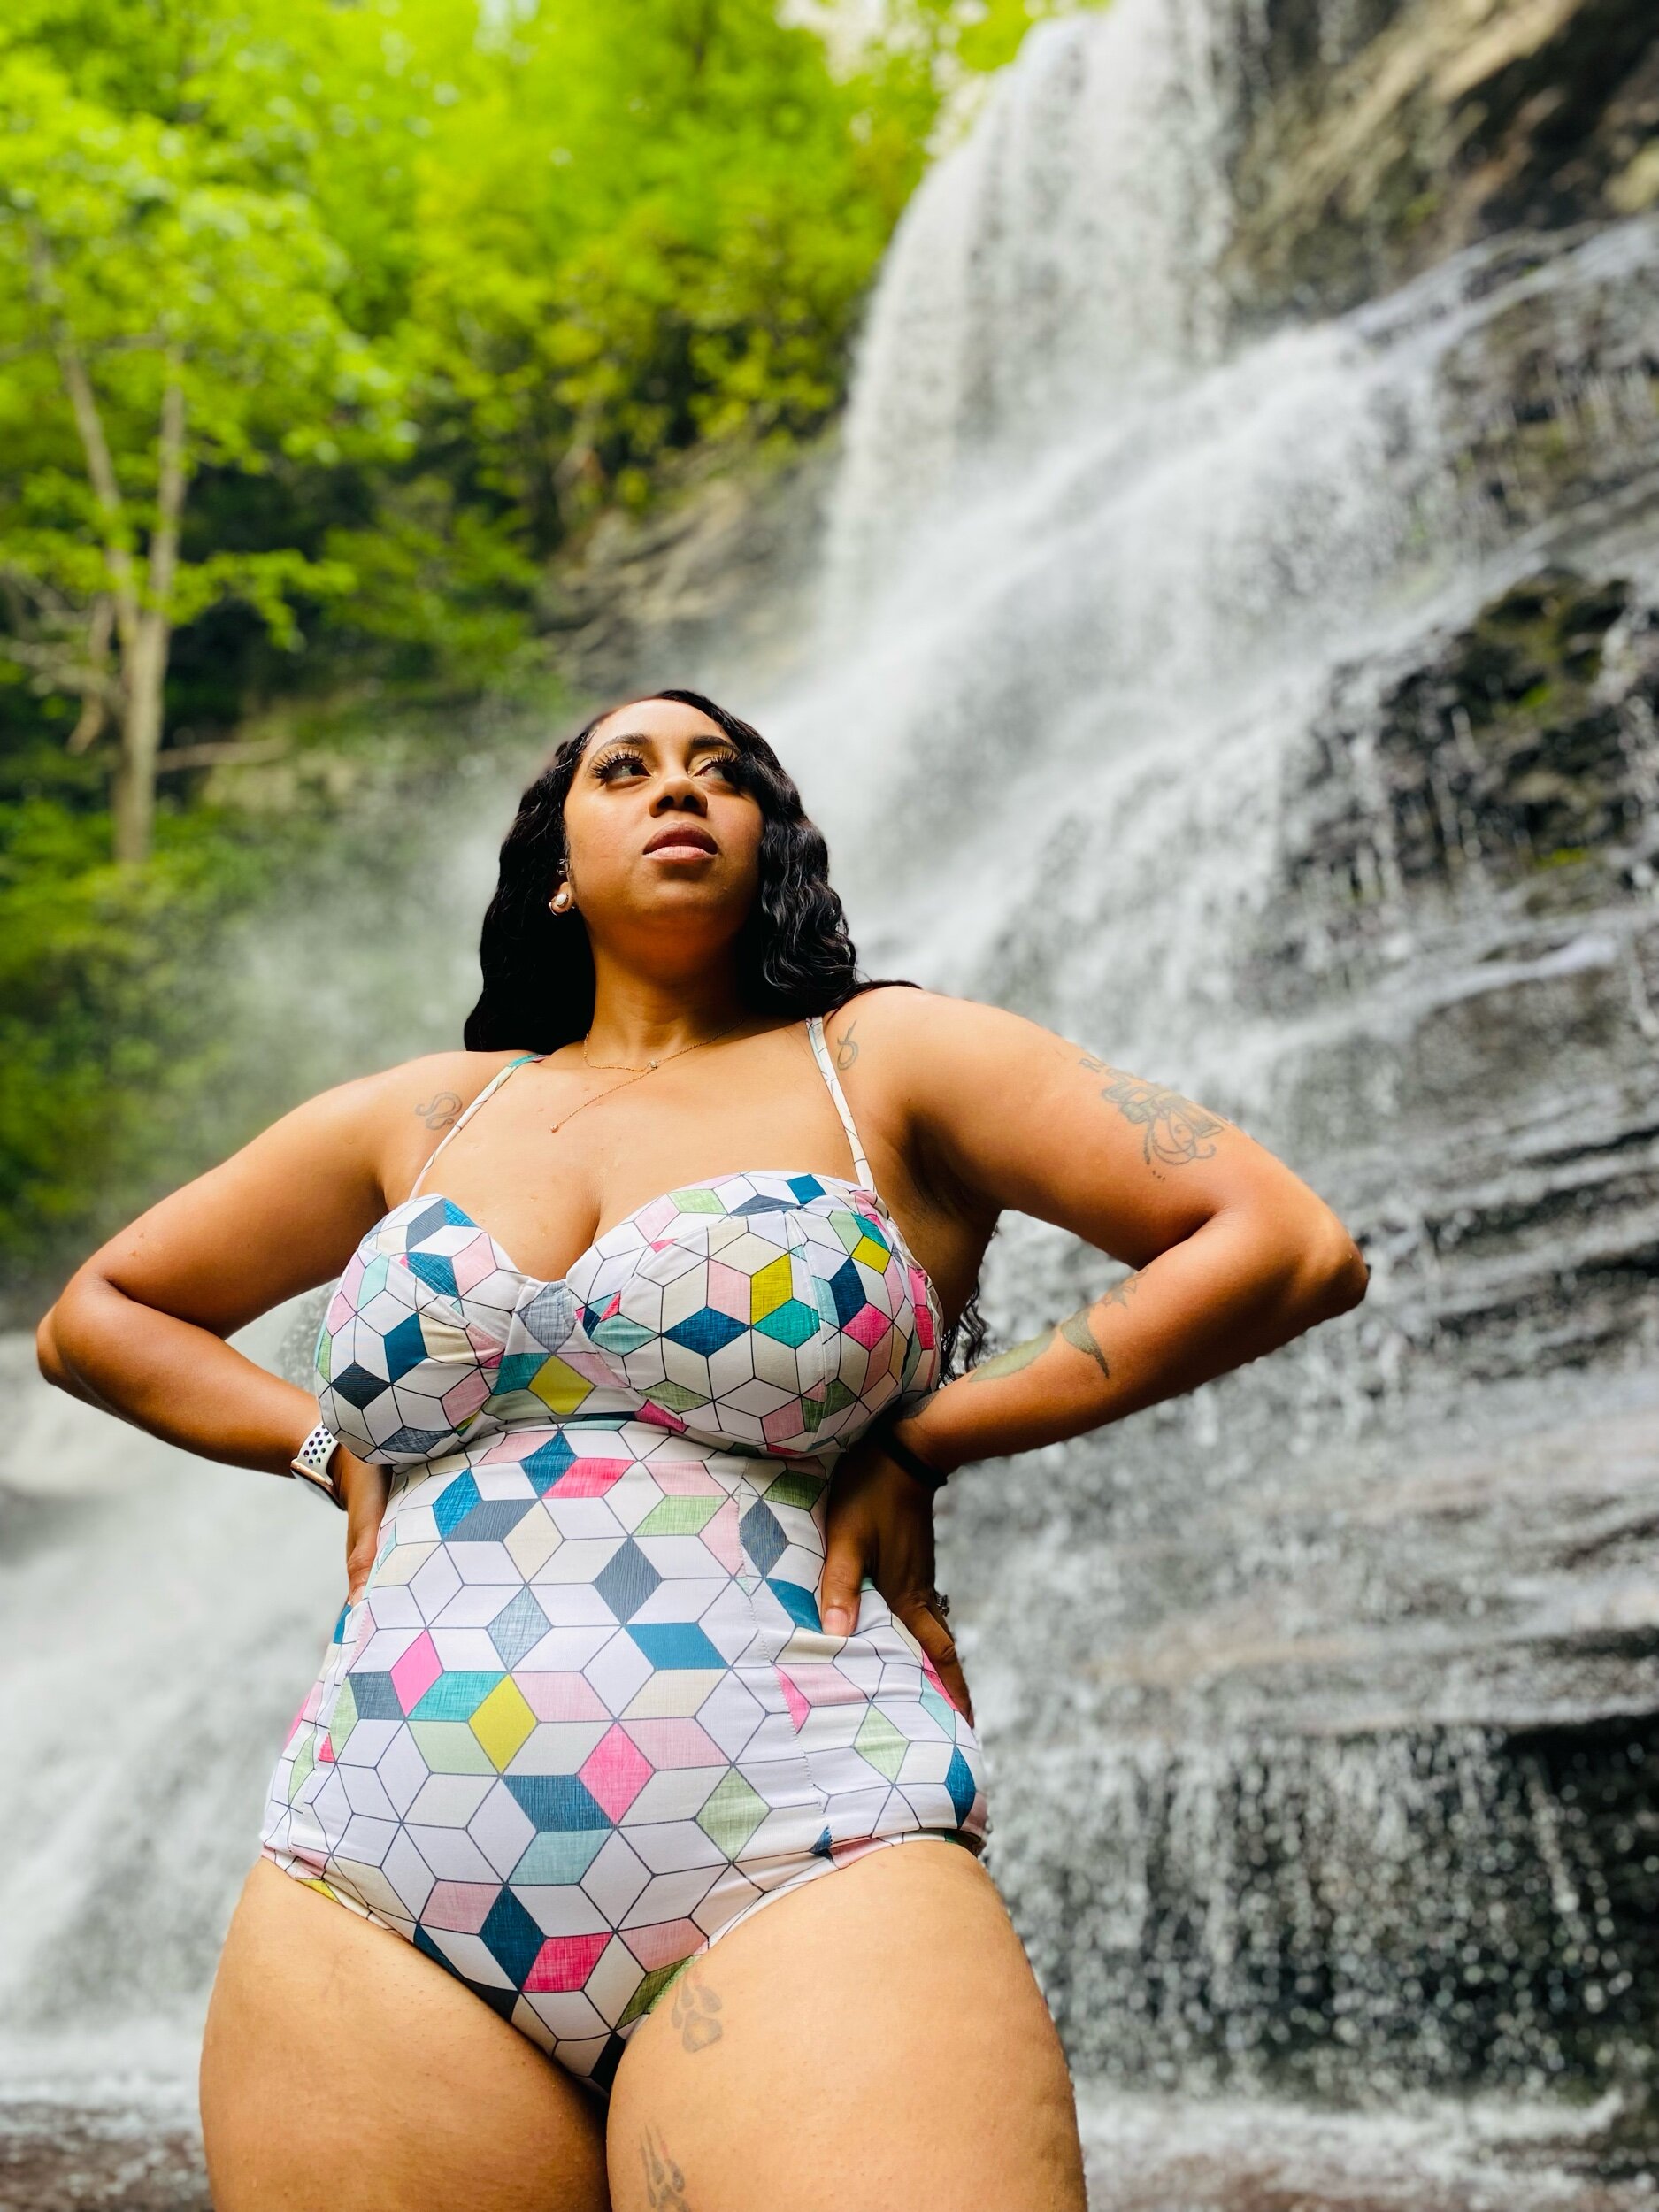
Hey y’all! I pulled out this Spoonflower Sports Lycra™️ to create not one but two of my favorites, swimwear and leggings. For the swimsuit I used the Closet Core Sophie swimsuit pattern and for the leggings I used a TNT Mccalls pattern (more deets on those here). I’m all for a matching set and I was inspired to make these two because I wanted to purchase a similar set from IVY PARK. Well them thangs sold out as quick as you can inhale. So I went to the drawing board and thought how can I achieve this look myself? And here you have…the HEXY SET!
Sophie Construction
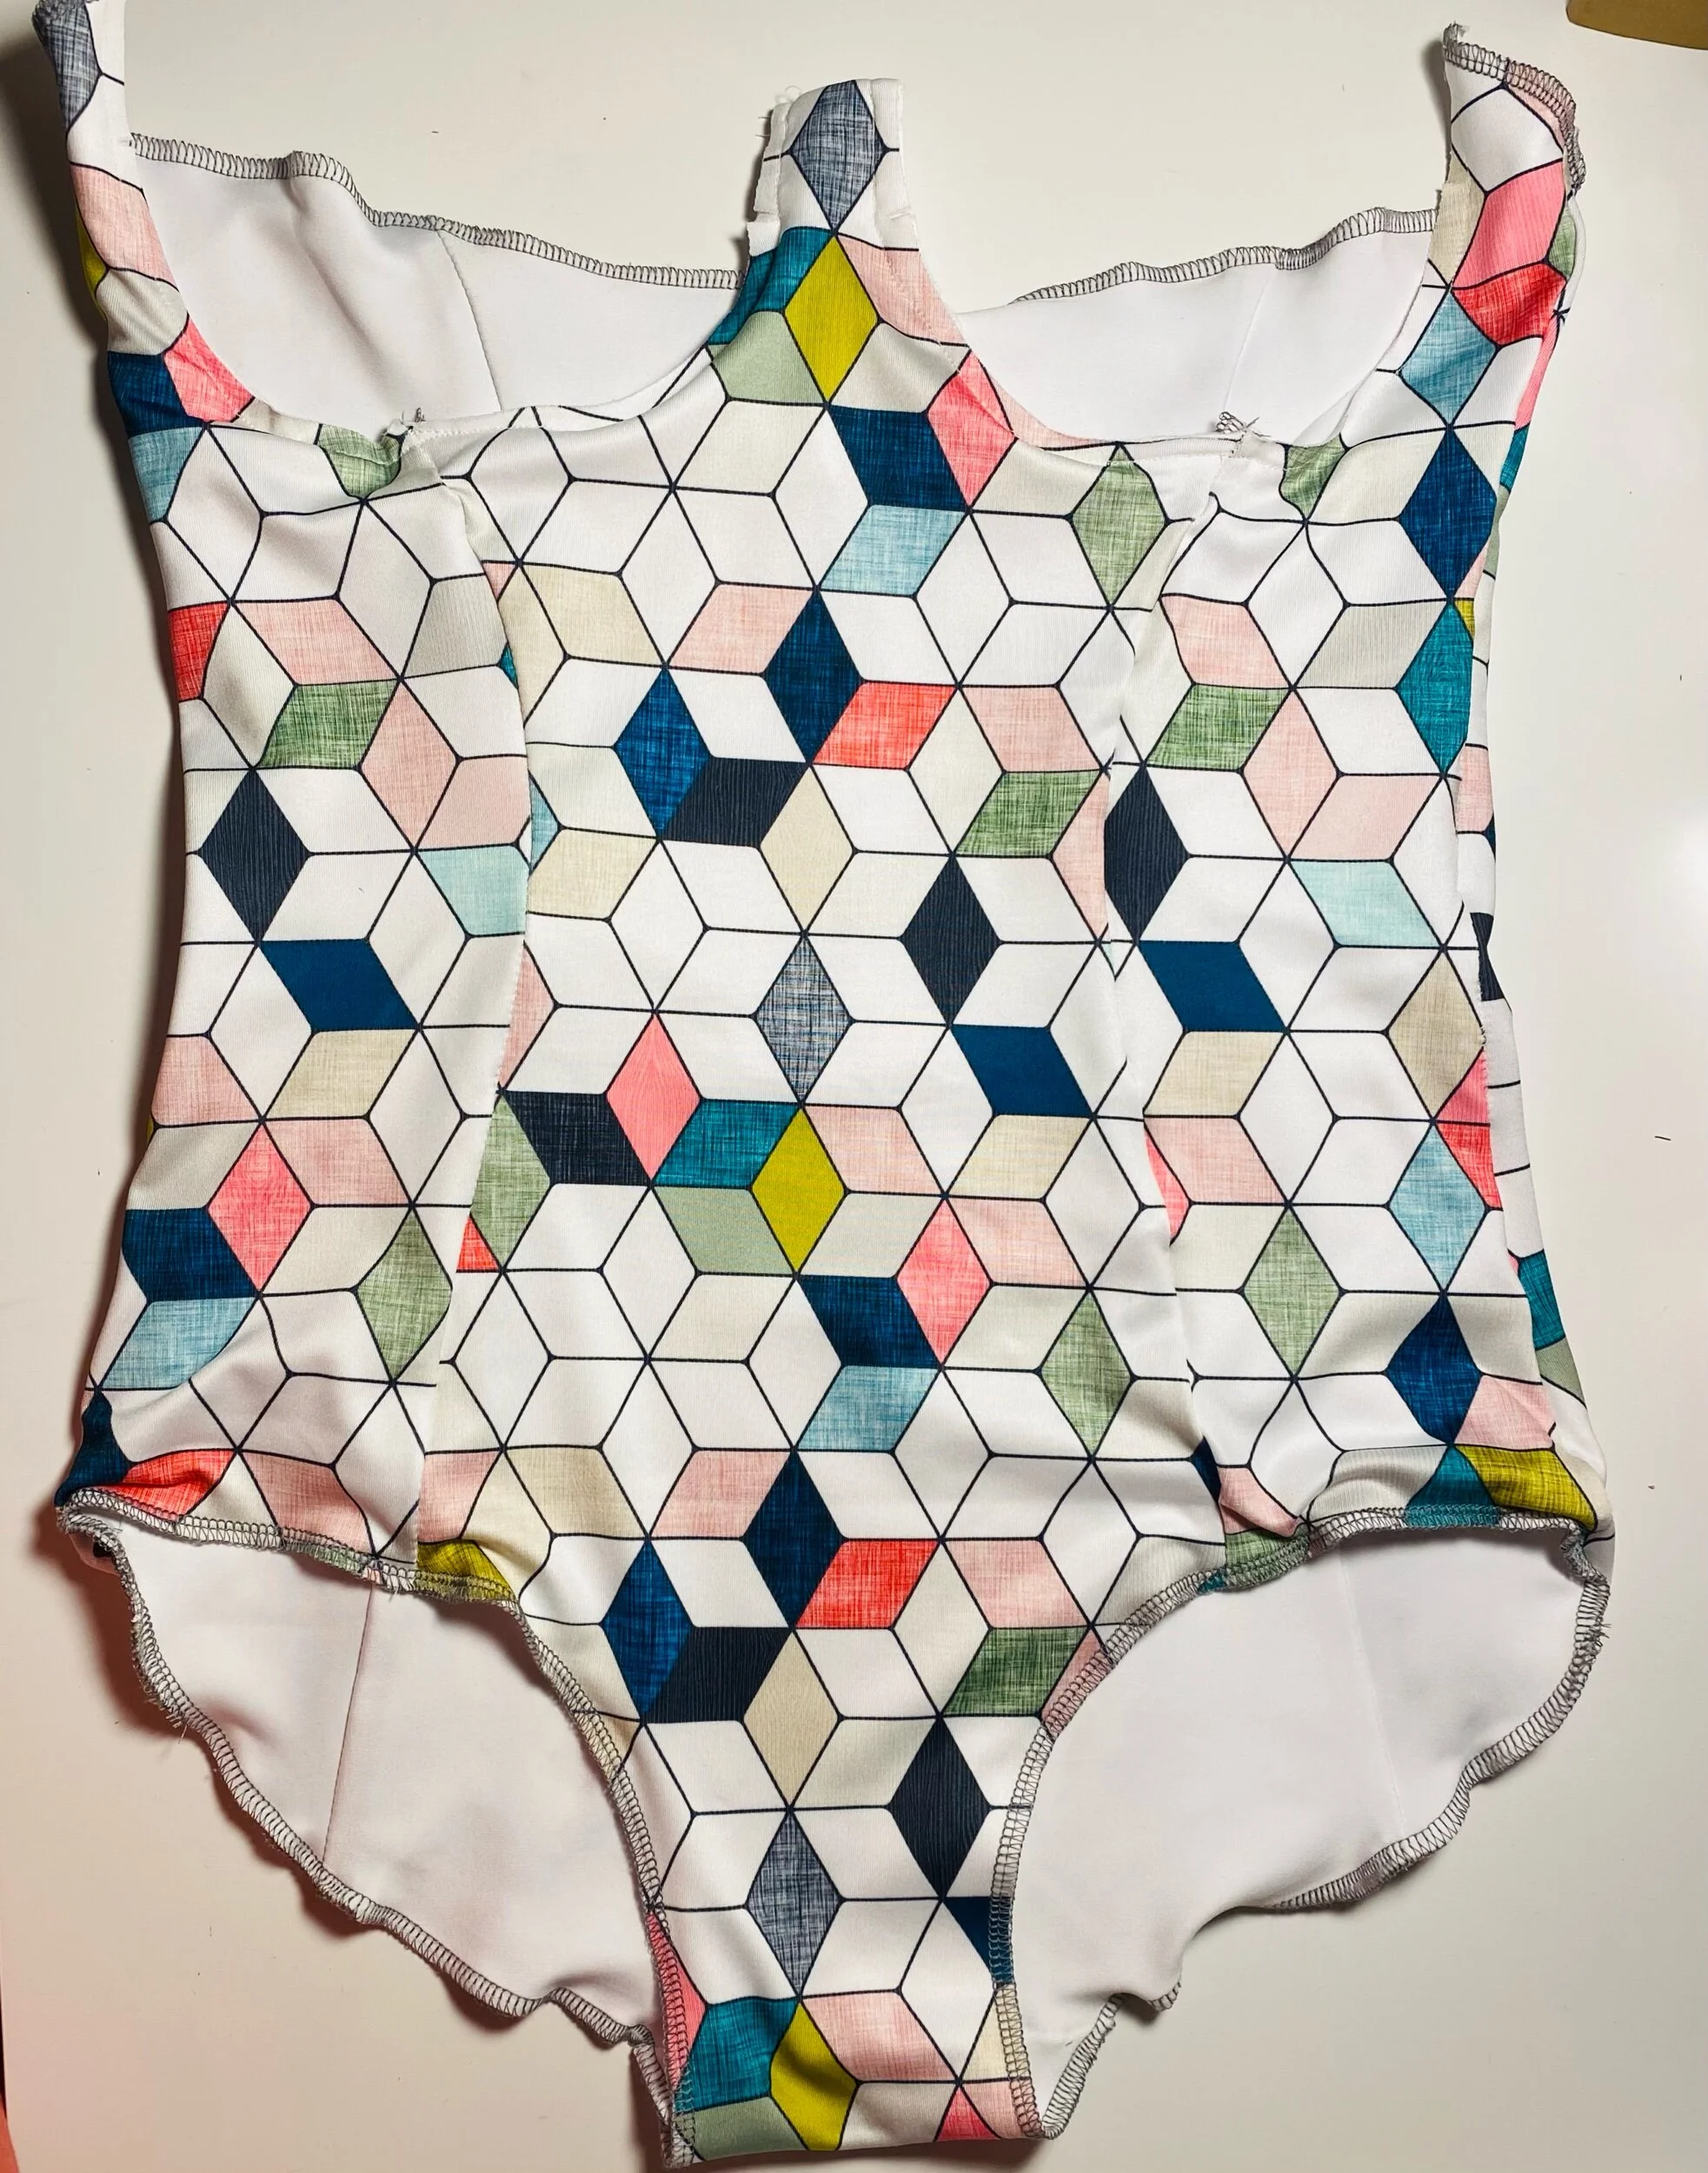
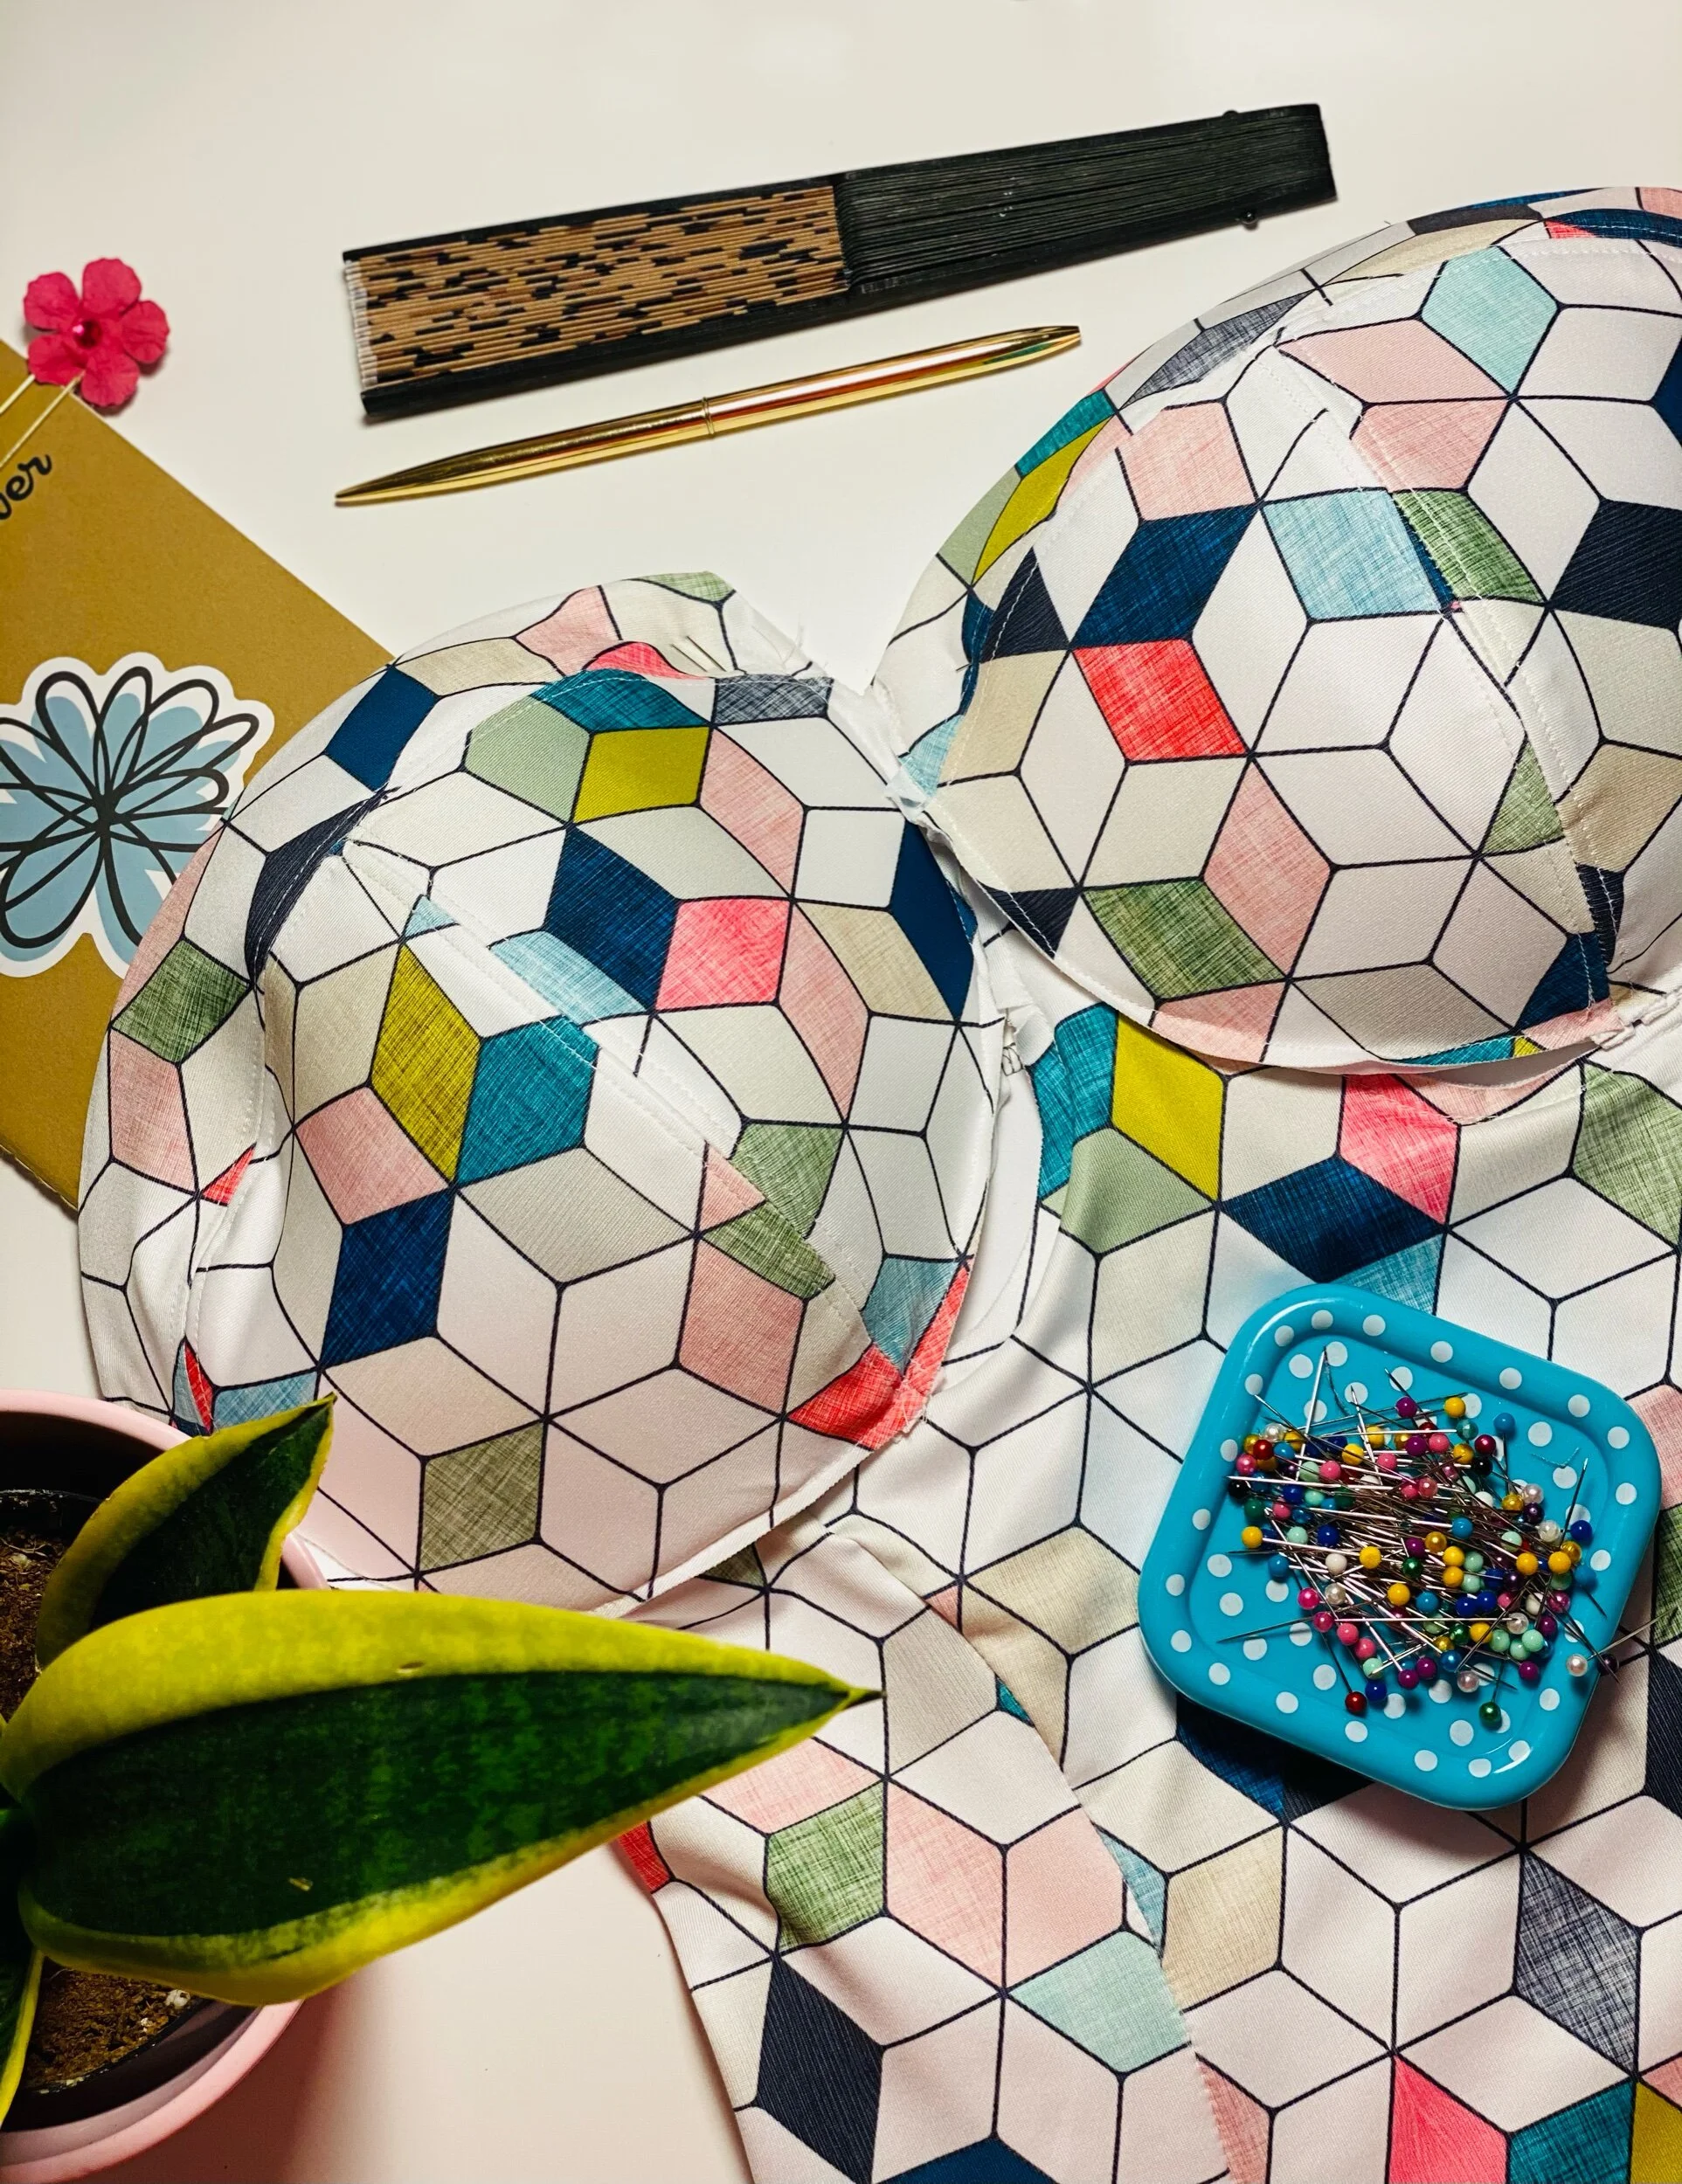
This swimsuit was also an introduction to bra making (more on that journey really soon). Obviously you would need to create bra cups for this look. For me, finding the right cup size was a challenge. I still didn’t get the perfect fit that I was trying to achieve and I even made an initial practice cup that covered about 3 inches of my girls lol, but this will not be my only Sophie swimsuit this season.
I lined the swimsuit with a white Jersey fabric a bit lighter in weight than the Sport Lycra. You can use whatever swimsuit lining you like. My preference is always whatever will hold the tummy in comfortably. You will also need something to shape the cups. I used my tailors ham but I do wish I had something more circular. Maybe next time I’ll use baby watermelons, I mean they’re about the right size lol.

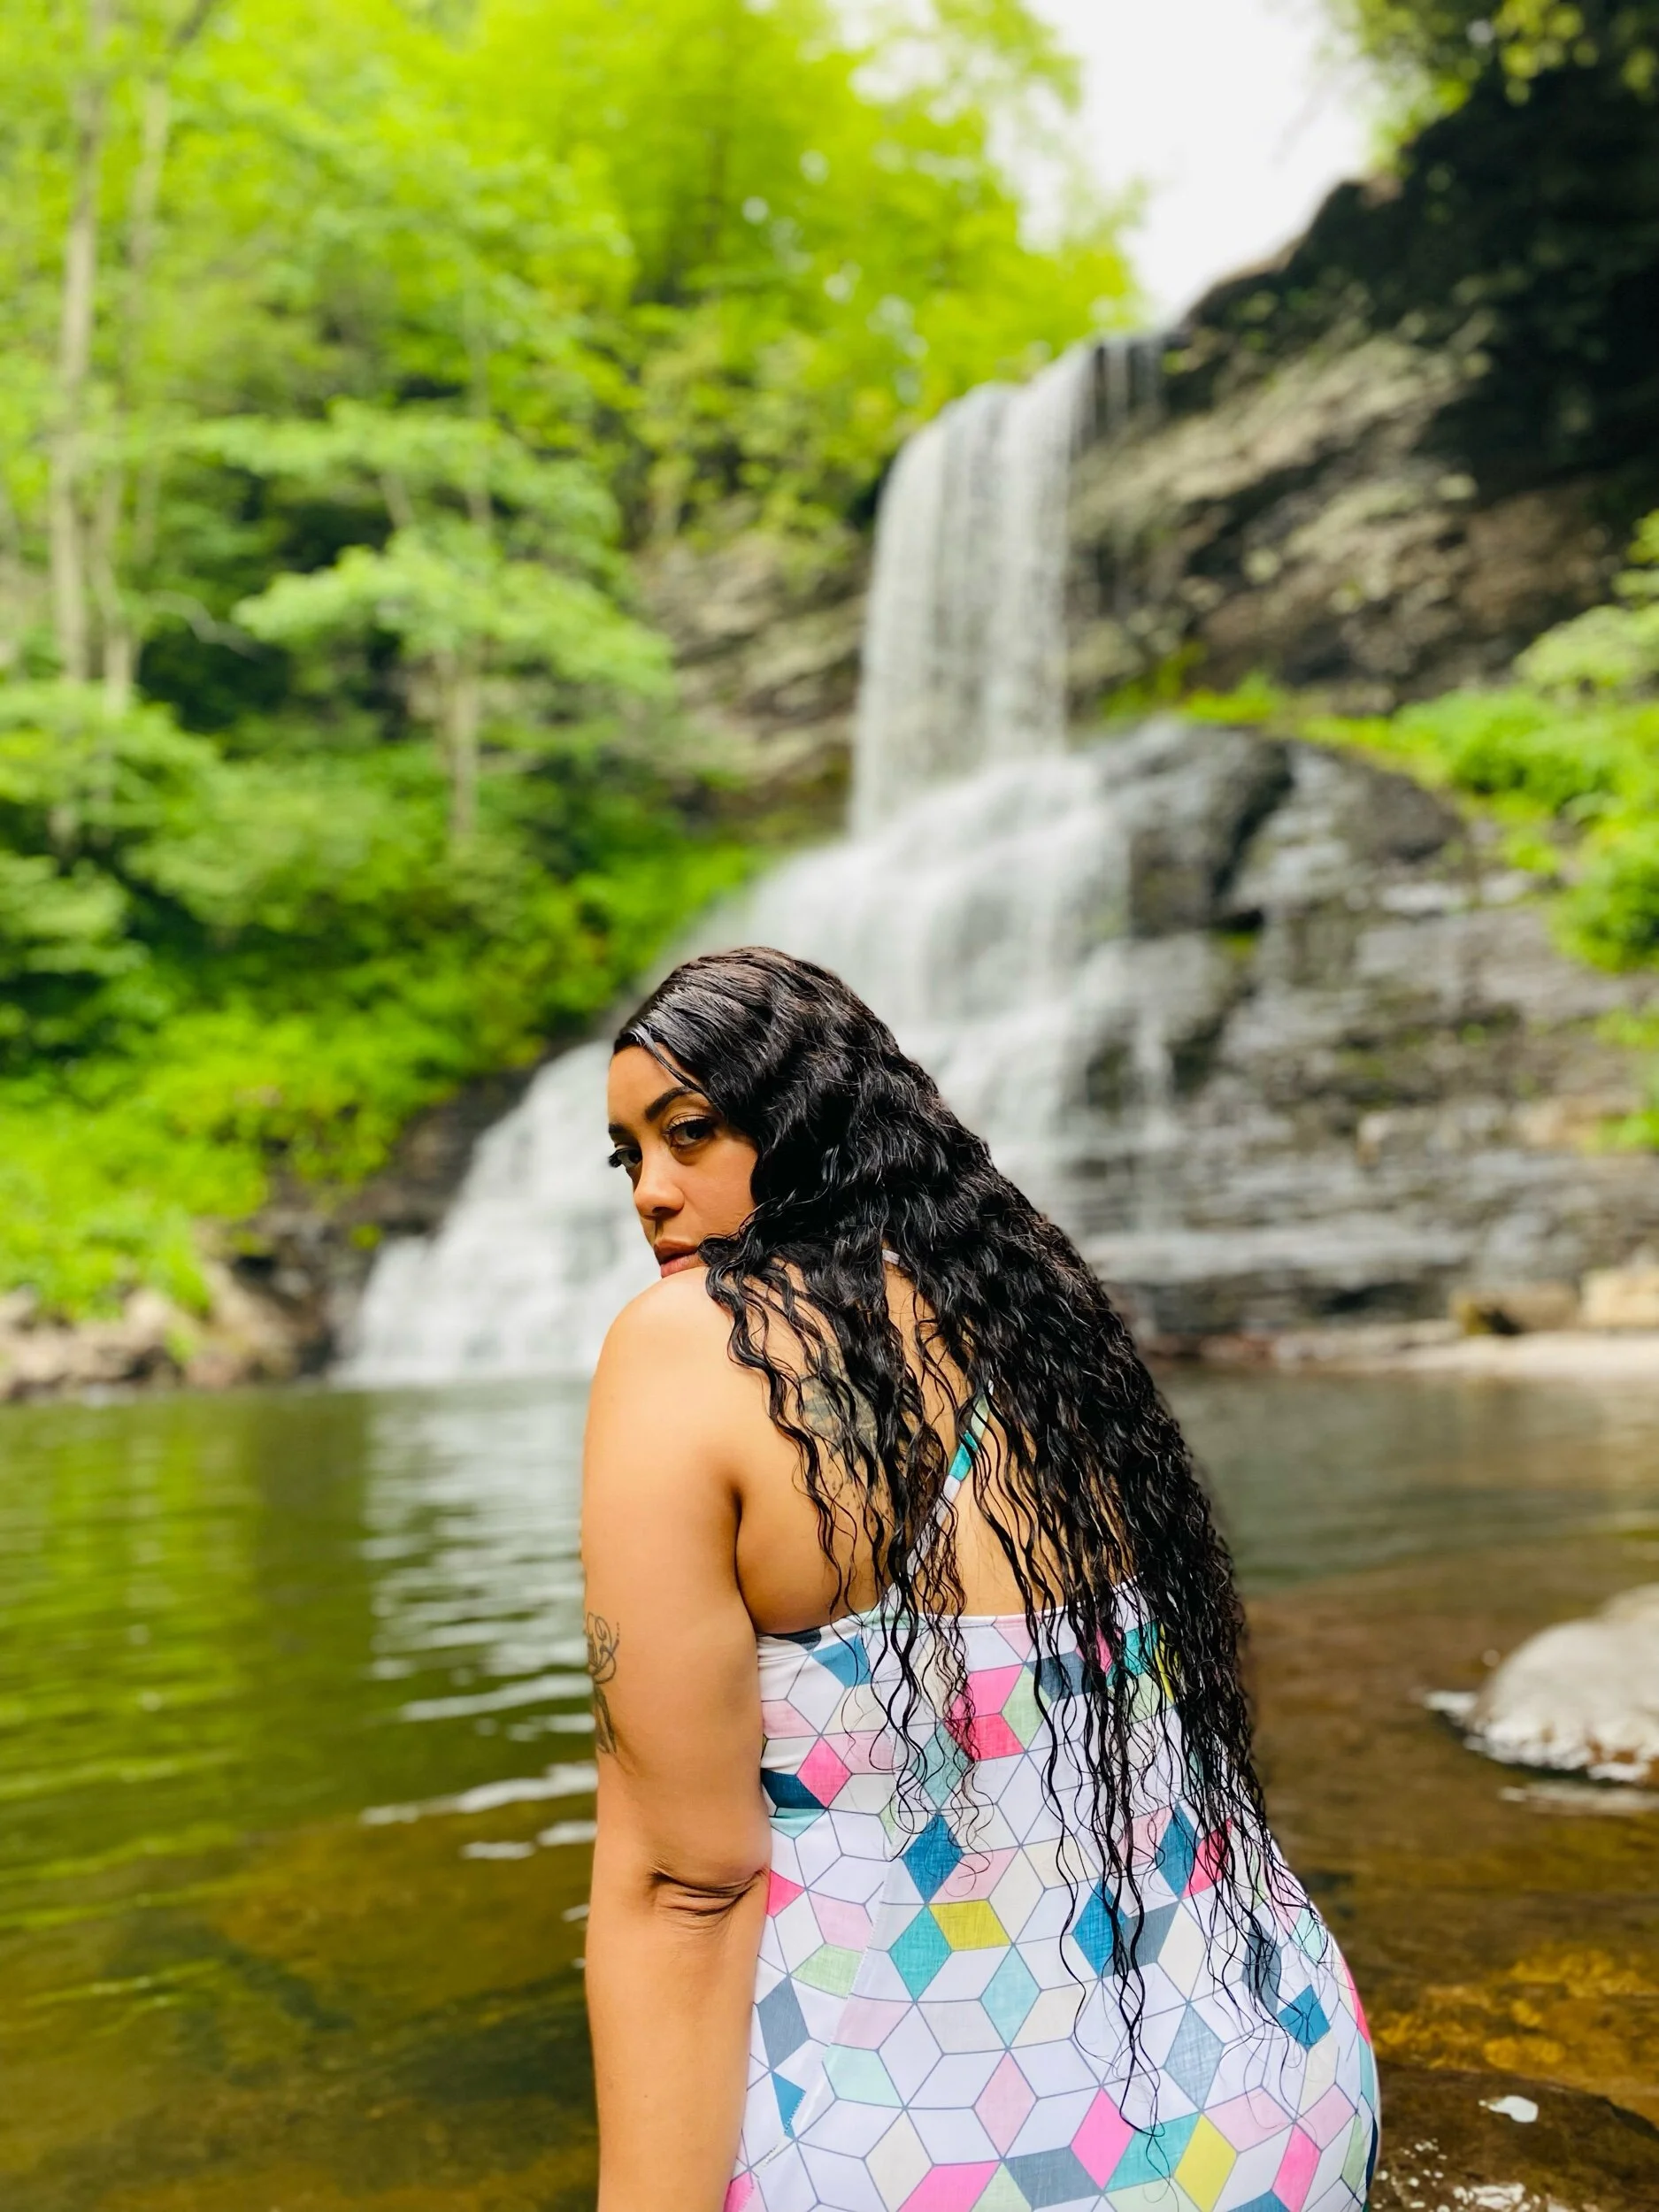
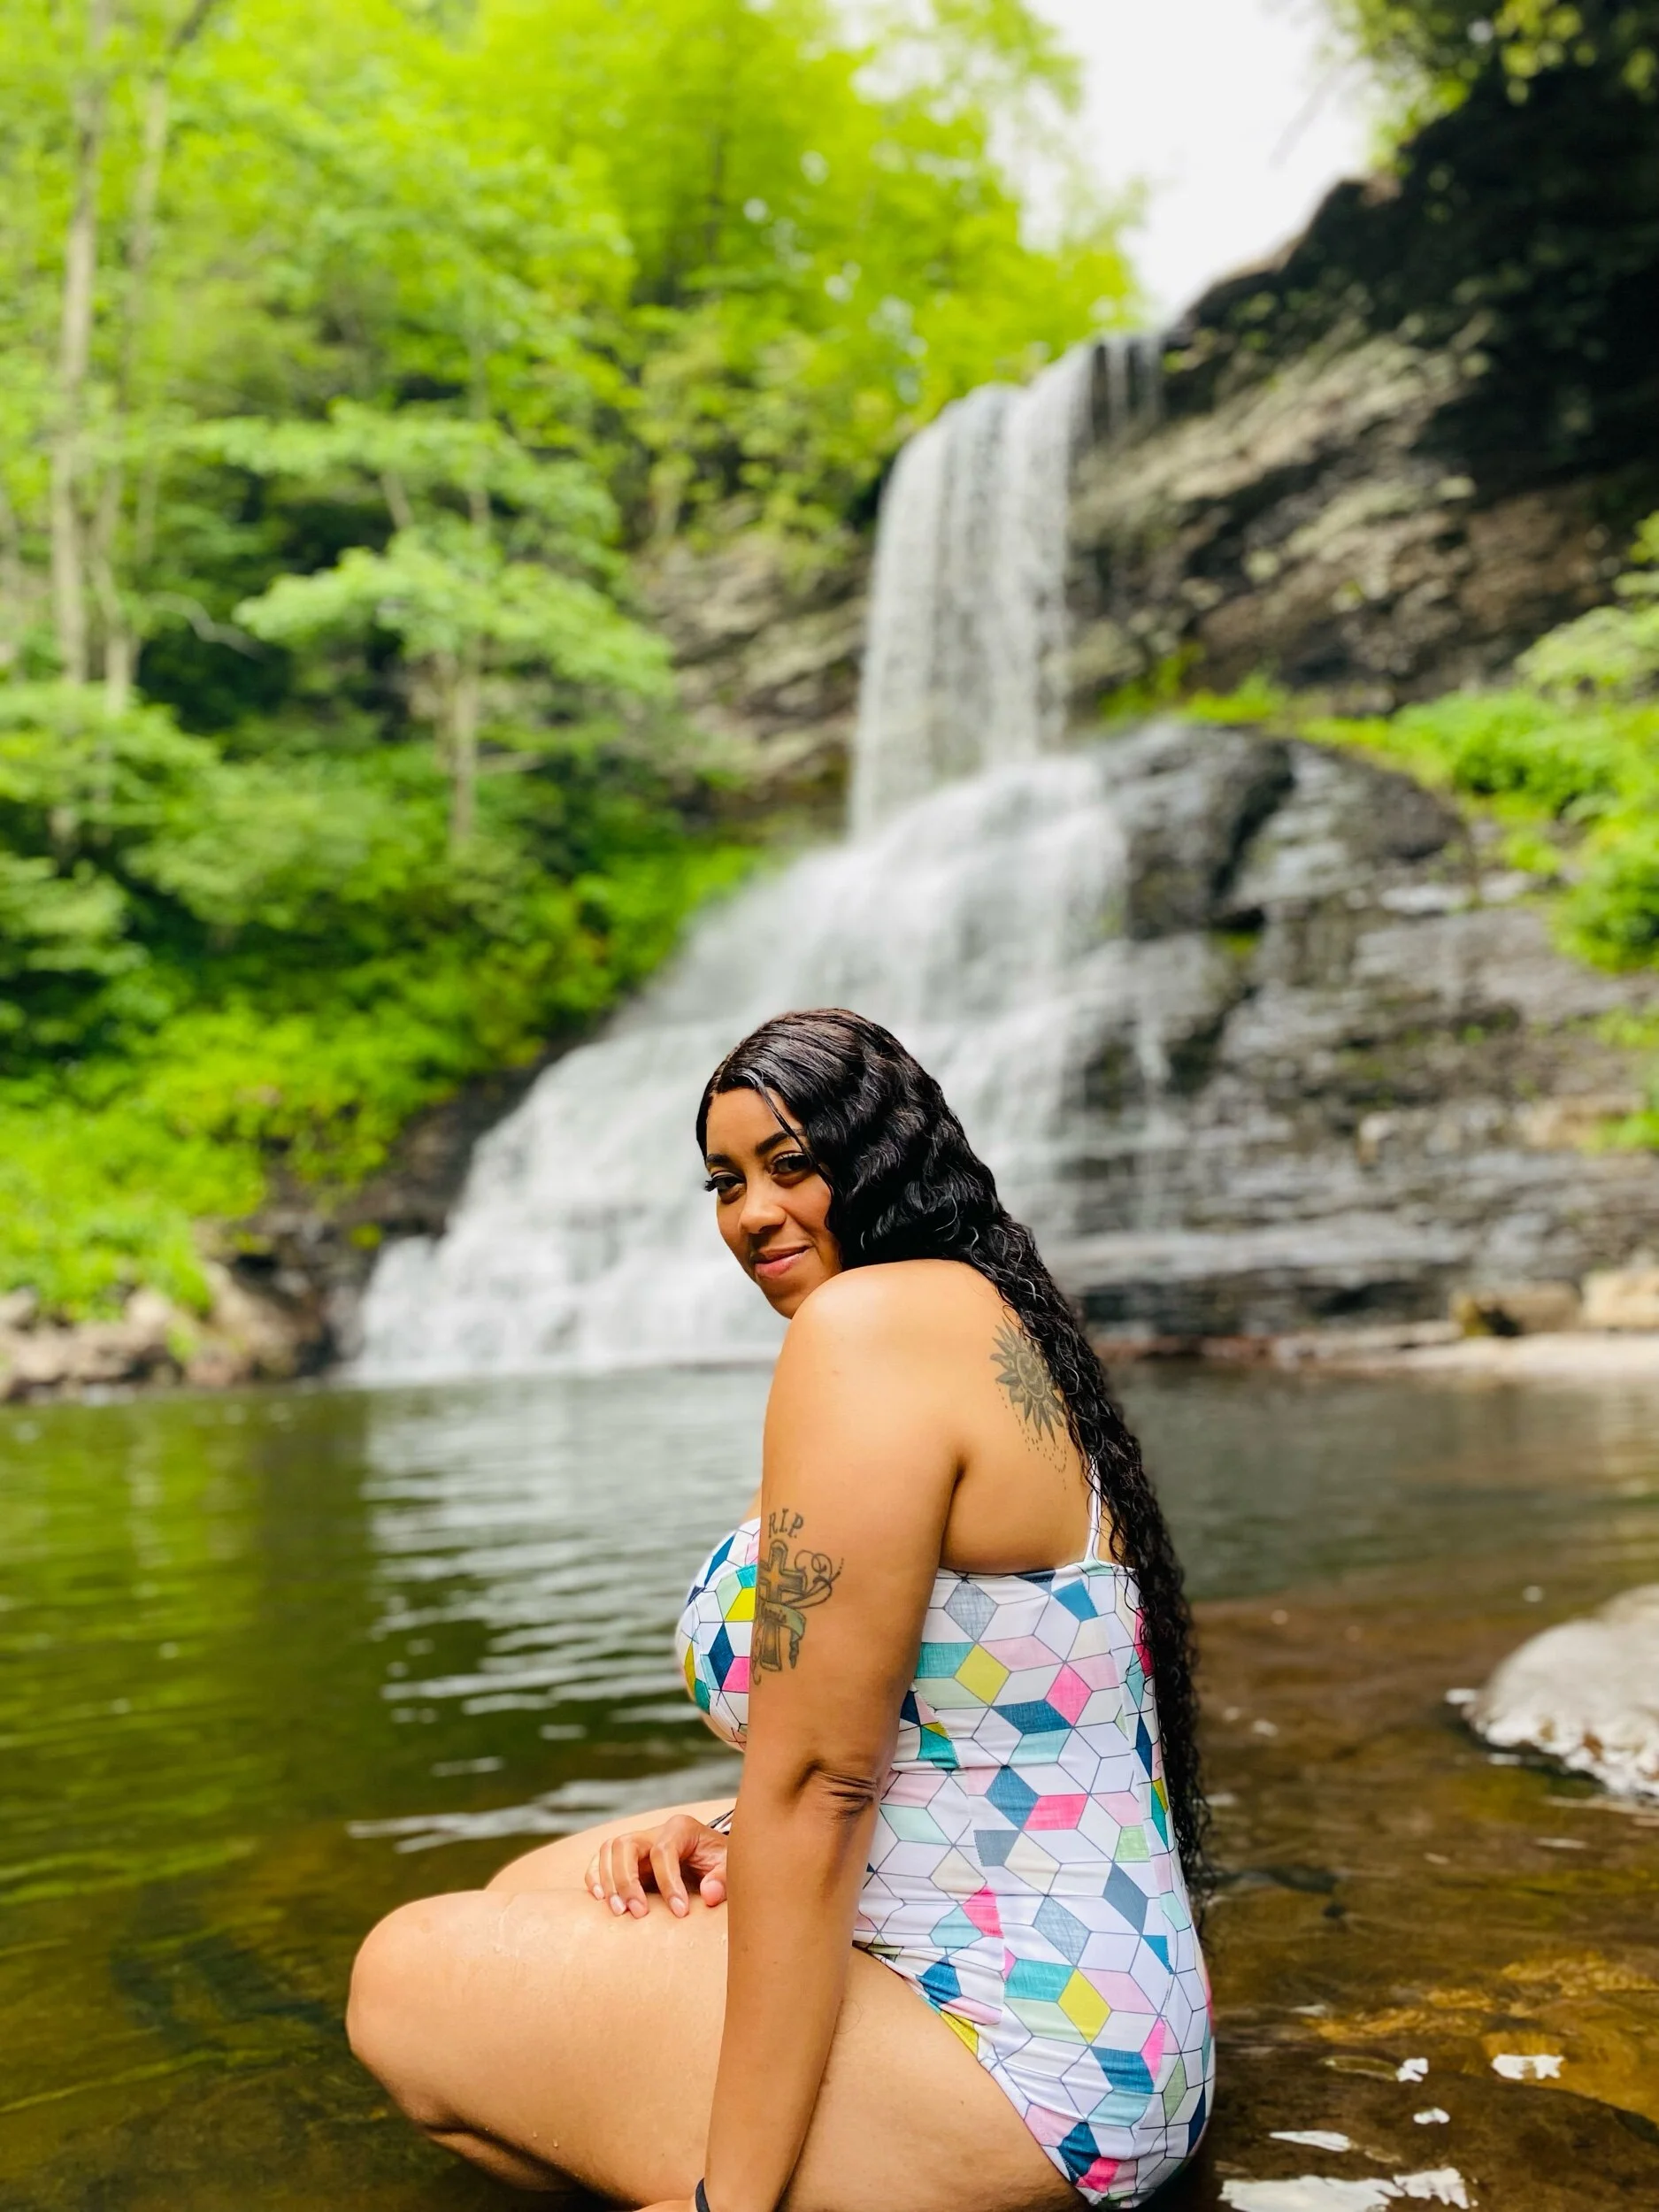
Sophie and WATERFALLS
It’s summer right? Well I’ve had this swimsuit made since winter and this Sophie was literally waiting for the right time and scene to make an appearance. My 1st water outing this season was this beautiful, nature filled hike to and even more beautiful waterfall!


Overall I love this swimsuit and I will definitely make another with a few adjustments to cup size and make the legs more of a bikini cut than full coverage bum. Tell me what you think about my HEXY Set below. As always thanks for stopping by.
Peace & Blessings!
Lush & Wild
Lush & Wild
I had the pleasure of receiving Katie Kortman’s Lush & Wild double gauze fabric in this beautiful print before it was released April 19th on Fabricdotcom. Click the link here to view the entire collection. Let’s just say I absolutely love these prints
The fabric choices include double gauze, sateen, canvas, and quilting cotton. The hand on the double gauze is a nice soft drape and perfect for Spring and Summer. After sharing a sneak peak of this look on my IG, this print sold out on the 1st day lol. But don’t worry they will print more and it will be available again soon.

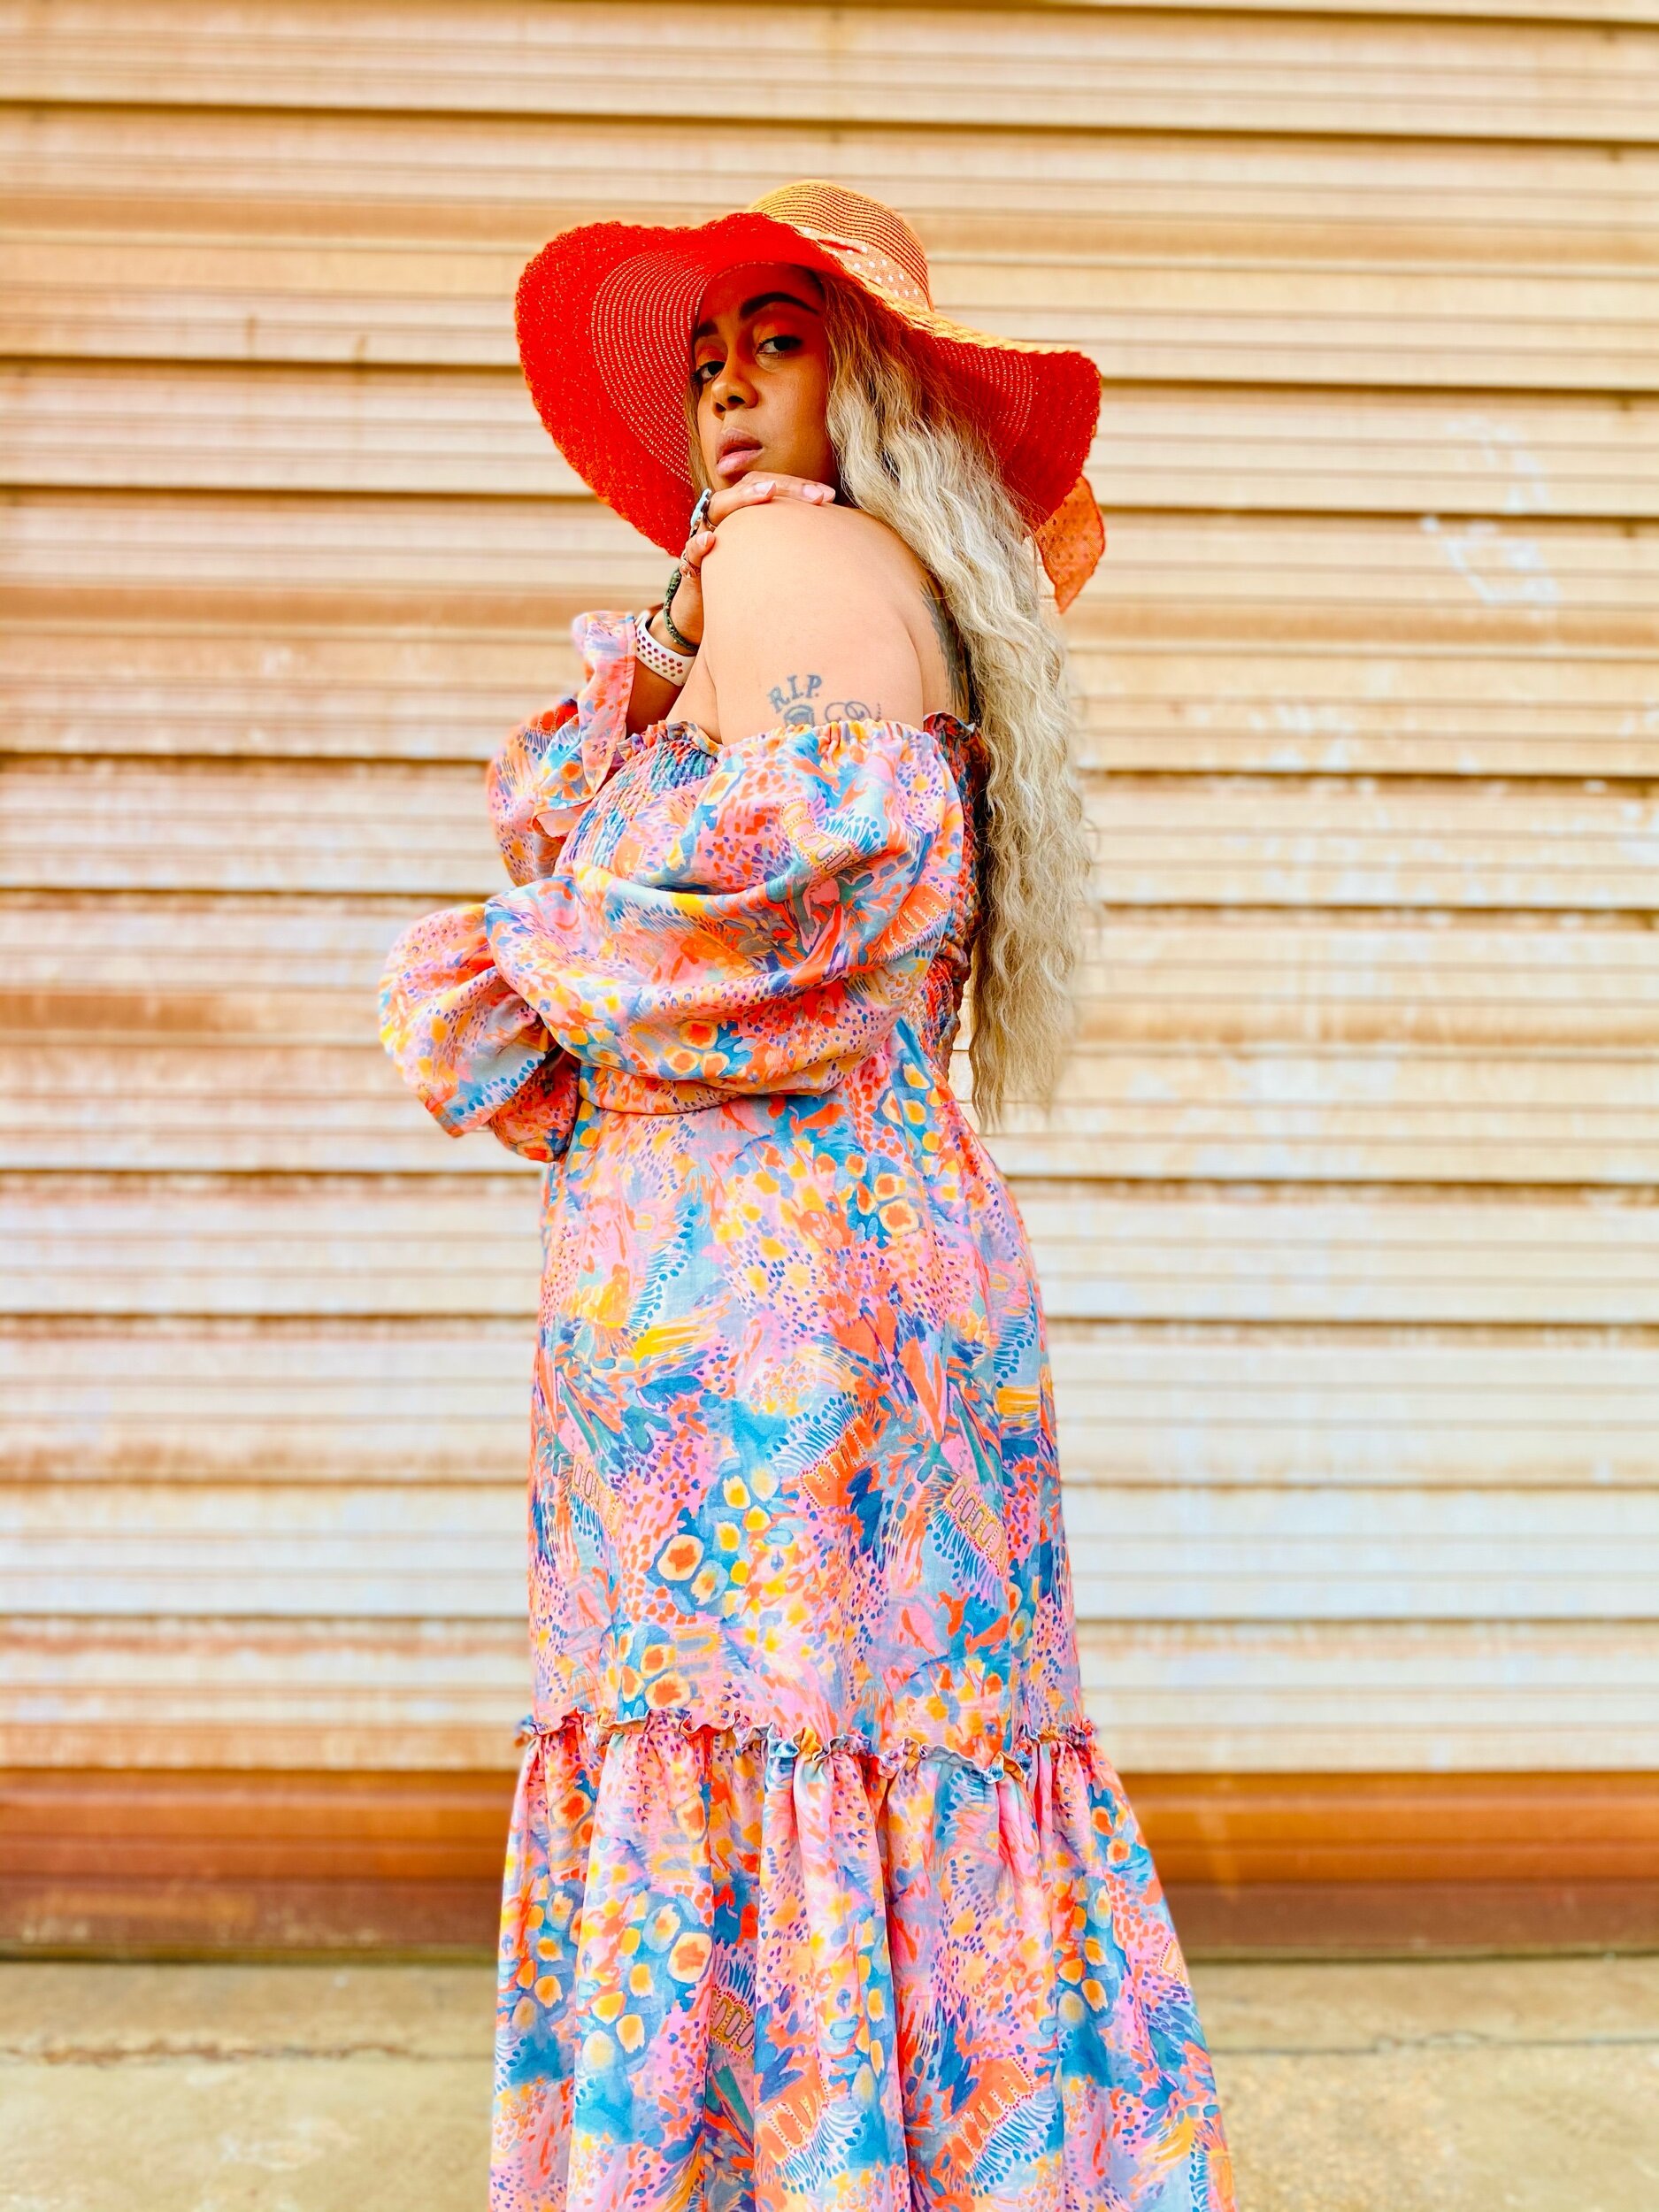
Shirring
I had never tried shirring and with the 4 yards of fabric I had, I figured I could squeeze out shirring, big sleeves, and a gathered skirt. Luckily I was able to finish this dress with about 1/4 of a yard to spare.
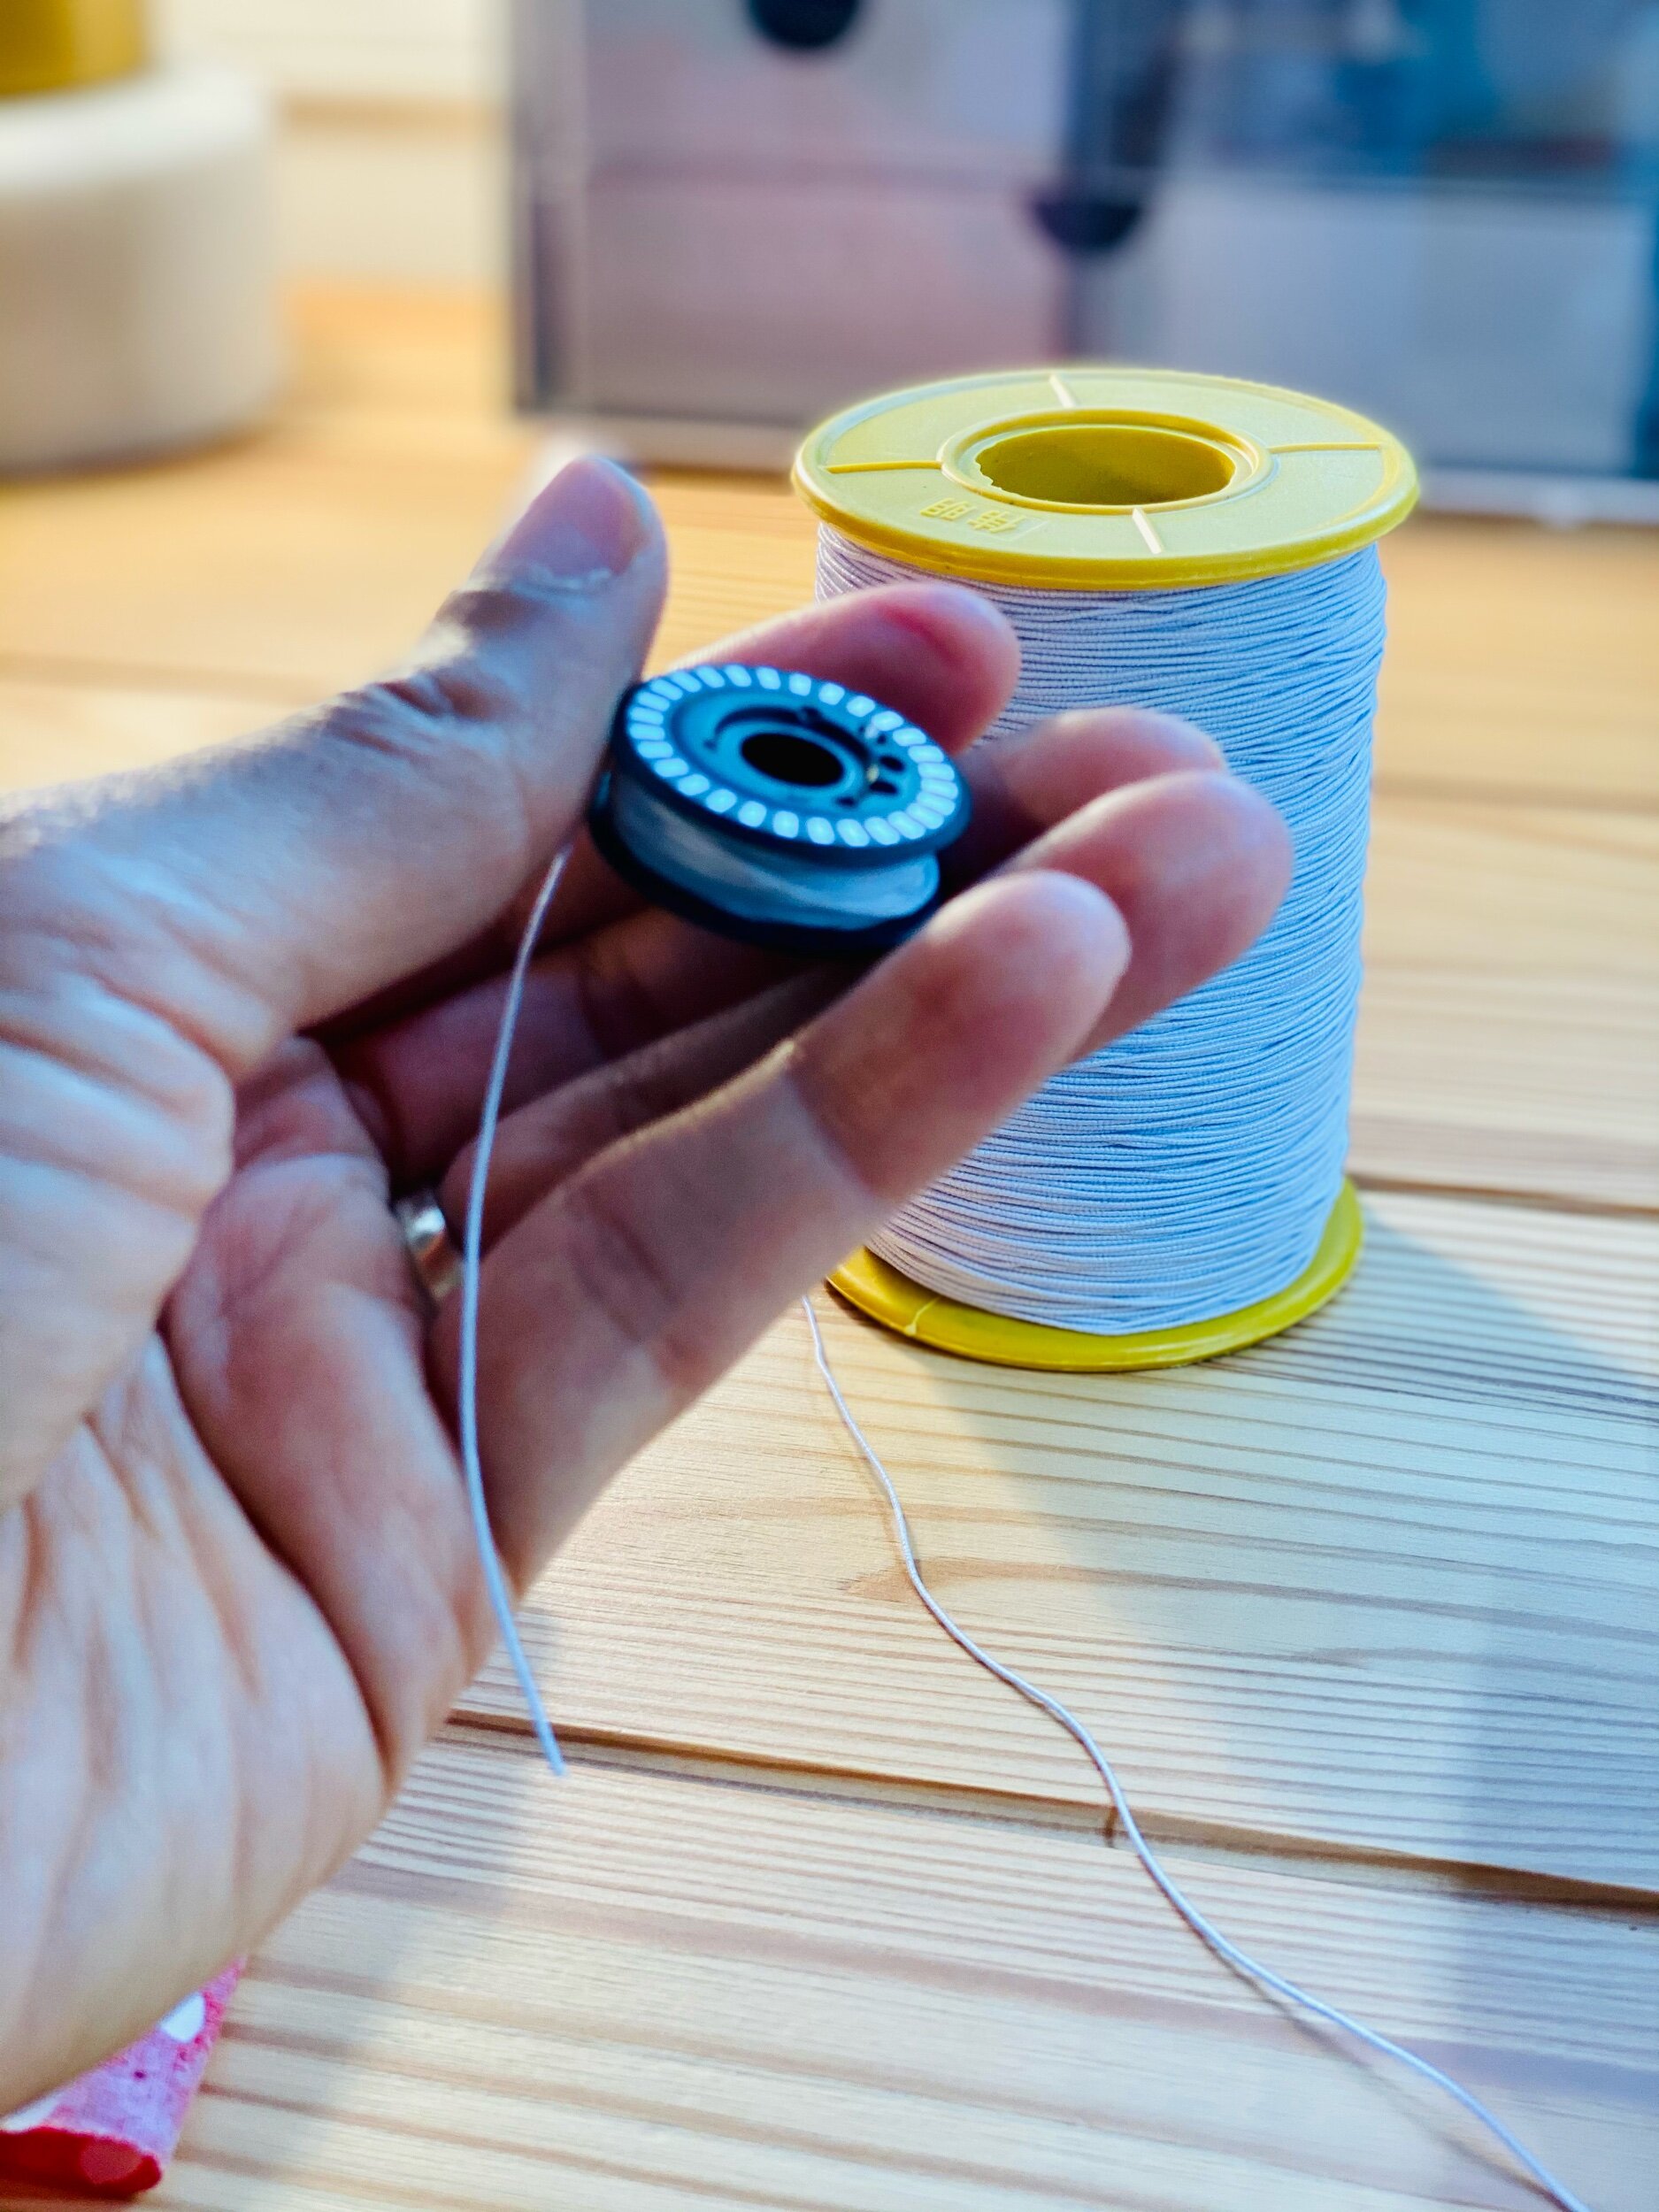
Okay, so many people told me they’re afraid of shirring. I too was skurrd lol. But I finally put my fears aside after my friend Raven assured me that it wasn’t that bad. One of the most tedious things about shirring is hand winding your bobbins. I sew on my Bernina 880 plus and the elastic thread is too thick to feed through my automatic bobbin threader. If your machine can, then by all means do you. The great thing about my 880 is that the bobbins are jumbo size so I only used about 3 and a half bobbins for my elastic thread.
Please keep in mind the amount of shirring you choose and spacing will determine how much elastic thread you will need. I will say you will about 3-5 bobbins for shirring spaced 1cm apart and on an average of 20-30 rows of shirring should be enough. You want to be sure not to wind your bobbin too loose or too tight!
For this project you will need:
Sewing machine
elastic thread (check out my Amazon shop here)
all purpose thread
Binding or bias tape (for sleeves)
Lingerie Elastic 3/8” or 5/8” (for sleeves)
This dress is the By Hand London Shirred dress. It’s literally 4 rectangles. What you will need is your bust measurement x 1.5 and whatever length you want for your dress. For the bottom tier, multiply your dress measurement by 2 and the length about 20 inches (you can make this shorter or longer). For the sleeves cut two rectangles 24” long and 30” wide. You can find more in-depth details in the highlights of @Byhandlondon for this shirred dress.

I sewed 29 rows of shirring for my dress. My bust measurement is 42” so I needed more than the suggested 20 rows of shirring.
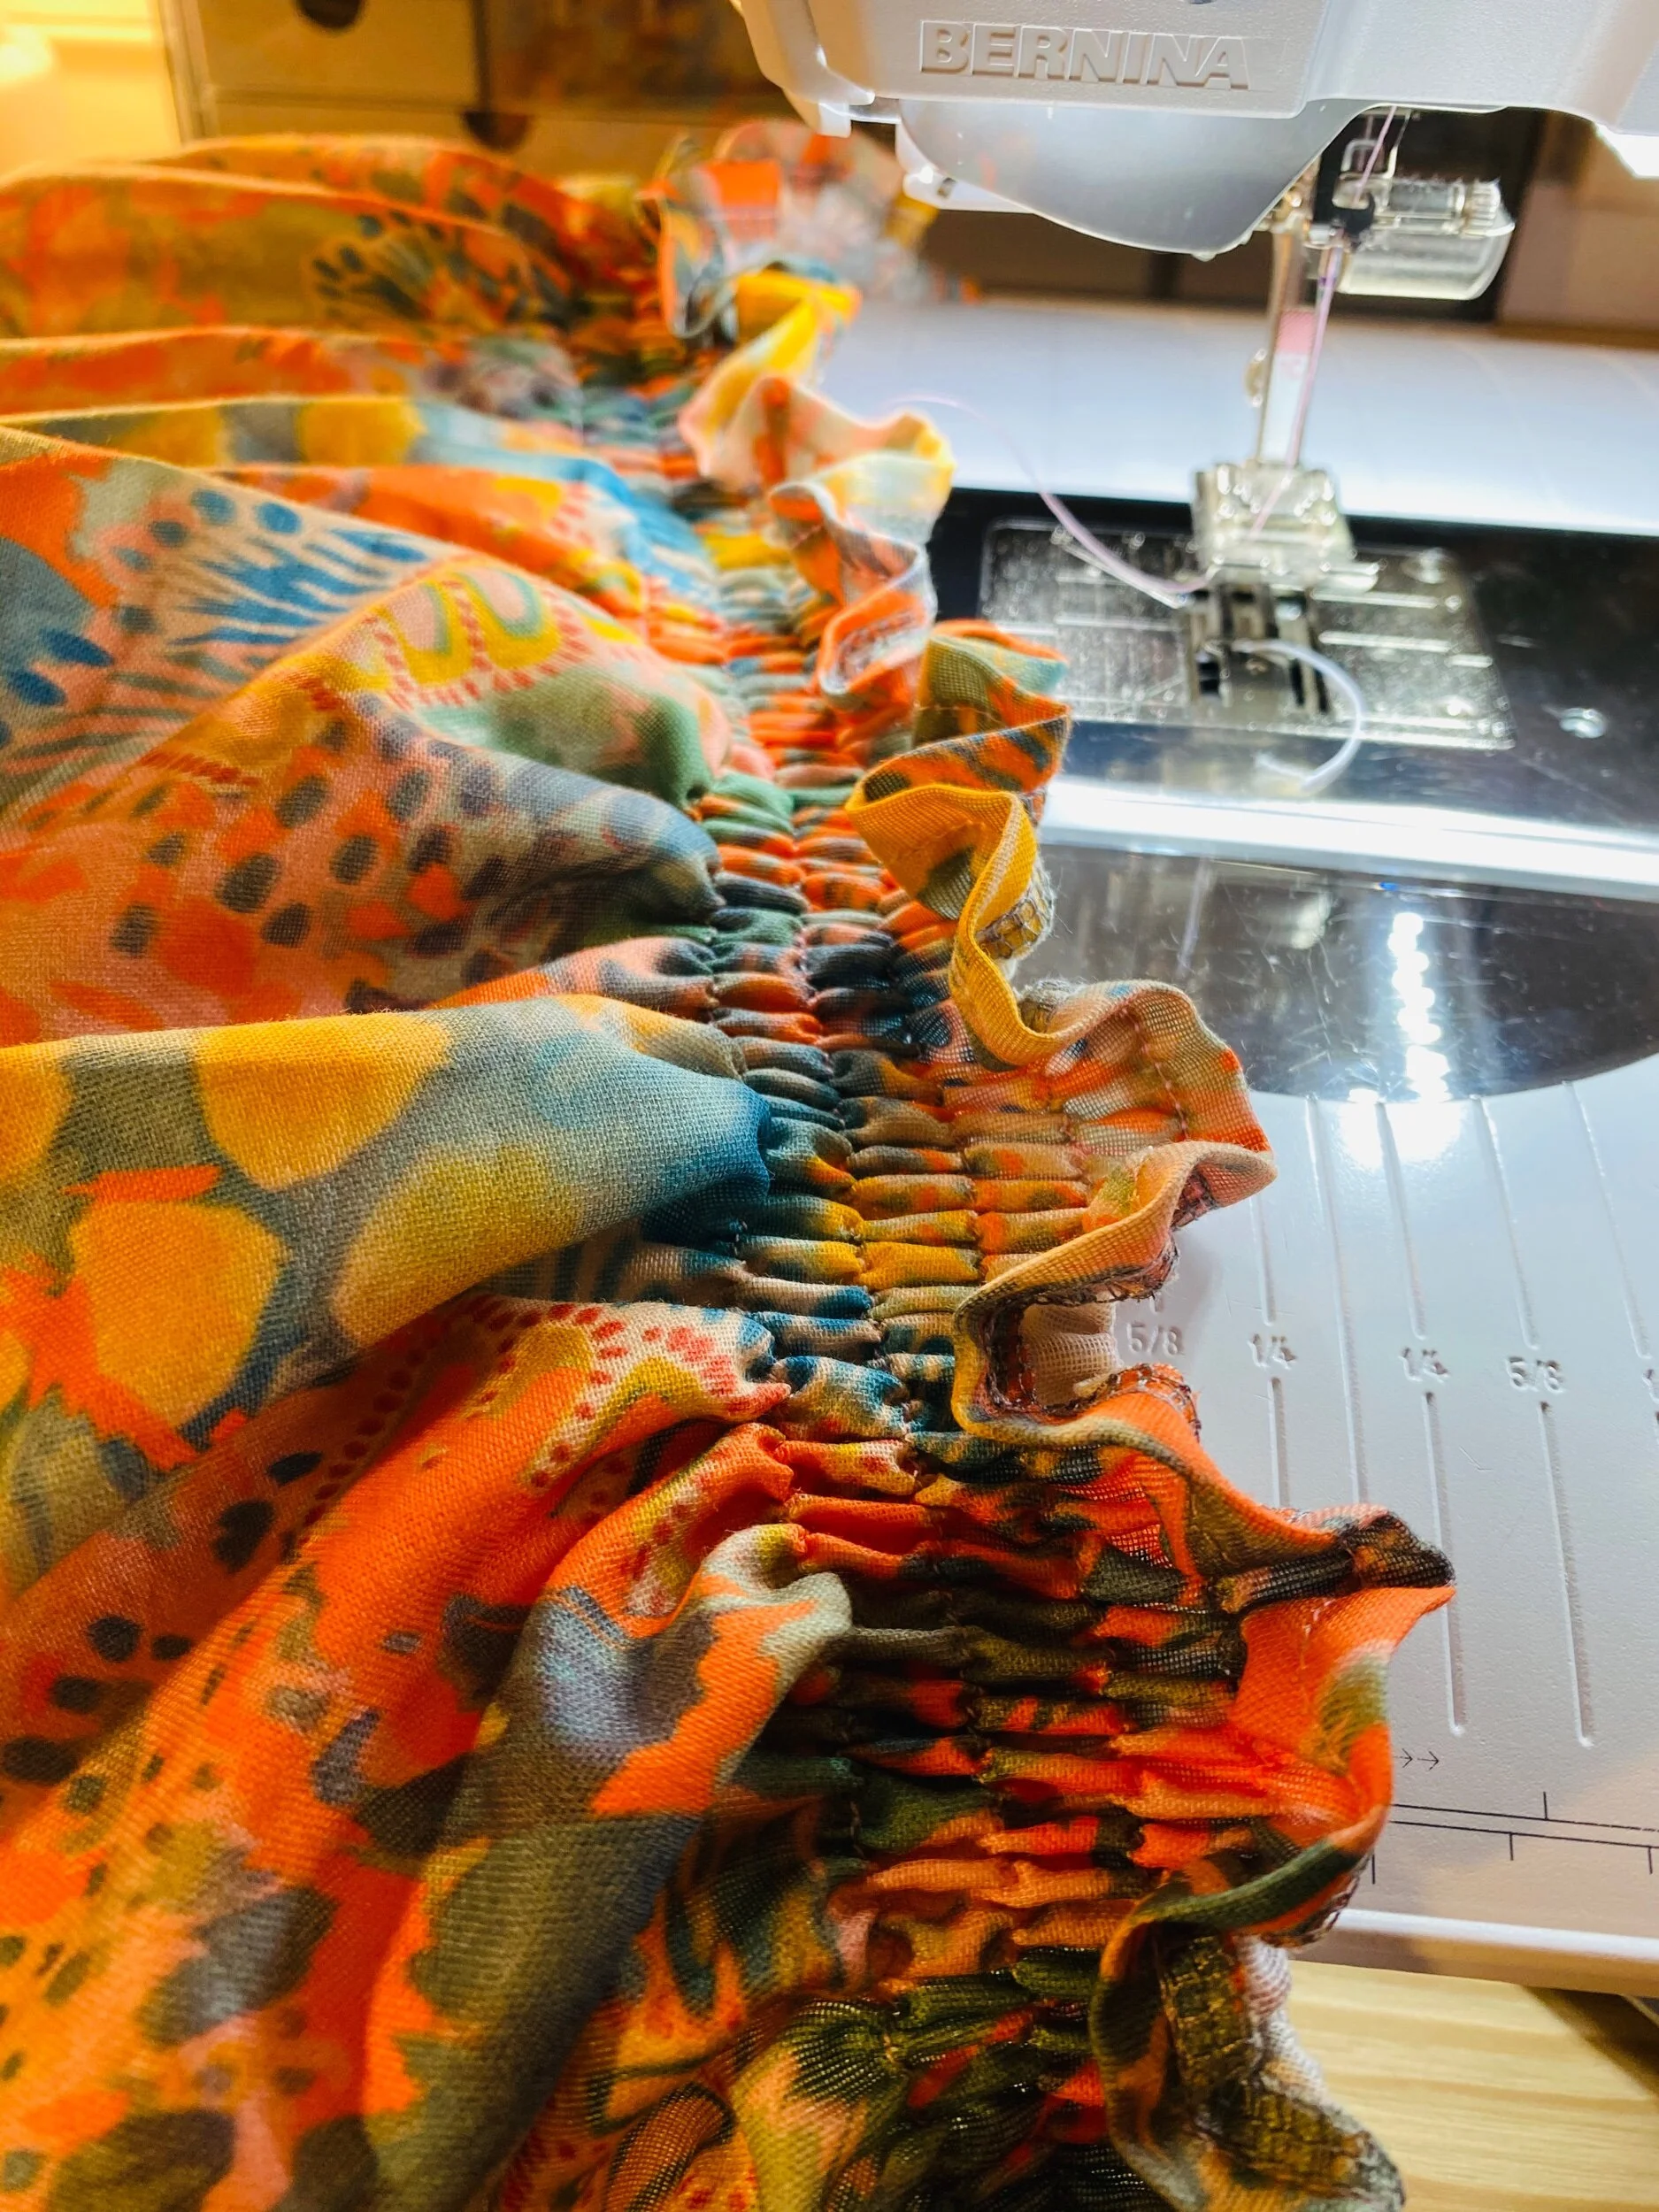
For the bottom tier I wanted an exposed gathered look so I did a rolled hem on the top and gathered by using my Bernina Ruffler foot.
I wanted a little razzle dazzle so I added this beaded trim I had on hand to the bottom hem of the dress.


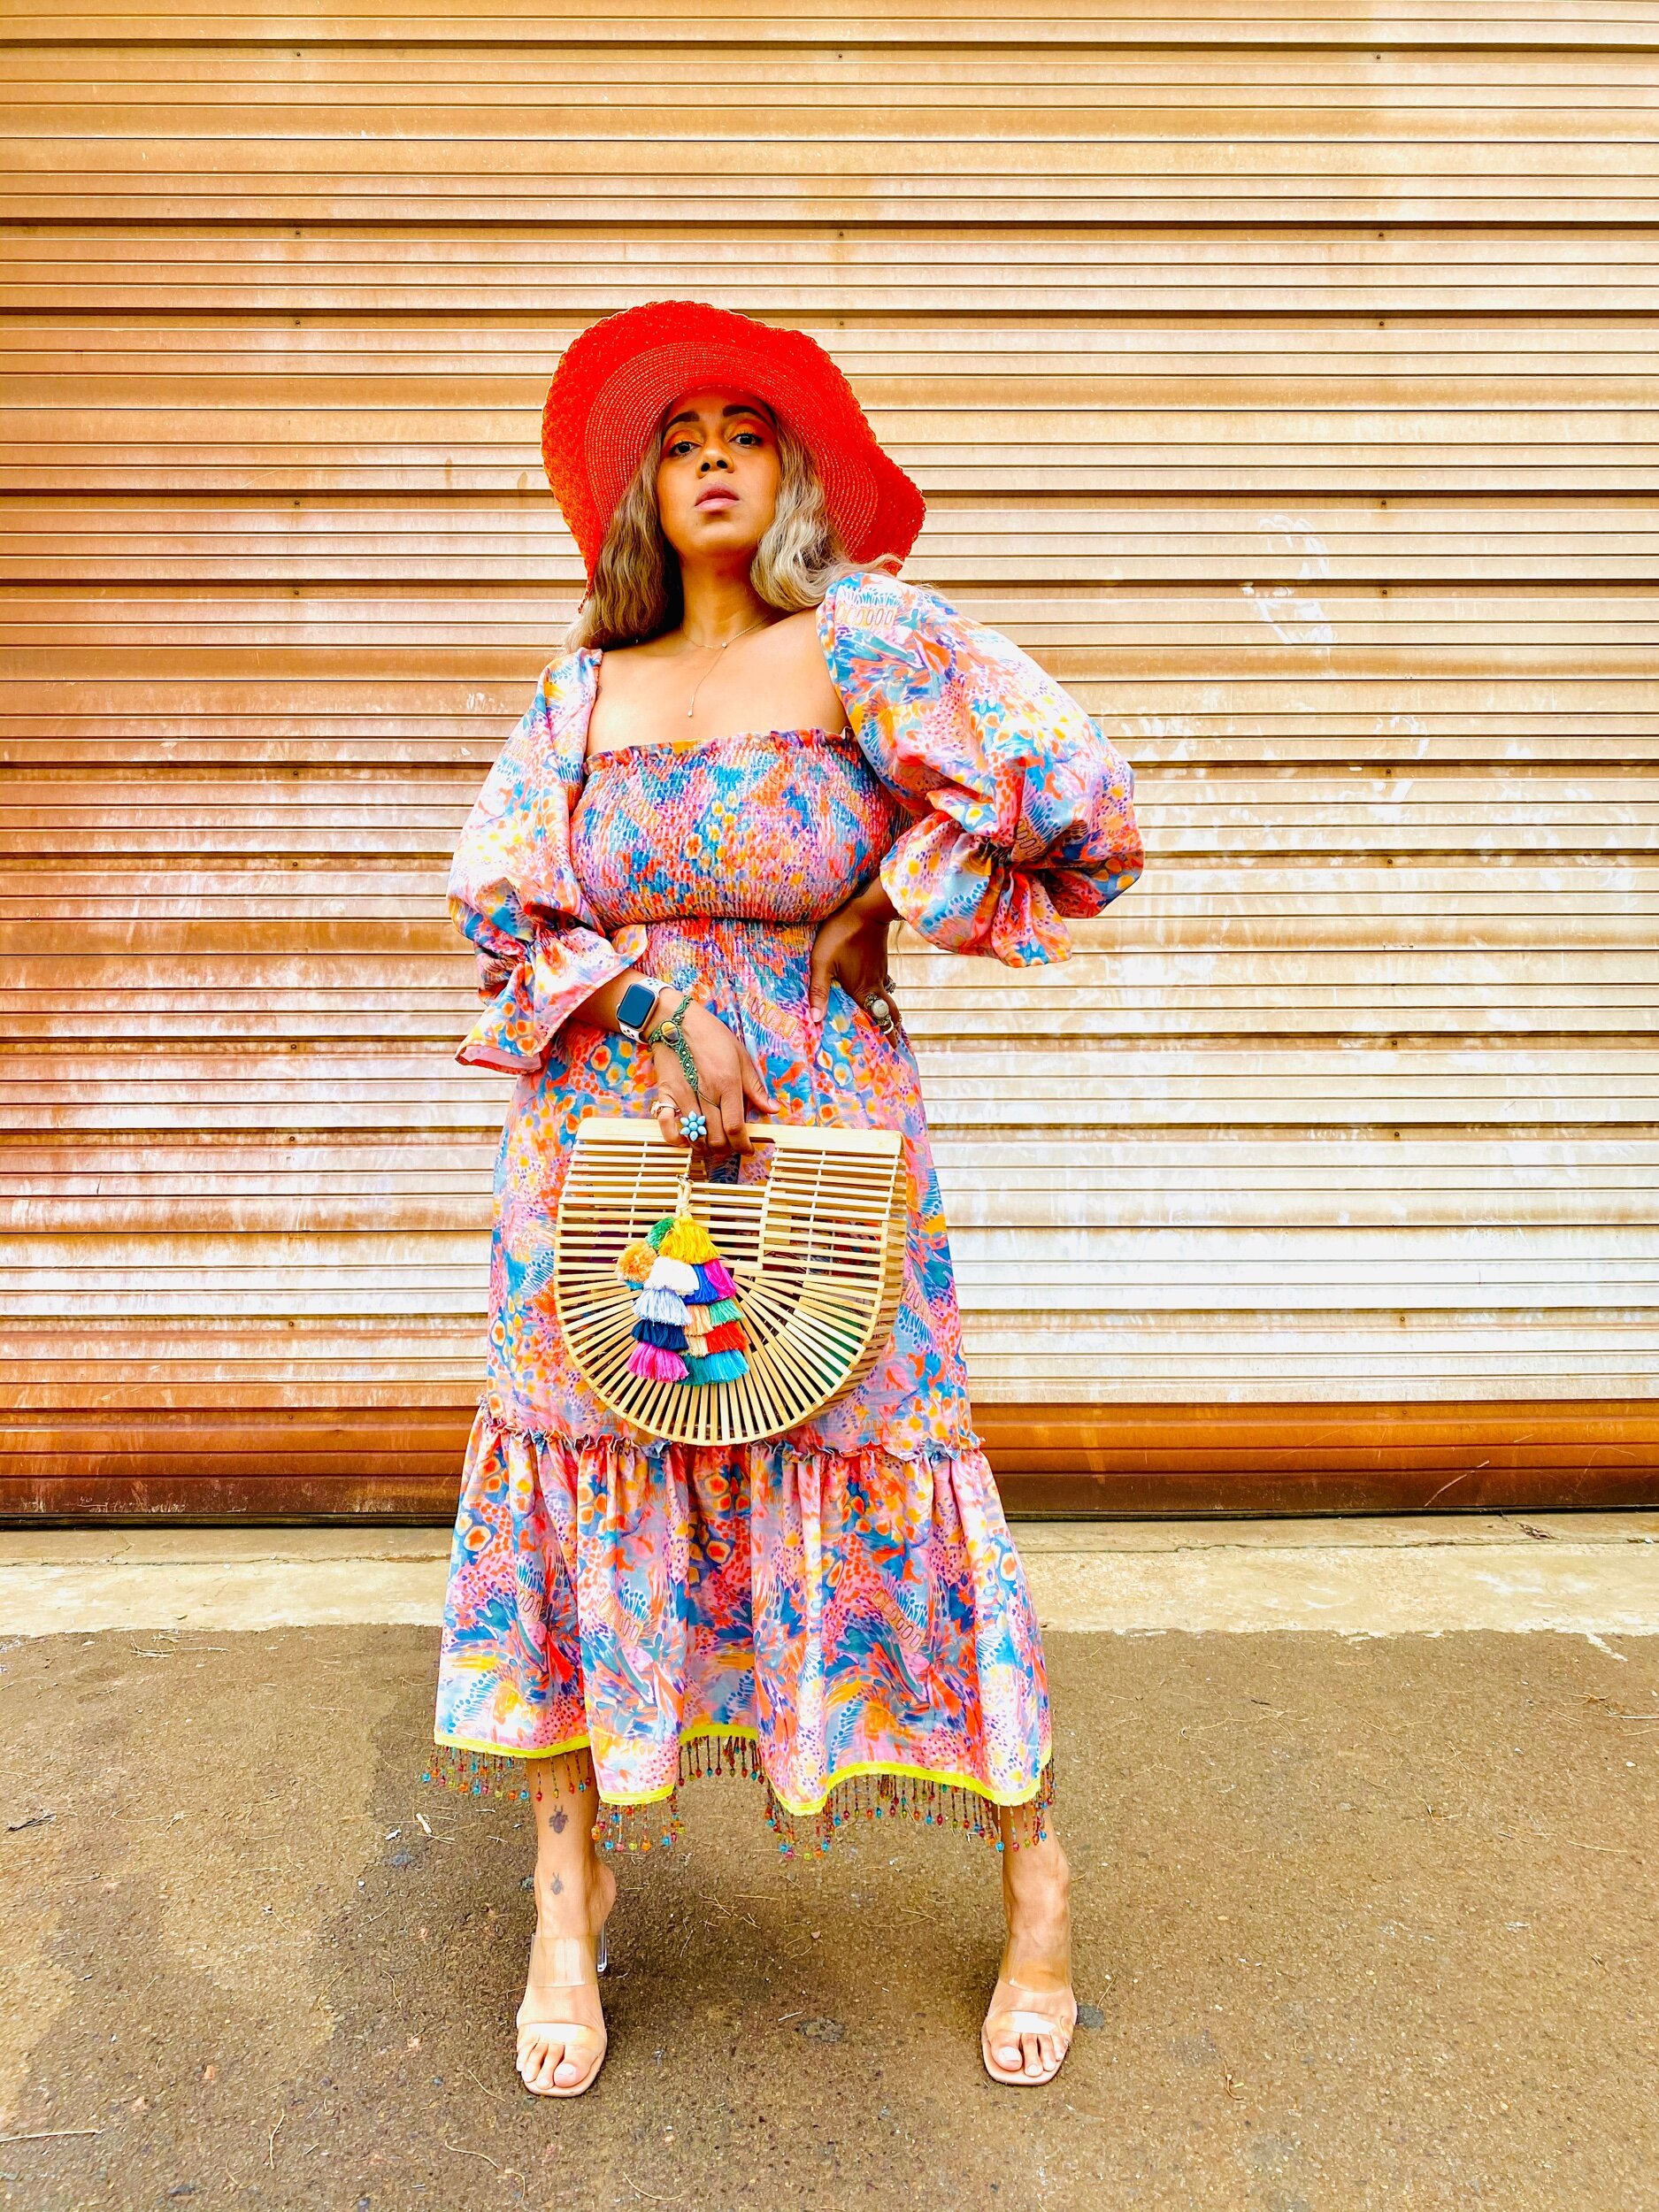


I do hope you enjoyed this look and that you go check out the new Lush & Wild Collection by Katie Kortman! Thanks for stopping by and as always
Peace & Blessings!

National Flannel Day
Are you a flannel addict?
I didn’t realize how much I actually love flannel. So much so, I think it’s only right to make December 25th National Flannel Day!
I mean how many of you, your friends, and family were rockin flannel on Christmas Eve and Christmas? Errrbody, lol.
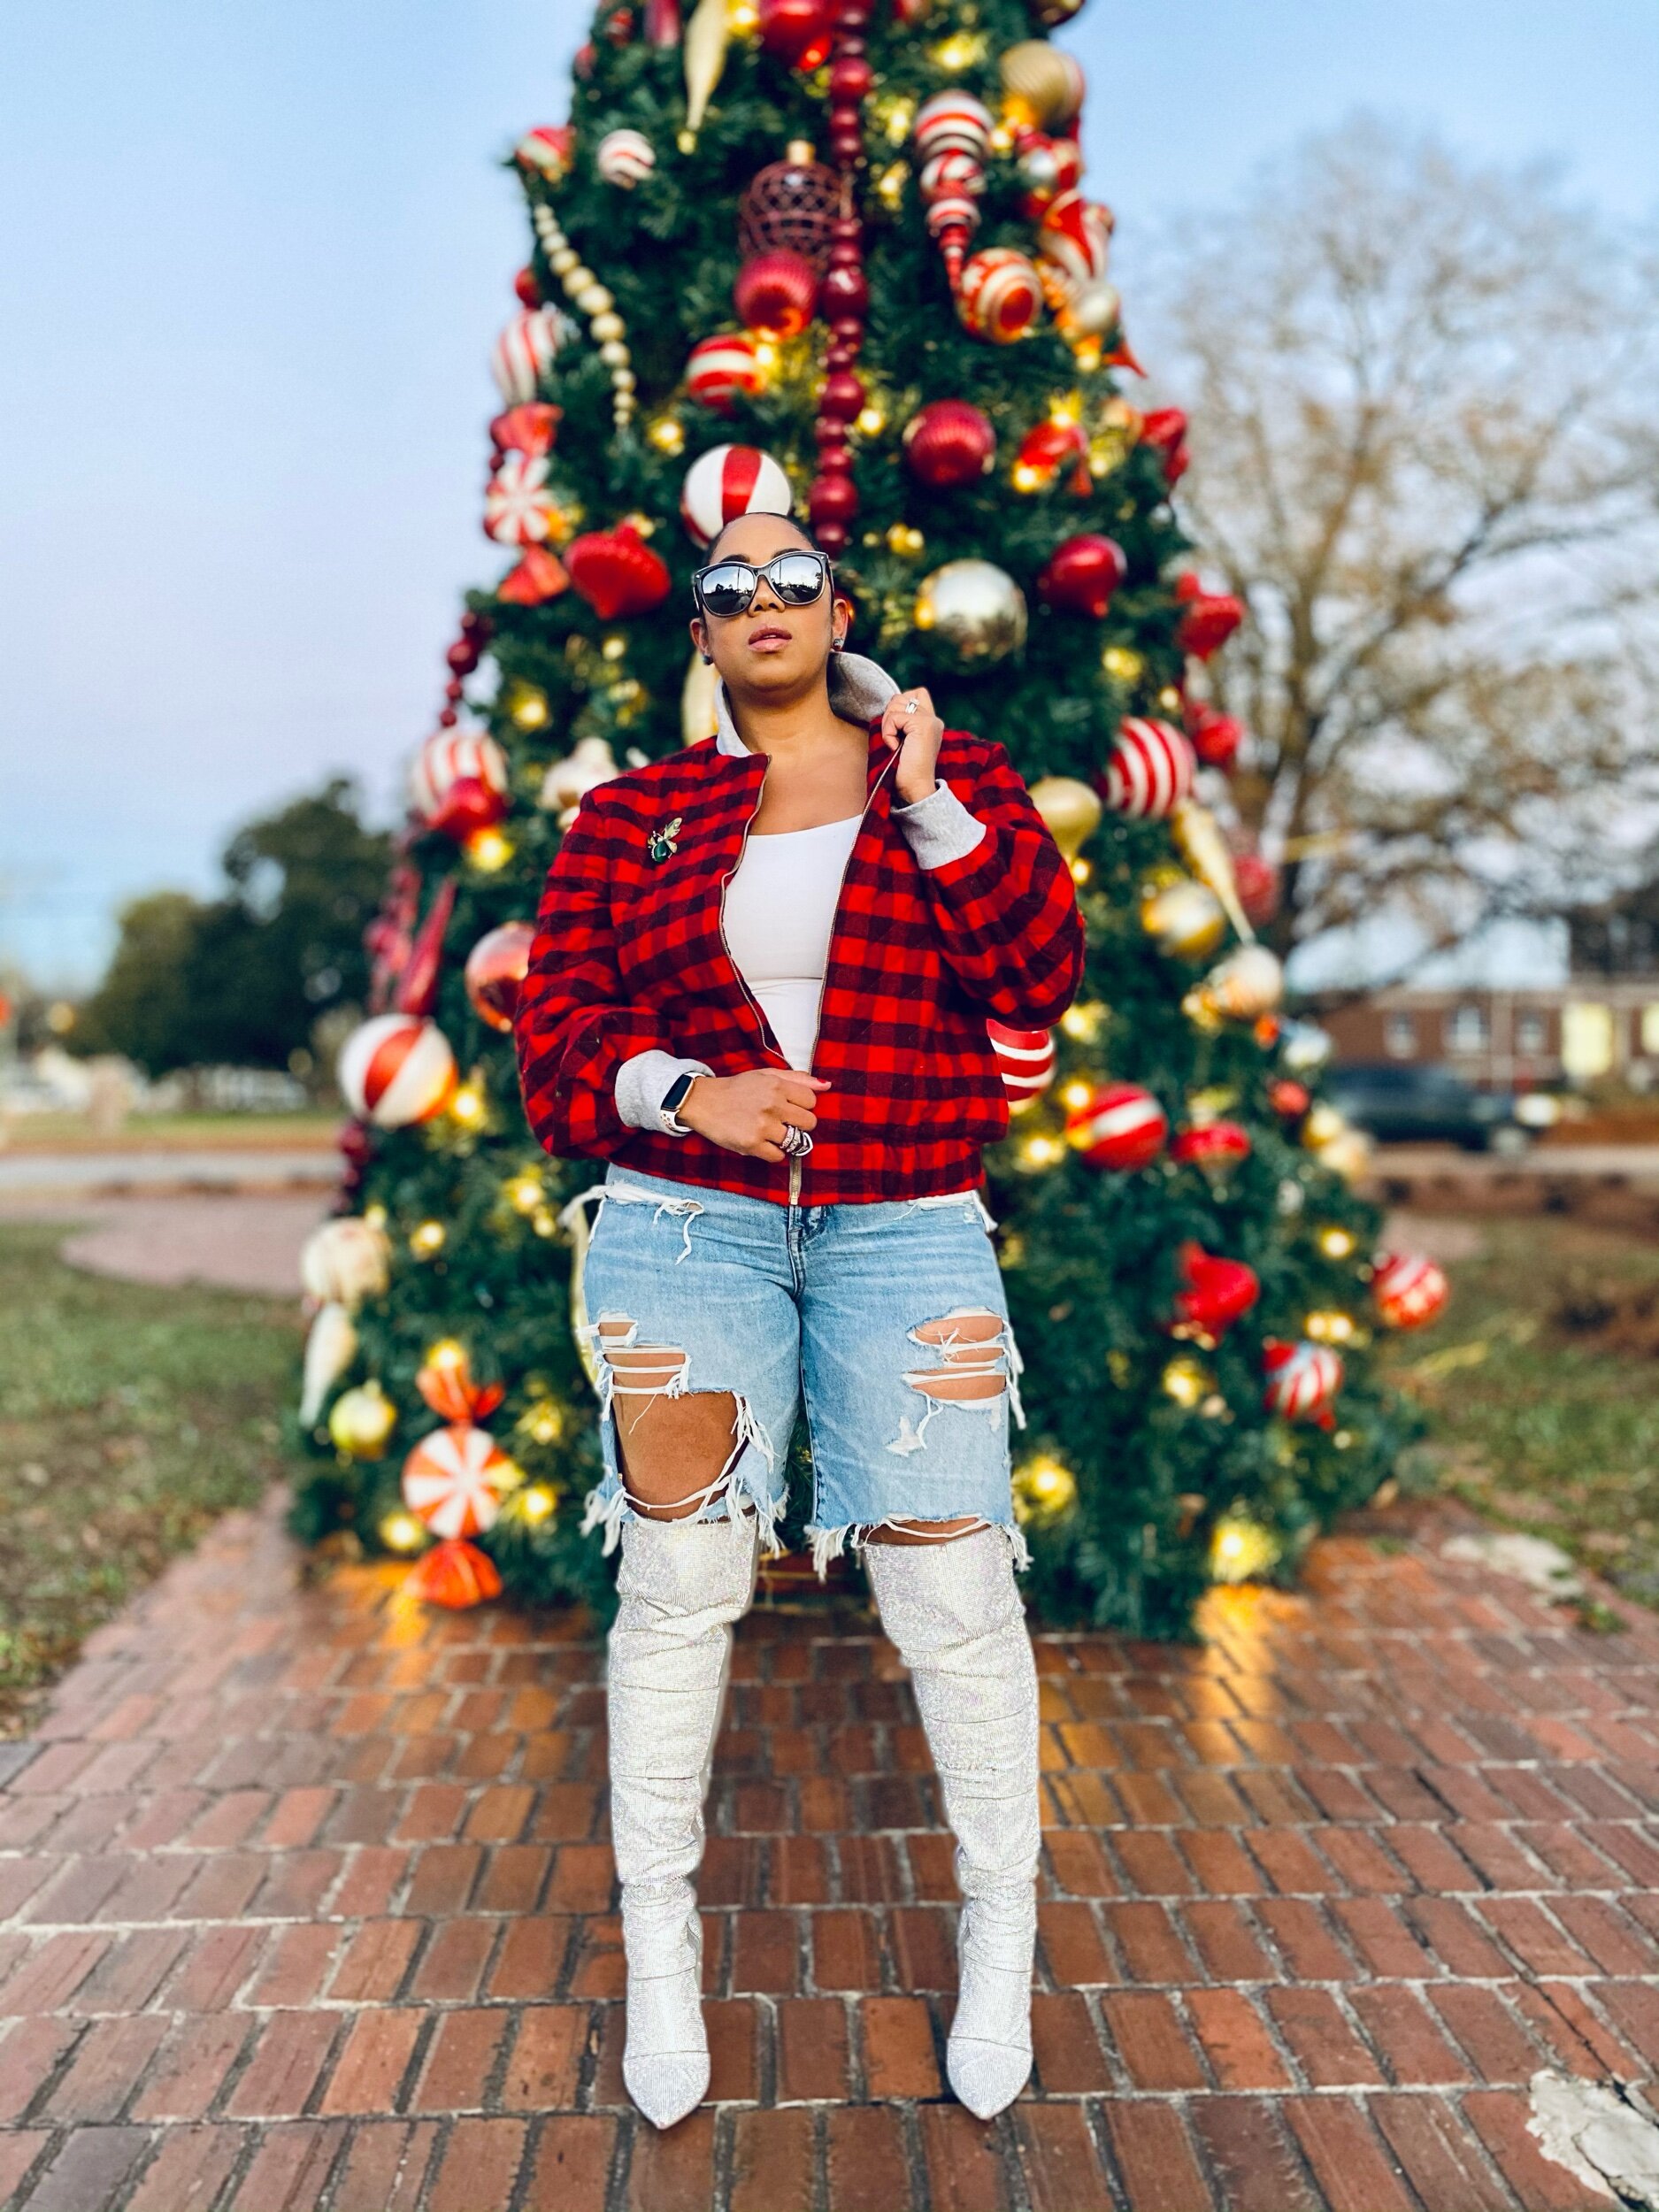
I have had this quilted flannel fabric for over two years now and finally decided I needed to bring it to life. On one of my IG scrolls I saw Mimi G’s throwback of her flannel bomber jacket with casual sneaks and shades and I remembered why I bought the fabric in the first place.

Let’s Talk construCtion
So I have flannel fabric but didn’t have gray for the cuffs and the collar…or did I? Okay, here’s a tip if you want to recreate this look and don’t want to buy the gray fabric like me. Hubs was literally throwing out old gray sweatshirts that were actually not very old at all and I looked at them (being the fabric hoarder I am) and said ummm I can repurpose these. So…I did!
There were vinyl lettering on some parts of the sweatshirts but I manage to find enough space to cut (in the appropriate stretch direction) the two pattern pieces needed for the collar and cuffs. This quilted flannel is nice and fluffy and it is definitely keeping me warm even in below 30 degree weather.
If you caught my previous blog then you will notice I also used the same animal print fabric as my Jogger Season bomber for lining (no fabric left behind).

To match or not to match? that’S the question
Here’s where some sewers may say flannel matching, HELL NO! I’m usually HELL YES!! The sizing of the flannel in this fabric is not too small where I feel I can’t pattern match but if it were smaller, I might rethink that idea. But guess what? If you don’t want to pattern match flannel that’s okay and that’s yo business! I managed and purposely patterned matched this jacket with the exception of the shoulder and sleeves seams. I tried but my eyes eventually said that’s enough honey!
Below you can see for my zipper install I stitched down one side of the separating zipper and then marked the remaining unsewn zipper piece on the wrong side of the zipper where patterns match. This helps me to eliminate pulling out my seam ripper because my prints aren’t lining up once zipped together.
I live for an exposed zipper and I had a nice gray zipper handy so I stitched a little closer to the edge than the pattern called for.
If you made it this far I bet you’re also wondering if I used a pattern? Yes I did use a pattern but I didn’t follow it to a tee. This pattern by Nikki Brooks of Beaute’ J’adore M7636 is one of my faves. I opted out of the cording and made the sleeves one pattern piece instead of two. I do want to add that if you have a basic shirt sloper you can achieve this look without this pattern. You would need to make sure the fit is to your liking (baggy or fitted) and cut down the middle of the front piece to add a zipper. You would also need to factor in length to fold up to create the waistband of the jacket and pockets if you choose. I like welt pockets for bombers but I didn’t want to make time to insert them this go round.


The jacket has a few seams and in my opinion can be sewn within a few hours (not including cutting). I managed to cut and sew both jacket and lining, with zipper install in under 3 hours but I was rolling lol.
I think this pattern is easy to moderate depending on confidence with zippers, pleating (sleeves), and cording (if using). I would definitely recommend it and once you try it, you will probably use it again and again.


I hope you all enjoyed this creation. Tell me what you think below. I’d love to hear from you.
Until next YEAR!! Bye 2020
Peace & Blessings

Fall Florals
Fall Florals

Who says you can’t be colourful in the Fall?
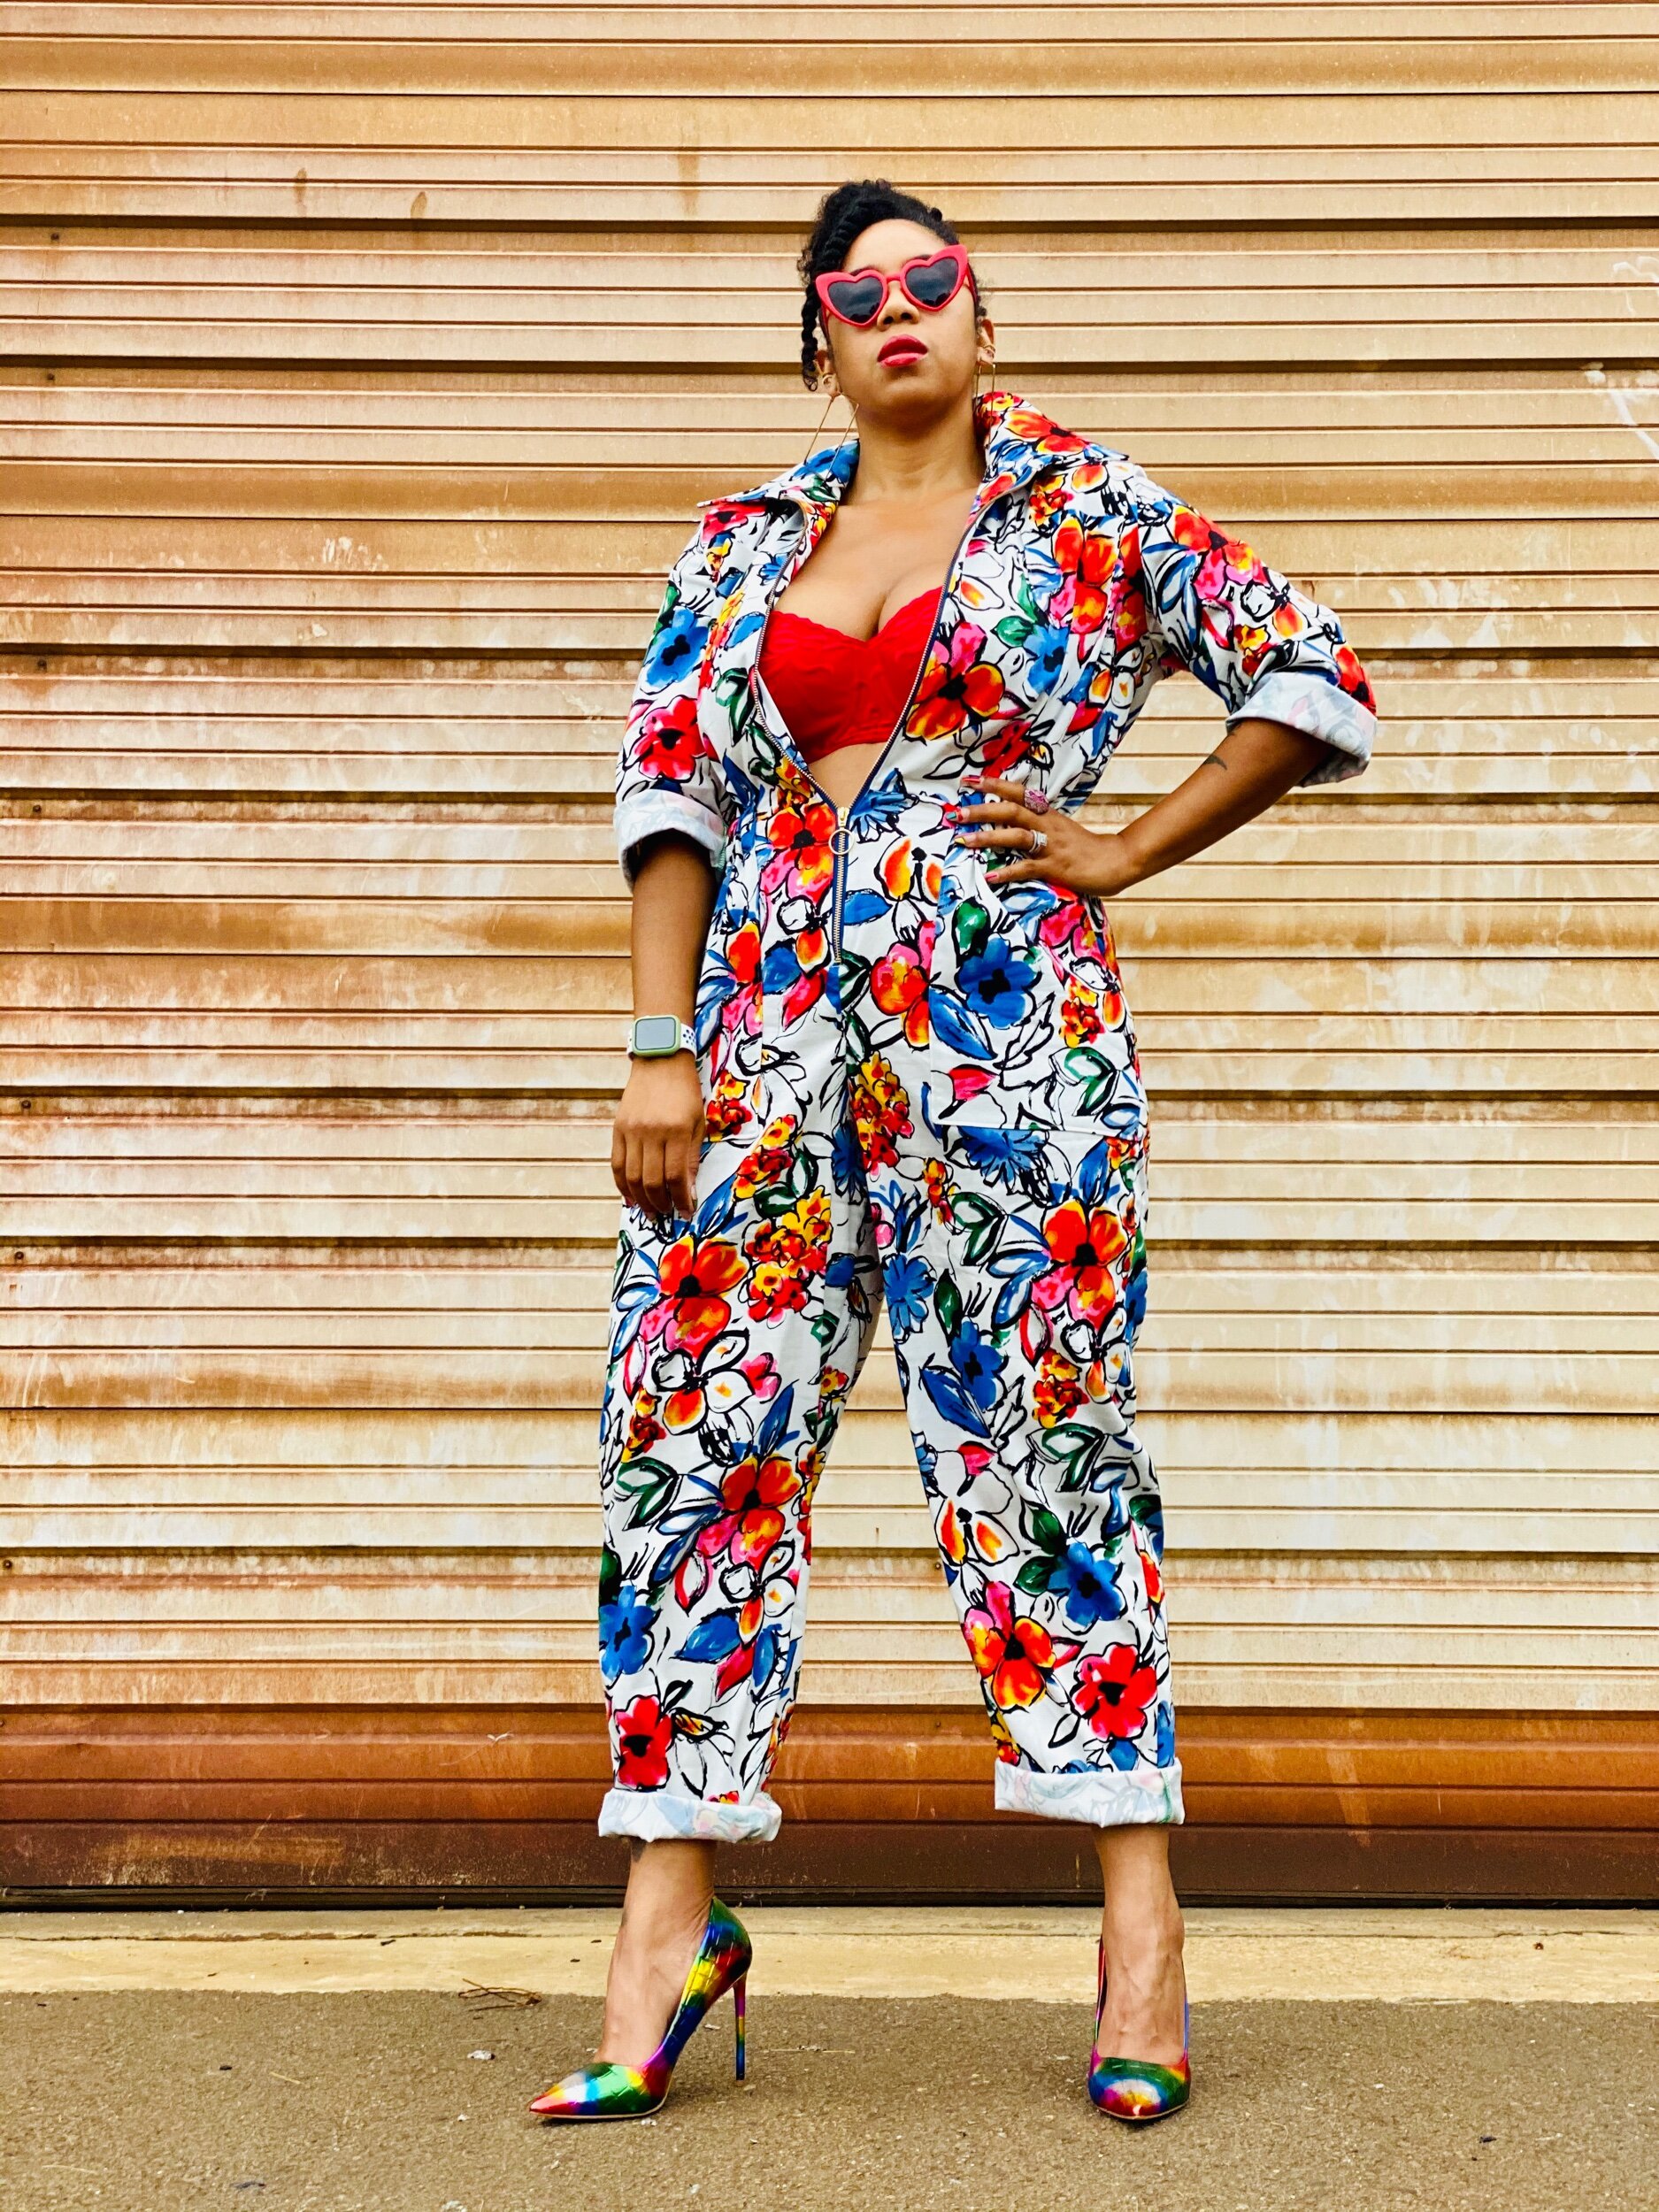
Greetings! It’s finally fall and I like to migrate my vivid summer colours all year round. So for my first official fall make I wanted to use this Telio denim cotton from fabricdotcom. I had to have it (I also snagged it in yellow). So what to make? I have 8 yards of this amazing fabric and the first thing I thought of was a jumpsuit!
I choose the Intrepid Boiler Suit by Alice & Co with the zipper and elastic waist option. What I love about this PDF pattern and the instructions is that it has a few different options for creating this jumpsuit. The main option is with an exposed zipper. You can also add a facing for inside the zipper and the instructions break down how. I added the zipper facing and bias binding to majority of my seam allowances for a more detailed look on the inside.


I won’t get too heavy into the construction of the pattern because I feel the instructions were pretty good. I did notice that when attaching the pants to the bodice there is more than enough space to make adjustments. I personally added 1.5 inches to the waist length of my pants because I have long legs. Even with adding the extra inches, I still needed to bring down the seam allowance for the bodice and pants seam. What I noticed for myself is, I needed a baggier fit in the booty and sewing based on the instructions, my boiler suit was definitely giving me more of a wedgie.
Tip: Until you see what seam allowance width is best for your body, this would be a seam to baste stitch instead of stitching at regular stitch length.
Tip: select a longer zipper if you’re taller so you can remove this jumpsuit easier for bathroom trips! I usually use a zipper 2-4” longer than what the pattern calls for. If it’s too long you can always remove teeth and shorten but if it’s too short…well, you’ll be upset you have to get a longer zipper.


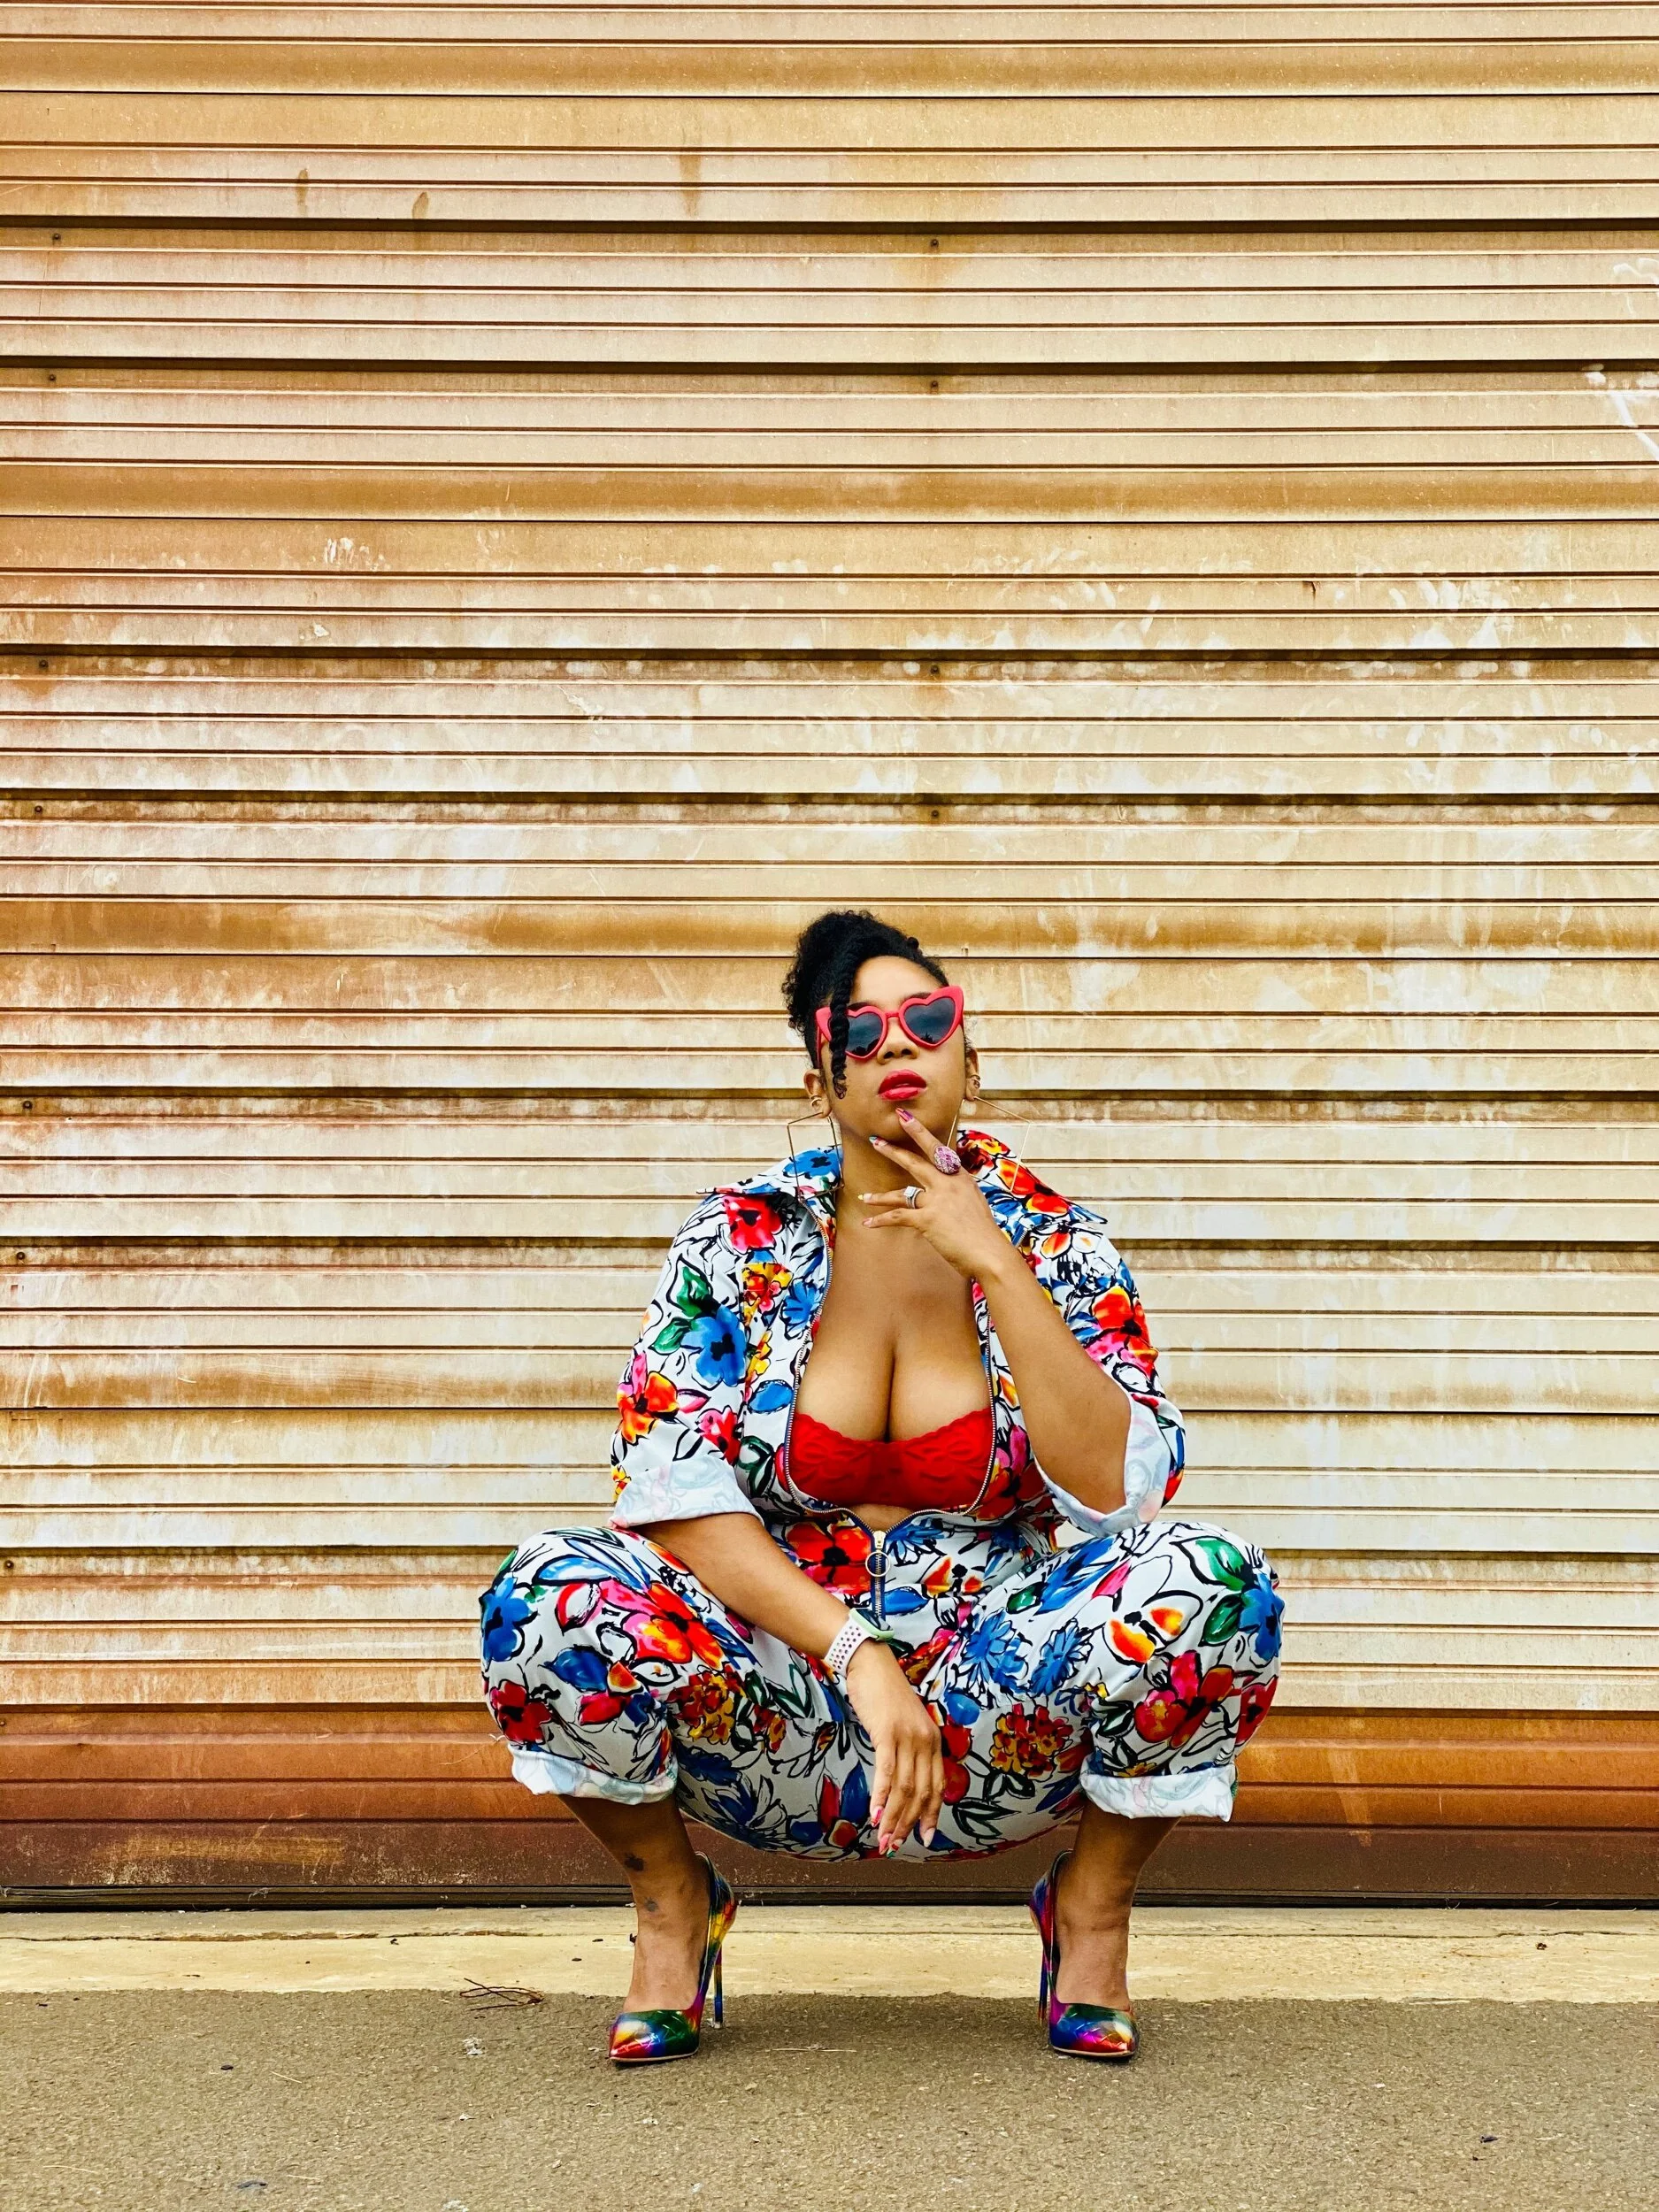
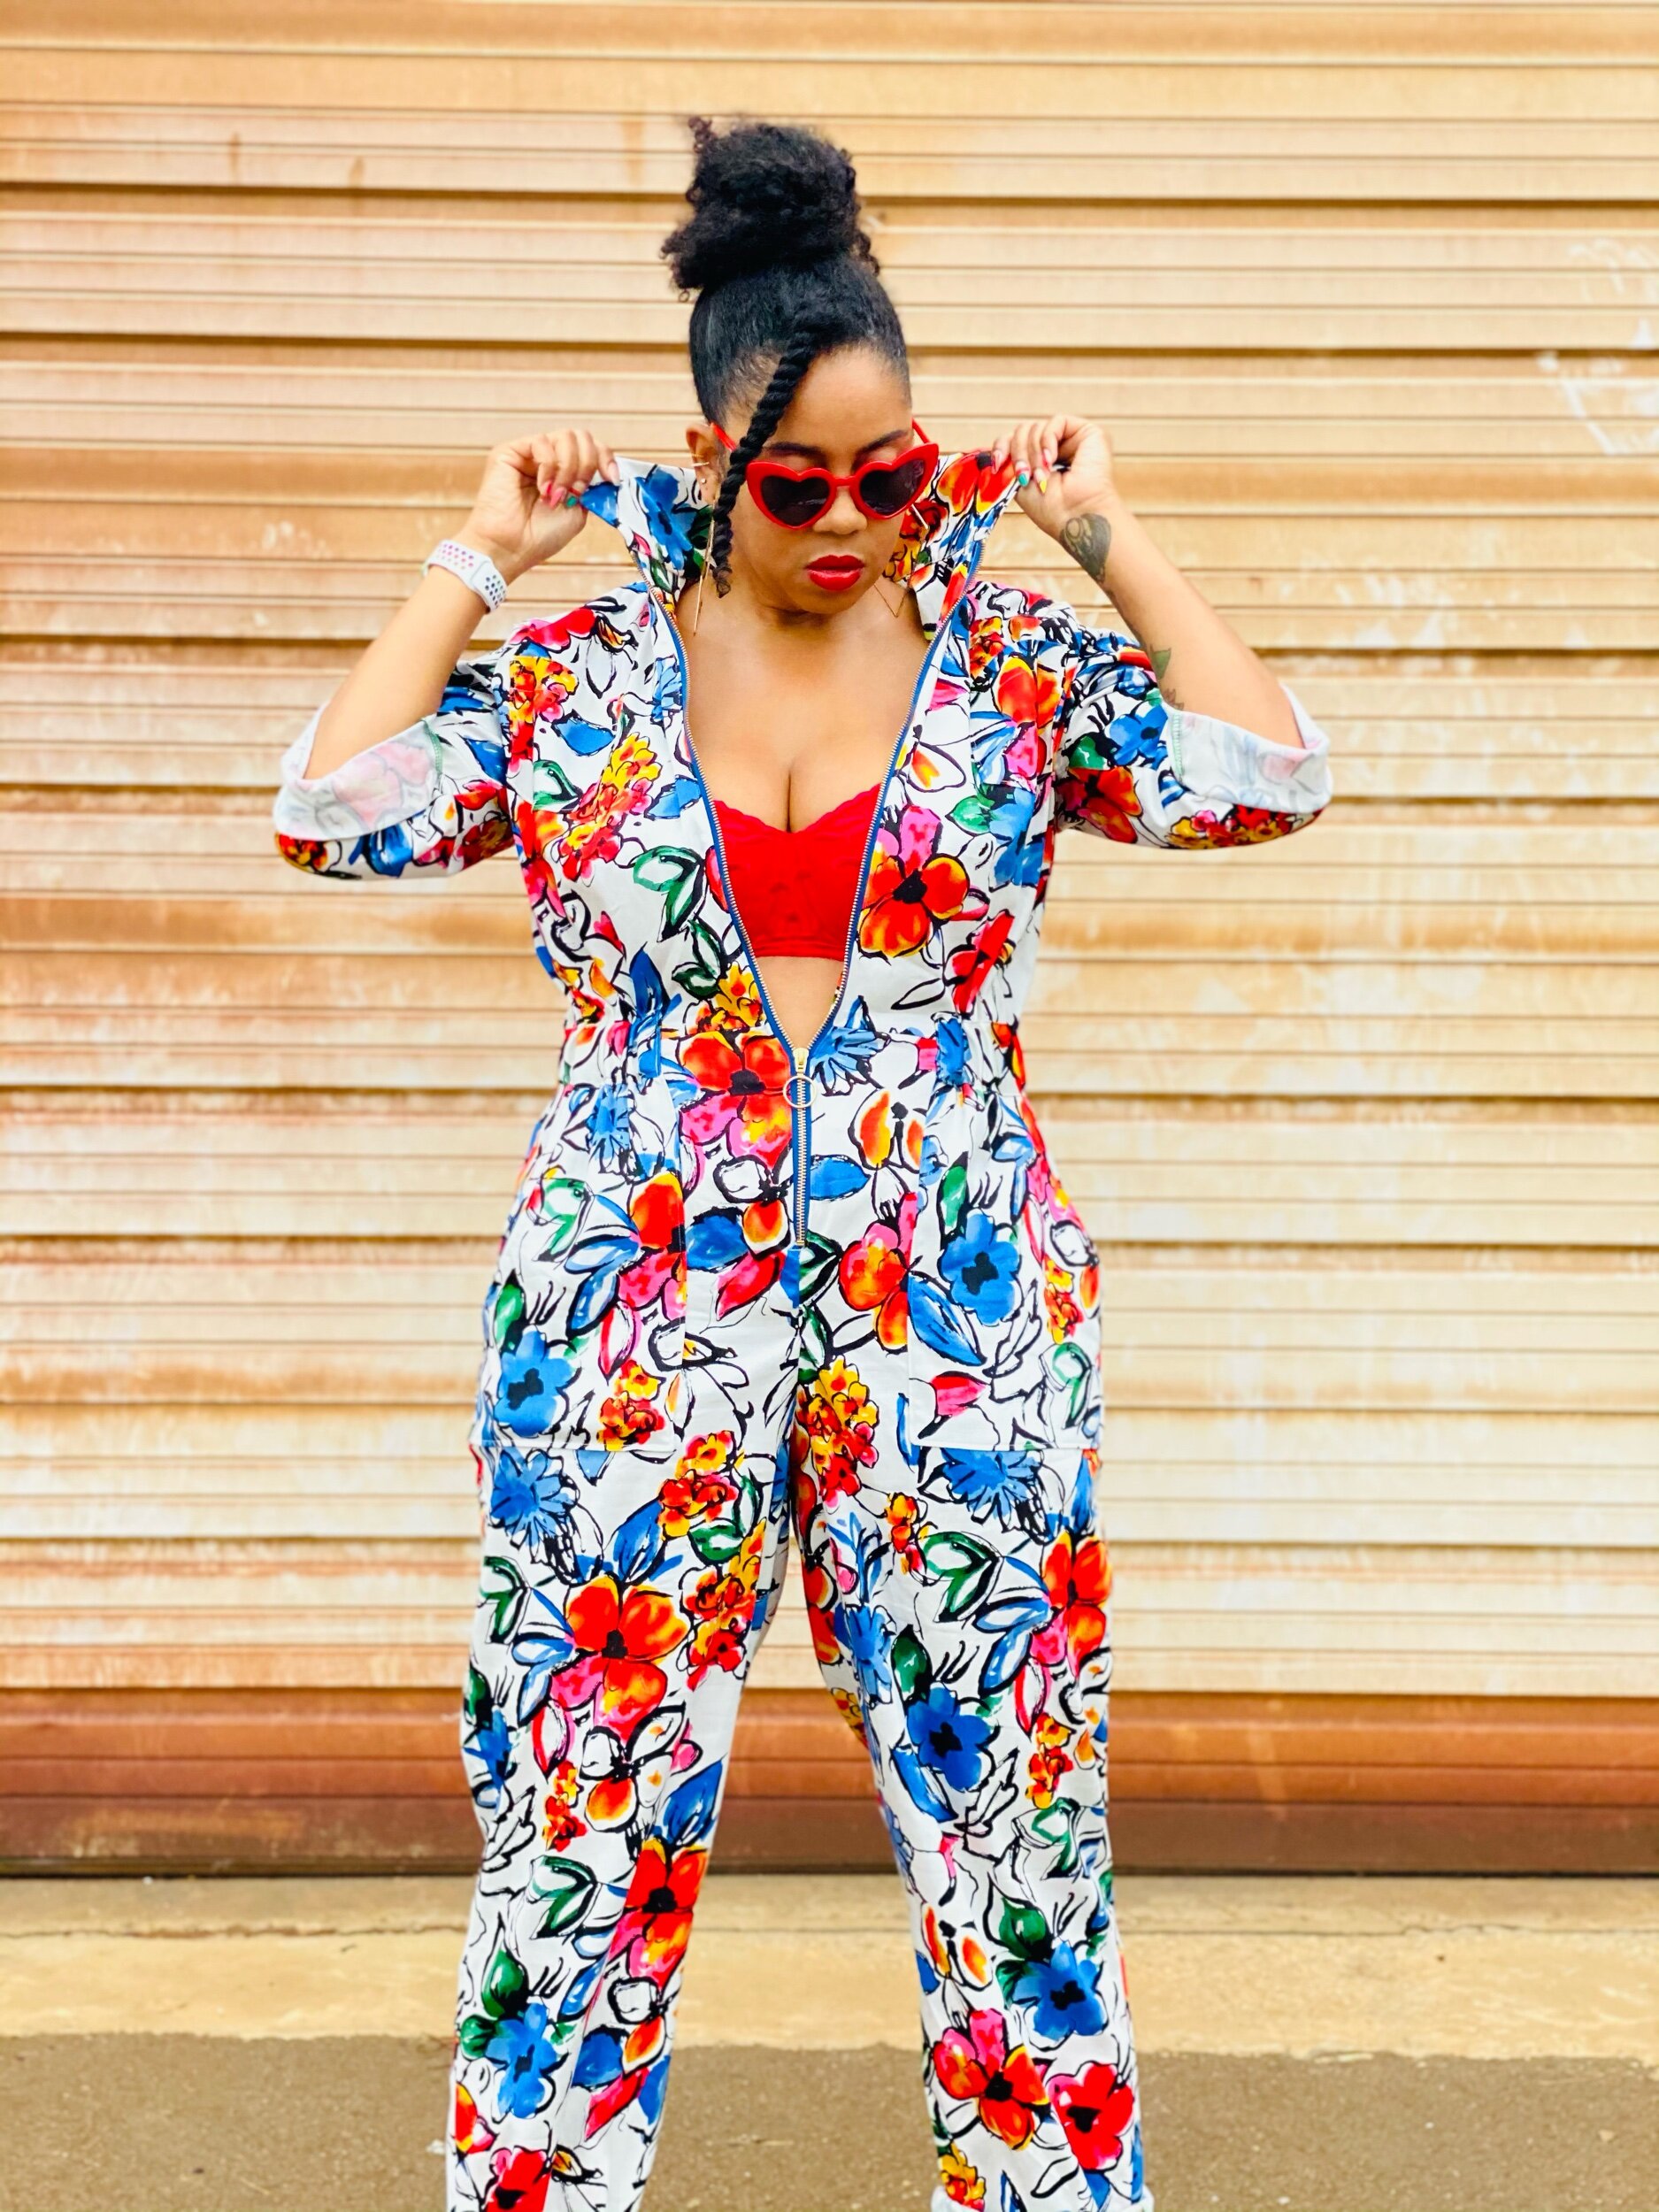

I have made this boiler suit once before and have yet to wear it because I want to add bigger pockets for the butt (the original pocket do seem small to me). As far as additions and spicing this boiler suit up a bit, I plan on creating another version with pocket flaps, a loop to catch the the sleeves when folded, and instead of elastic in the waist try a tie belt. I hope you all enjoyed this look and I would love to hear your thoughts on this pattern. Are you jumping on the Boiler suit train? I hope you are welcoming Fall with lots of colour! Until next time,
Peace & Blessings!
Flintstone Feet
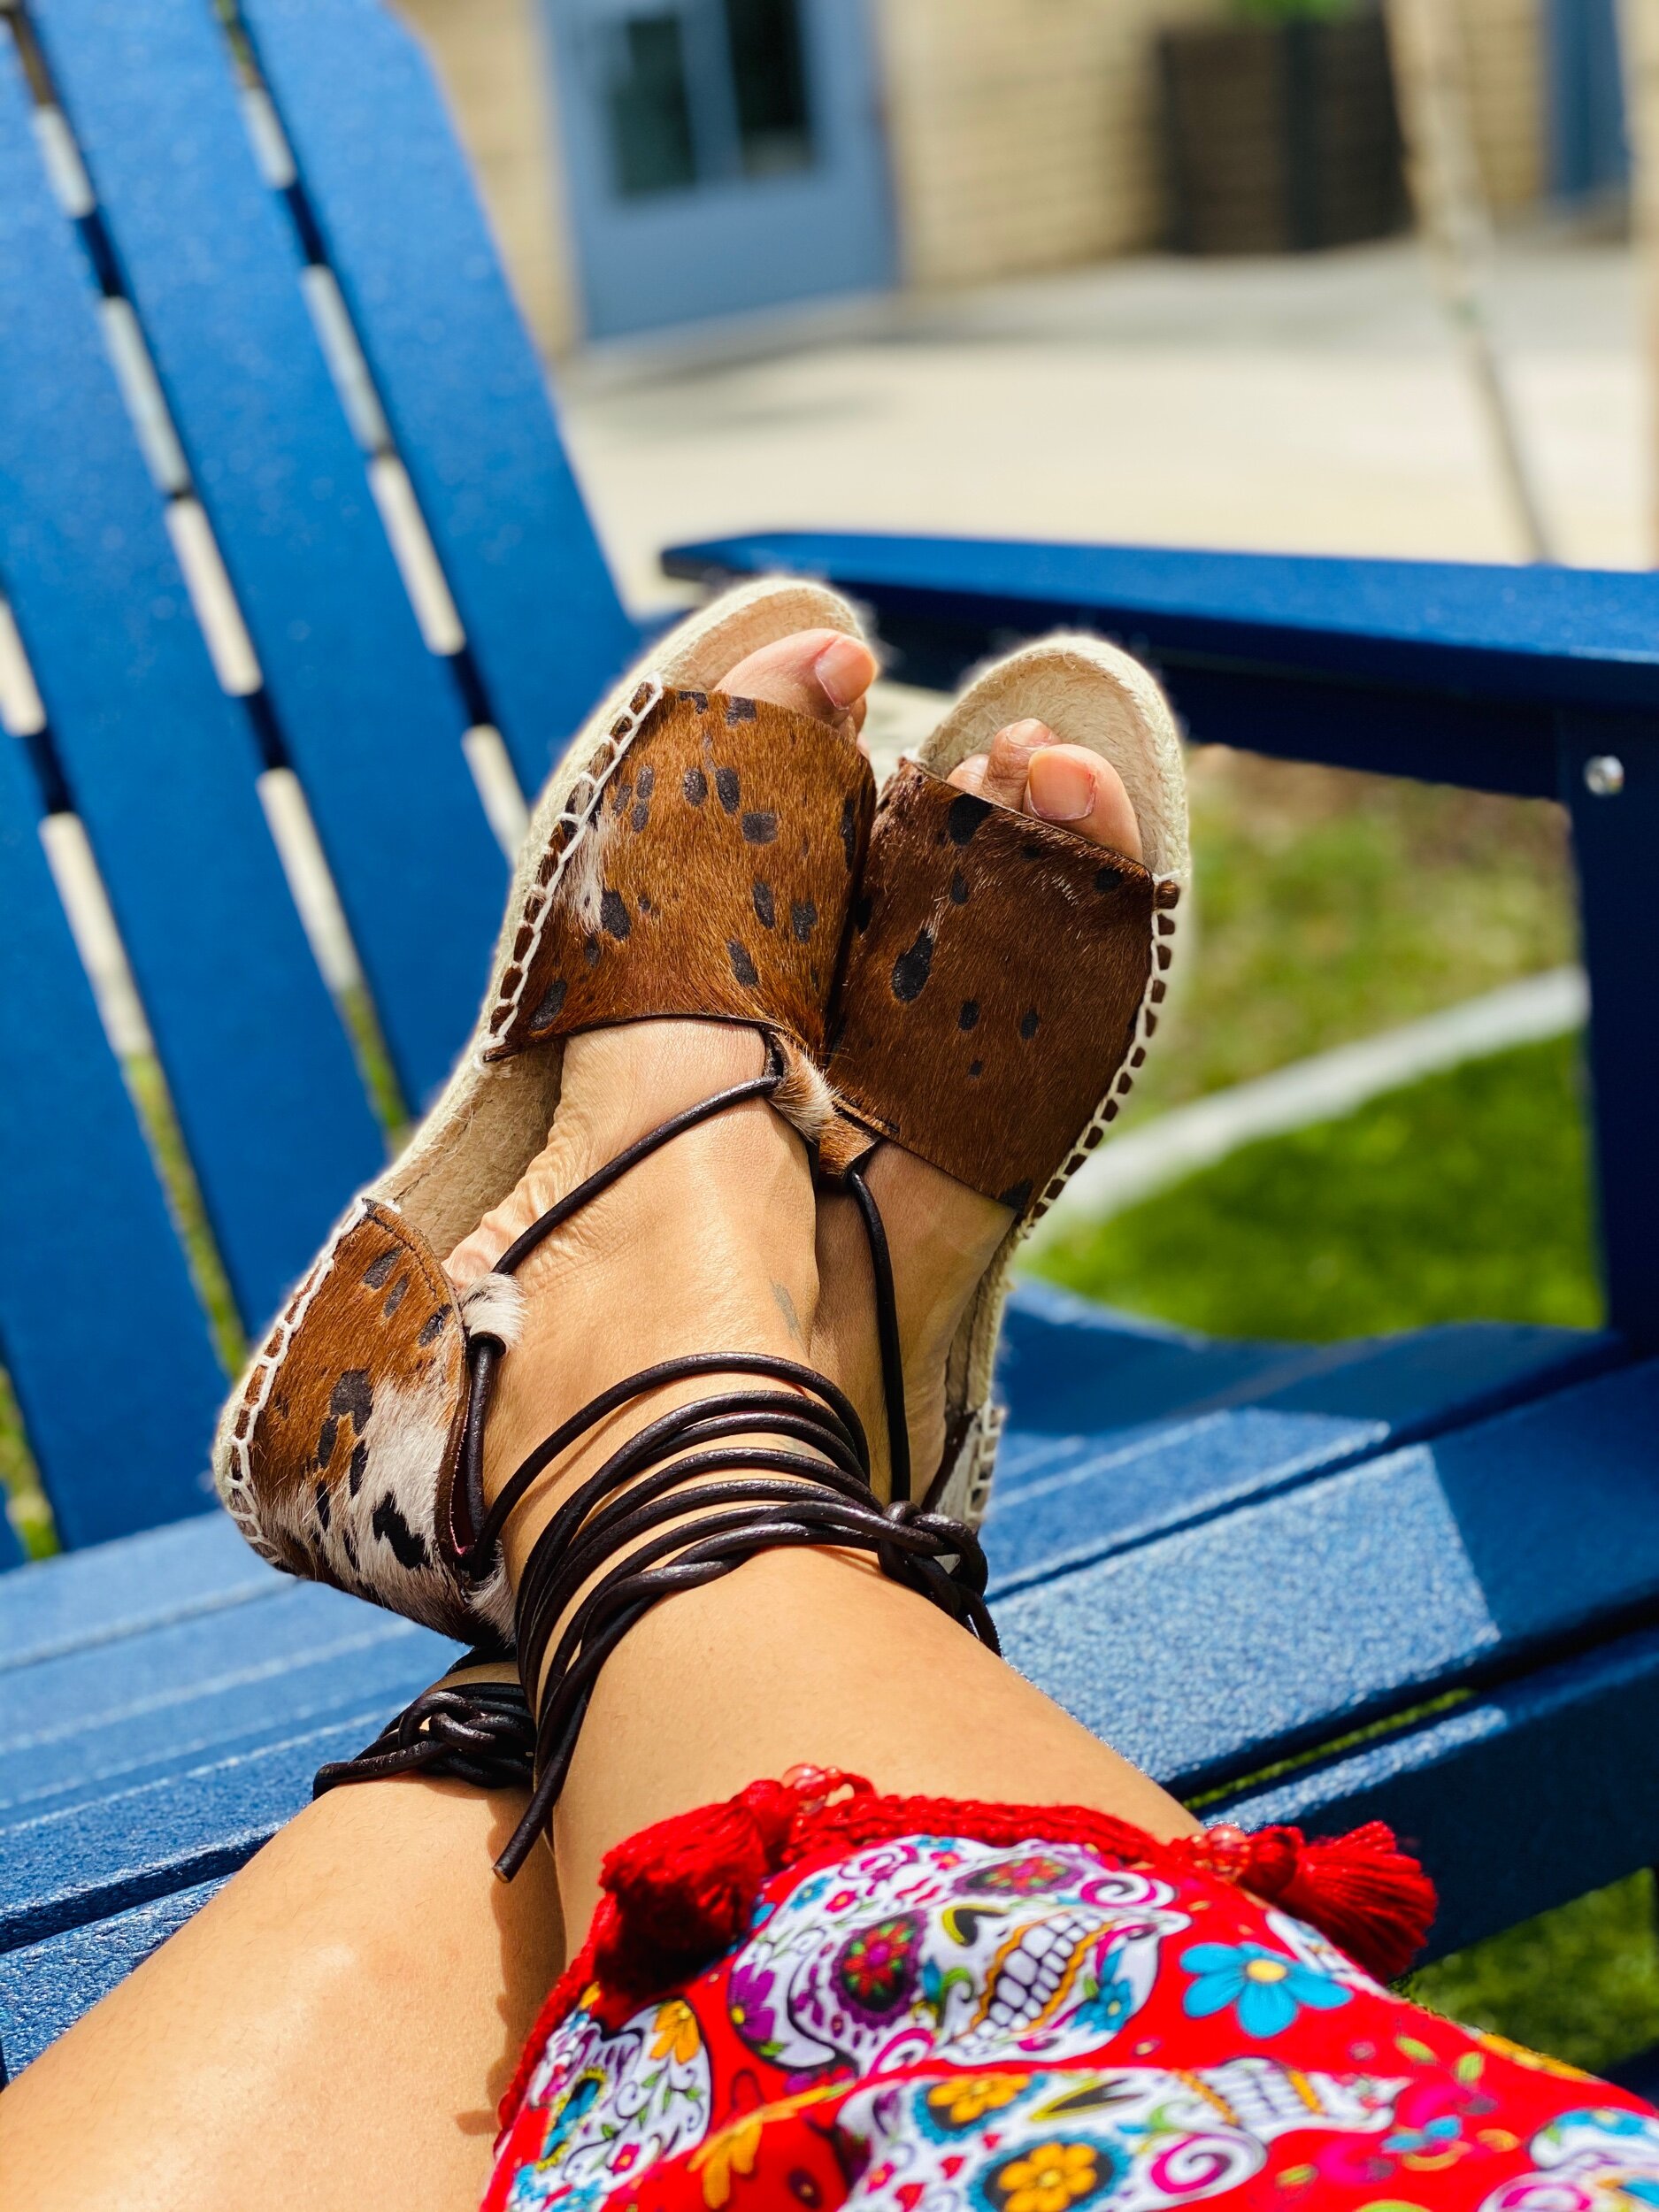
I made my first pair of shoes!
I stumbled across an Espadrille Kit by A Happy Stitch a few years back and I had shoe making on my list of creative things to do. Fast forward to 2020 when leather bag maker extraordinaire, Treasure of Nikki & Mallory collabed with A Happy Stitch to create a hair-on leather sandal espadrille tutorial. Unfortunately, this tutorial was only available for a limited time in A Happy Stitch Etsy shop. If I didn’t have the push a few years back, I definitely got the push now!

Supplies
Off to purchase leather scraps! There are a few items you will need outside of an espadrille kit and the Nikki & Mallory sandal tutorial. I decided to stick with hair on leather and I found several options on Etsy. Here’s what you will need:
leather scraps (if using hair-on leather beware it is messy and you will have hair everywhere)
lightweight leather for fusing
4mm leather cord 10-11 yards
Edge Kote (I used brown)
Leather Cement Glue
Upholstery thread
Leather needle for your sewing machine or you can choose to hand stitch loops in place.


Edge Kote applied on the left piece vs. No Edge Kote applied on the right piece
I used pink leather scraps from my stash for my fusing and then cut out all the required pieces for the sandals (rotary cutter highly recommended). The leather cement glue is used to glue the fusing (lightweight leather) to the inside of the back pattern piece for extra stability. The Edge Kote is applied to the edges of all your leather pieces. Once you have glued, sewn all the loops on, and finished your edges with edge kote, you’re now ready for the fun part…stitching your sandals together!

The espadrille kit provides all the items you will need like needles, yarn, and wax. You’re going to want to pin your fabric pieces onto the shoe sole and fit to your liking. I have pretty long toes so I made those adjustments to position the top sandle pieces so my toes were comfy. Now for the blanket stitch! I had no idea what this stitch was, really. Once I got the hang of this stitch it was on and poppin and then I purchased 2 more espadrille kits lol. Yes they are addictive y’all. After you’ve completely sewn down your pattern pieces to the soles the last thing to do is measure out your straps and you’re all done.


Overall, I absolutely loved creating my Flintstone Feet. I would’ve never thought that I would be making shoes but here I am. Have you tried shoemaking? Or even made a pair of espadrilles? I’d love to know your thoughts and experiences.
As always
Thanks for stopping by!
Peace & Blessings
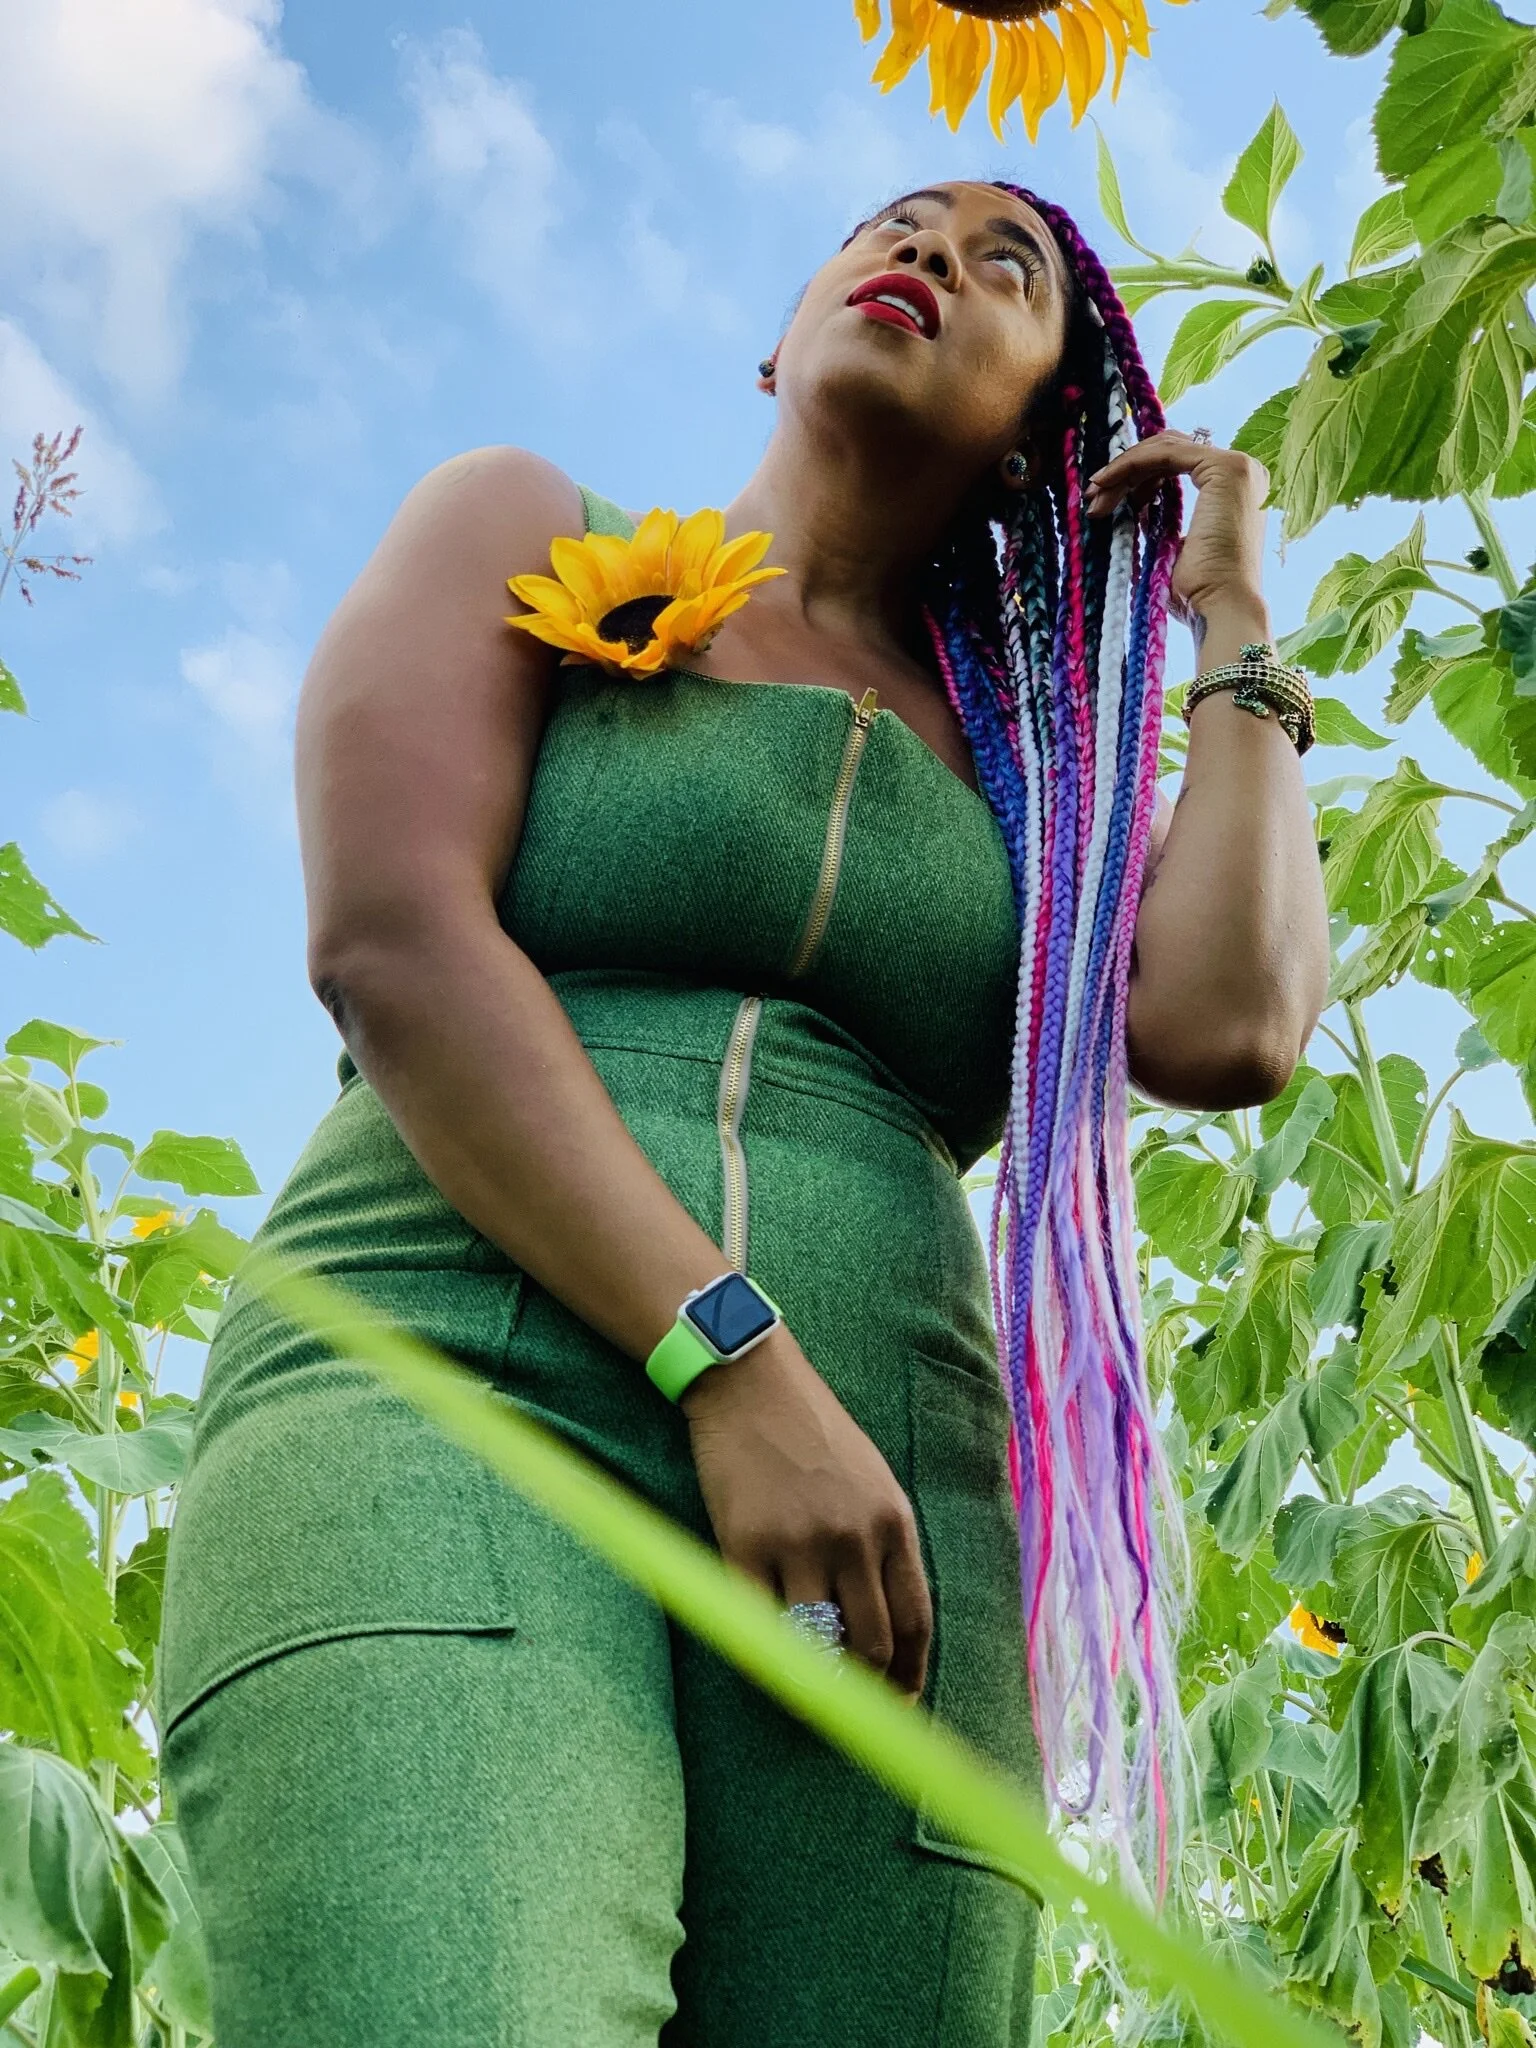
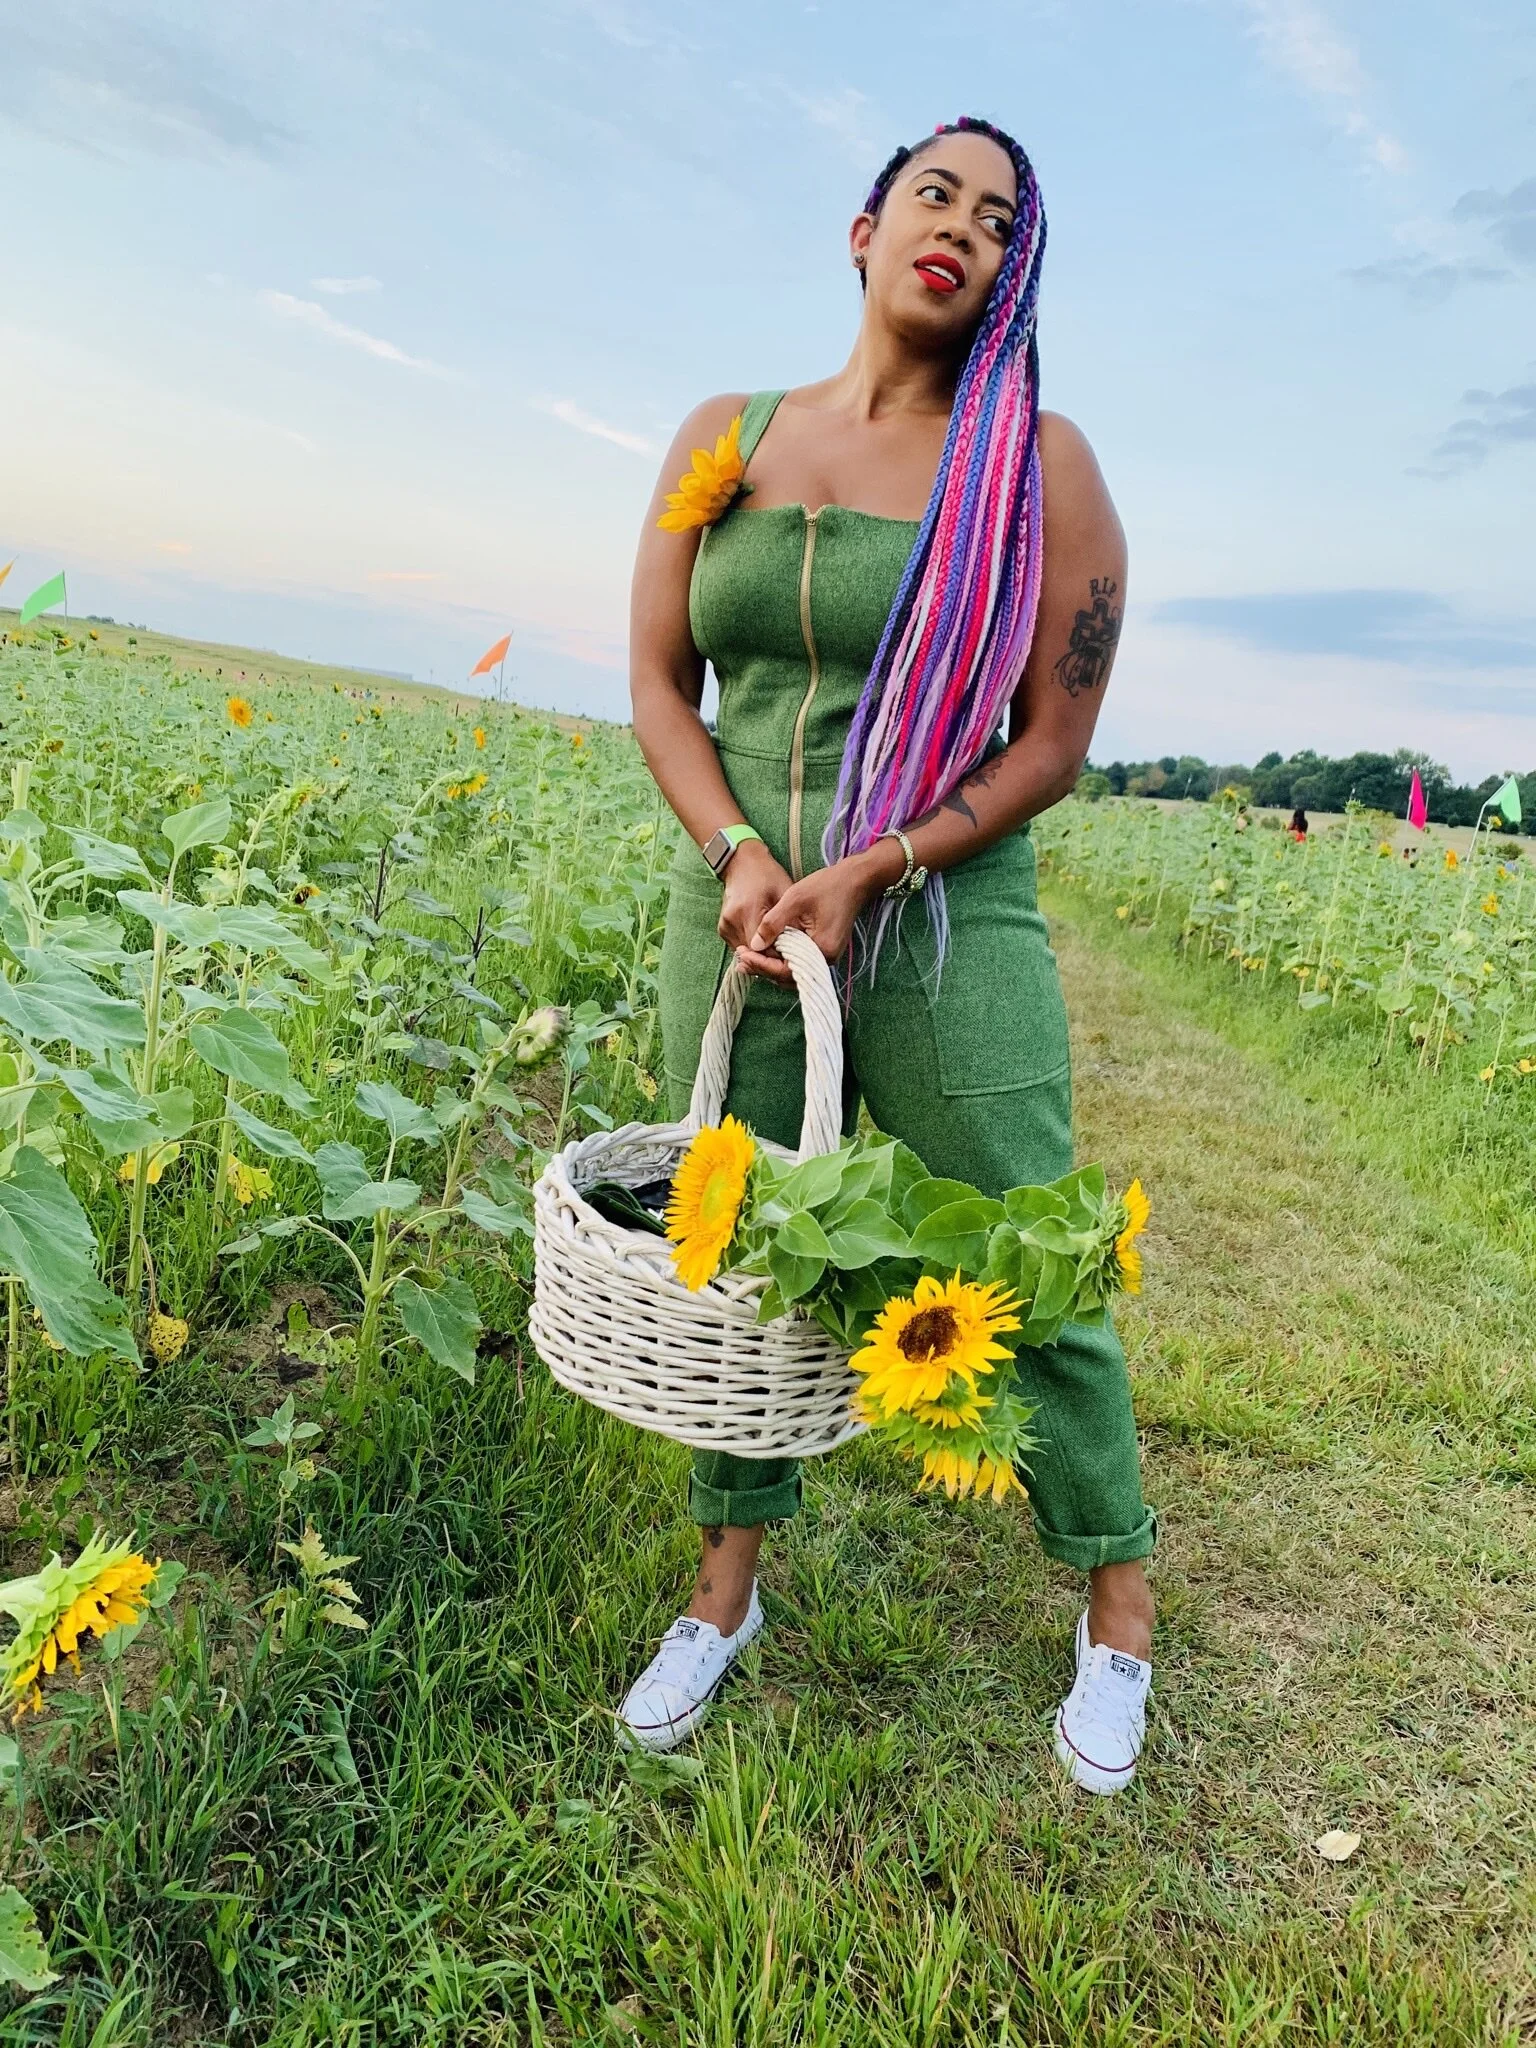
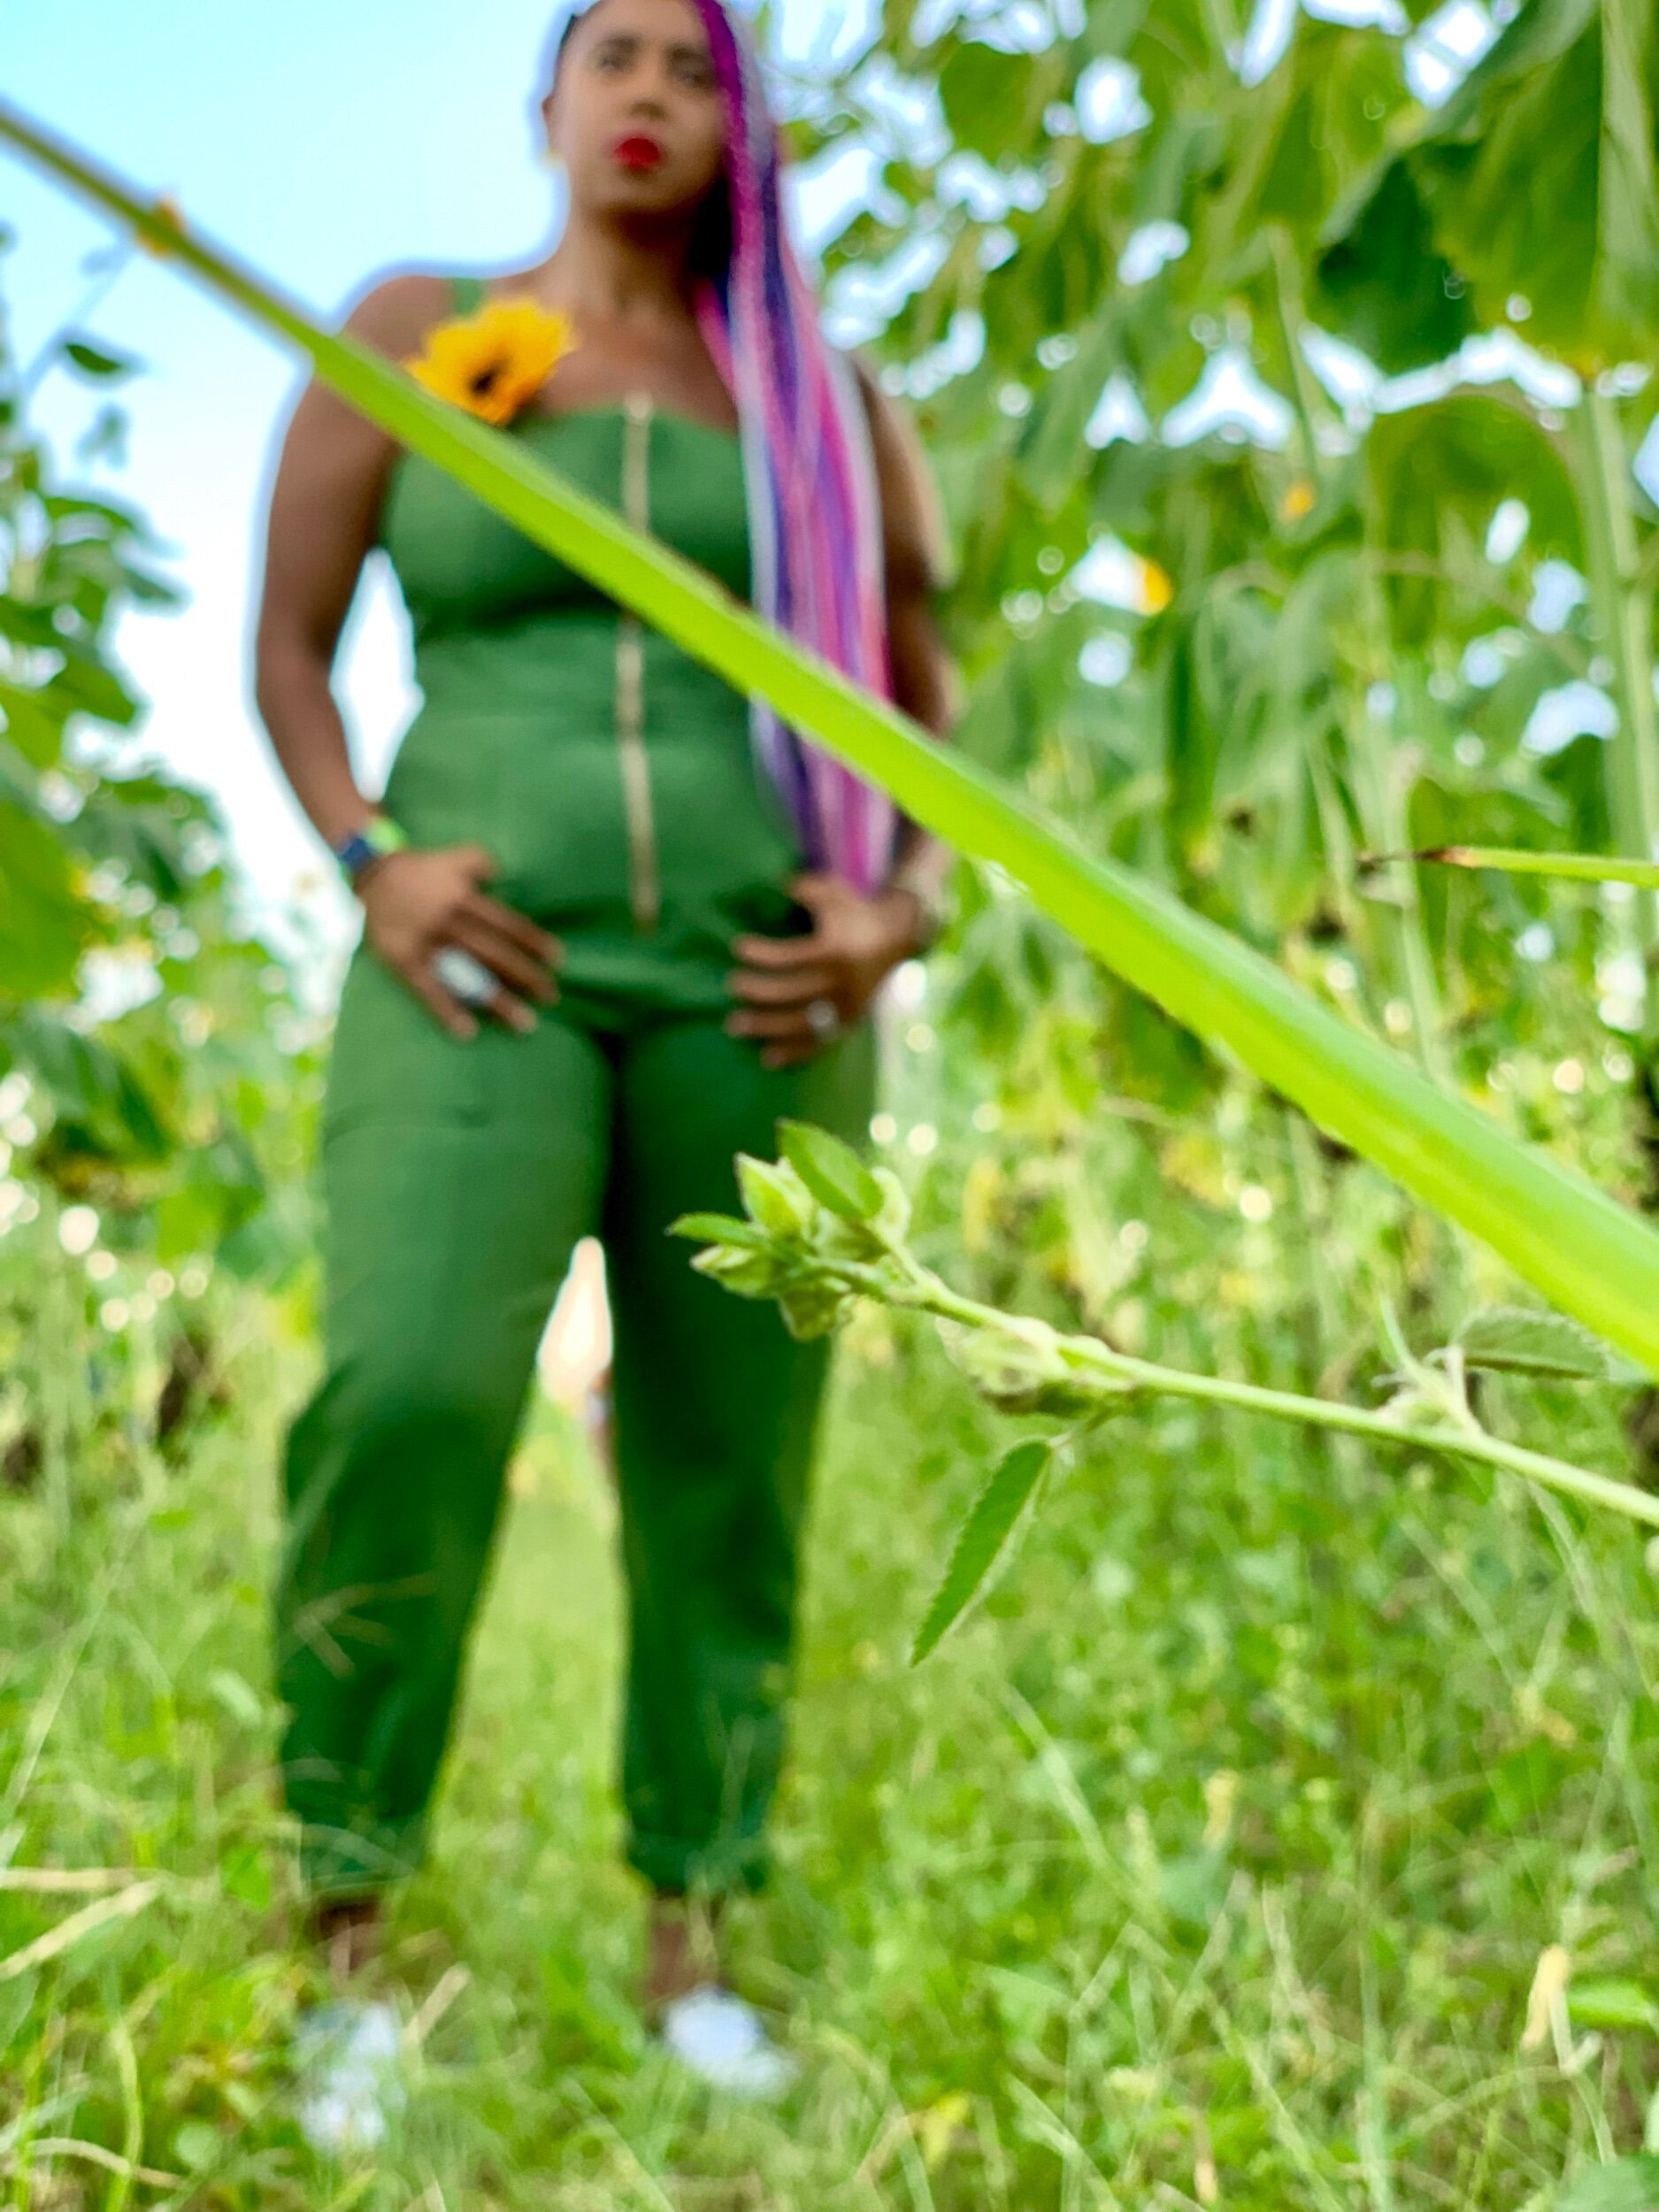
Sunflower Sloanes
Sunflower
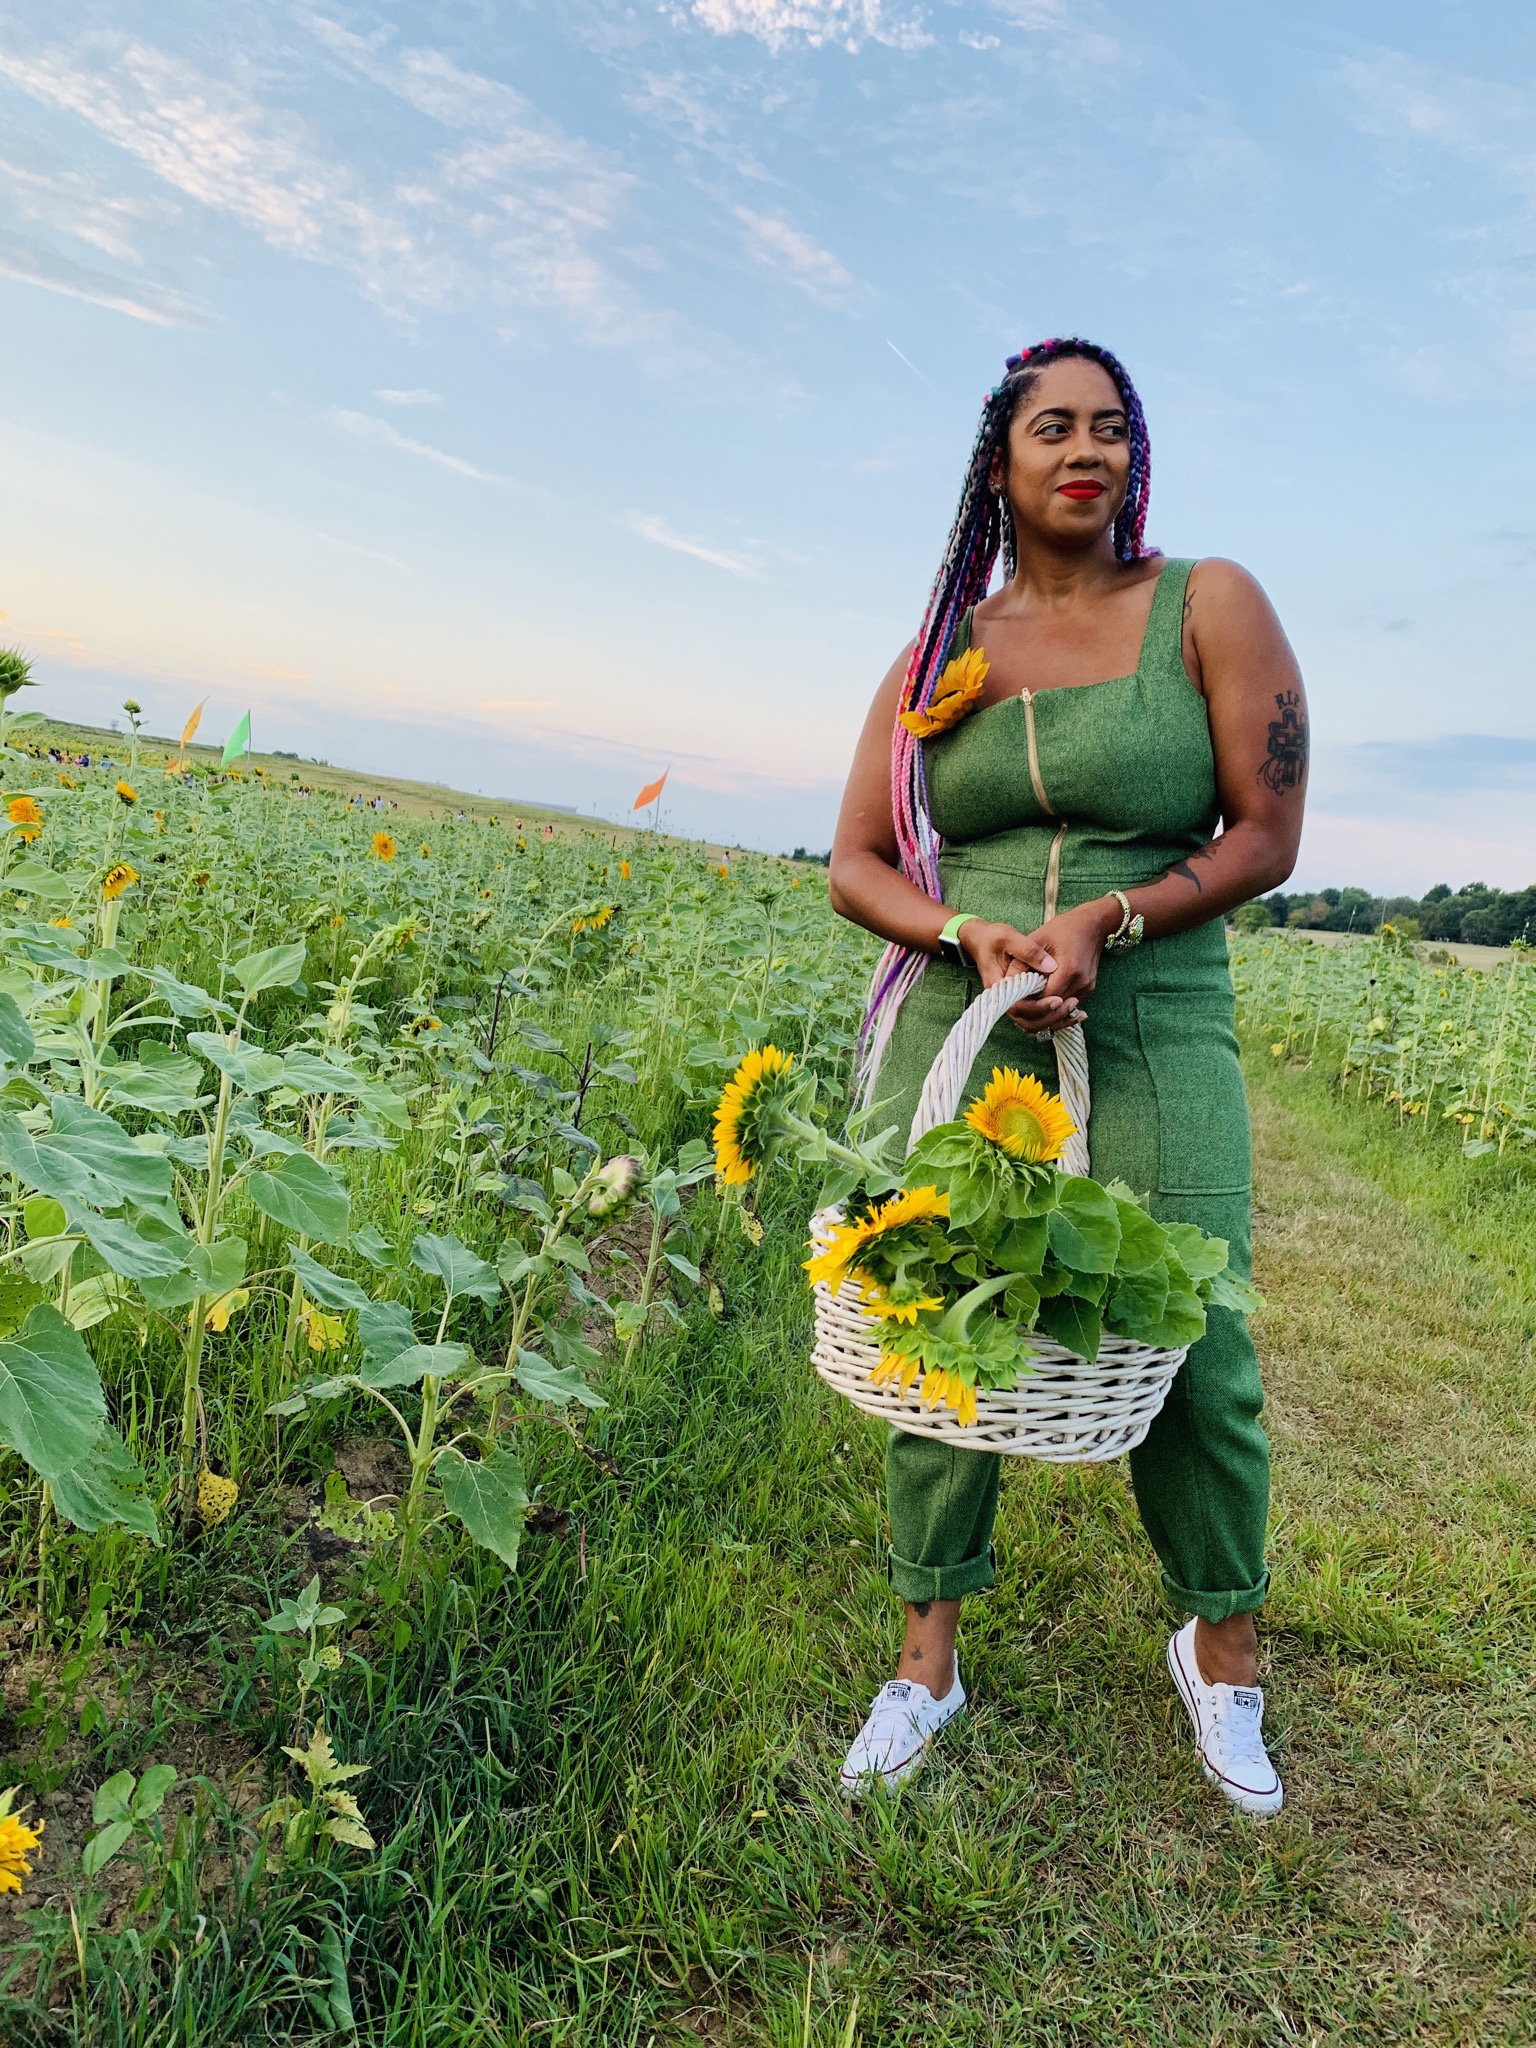
Summer is officially over and the leaves are falling. But I can’t help but feel like the Fall breeze is far far away. Counting down to fall, I went to a beautiful sunflower field and managed to even pick a few sunflowers to take home. My plan was to keep them alive and grow my own sunflowers…I failed miserably lol.

Sloanes
Victory Patterns recently released the Sloane Overalls and Sloane pants and I fell in love. I decided to make the overalls first and I must say they are so good.

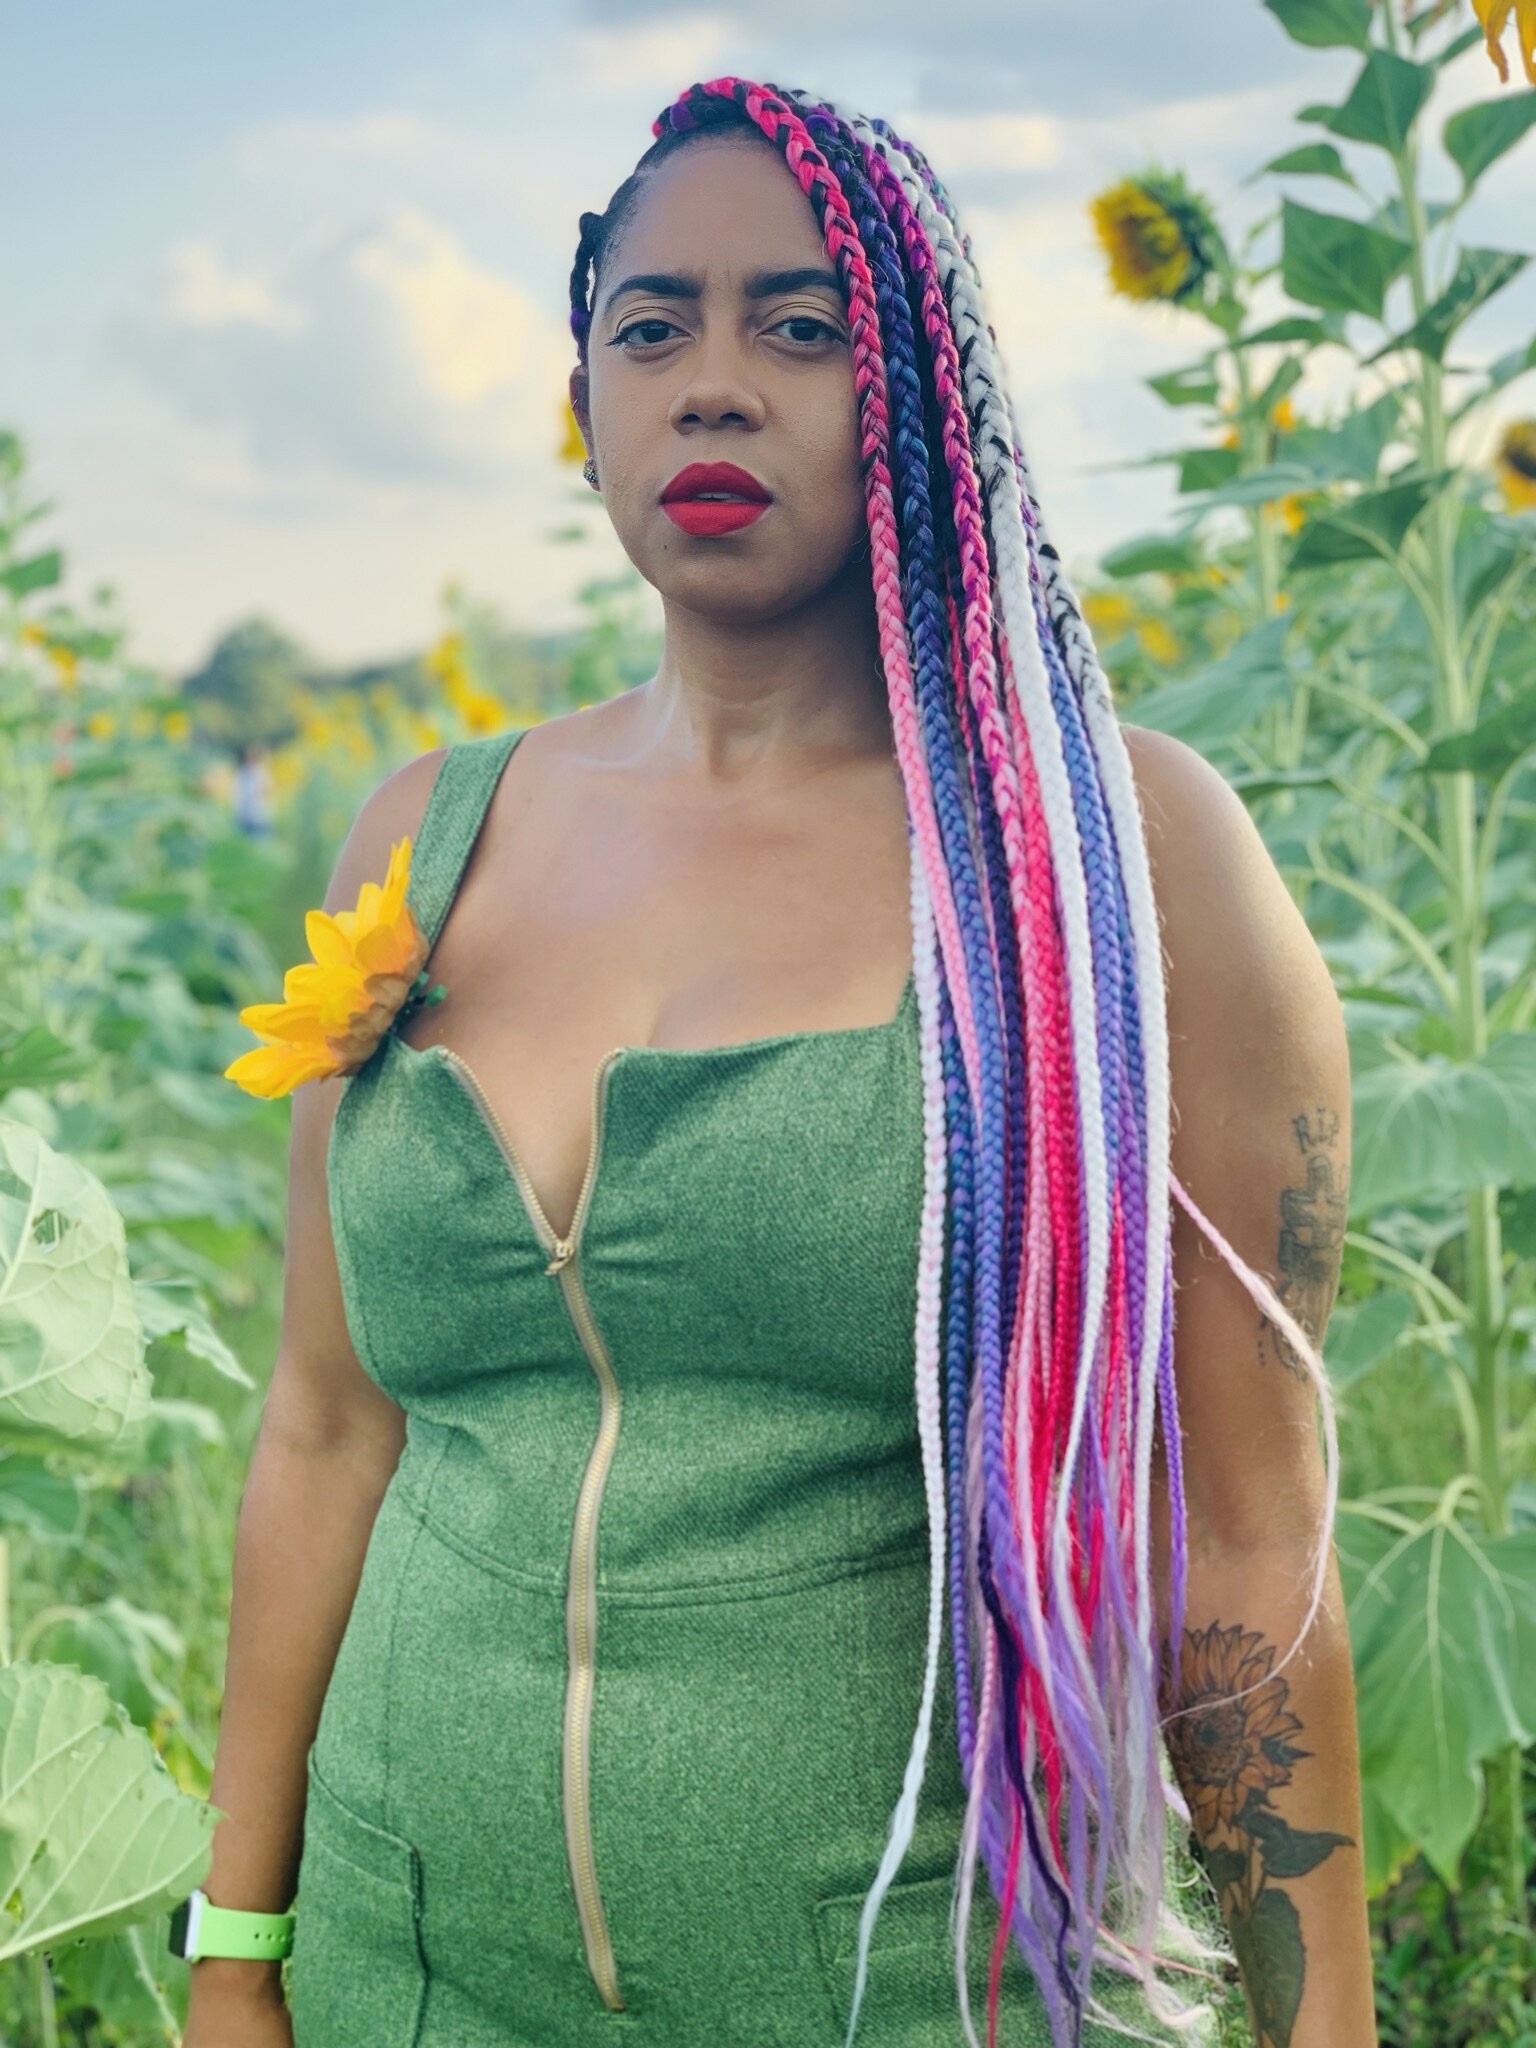
Pattern & Construction
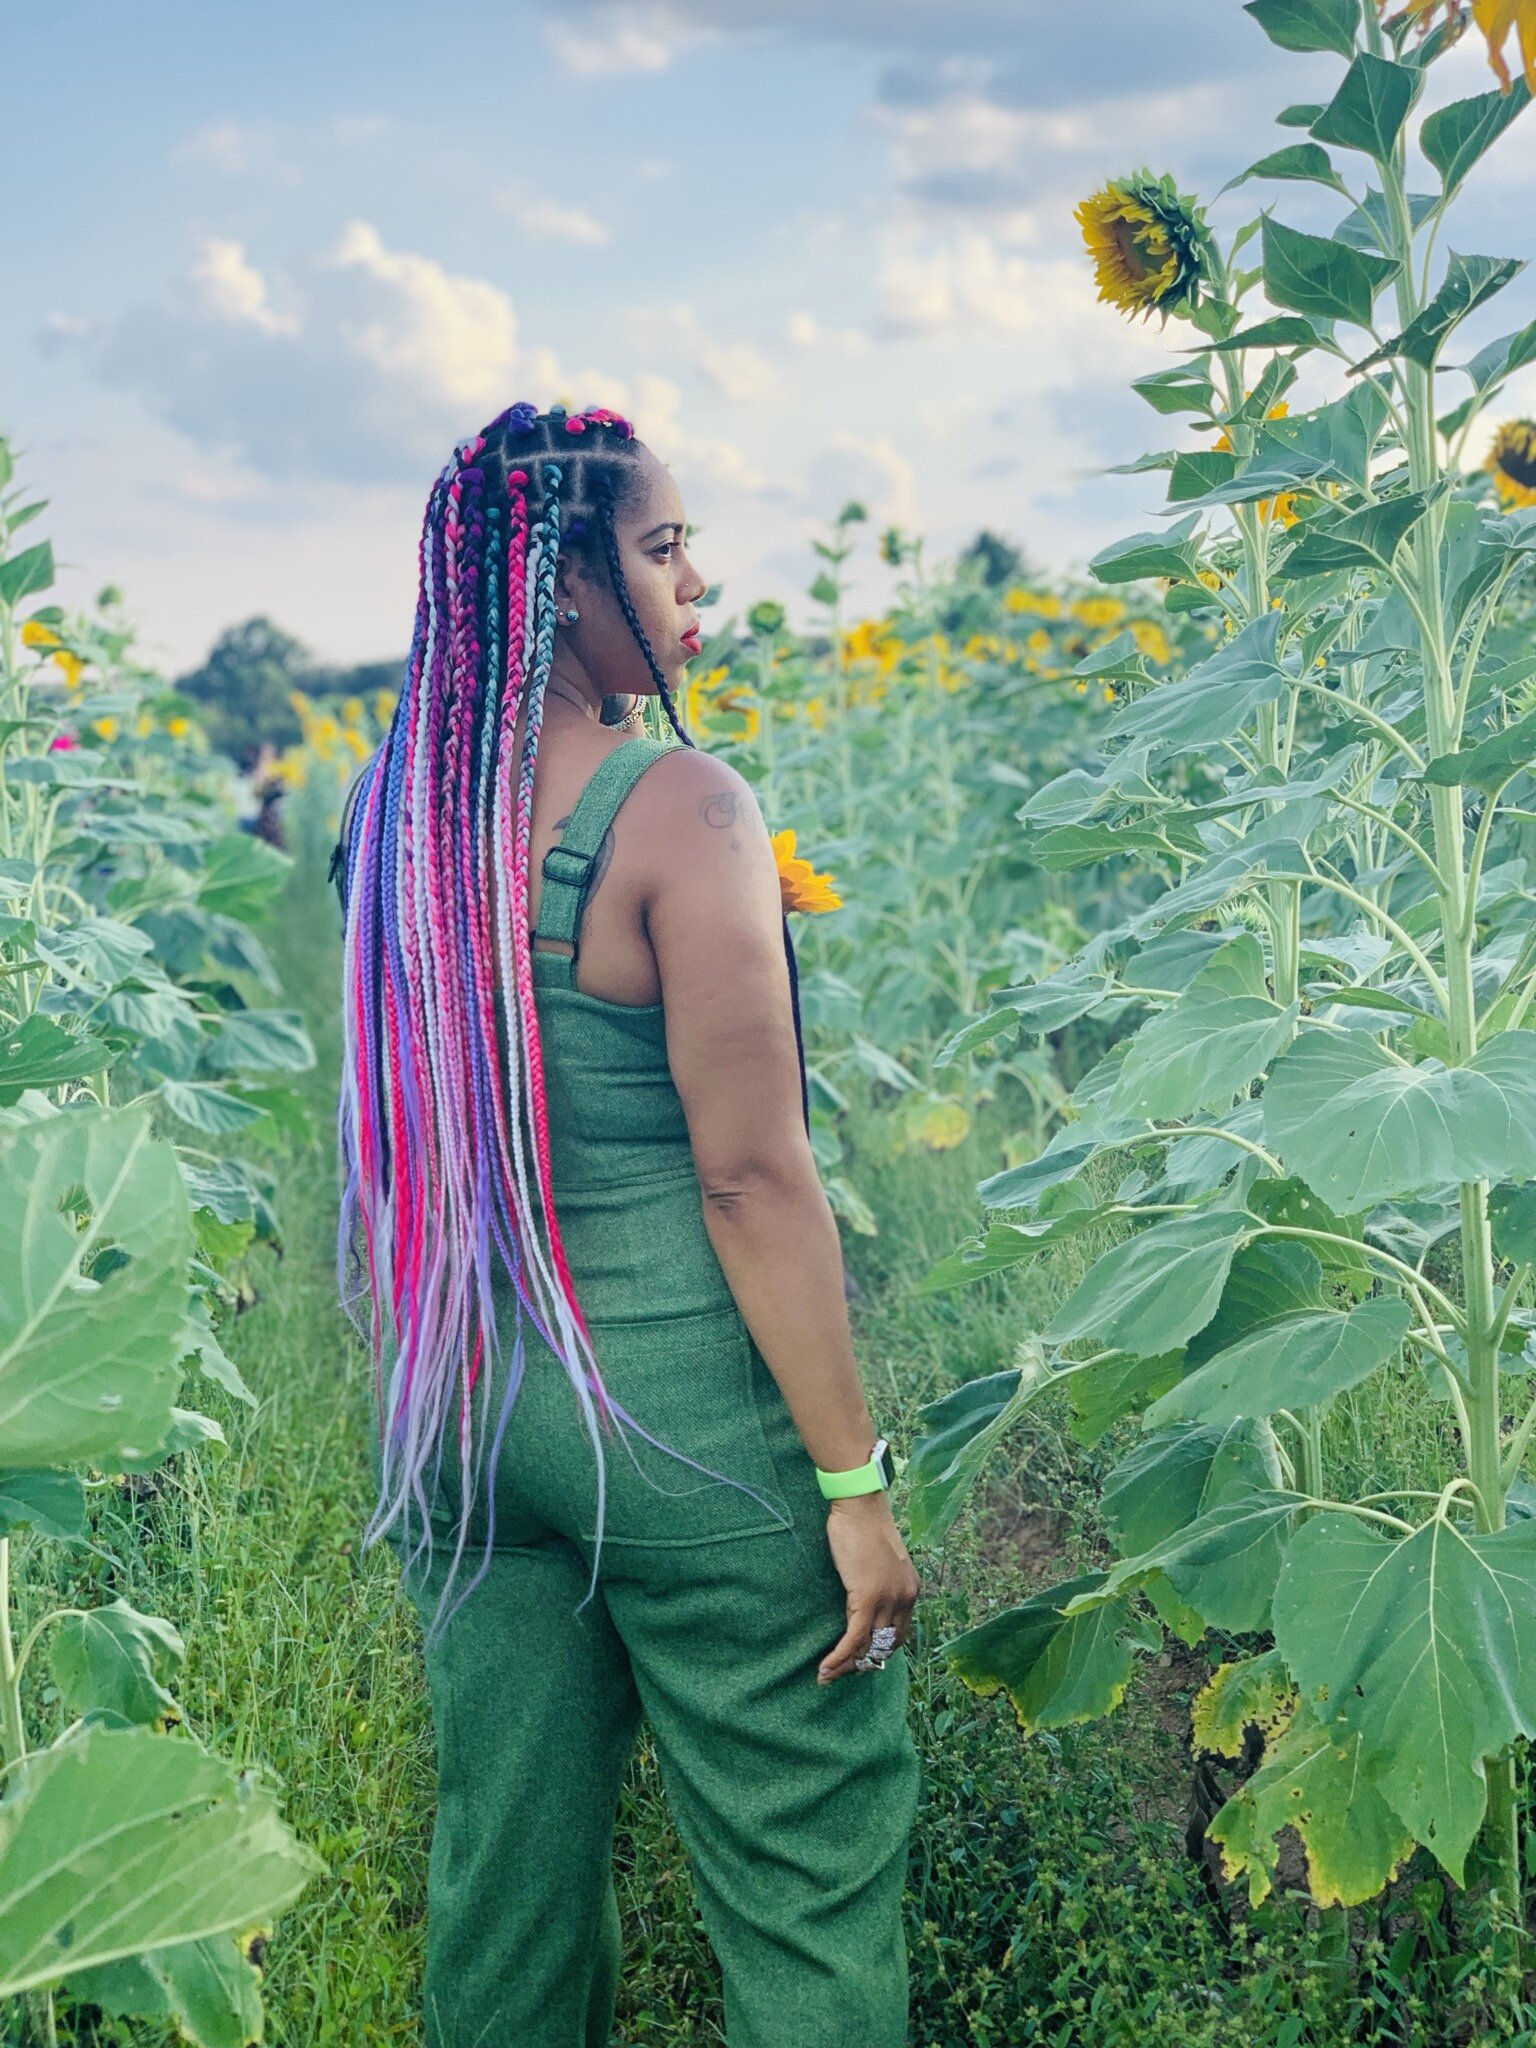
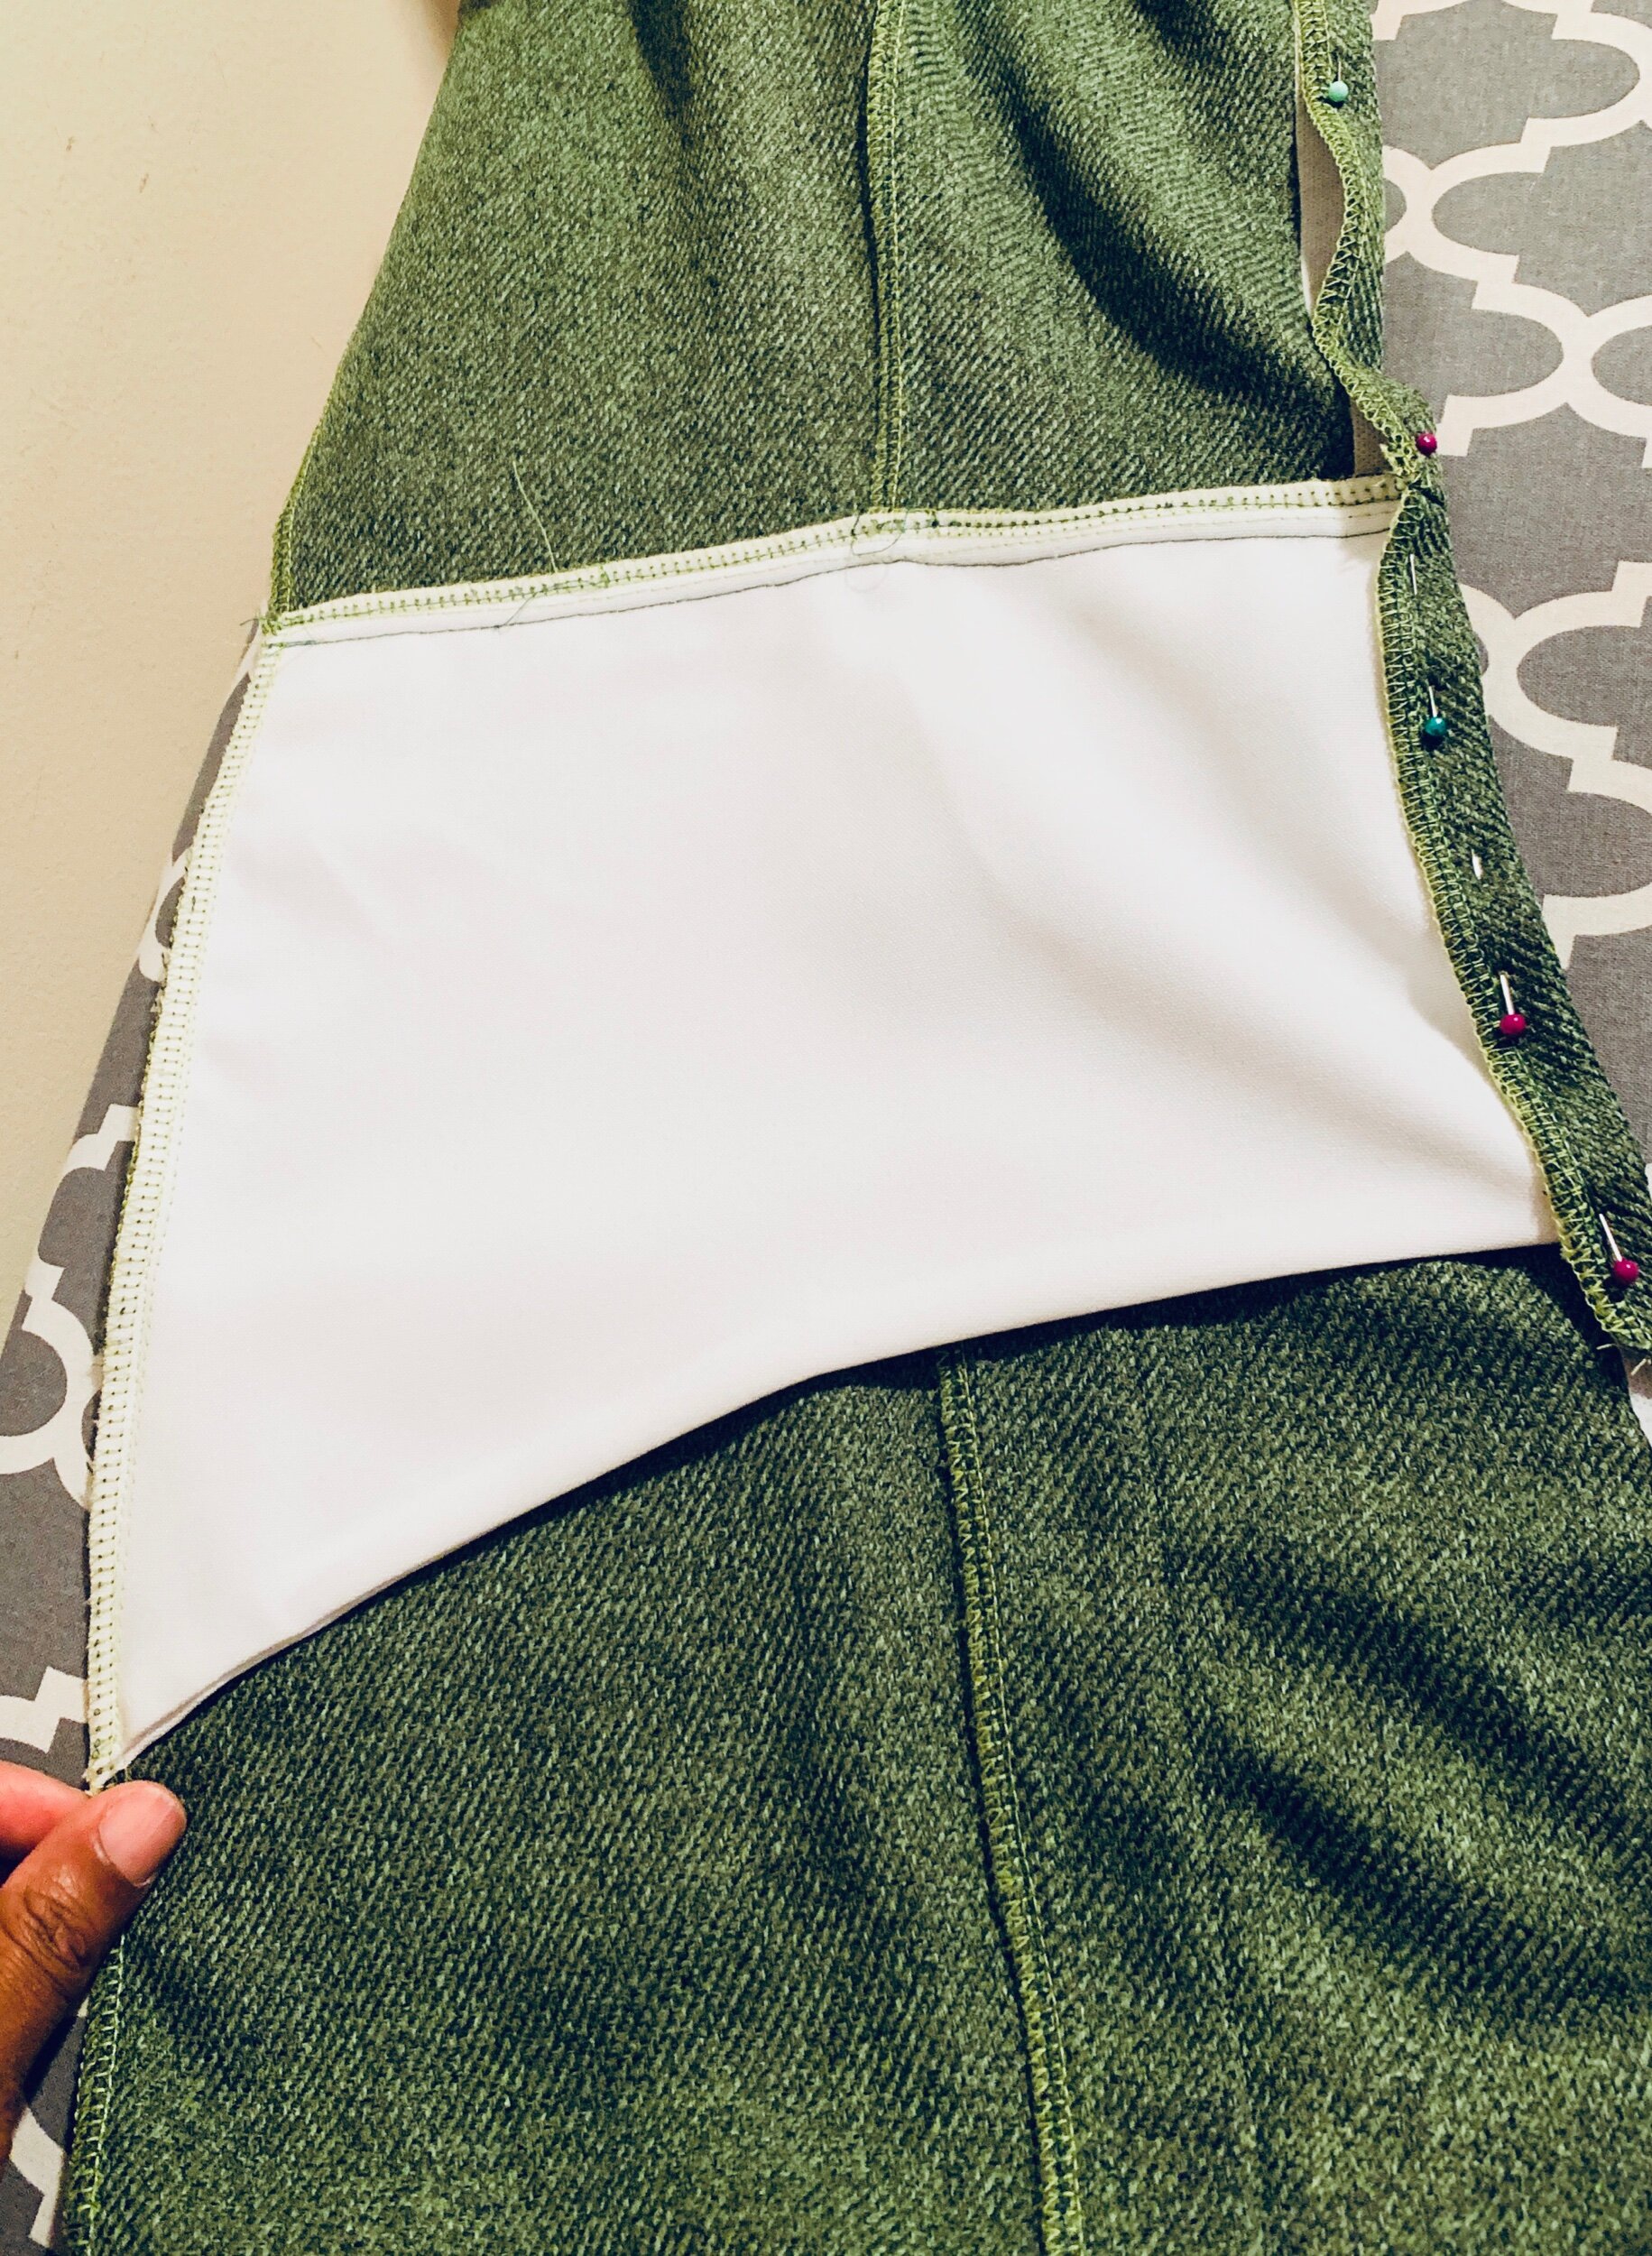
The Sloane overalls are available in PDF print. Luckily, I’ve had a little practice with pdf’s lately so this wasn’t a big problem for me. Both the pants and overalls have the option to add the Tummy Stay (which I am in love with and want to add to all my makes). Then there are optional topstitching (I recommend) that requires a little more construction time but so worth it. I choose a wool blend I had from a previous project and I literally scrap busted to make these overalls work. Would you believe when I was all done I found more of this fabric in my stash and I have enough to complete a pencil skirt? This is what happens when you don’t organize your fabric.
Okay back to the Sloanes. The pattern was very detailed and so easy to read. If you’re nervous about pdf patterns like I once was, this is one you shouldn’t fear. Obviously the Sloanes have an exposed front zipper. This is where you might experience a slight challenge (well I definitely did). Installing the zipper wasn’t the problem. The problem was finding a zipper long enough. For my sizing I needed a 17.5” zipper. I was able to find a 36” zipper in the color I wanted. I did shorten the zipper and replace the ends with the original zipper stops. If you’re not familiar with this process Victory Patterns has a tutorial and you can also find videos on YouTube.
I’d like to think the sewing time for this pattern was about 5-6 hours but I think it also depends on your speed and if you will be adding the topstitching.


Overall I loved creating these overalls and I’m most definitely obsessed with overalls going into Fall and Winter.
As always thanks for stopping by. Drop a comment below and tell me what you think of my Sloanes. If you’re creating Sloane’s or already made a pair, I’d love to hear your thoughts.
Peace and Blessings!

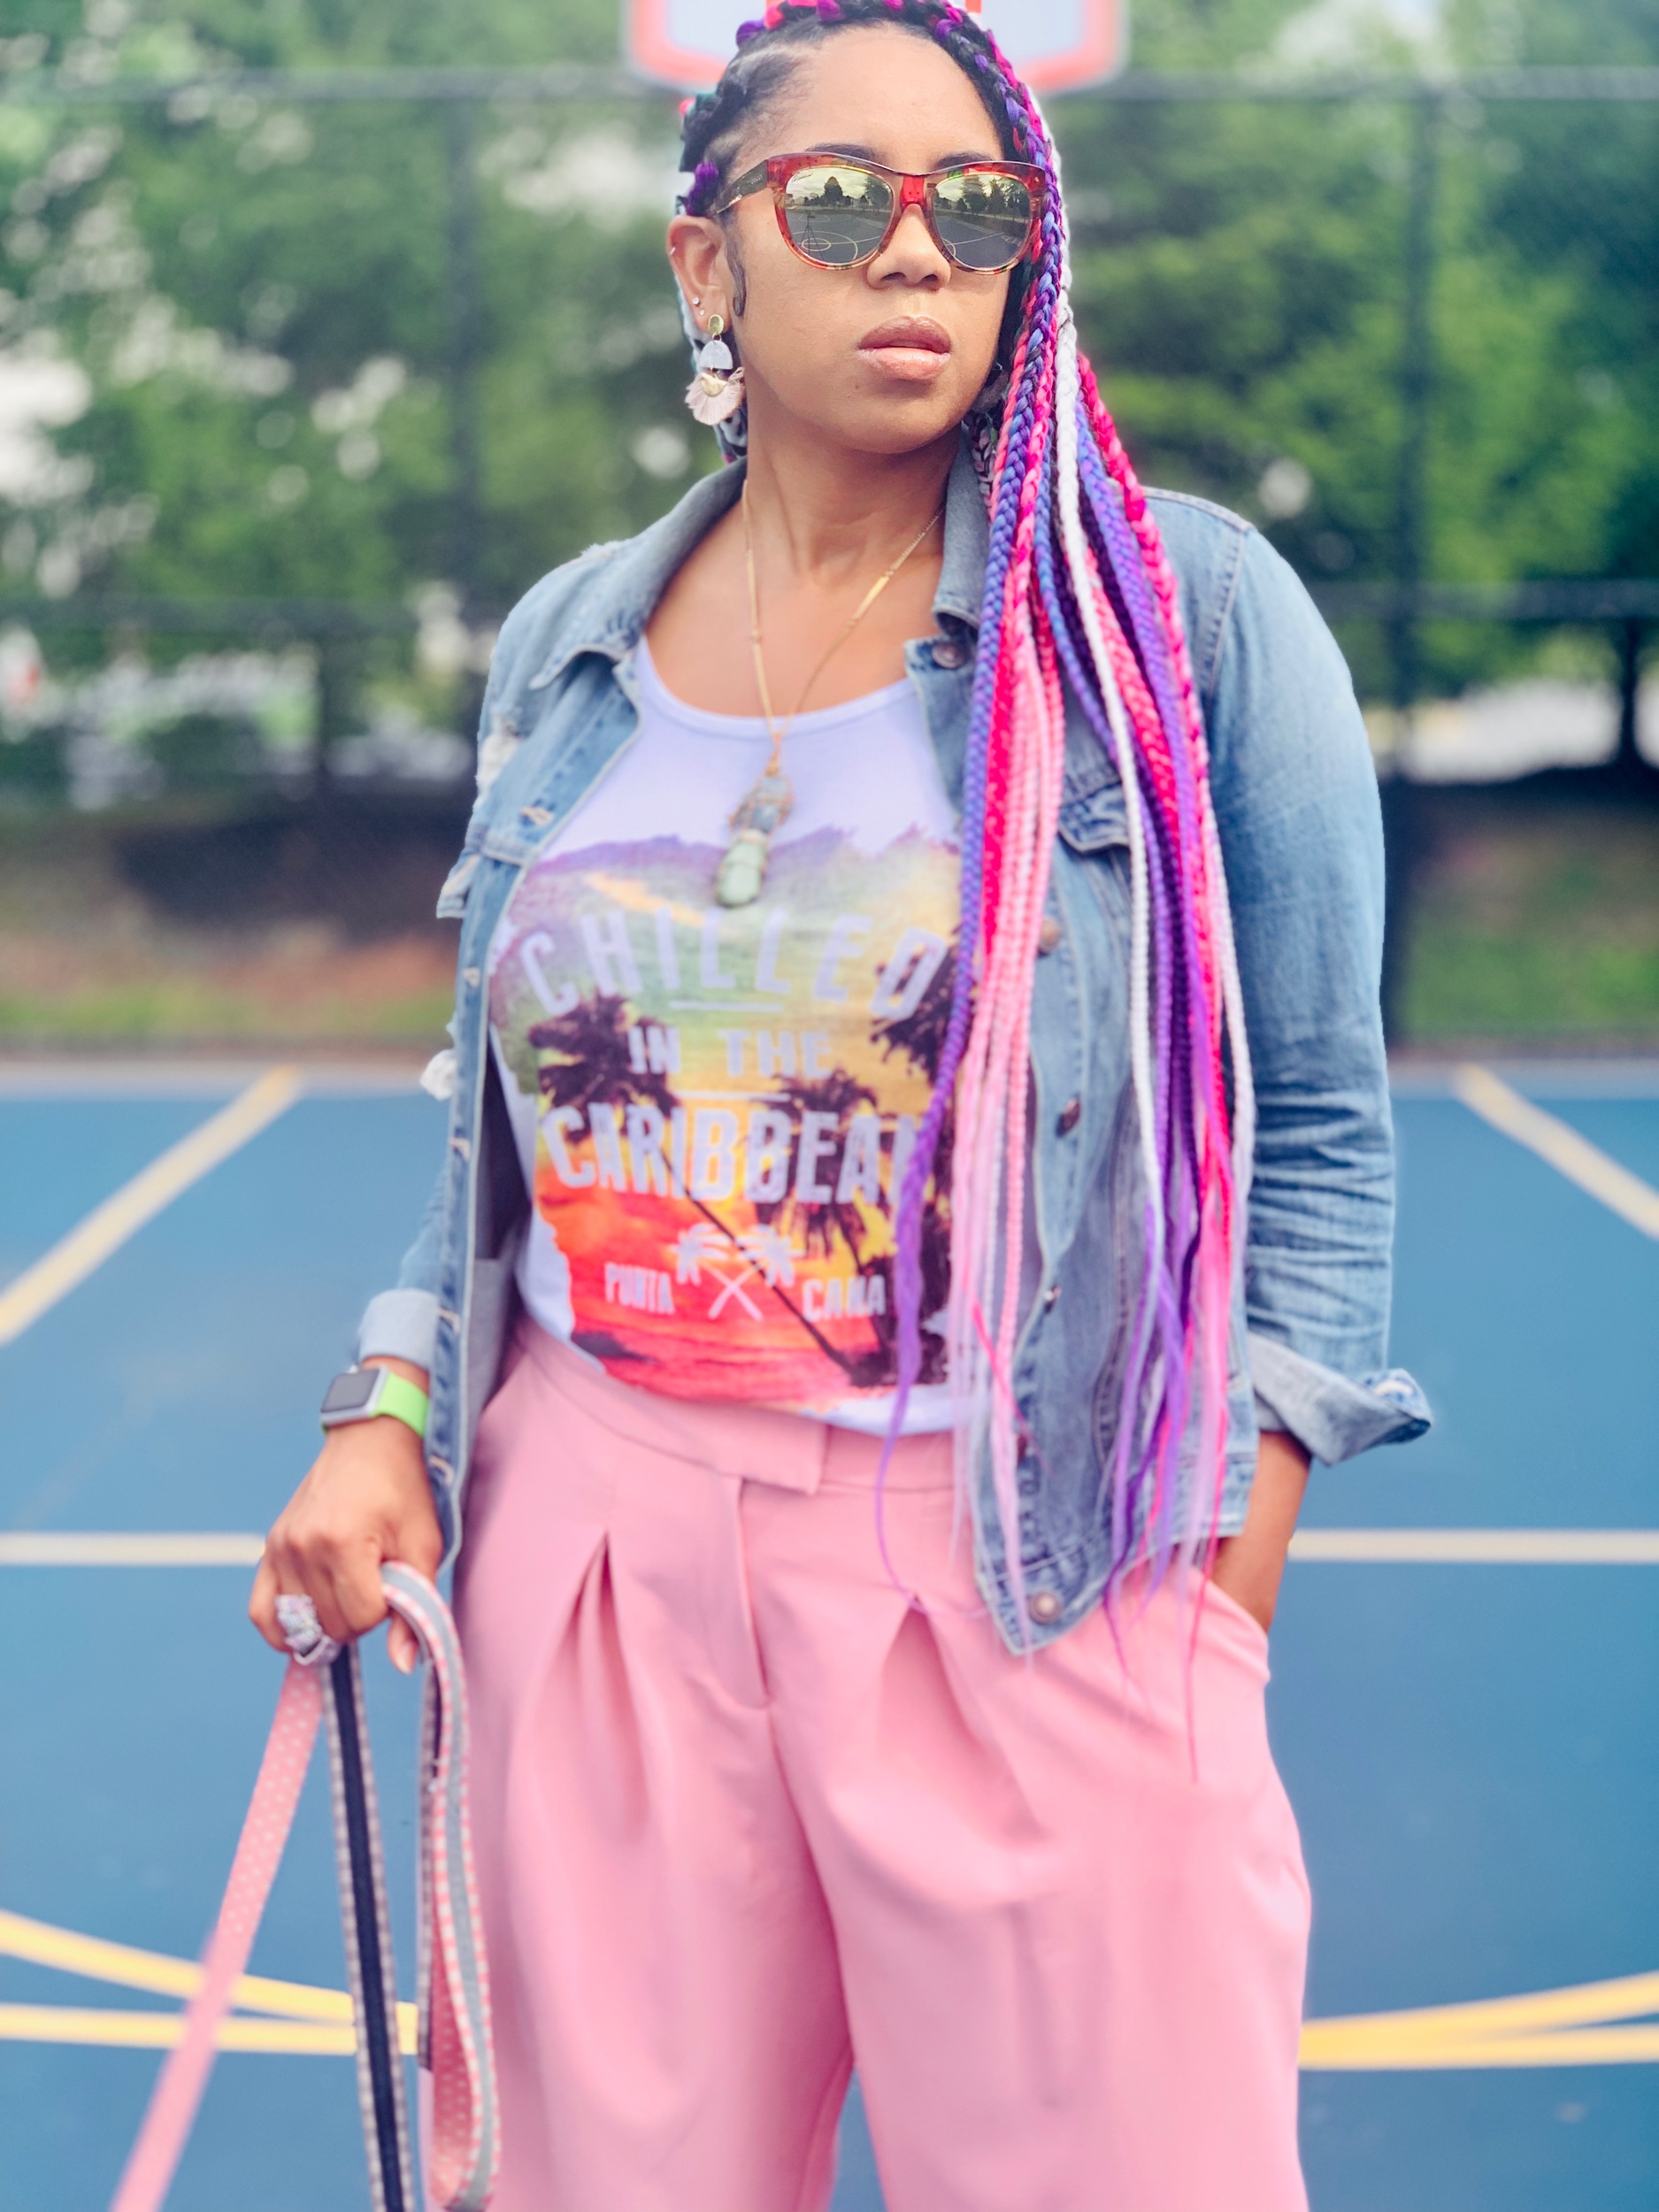
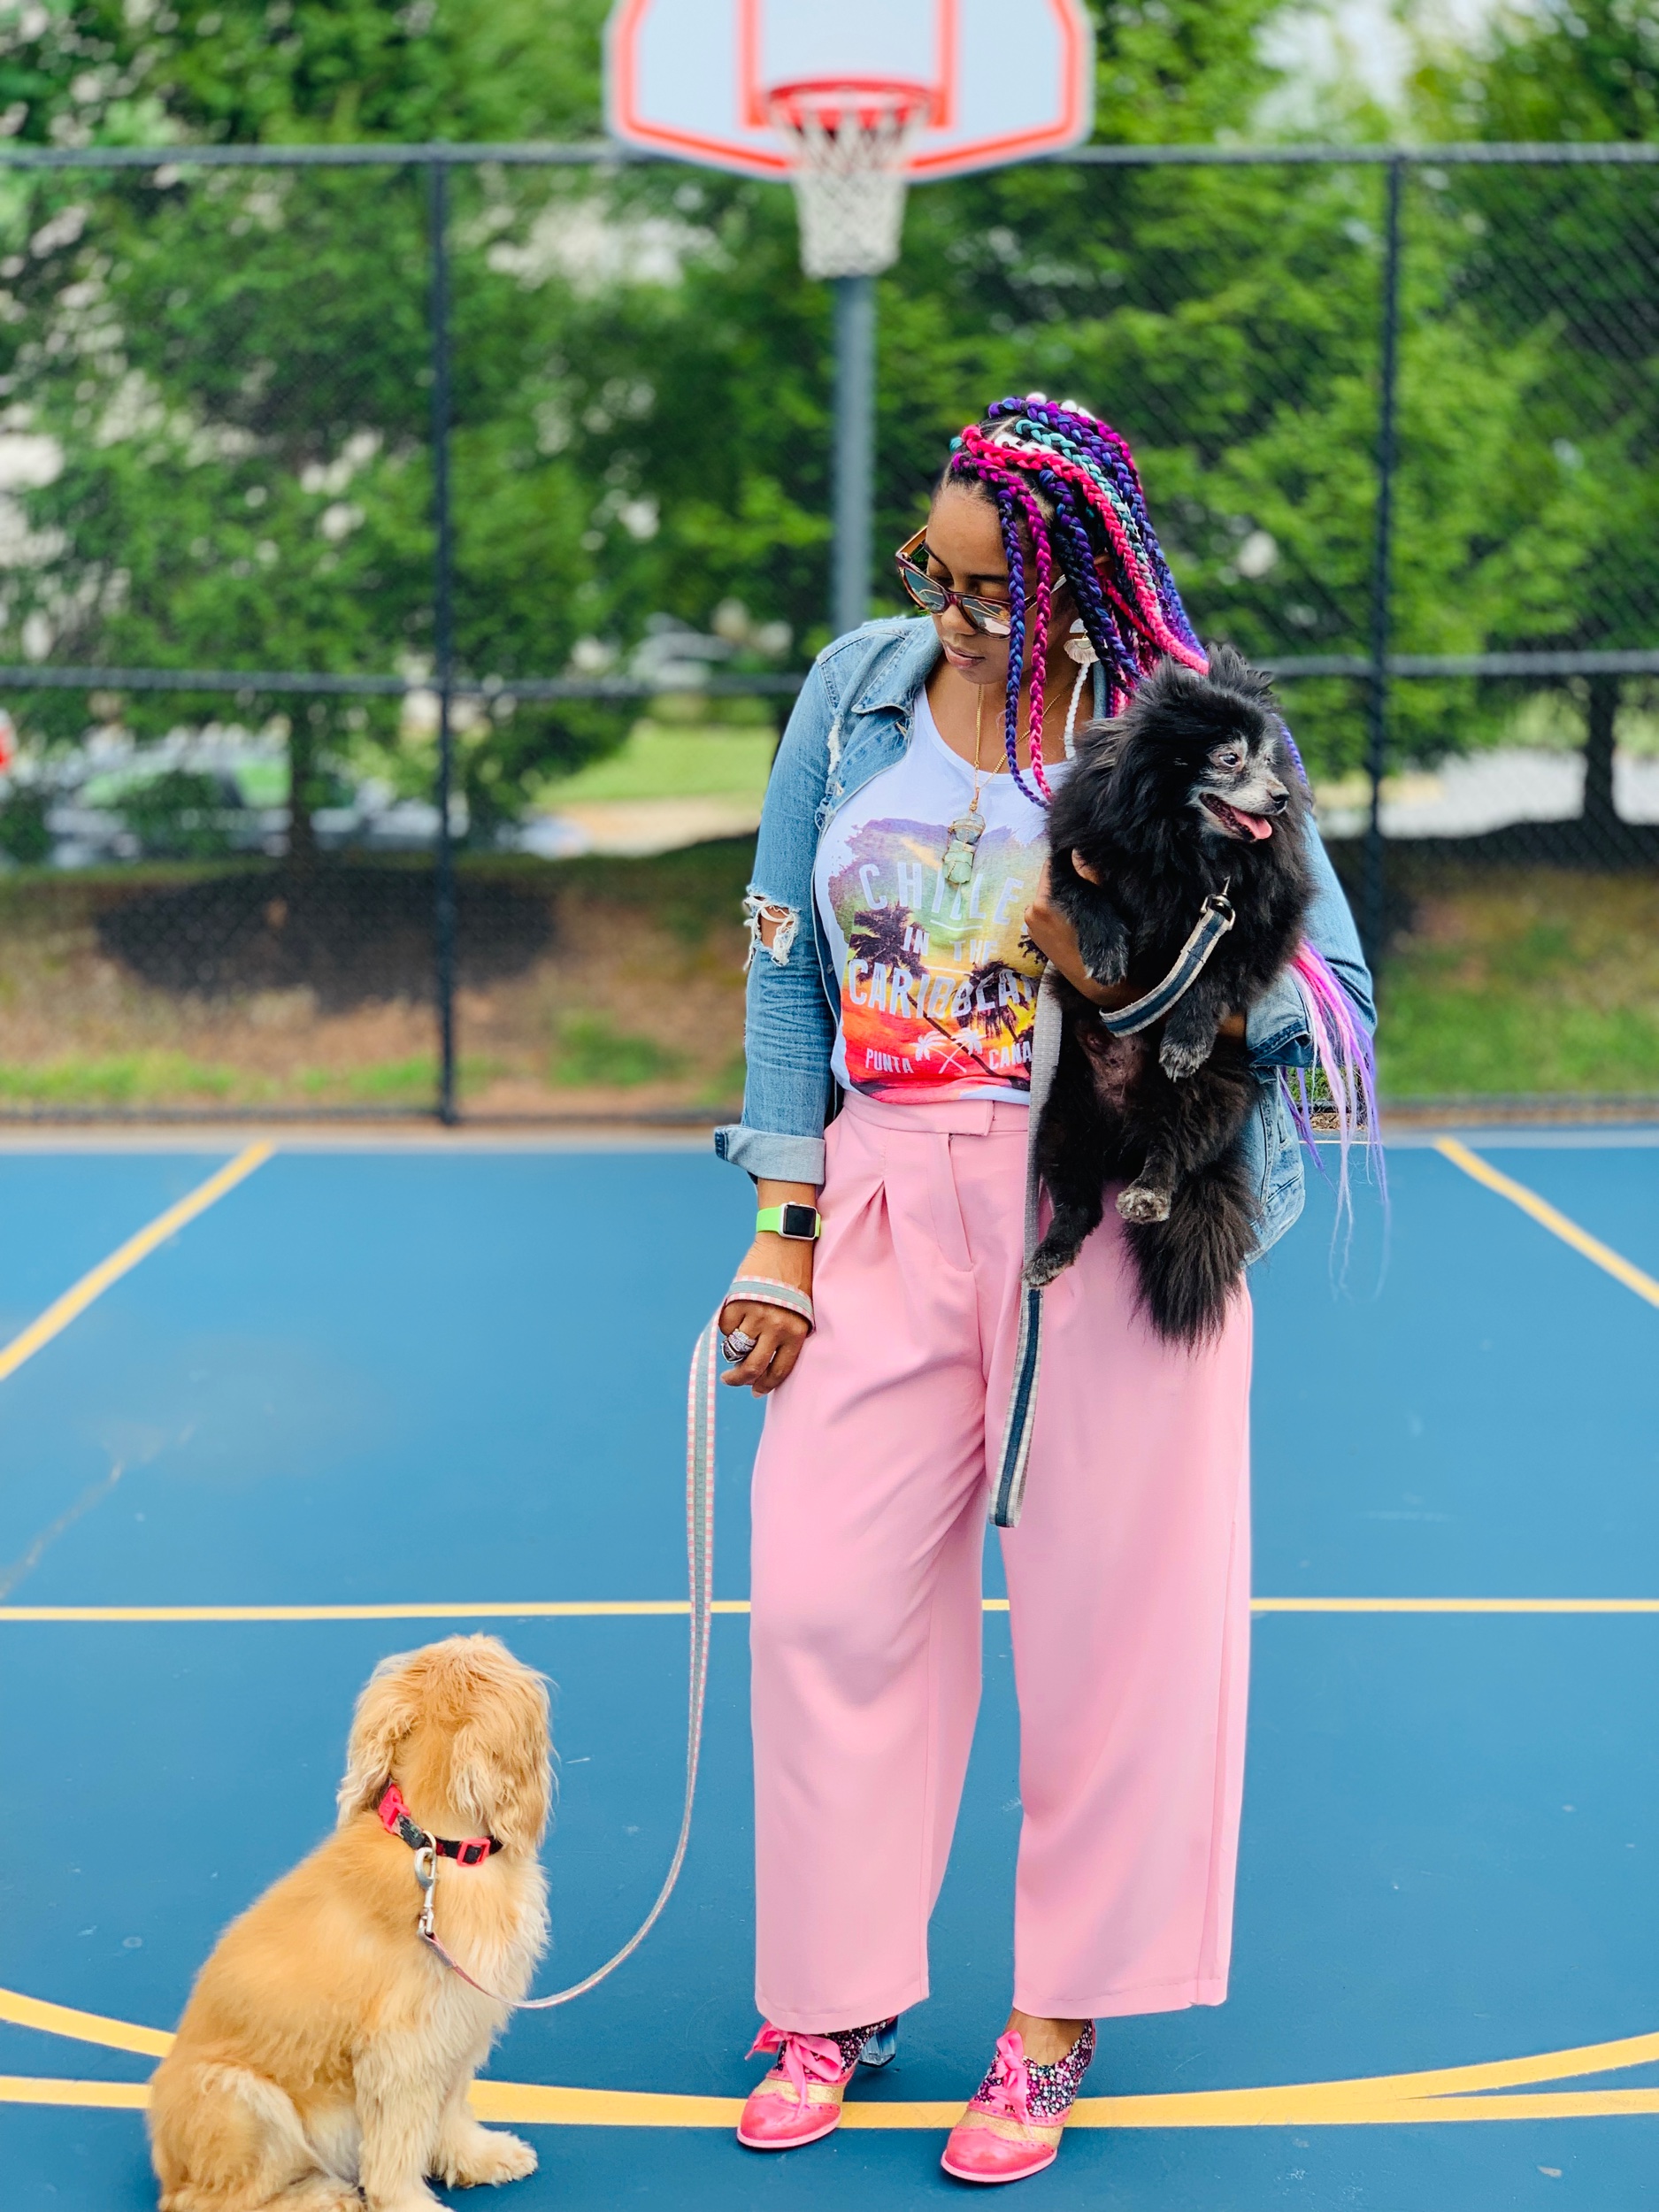
Pink panther
Think Pink!
I absolutely love pink and I couldn’t help but notice my wardrobe was lacking in pink separates. So what do I do with this stretch pointe knit from Joann? Make a suit, duh.
My inspiration for this suit blossomed around January of this year when I saw Tracee Ellis Ross lounging in her bed, wearing a very similar pink suit with a t-shirt and heels.
In that moment I decided I would make my very own.


The Perfect Pattern!
I used McCall’s pattern 7876 to create this look. This pattern was very easy to follow and the pockets on the sides can be switch out for exposed pockets on the front of the jacket if you choose. I decided to follow the pattern design with the addition of two extra buttons and I lengthened 2 inches so I could wear the jacket as a dress as well. I considered adding shoulder pads but I didn’t like the look with my shoulders already being a little broad. I choose 1 size up from my normal size because I wanted the jacket to be extra baggy.
The pants for this pattern were not my favorite right away. After styling, I now love them. They also have a baggy fit and double pleats on the front. I was honestly confused by the directions initially to create the pleat but I figured it out. My suggestion for choosing fabric would be one with a soft drape.
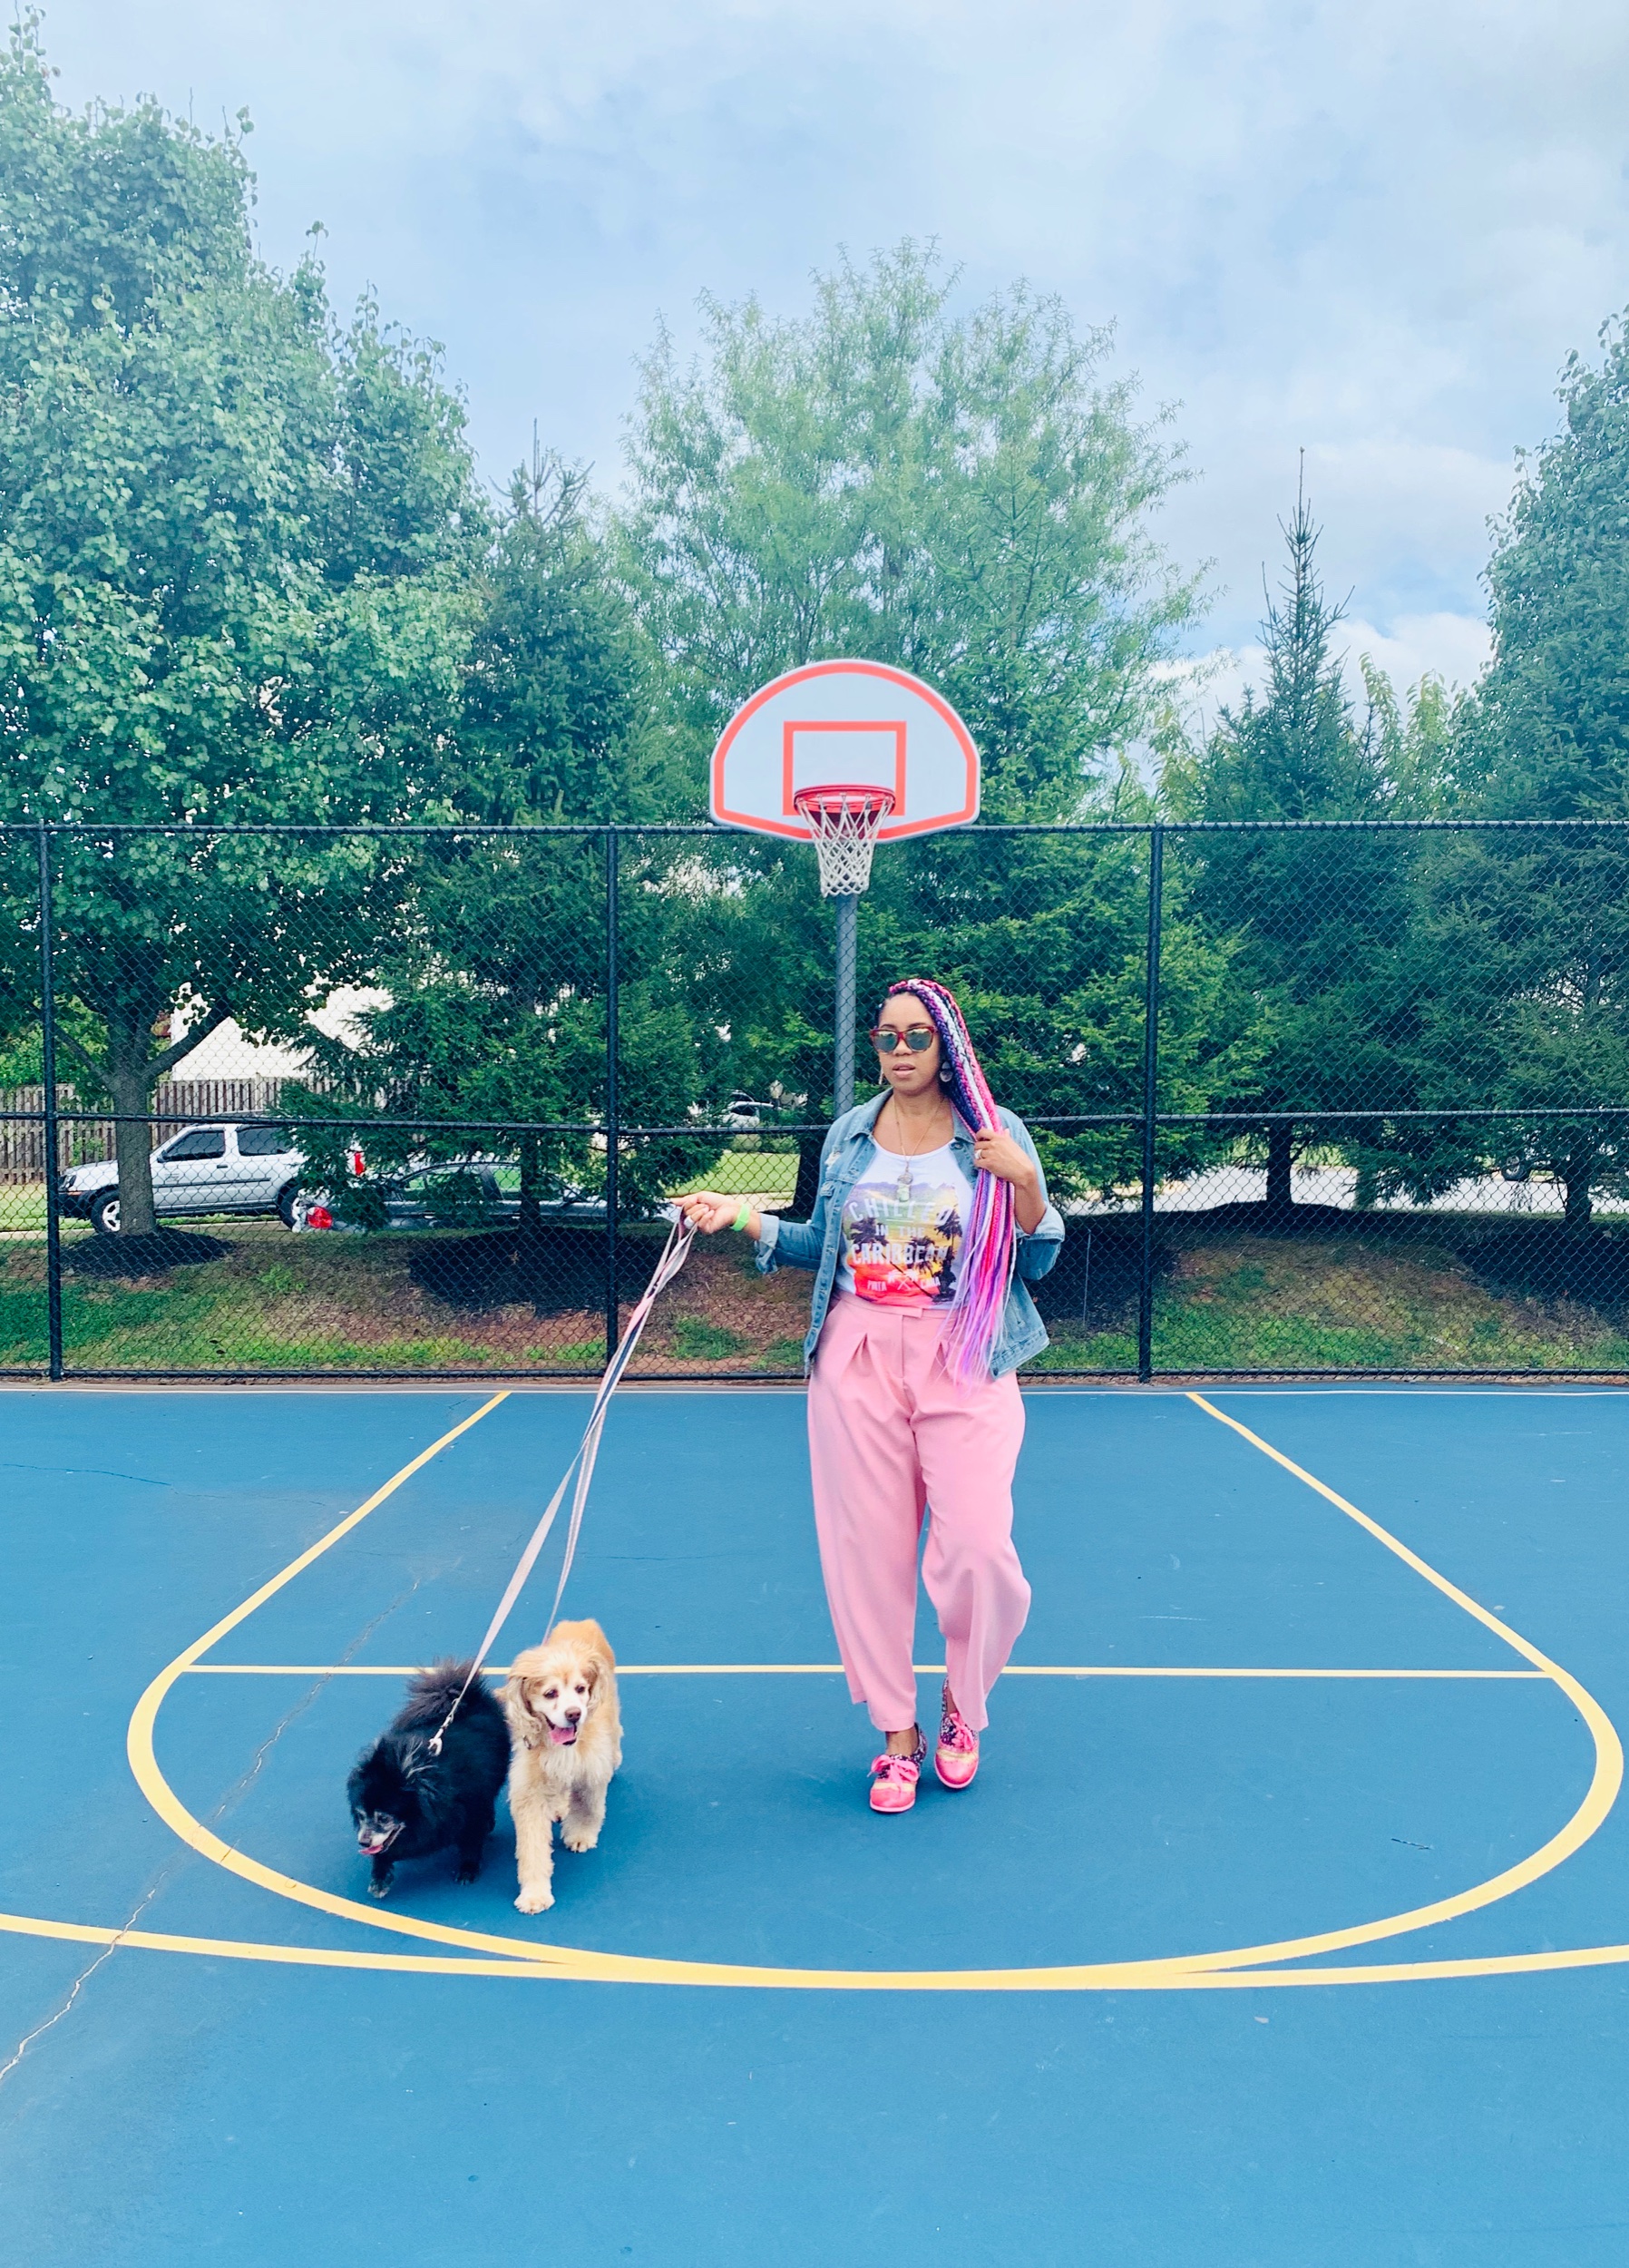
I love the versatility of a suit and the color pink. I mean come on, pink is a neutral too. There are so many ways to pair and mix & match these two pieces it’s unbelievable! Here’s how I’ve styled them thus far.


Sewing time
I managed to complete both the pants and jacket in a total of 3 days. I dedicated 1 day for cutting out the pattern and 2 days total for jacket and pants. Keep in mind the jacket requires hand sewing for the lining and not much tailoring involved because of the baggy style fit. I would definitely create with this pattern in the future.
Tell me your thoughts on this suit? How would you style it? What colors and shades are you thinking of for Fall?
peace and blessings!

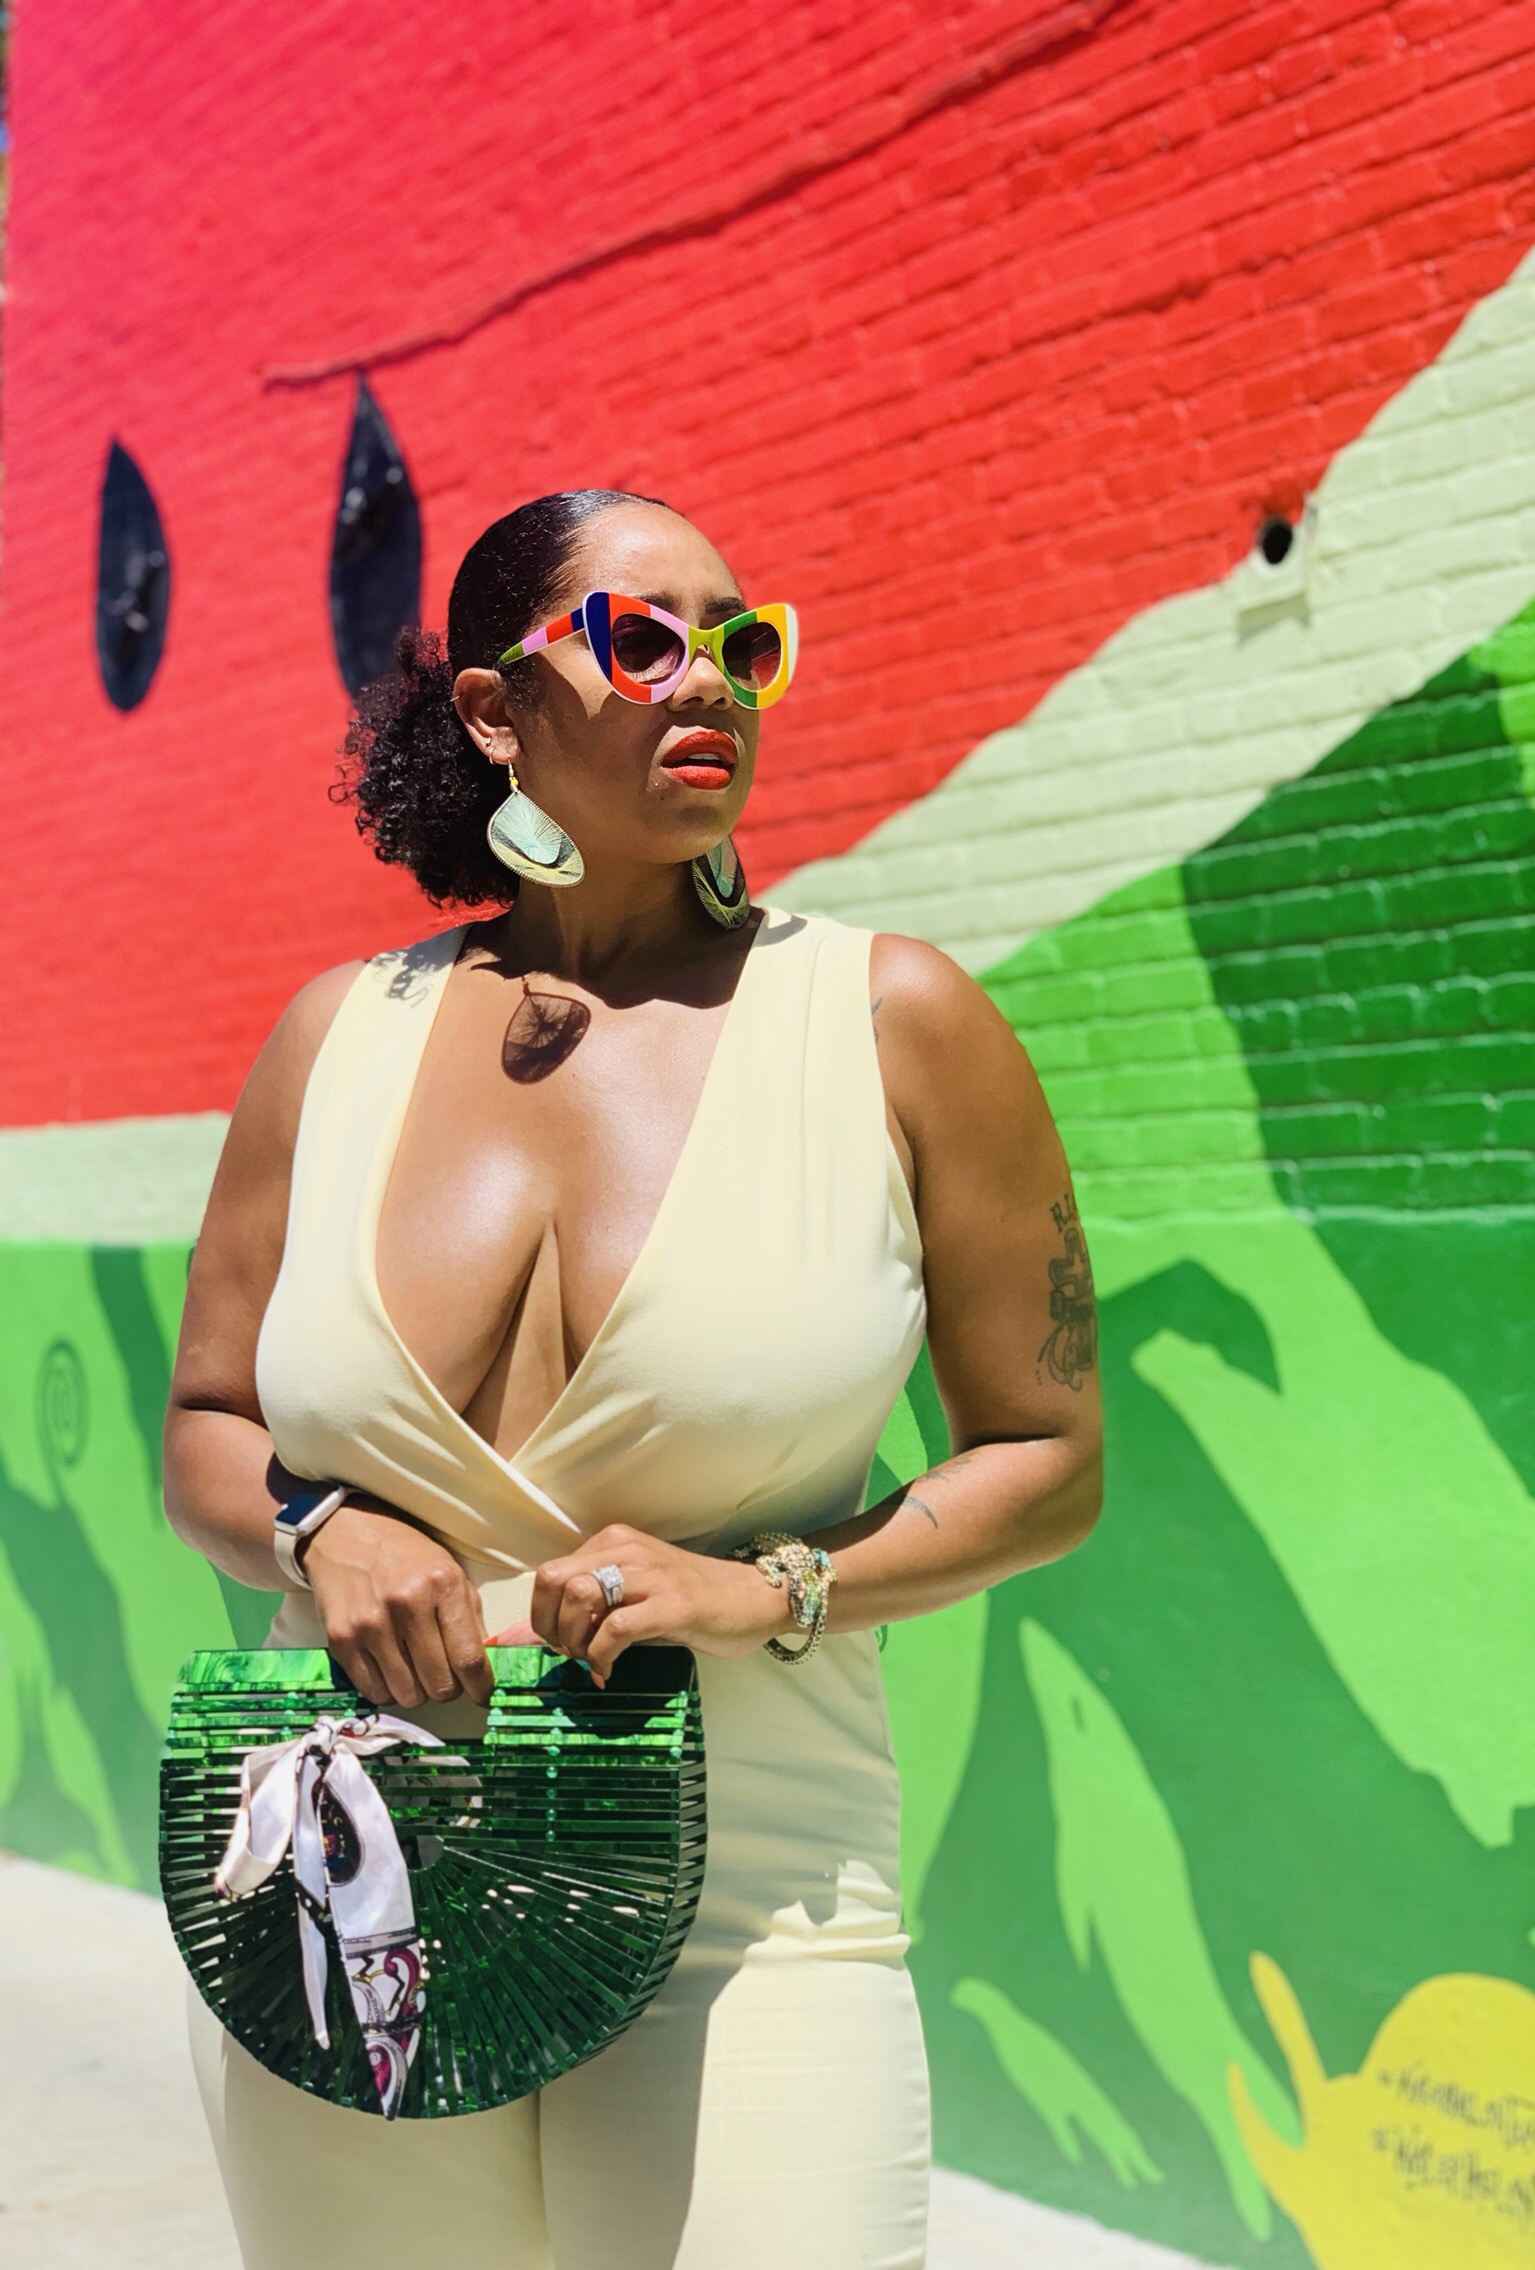
Canary Watermelon
Watermelon Season is here!
Summer is heating up and all my favorite fruits are accessible. On these hot summer days, I really love a nice cold watermelon (seeded to be exact). I can seriously eat watermelon for breakfast, lunch, and dinner and never get tired. Okay, now that I’ve got you thinking about fruit…let’s taIk about this canary jumper. This McCalls pattern M7910 has been in my queue for a little while. Don’t be intimidated by this one. There are only 4 pattern pieces…YES, 4 pieces. The fabric calls for stretch knit or jersey fabrics only. I’ve already created two jumpsuits with this pattern this summer.


Tips and tricks
When I sew stretch knits and jersey fabrics, I love to serge. If you don’t have a serger a zig-zag stitch is fine. The bodice is lined and you can cut out your lining with the same fabric or you can use a stretch lining. I used a mesh stretch lining (I think I like the same fabric for lining better). Around the calf and knee area I did need to take in a few inches. Other than those minor adjustments, this pattern can be sewn in an hour or less. Because the cut is so low on this neckline, I don’t wear a bra with this jumpsuit (my stickies were still visible through this canary yellow so they were a no go too). I plan on wearing both jumpsuits through the fall and winter seasons with an undershirt (style tip).


And there you have it, a fast and fun summer make that fits all those curves and gives your thighs a break from those summer dresses and that awful rubbing in the heat. I know I’m not the only woman who has this problem…lol. Tell me what you think about this jumpsuit pattern and the many options below. Until next time, I’ll be back. I’m going to cut into my watermelon.
Peace & Love
Nefertiti
Beach Vibes
Beach Vibes
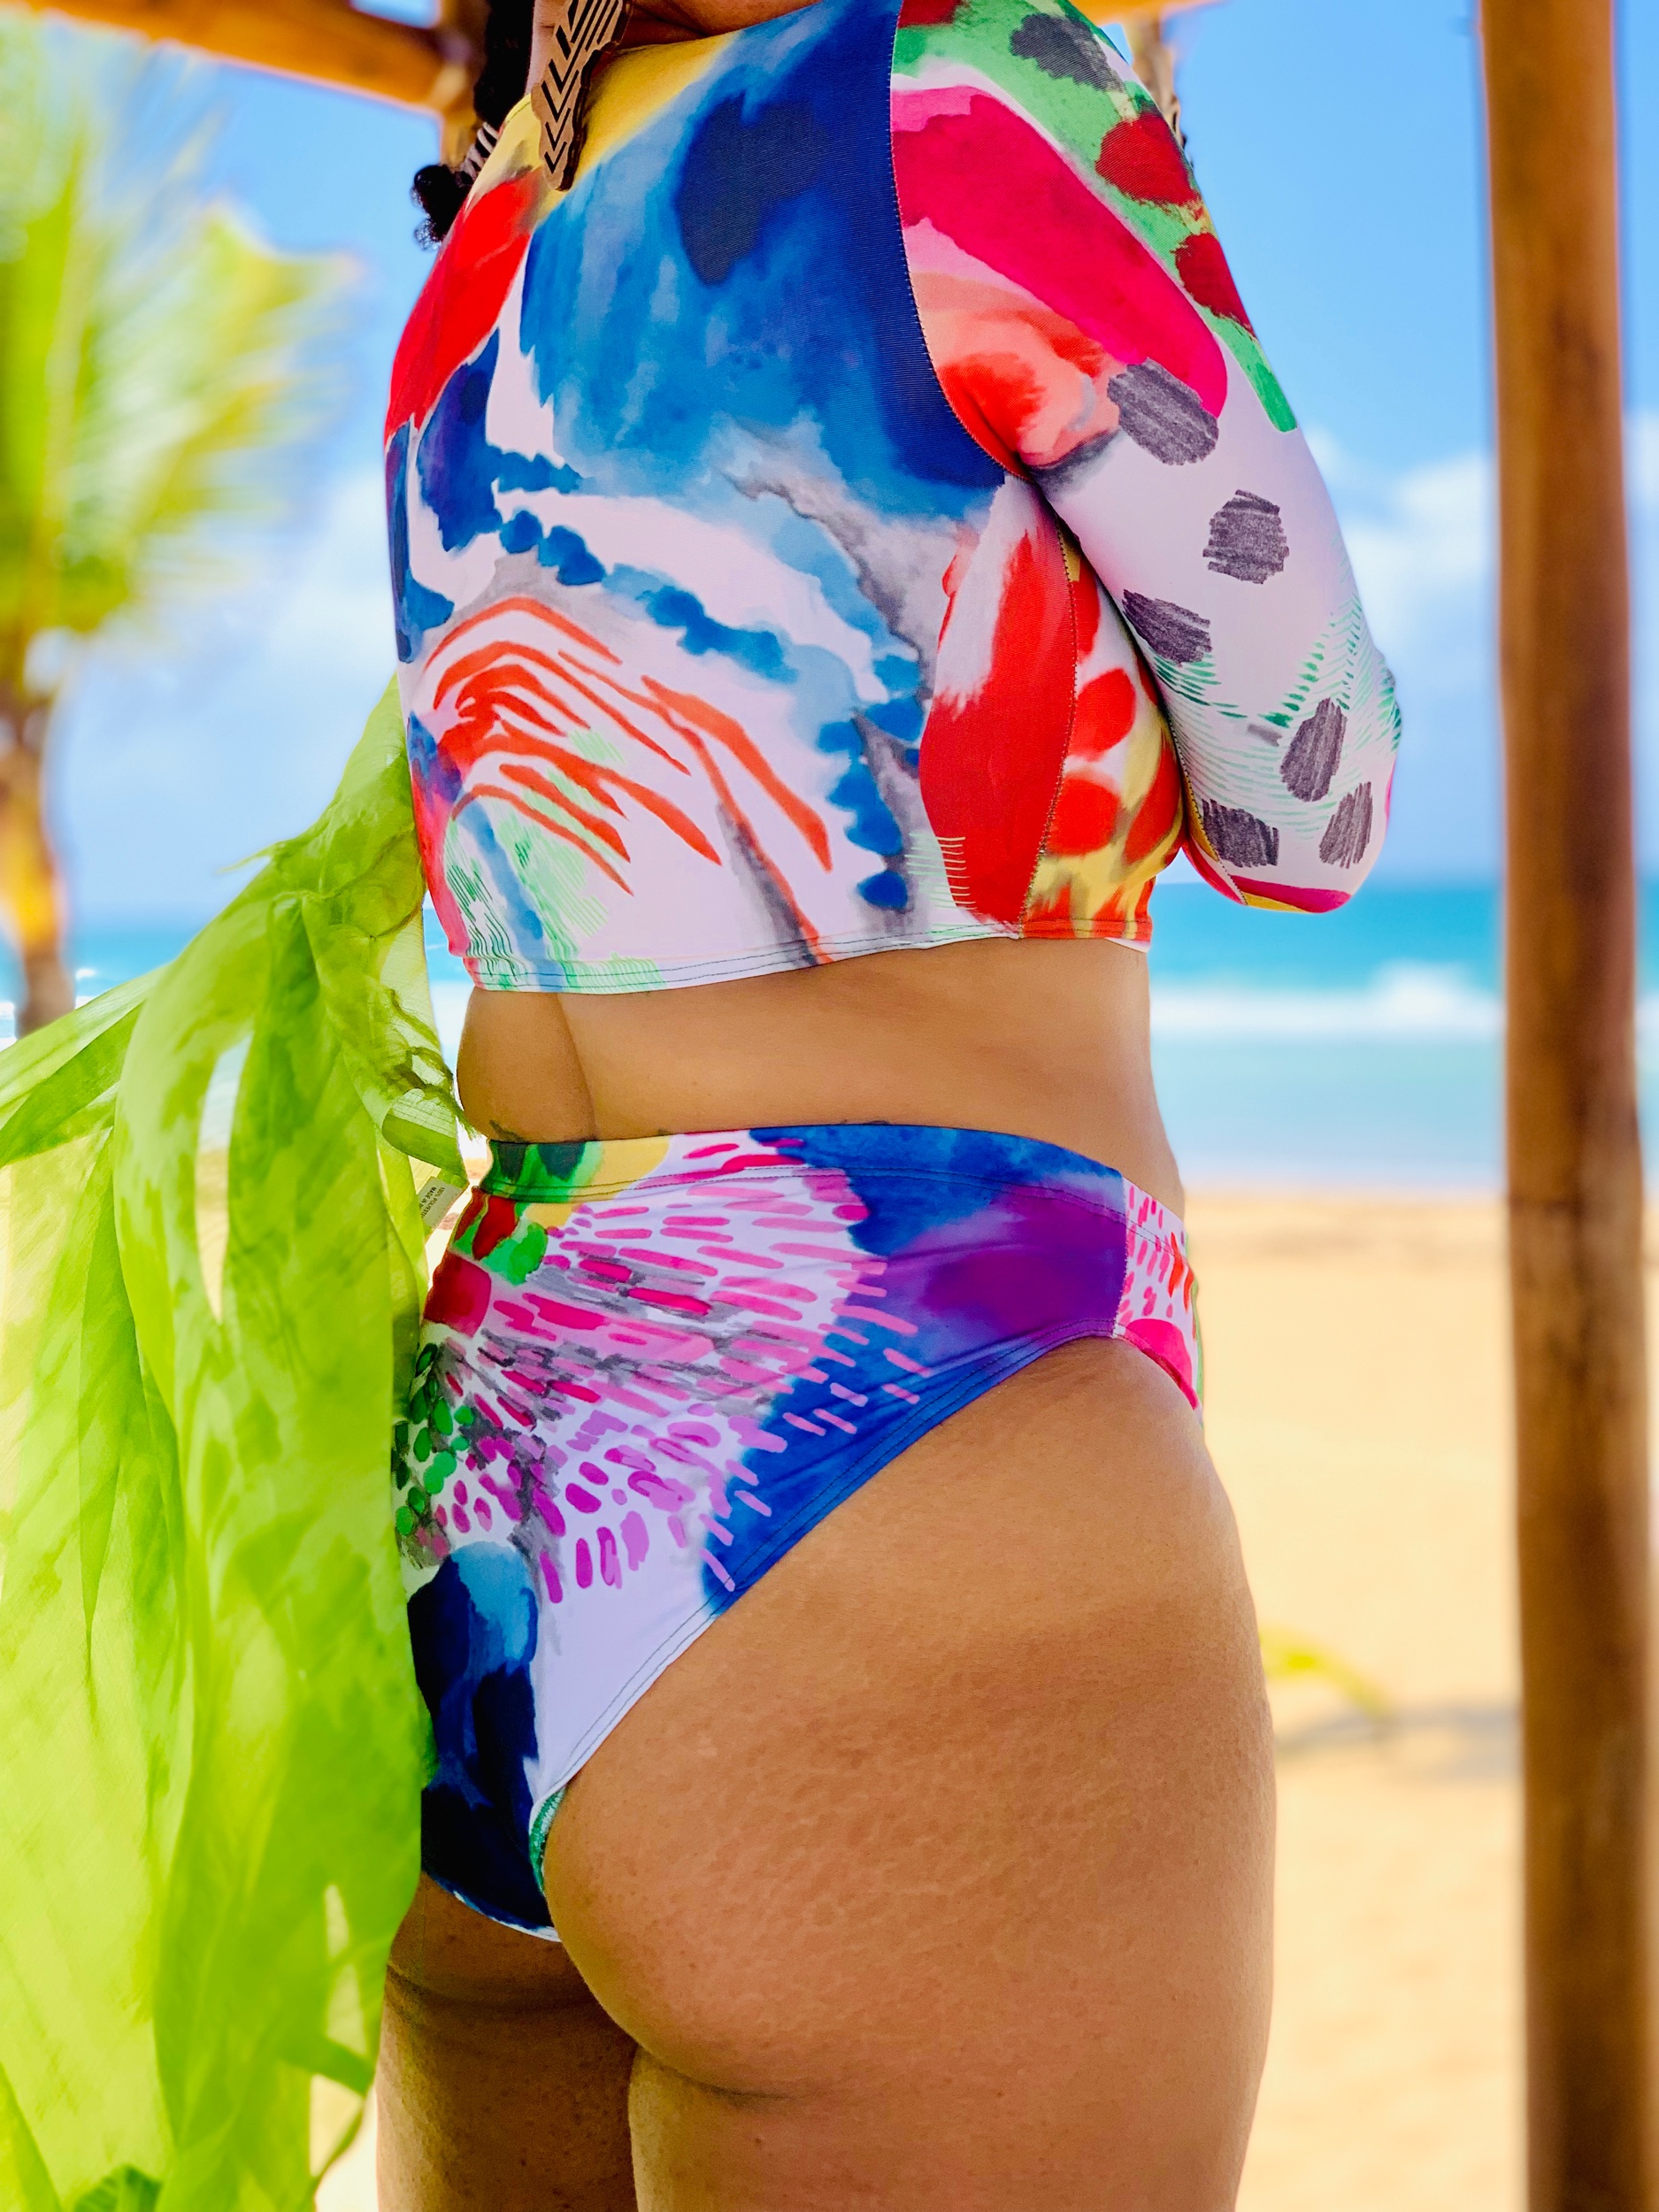
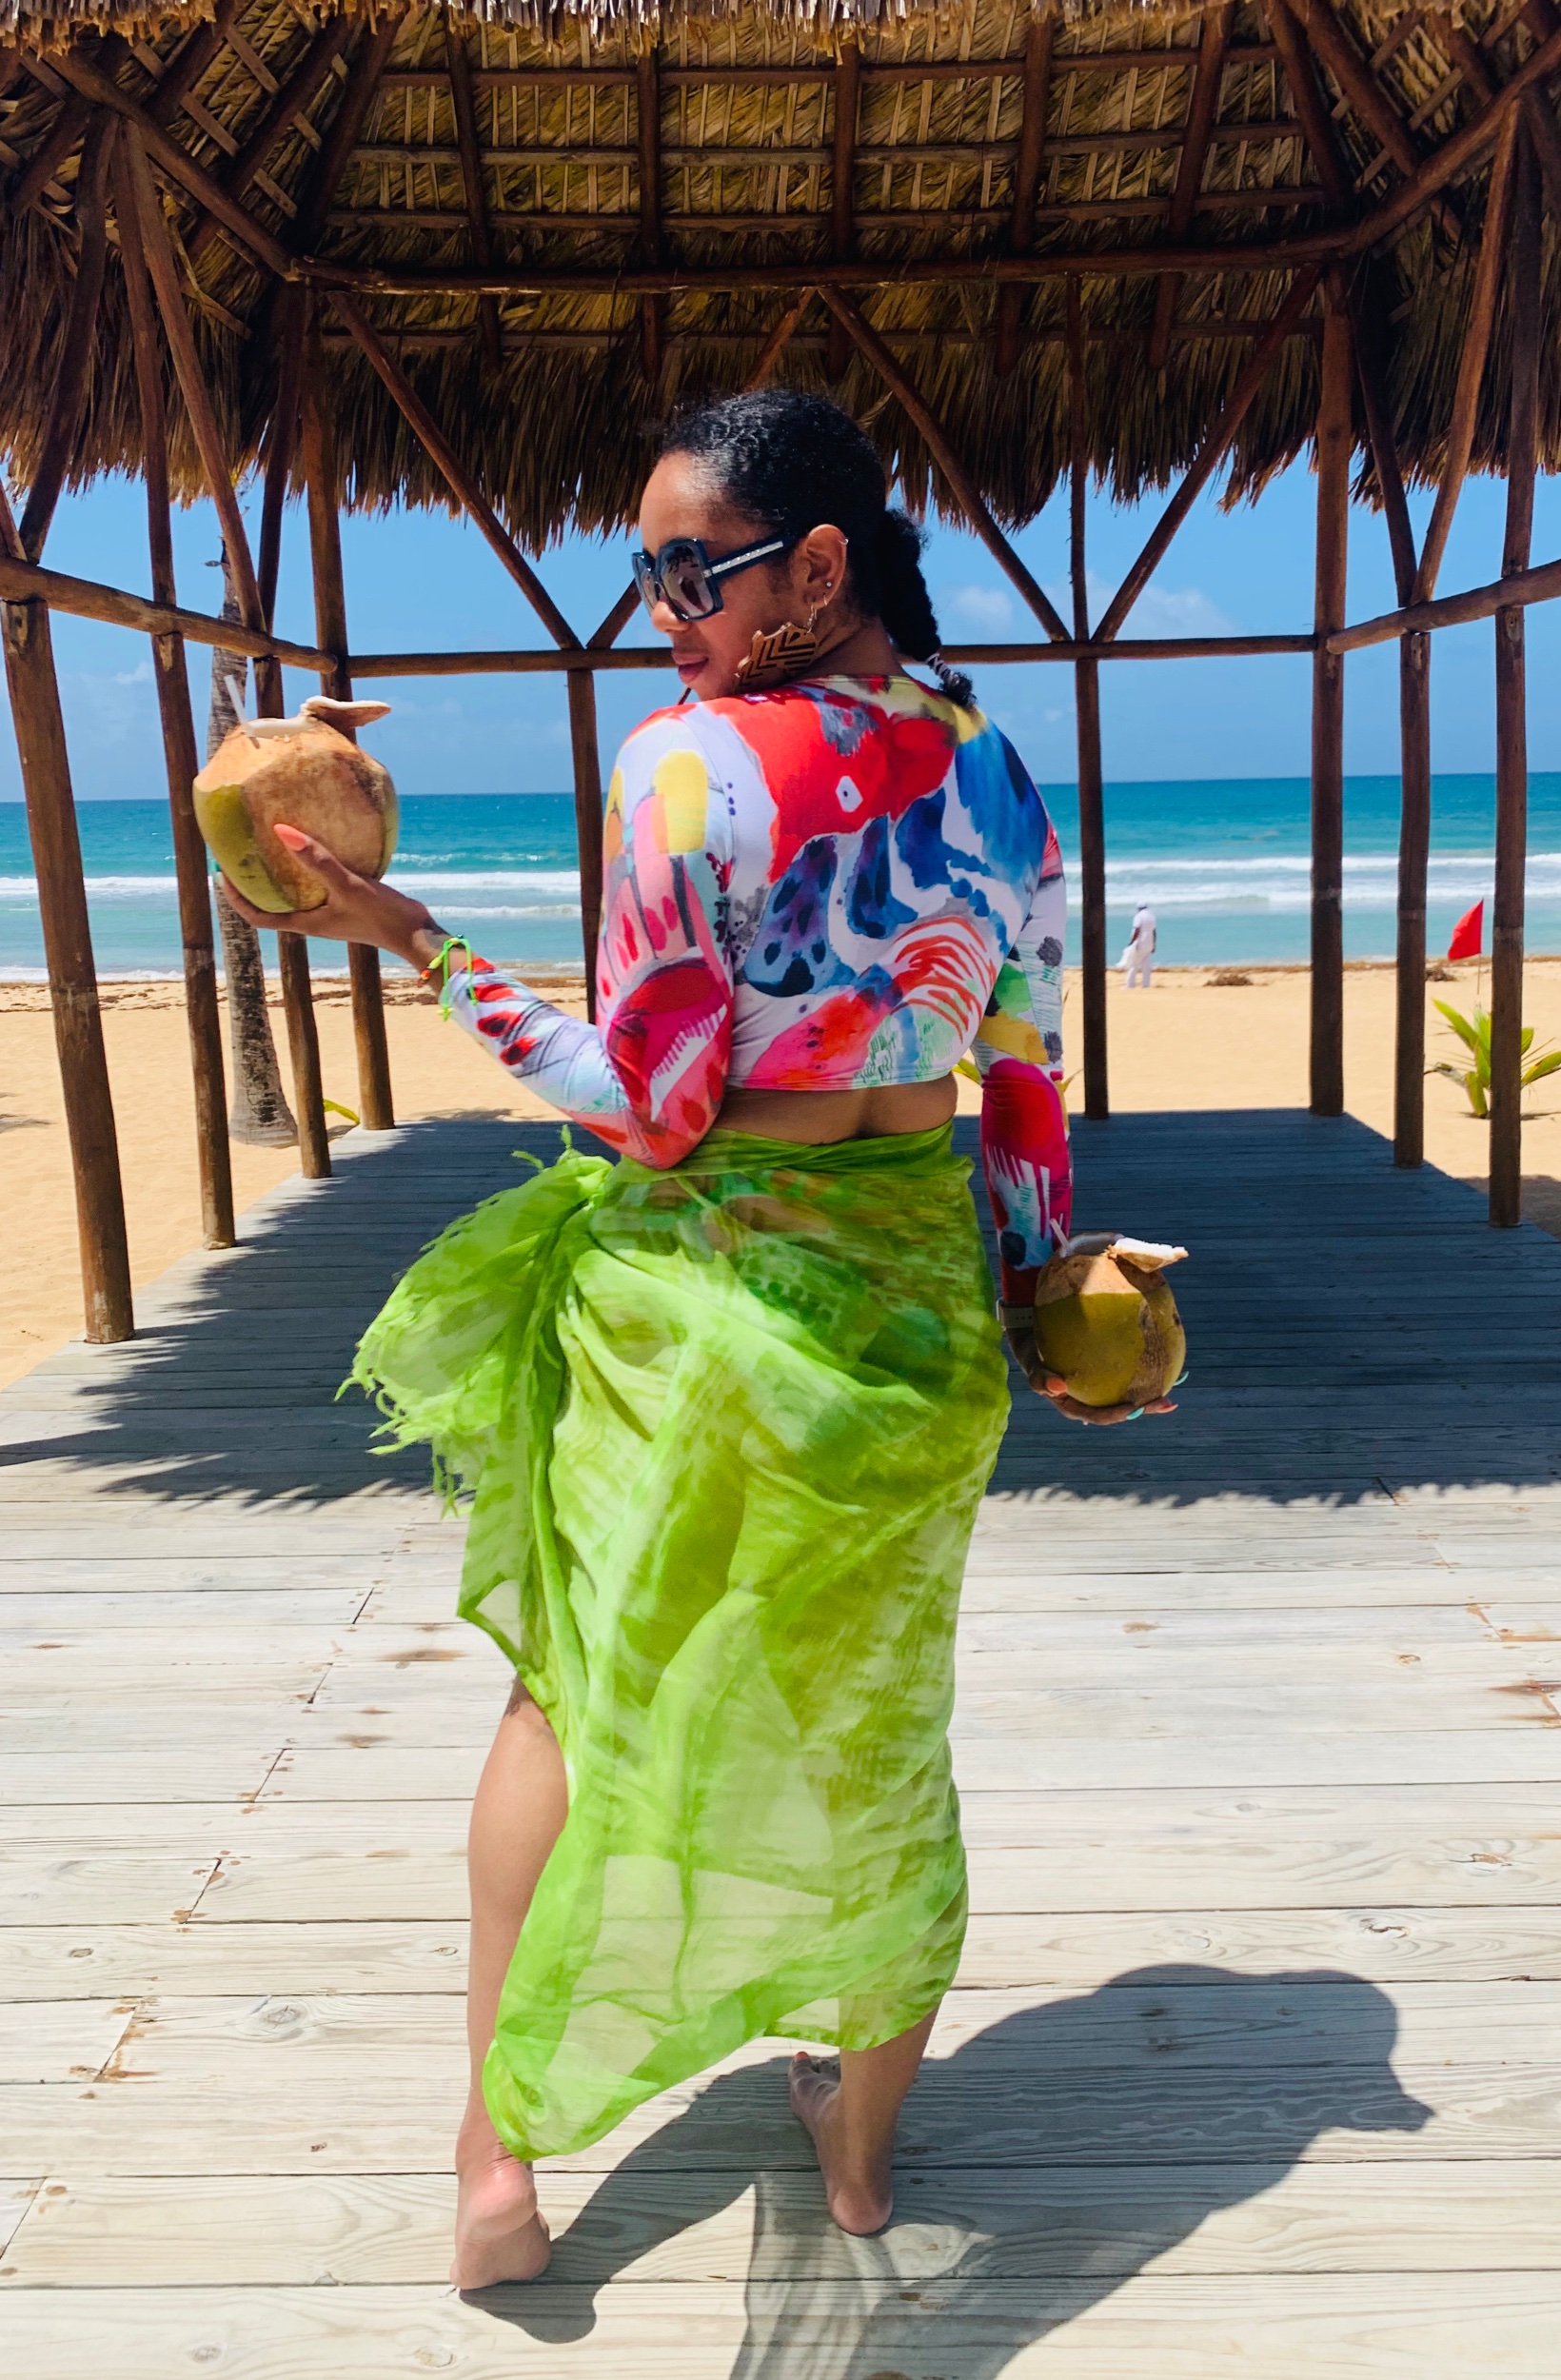
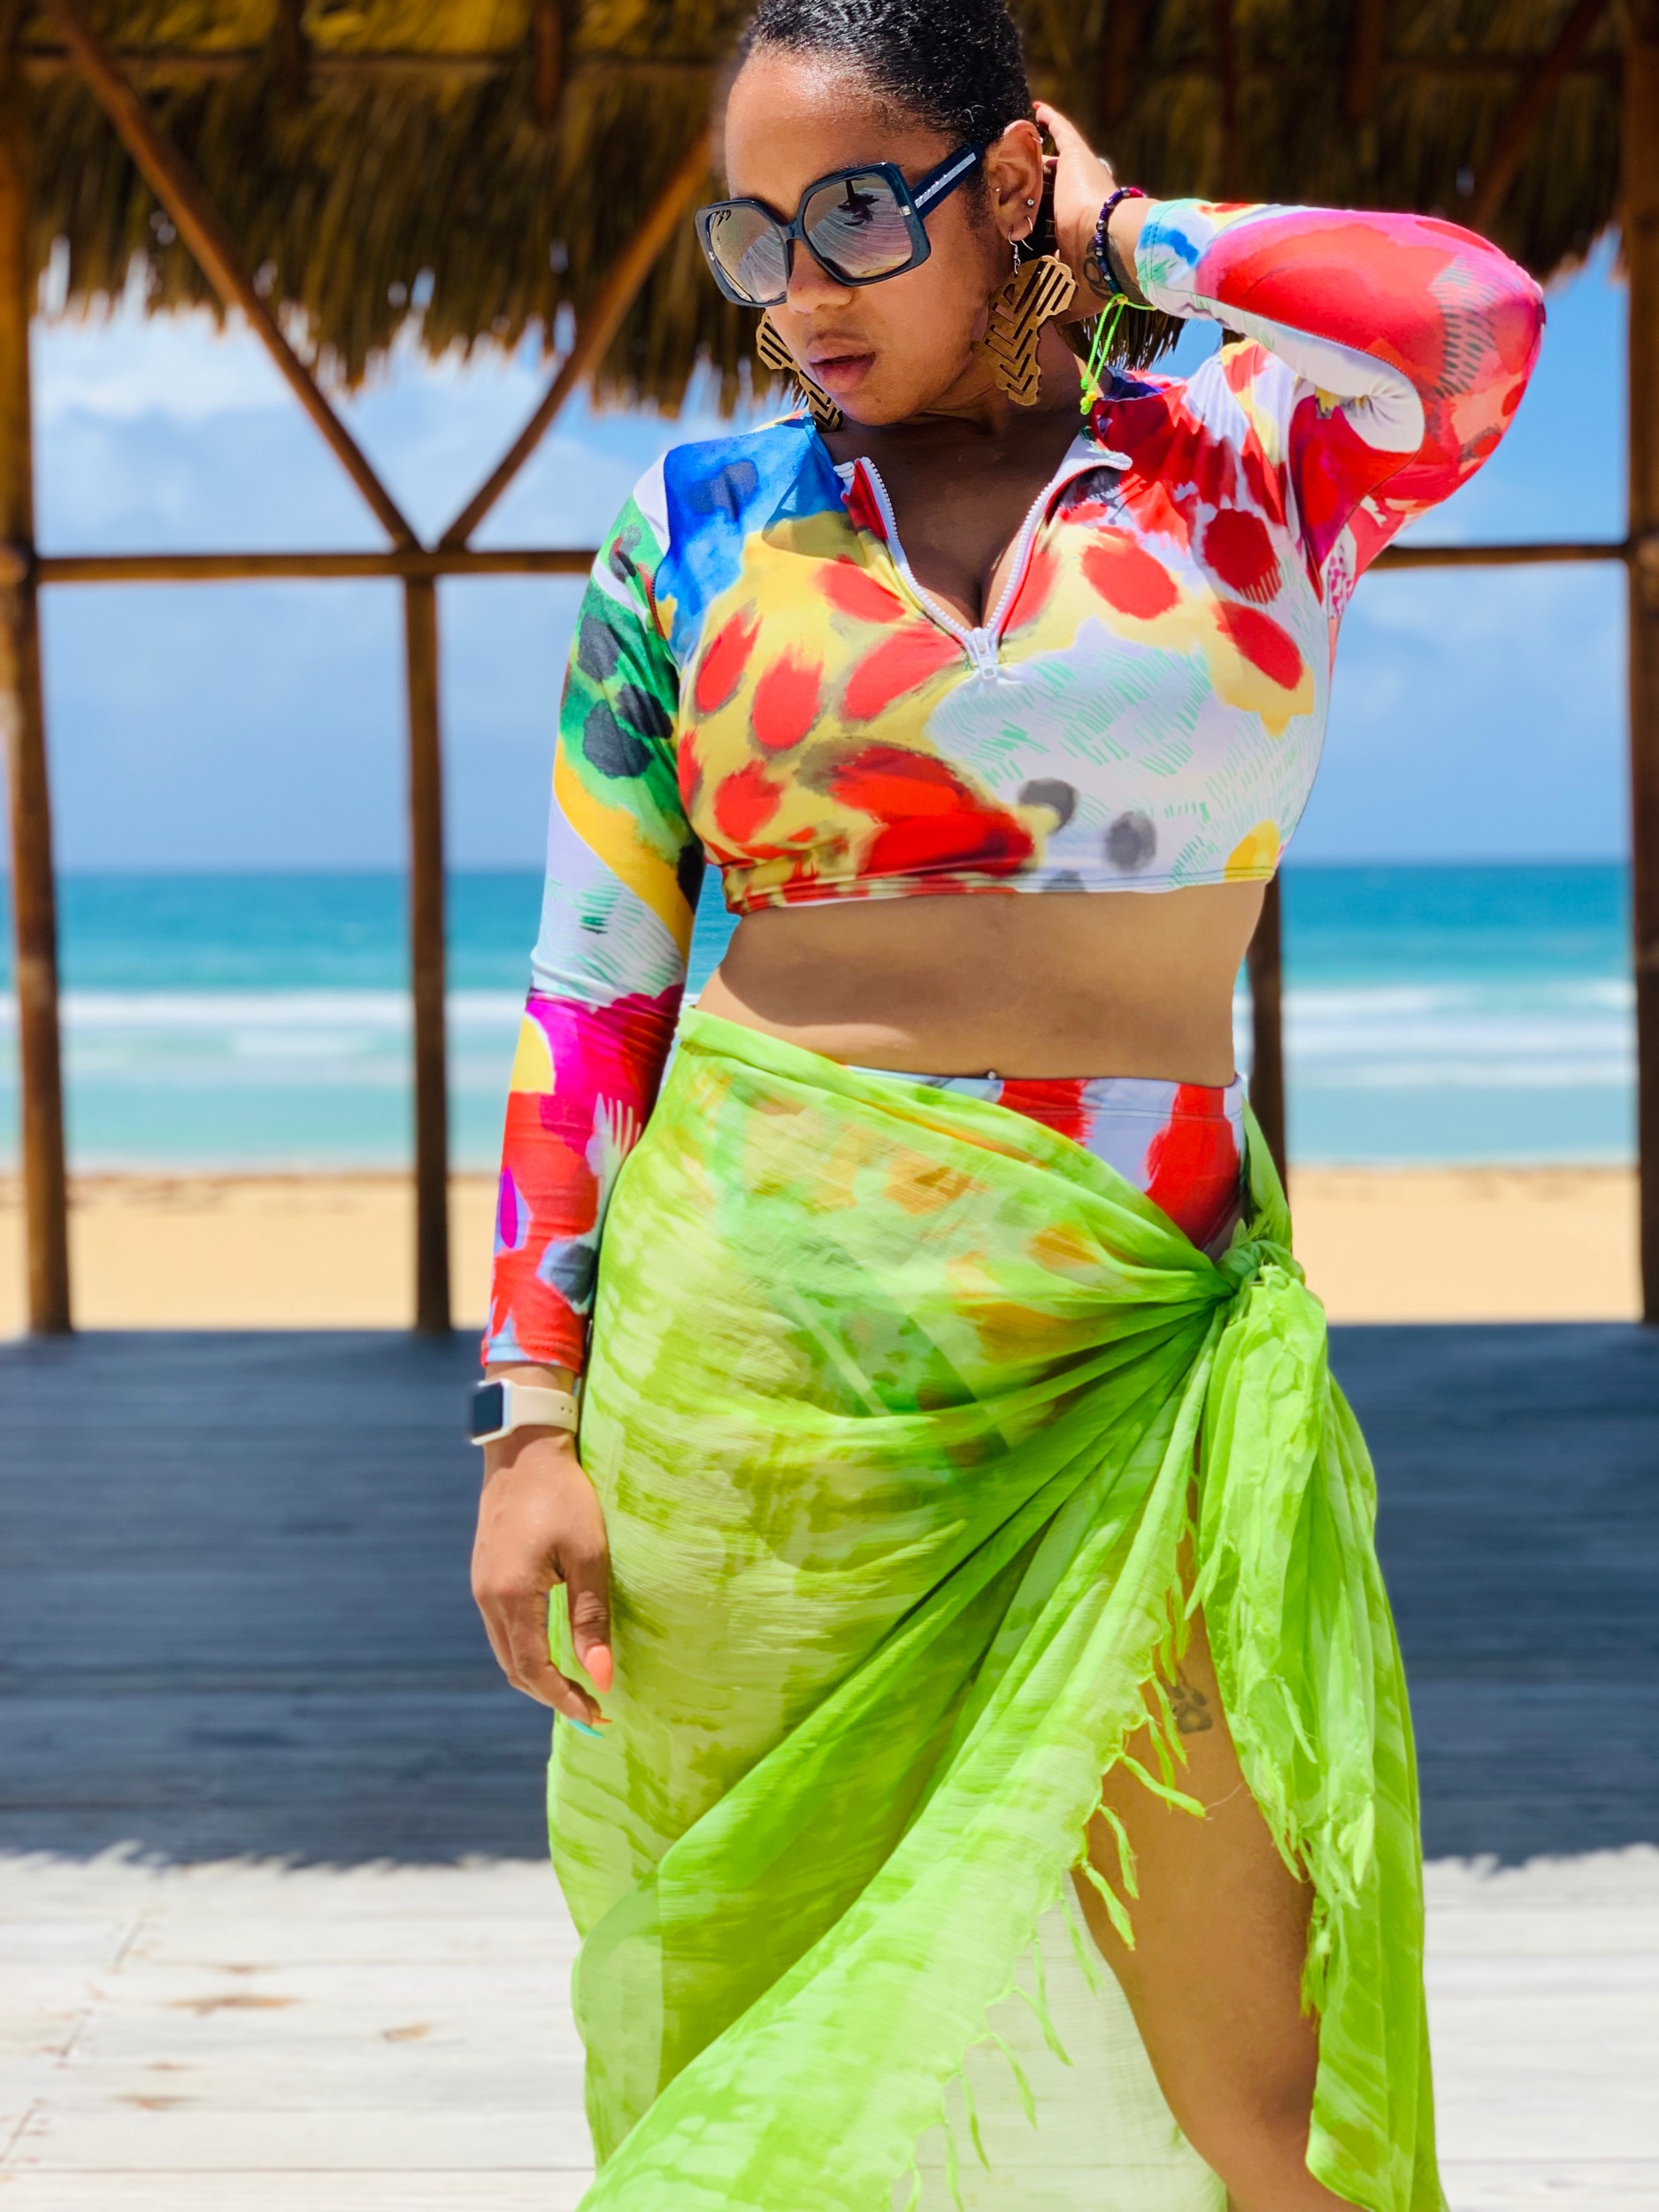
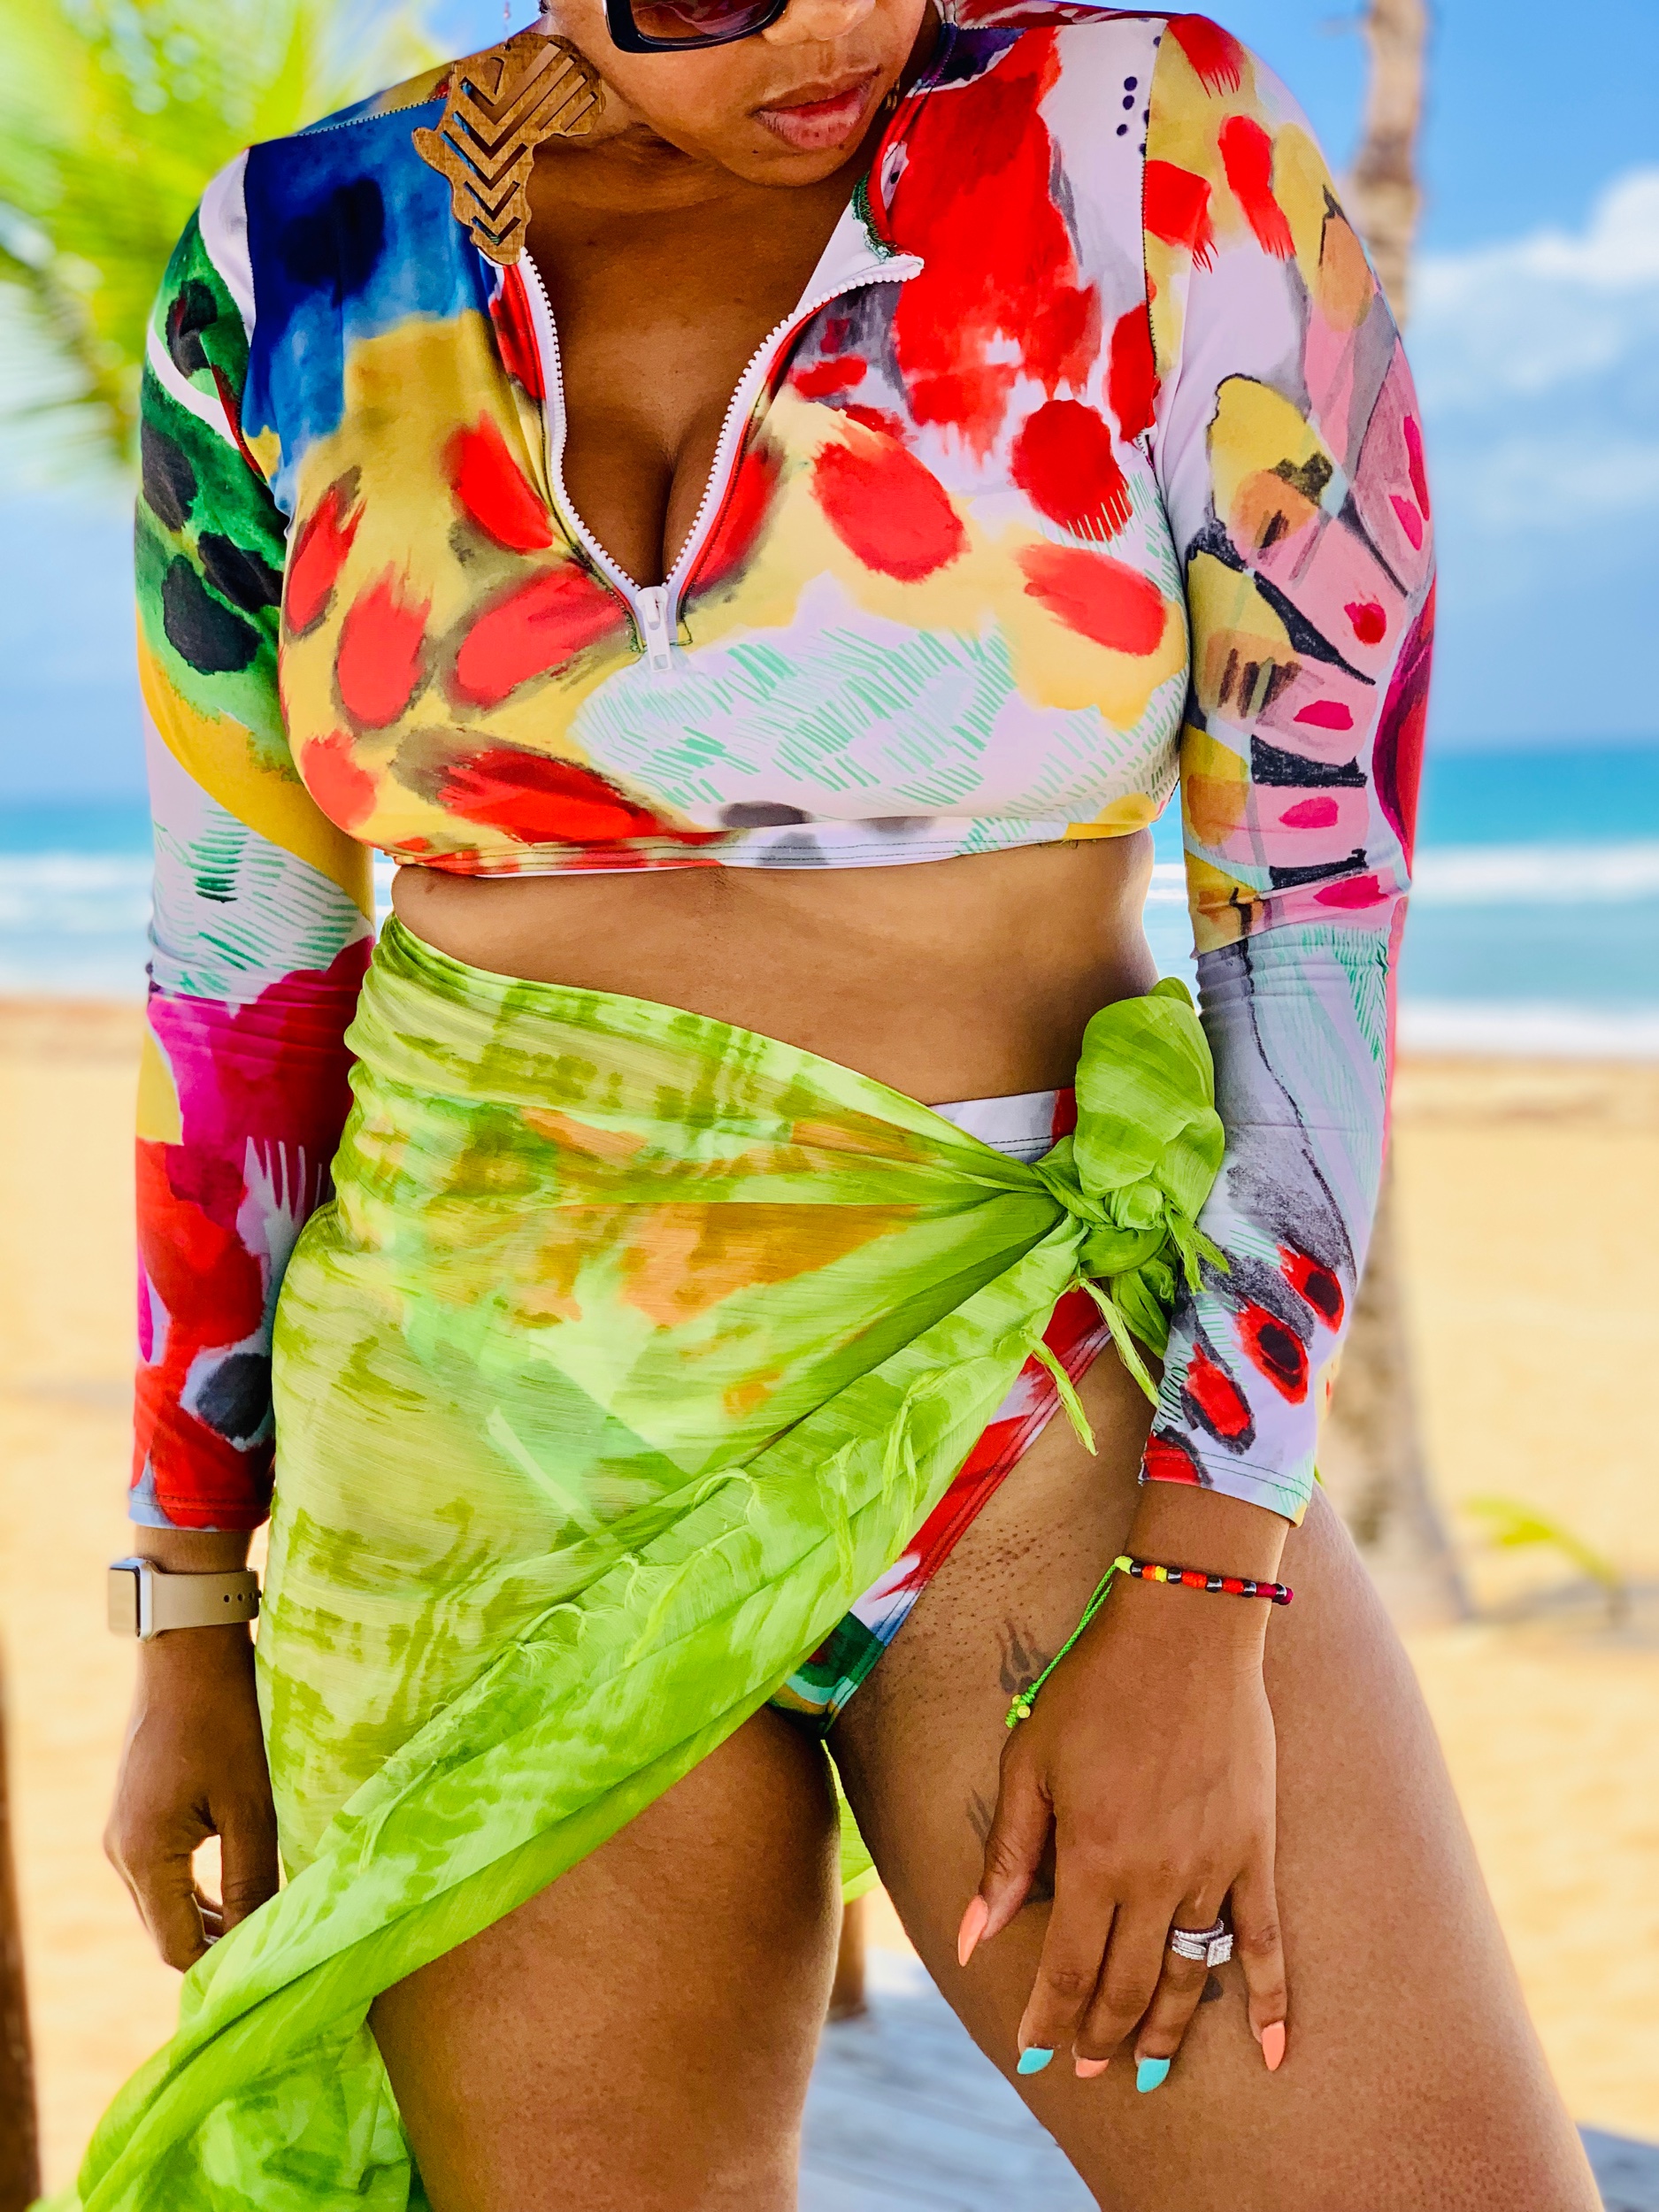
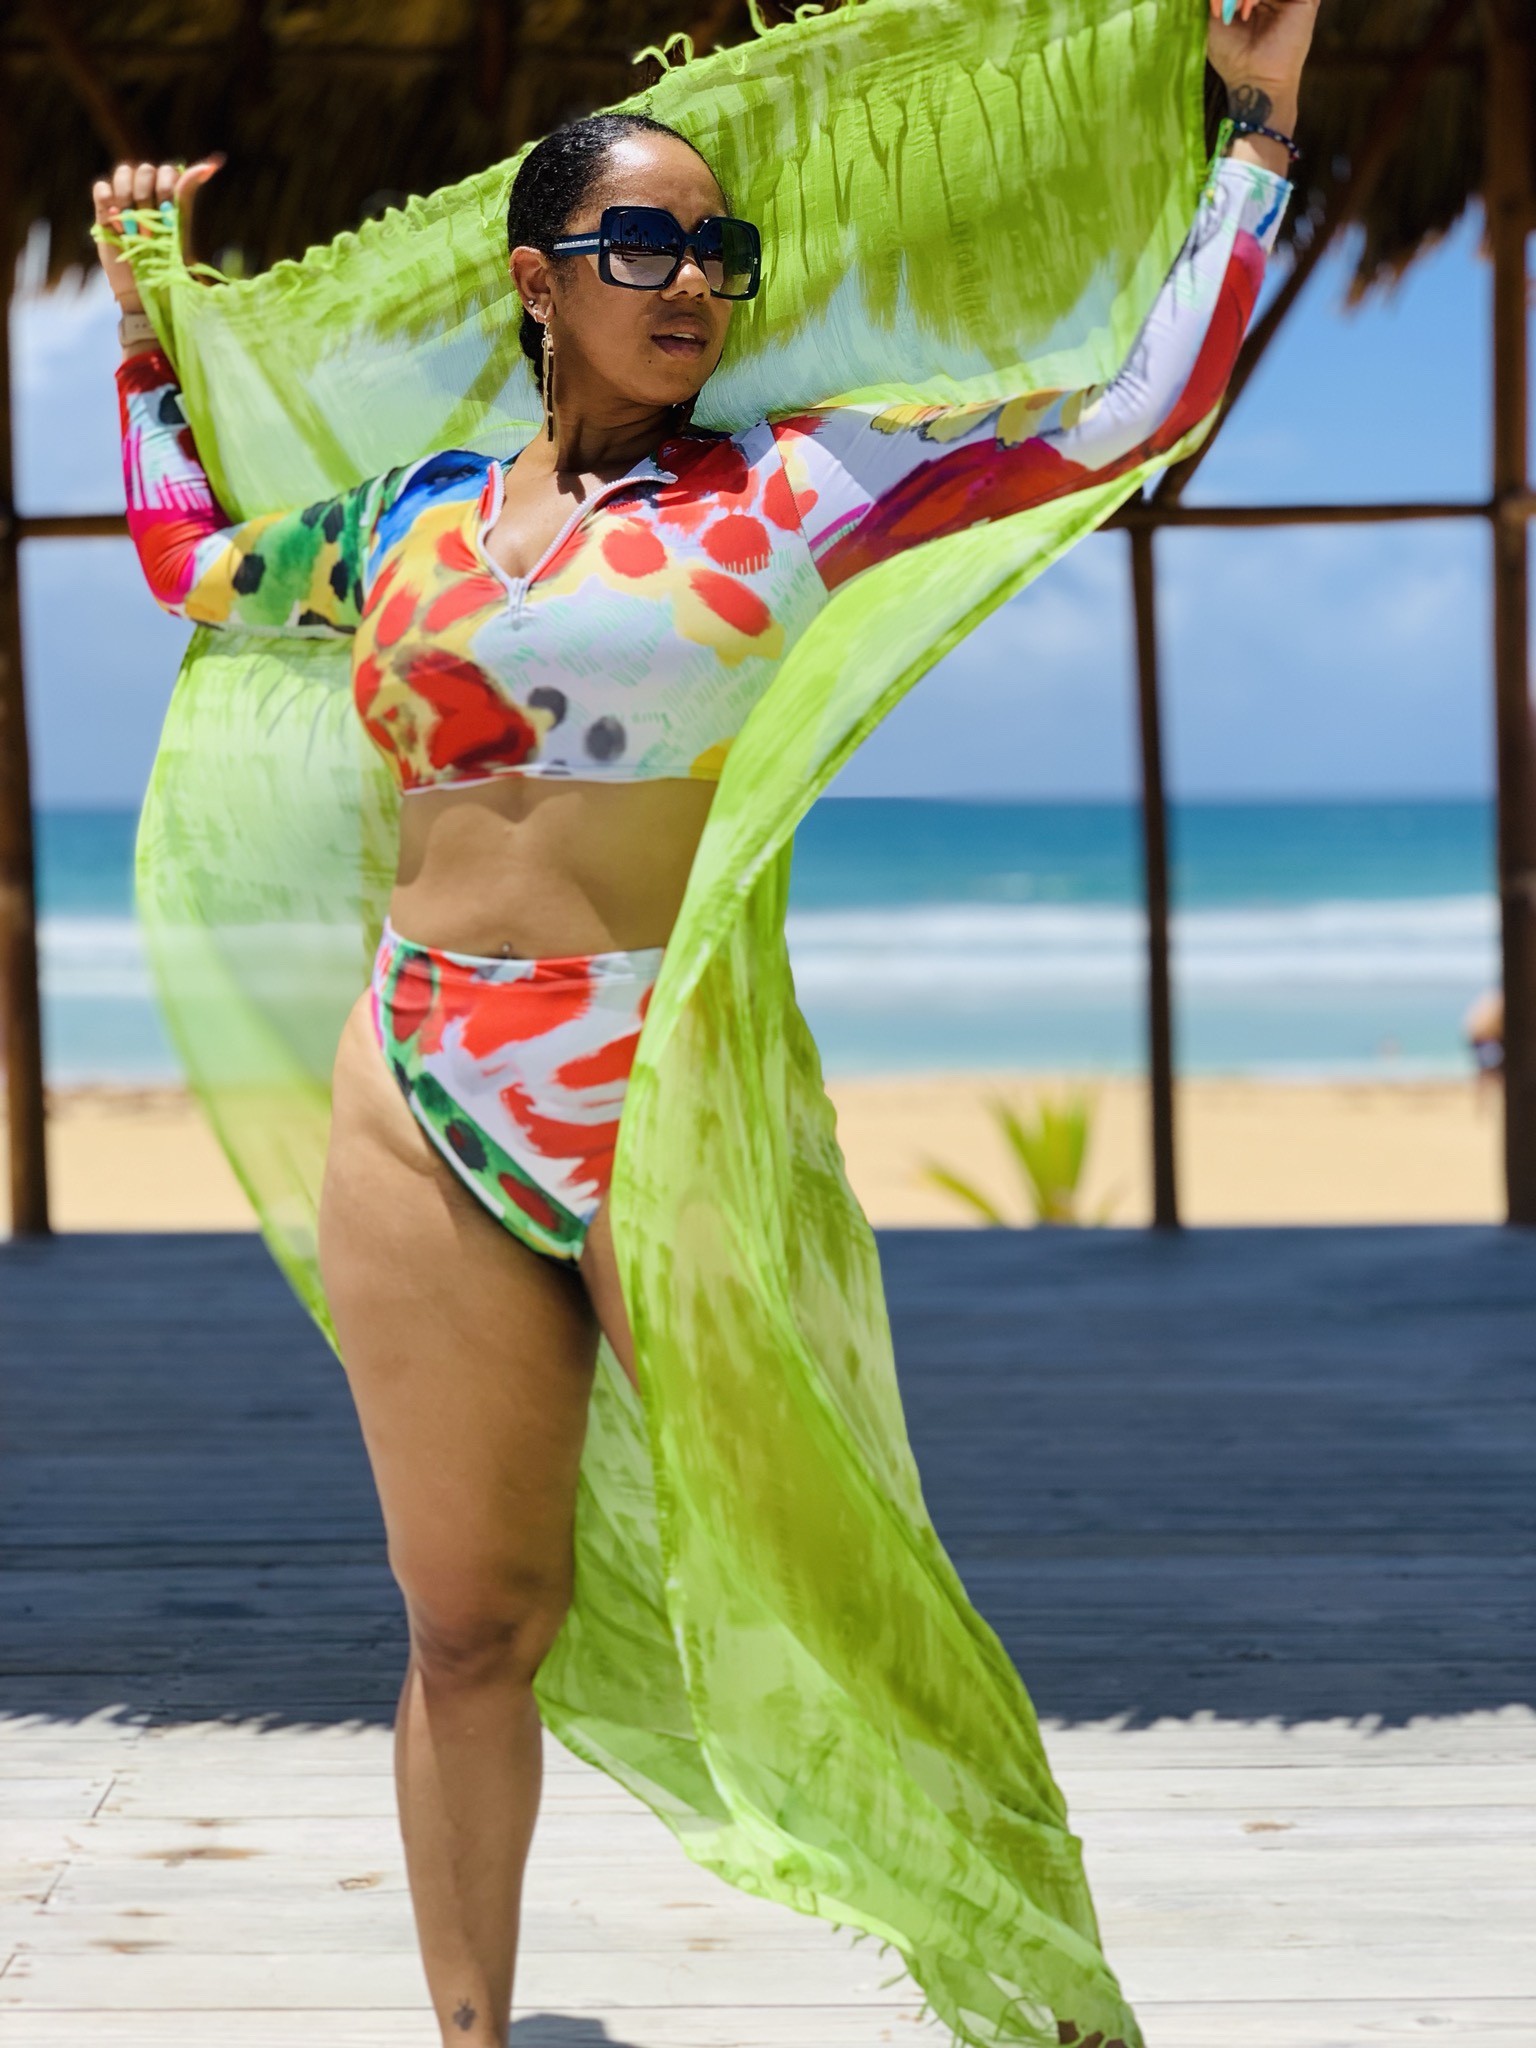
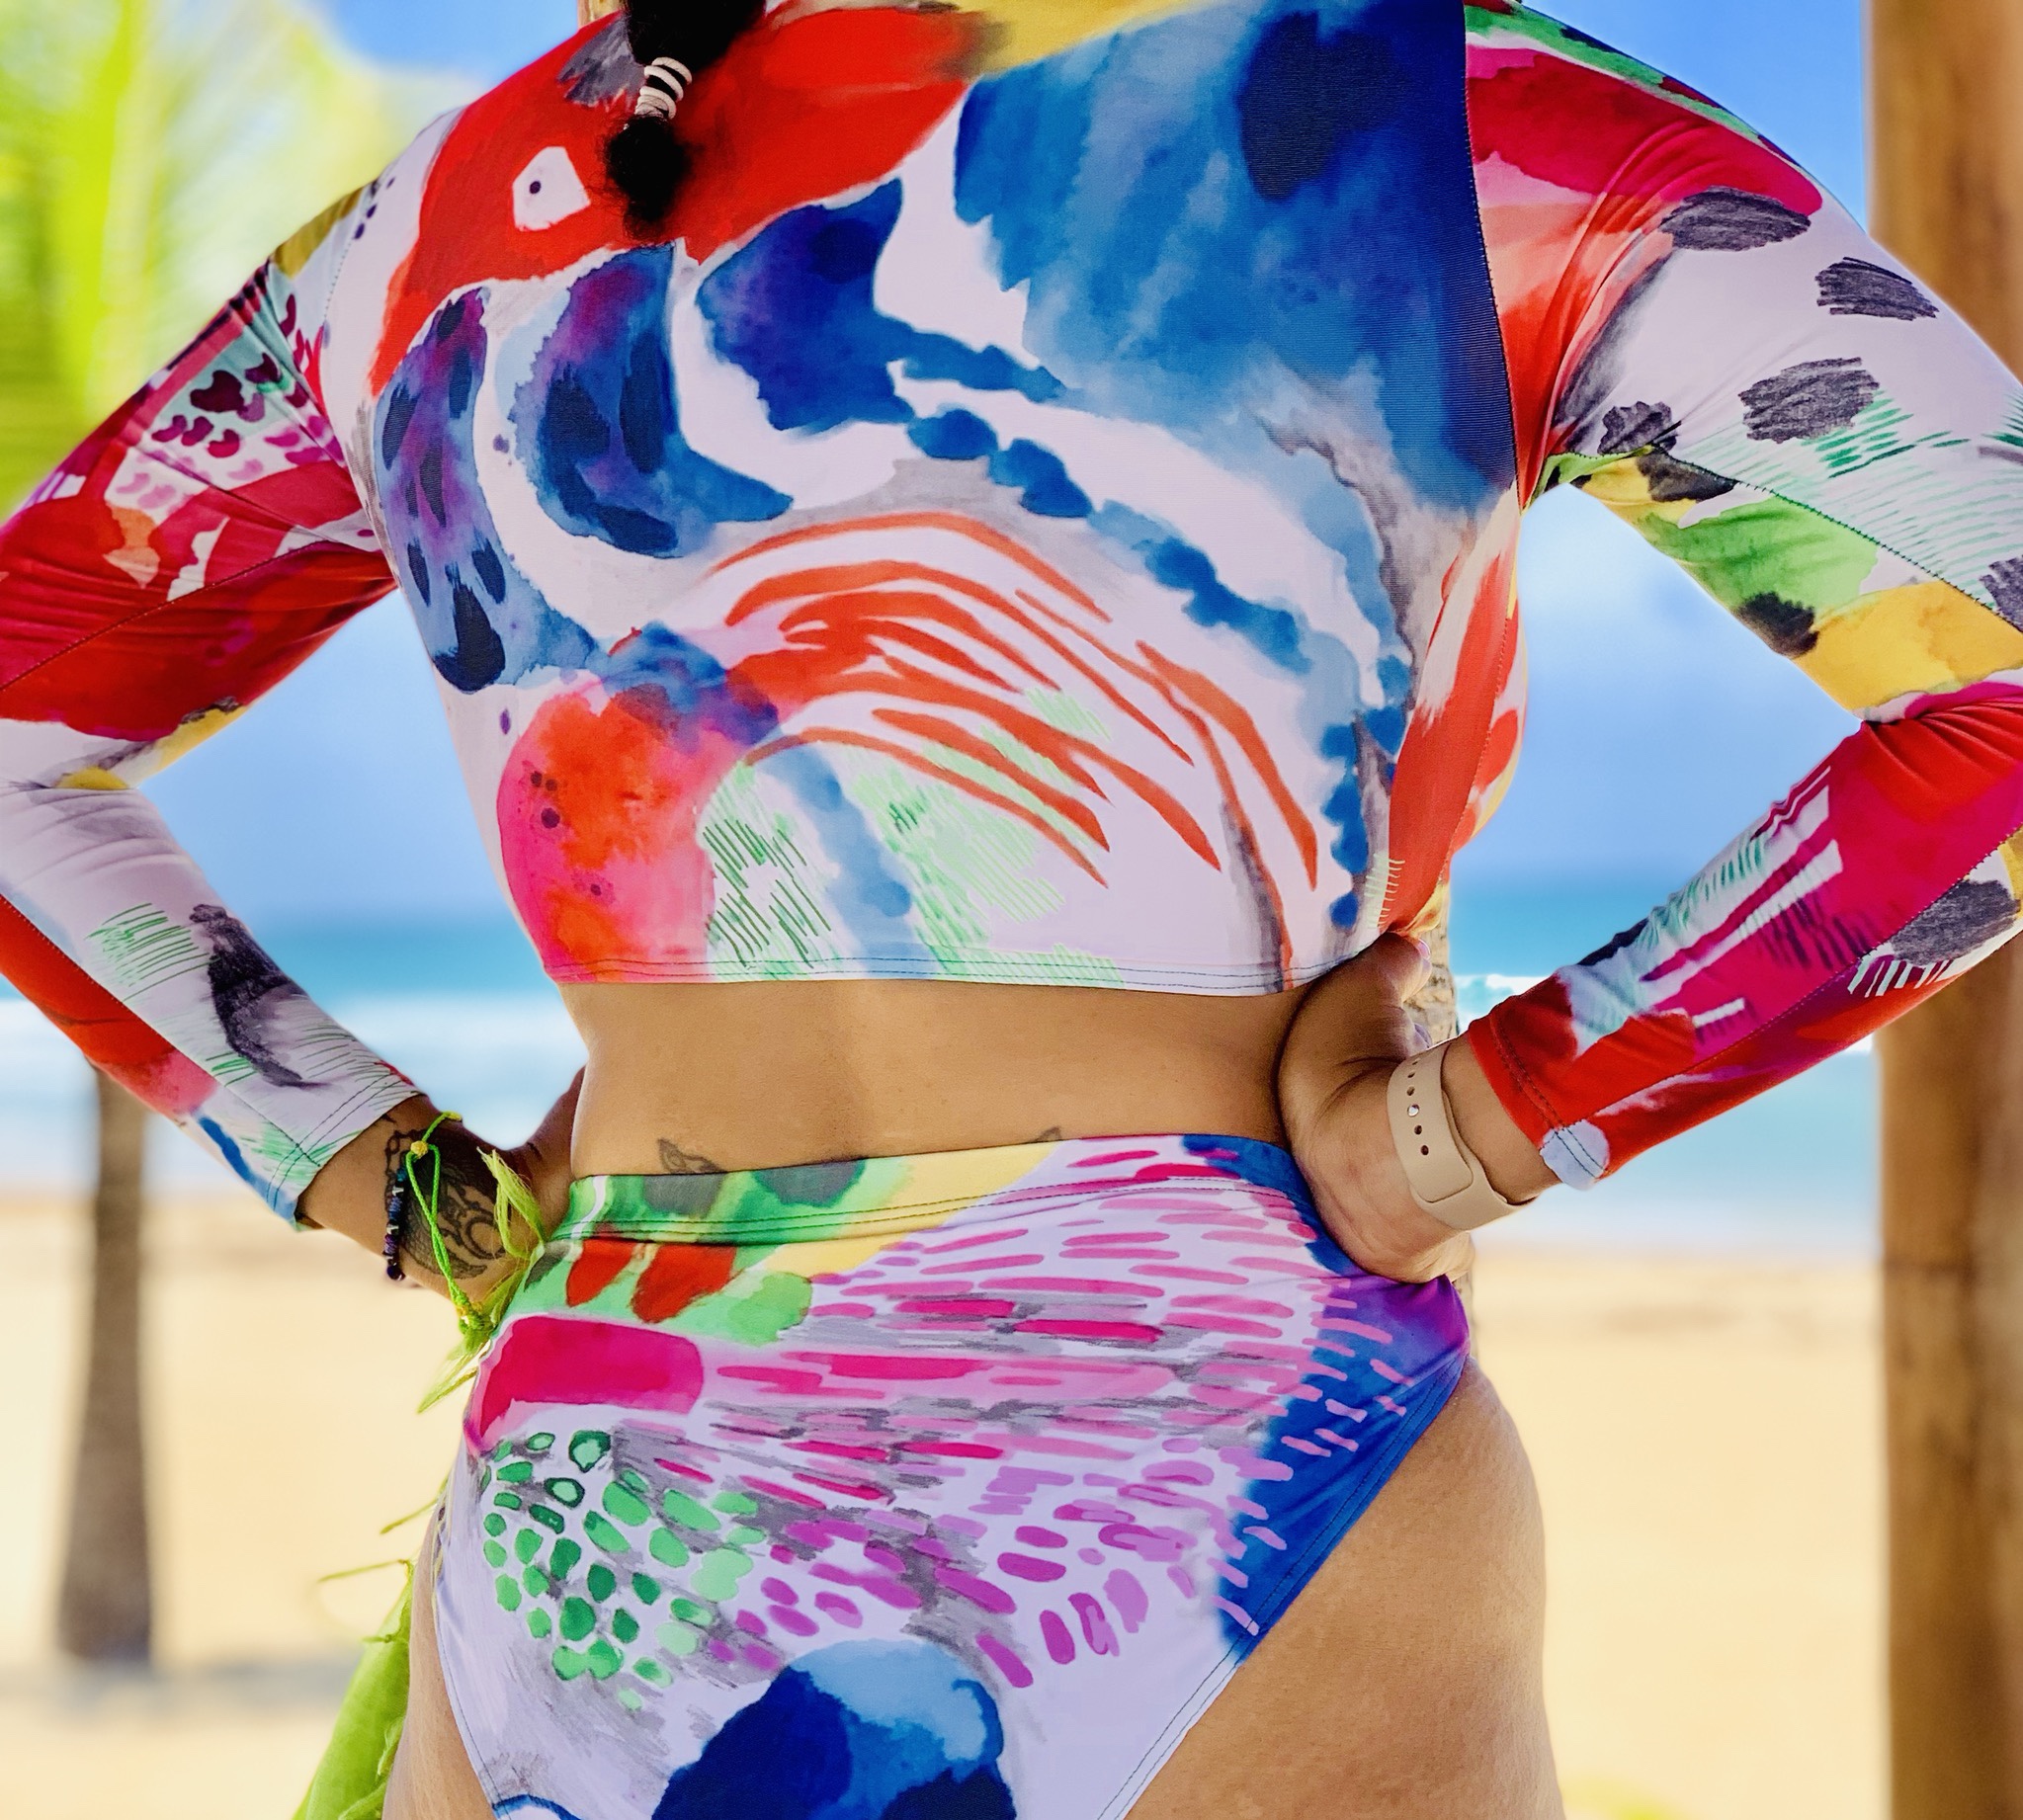
Summer vacations are here and always my favorite time of the year. This year I traveled backed to Punta Cana with my family. For this special vacation my husband and I are celebrating 10 years and renewing our vows! In typical sewist fashion, I had to create most of my clothes for this trip. One of my most favorite handmade items is this two piece swimsuit using my friend Katie Kortman’s Spoonflower fabric. Does this not scream CORNY RAINBOW?


let’s tAlk swimweAr!
First I have to share that sewing swimwear is not all bad. I will say if you have a serger that is half the battle. Picking your elastic is also very important. Be sure to purchase swimwear elastic. I purchased my elastic from amazon. Another tip for sewing swimwear is to use twin needles for stretch fabrics. The twin needle makes finishing the hems very professional and clean. While not all swimsuits need this finishing stitch, I think the double stitch is perfect for my two piece. I used a two piece swimsuit I purchased last summer for my pattern and added two inches to all edges. My old swimsuit did not have a zipper and the fabric is not as thick as this Sports Lycra so this make was perfect for a zipper. I cut straight down the middle of the front pattern piece and installed the zipper. The front top piece and the entire bottom piece are lined with mesh fabric. For the waistband I used 1 inch elastic. I attached the elastic after finishing my edges with my serger. I attached elastic at leg openings, waist of bottoms, and the edge of the top. An easy way to attach the elastic is with your serger (pull only the elastic while attaching not the fabric).
Where did I go wrong?
You don’t just sew your 2nd swimsuit ever without bumps in the road (well…I didn’t). My first mistake was thinking that since I’m sewing fabric I need to stretch, I also needed to use my stretch thread. Oh God…was I wrong. The stretch thread wasn’t necessary AT ALL! So after my thread broke while sewing for the 37th time I finally said to myself, why don’t you just use an all purpose thread. Well, I finally did and goodness I could’ve saved so much time if I just started with basic thread (talk about learning from your mistakes).
Overall I really enjoyed making this swimsuit and it fits me perfectly. This Spoonflower fabric made making this swimsuit that much more worth the hour plus of seam ripping lol. The time it may take to sew this look is about 1-2 hours. I plan on making more swimwear very soon and even considering a YouTube tutorial (I think I’ll take a poll on that lol). I hope you enjoyed this read.
Thanks for stopping by!
Peace & Love