
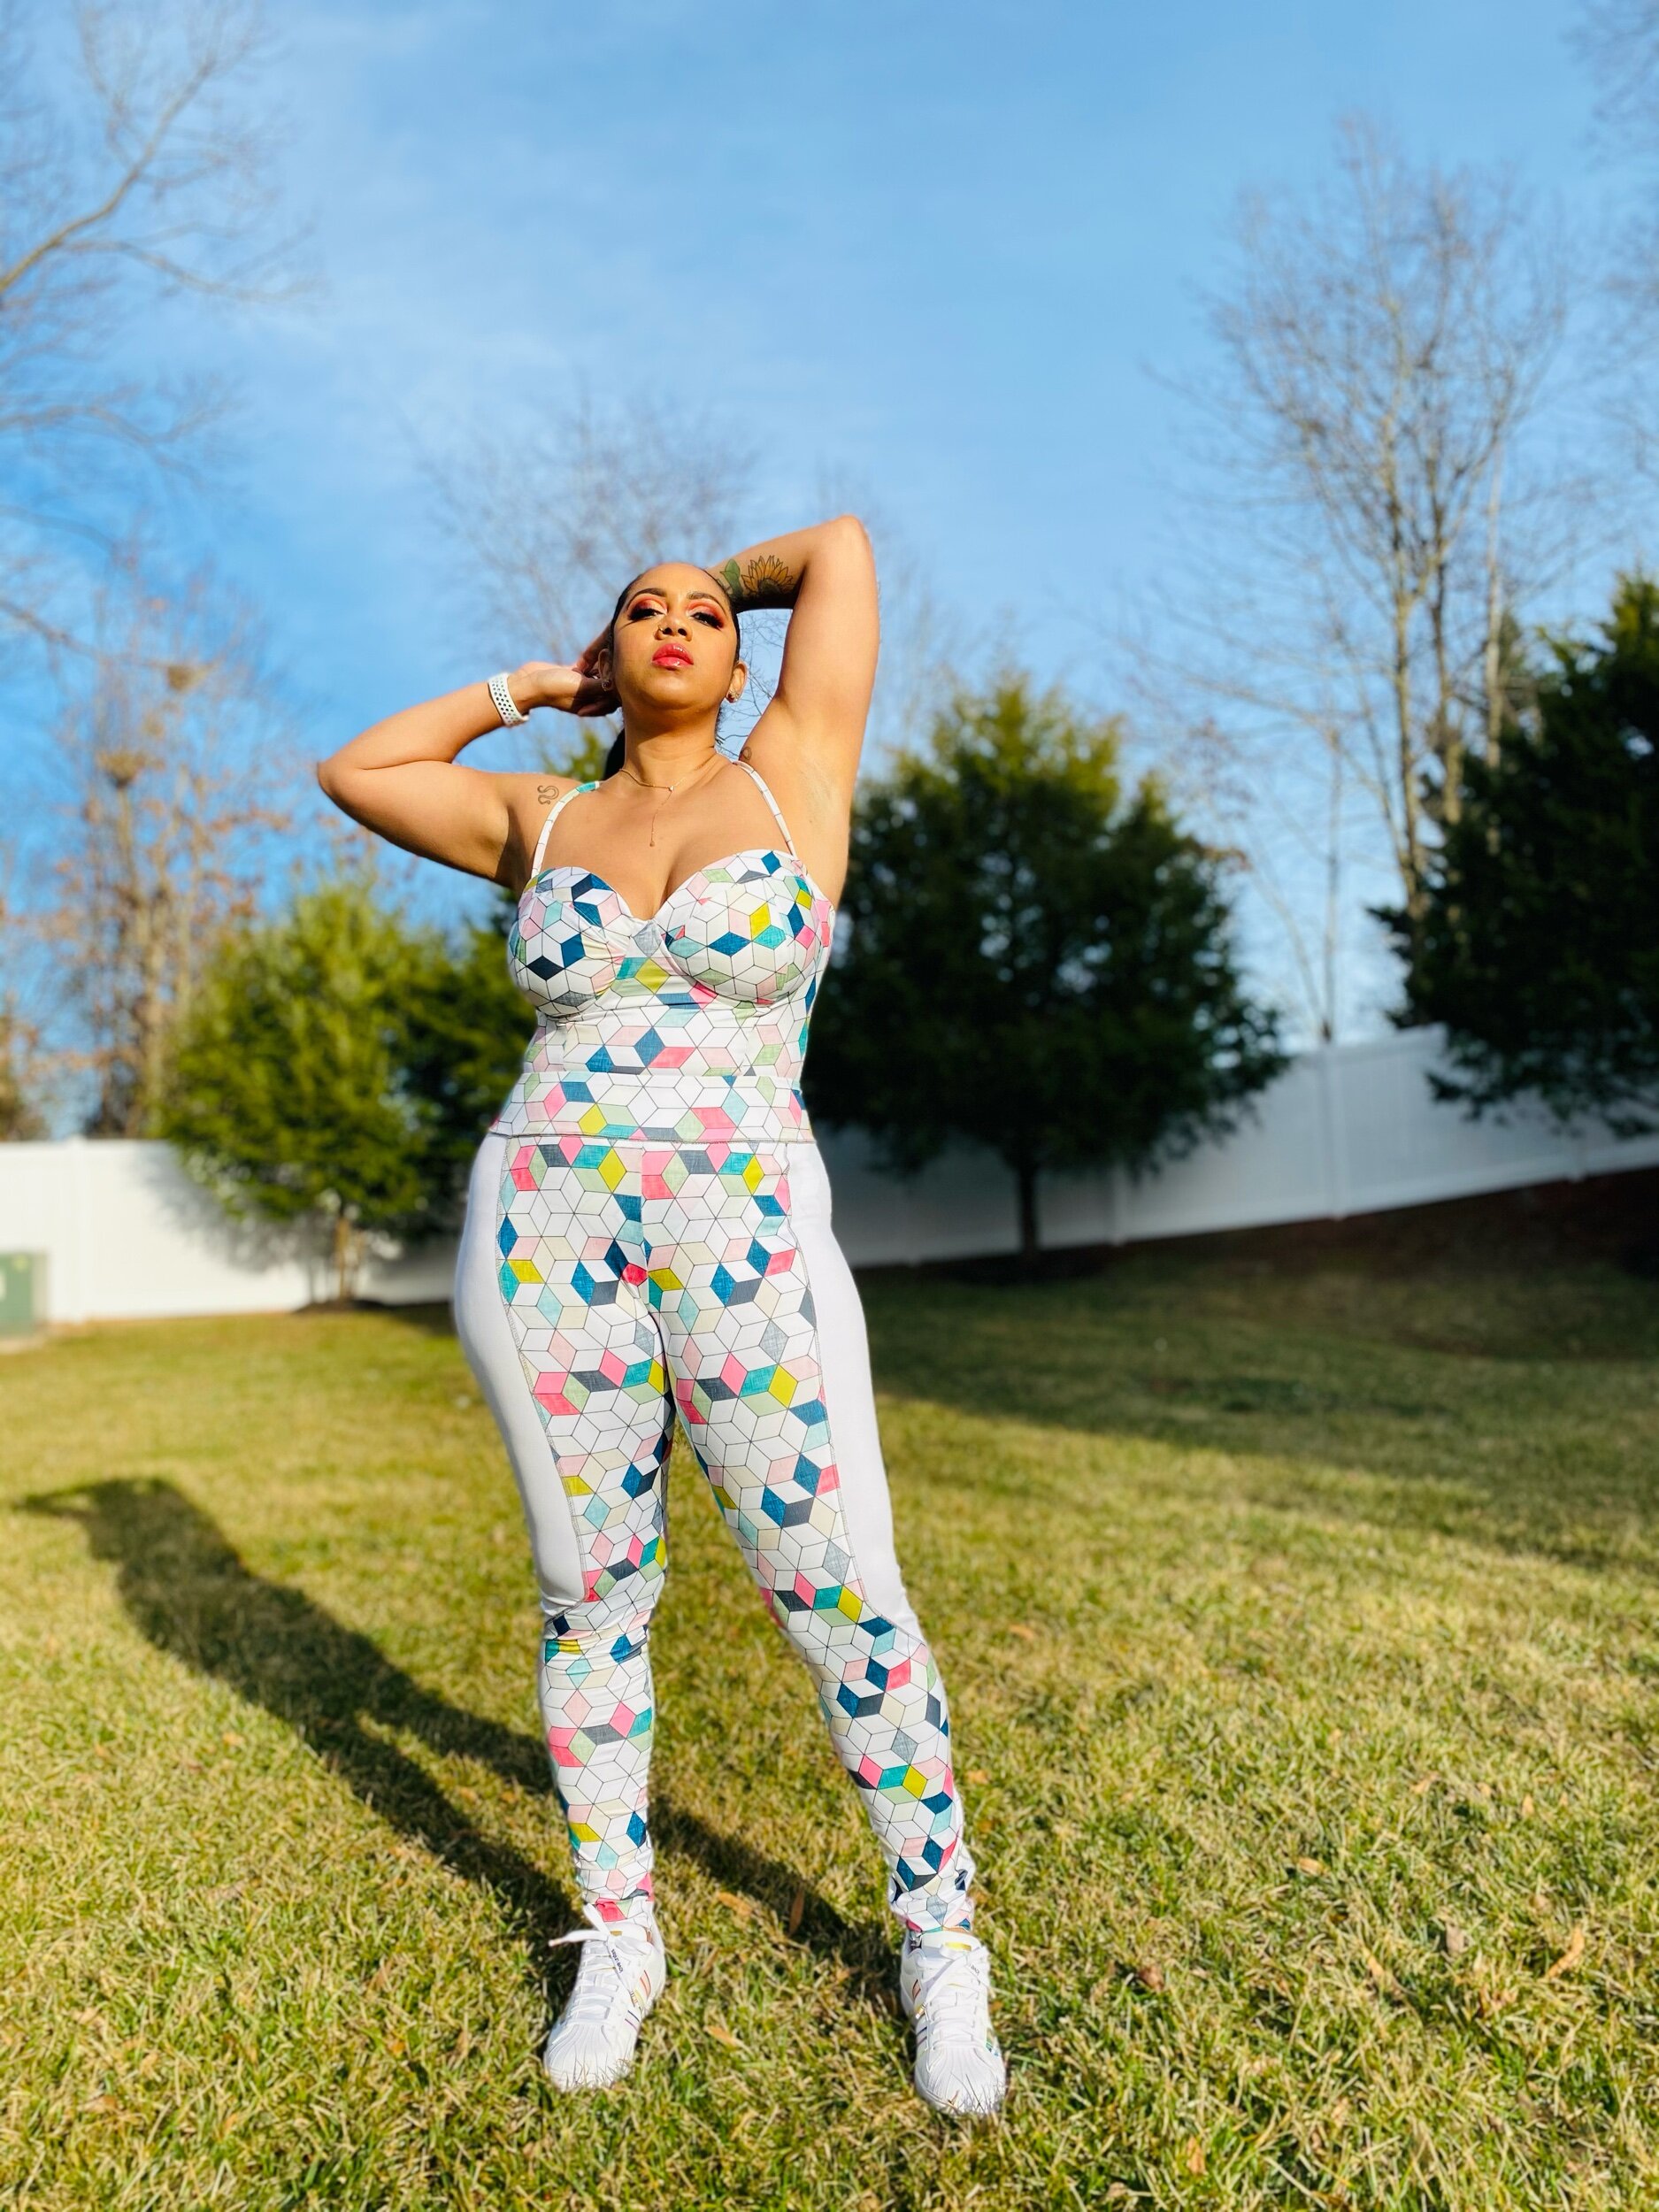
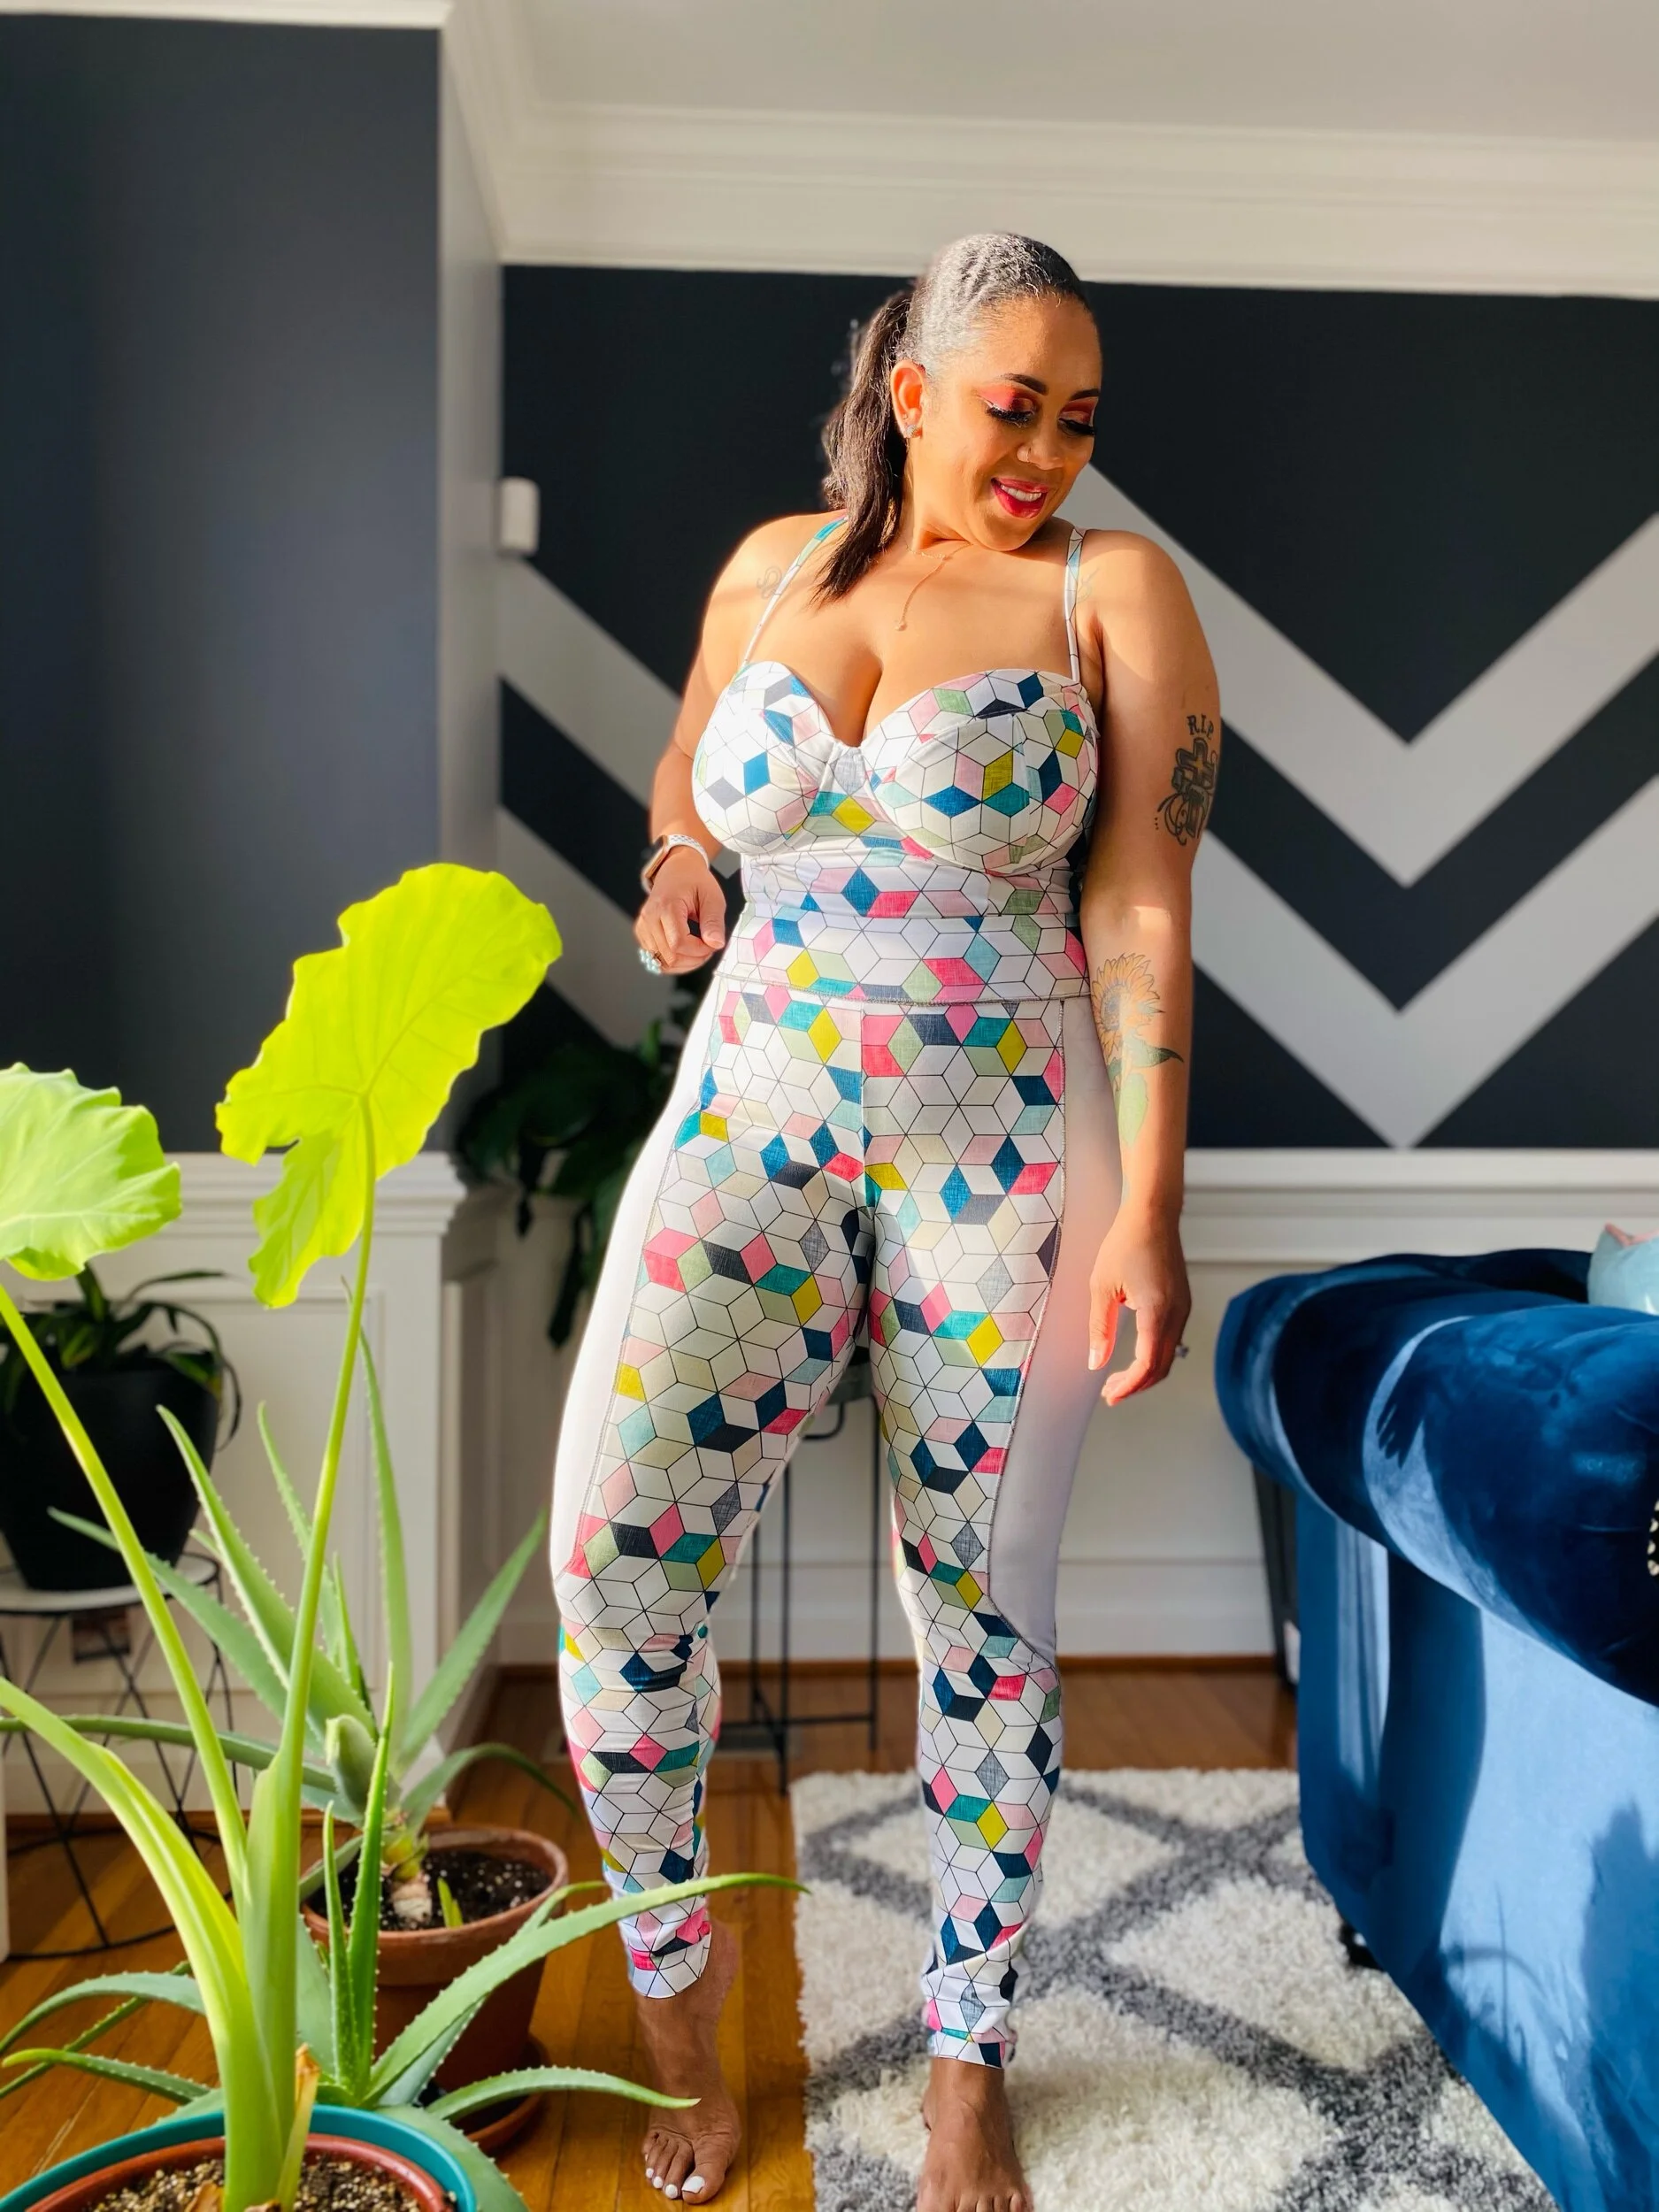
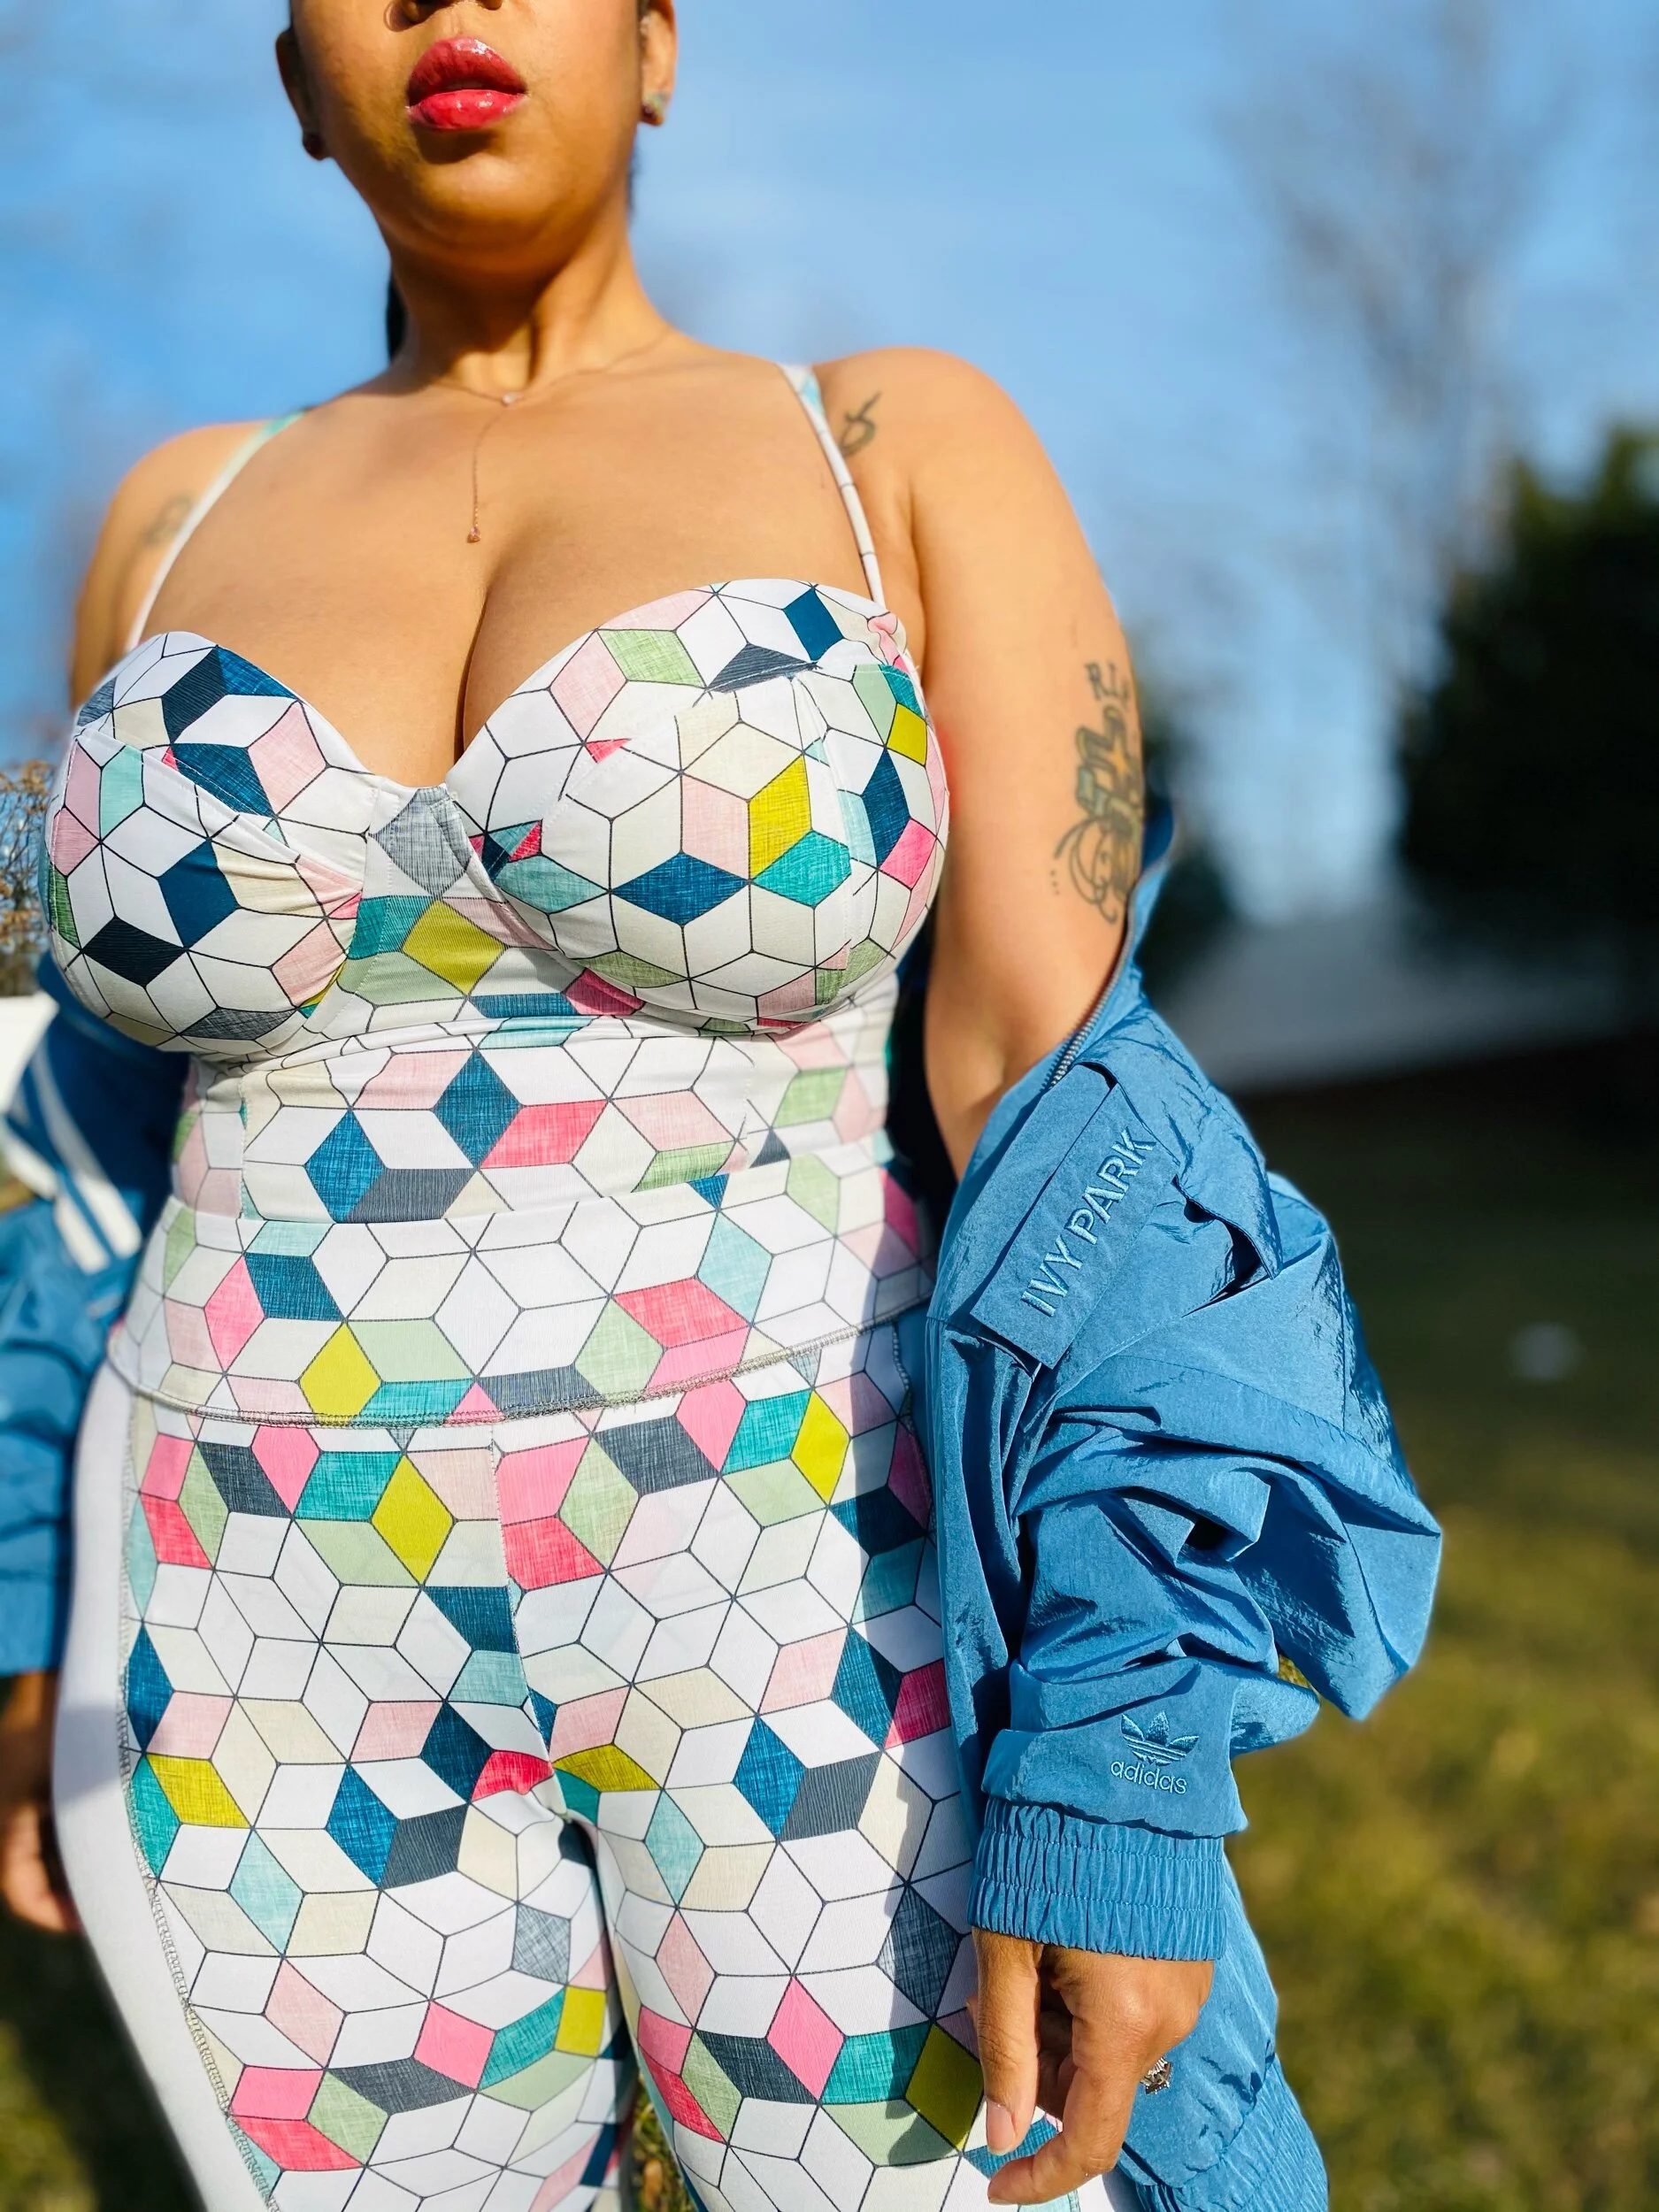
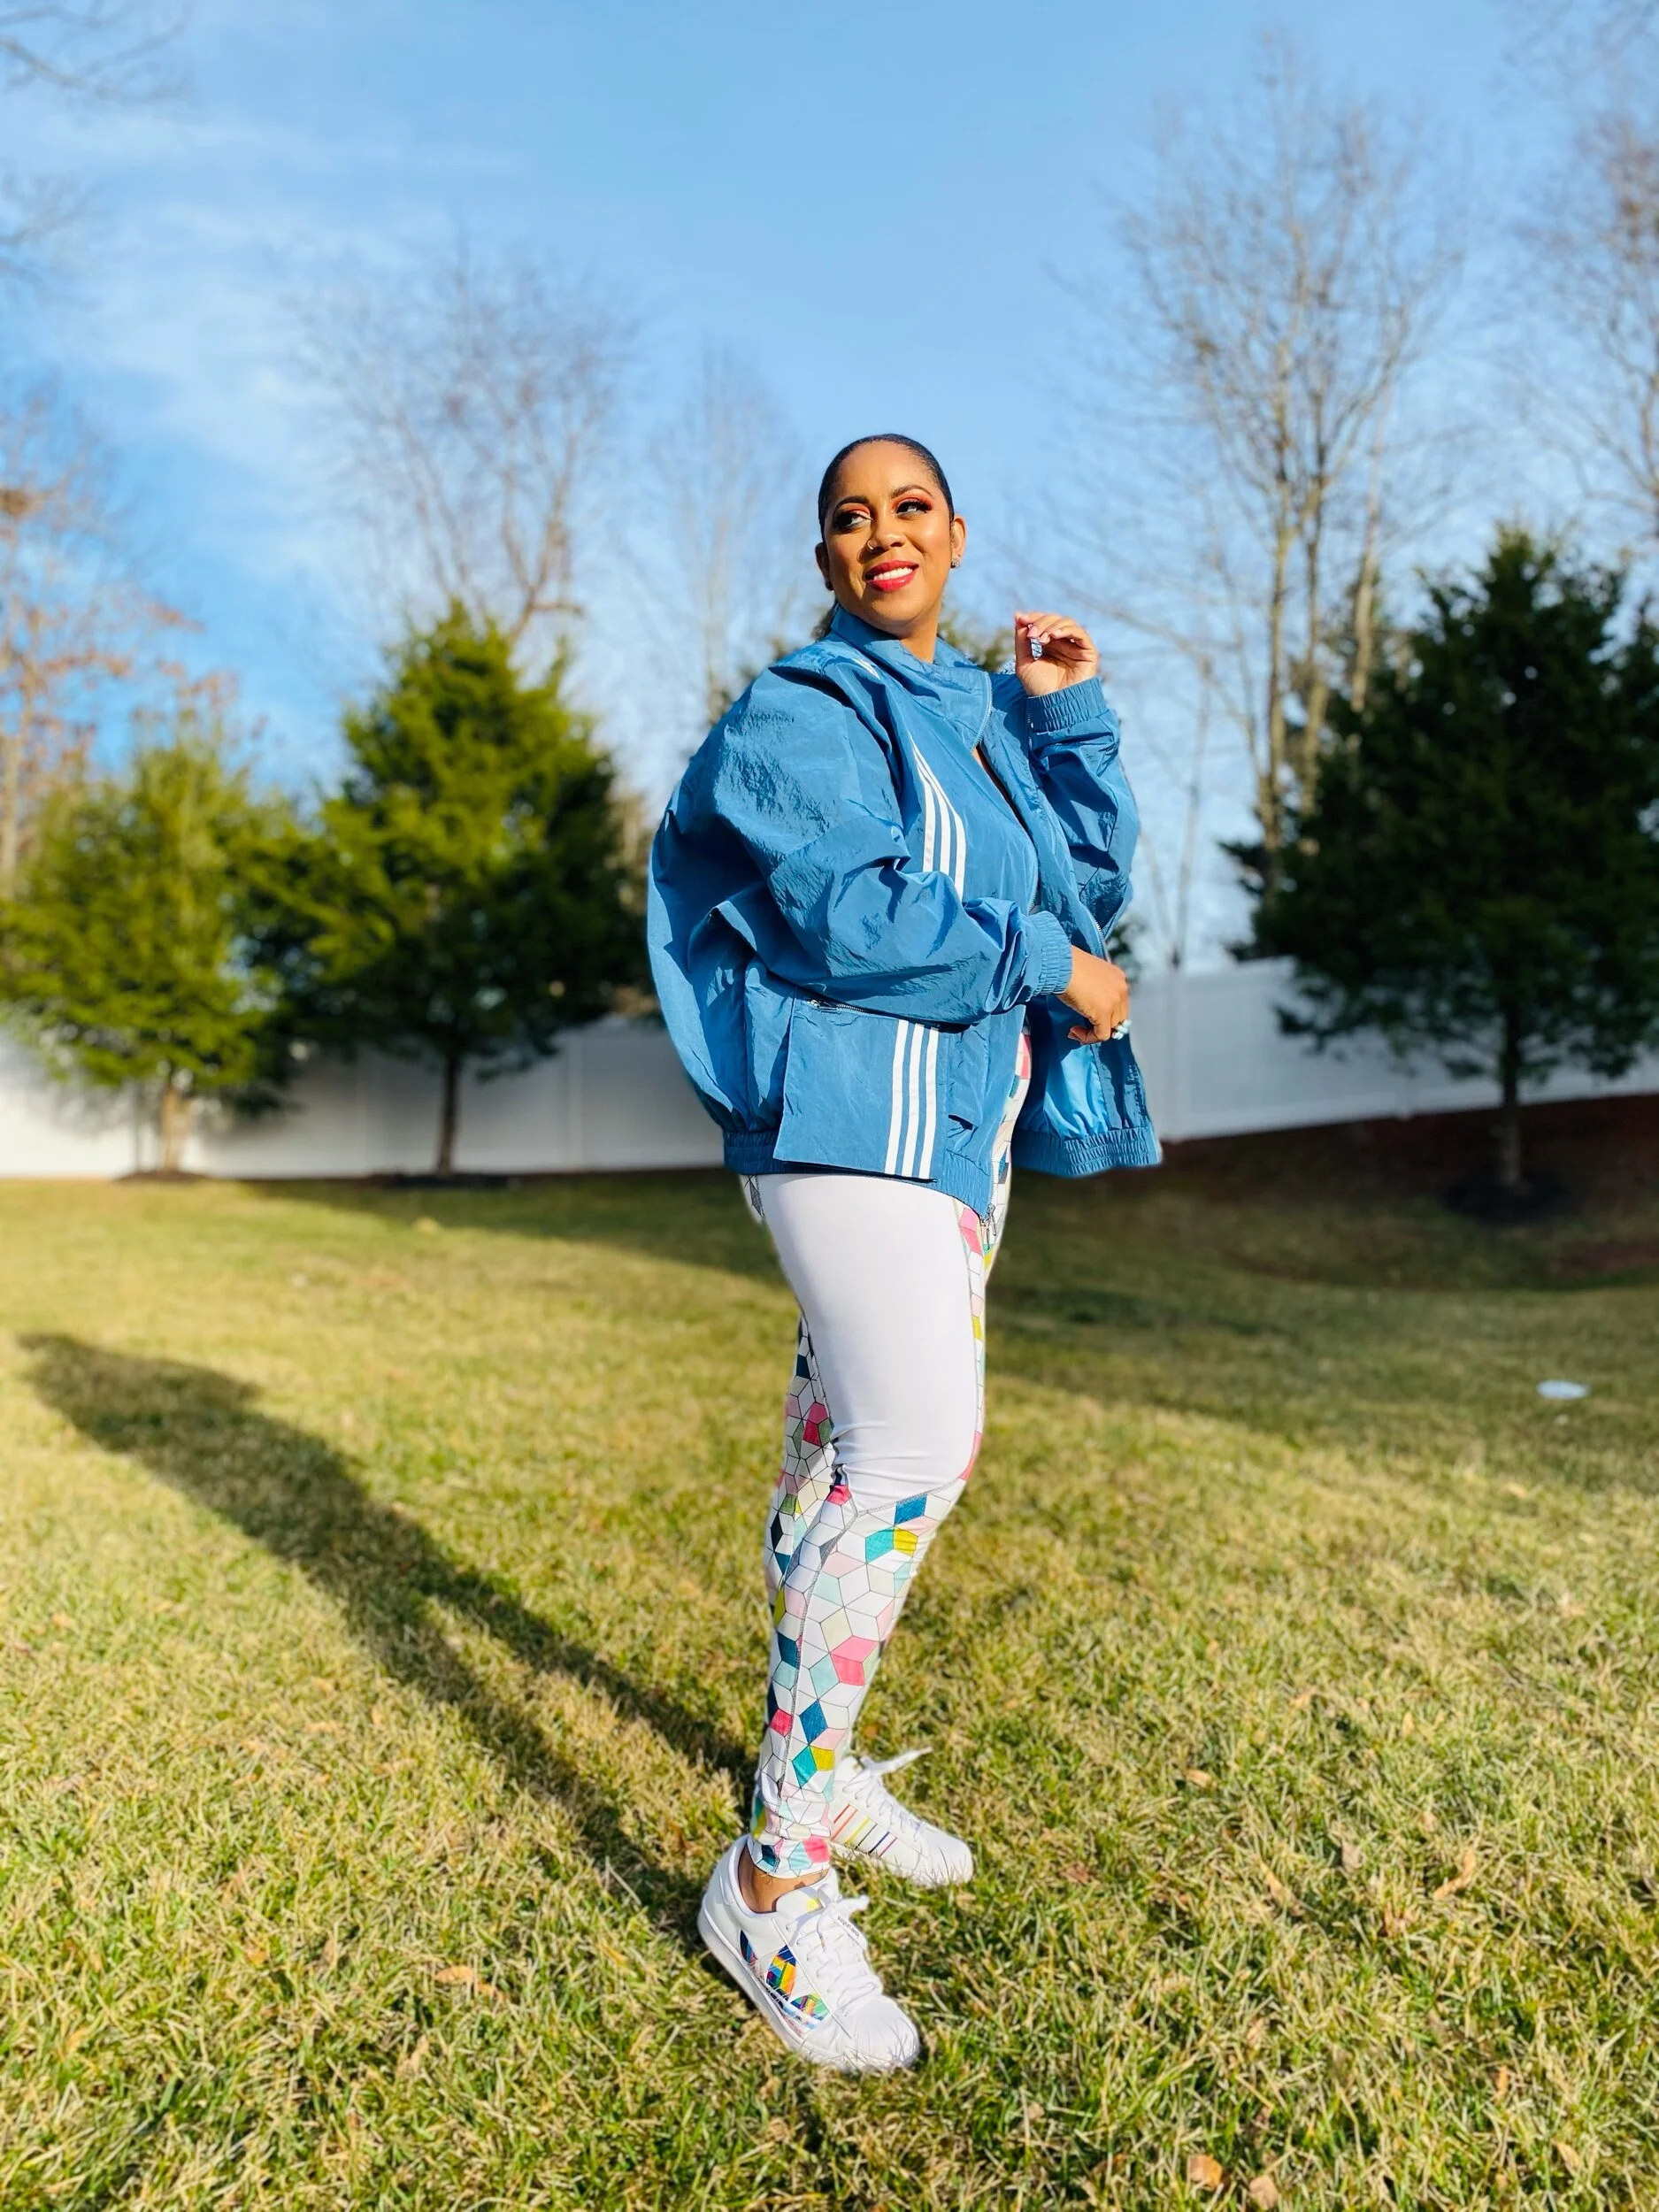
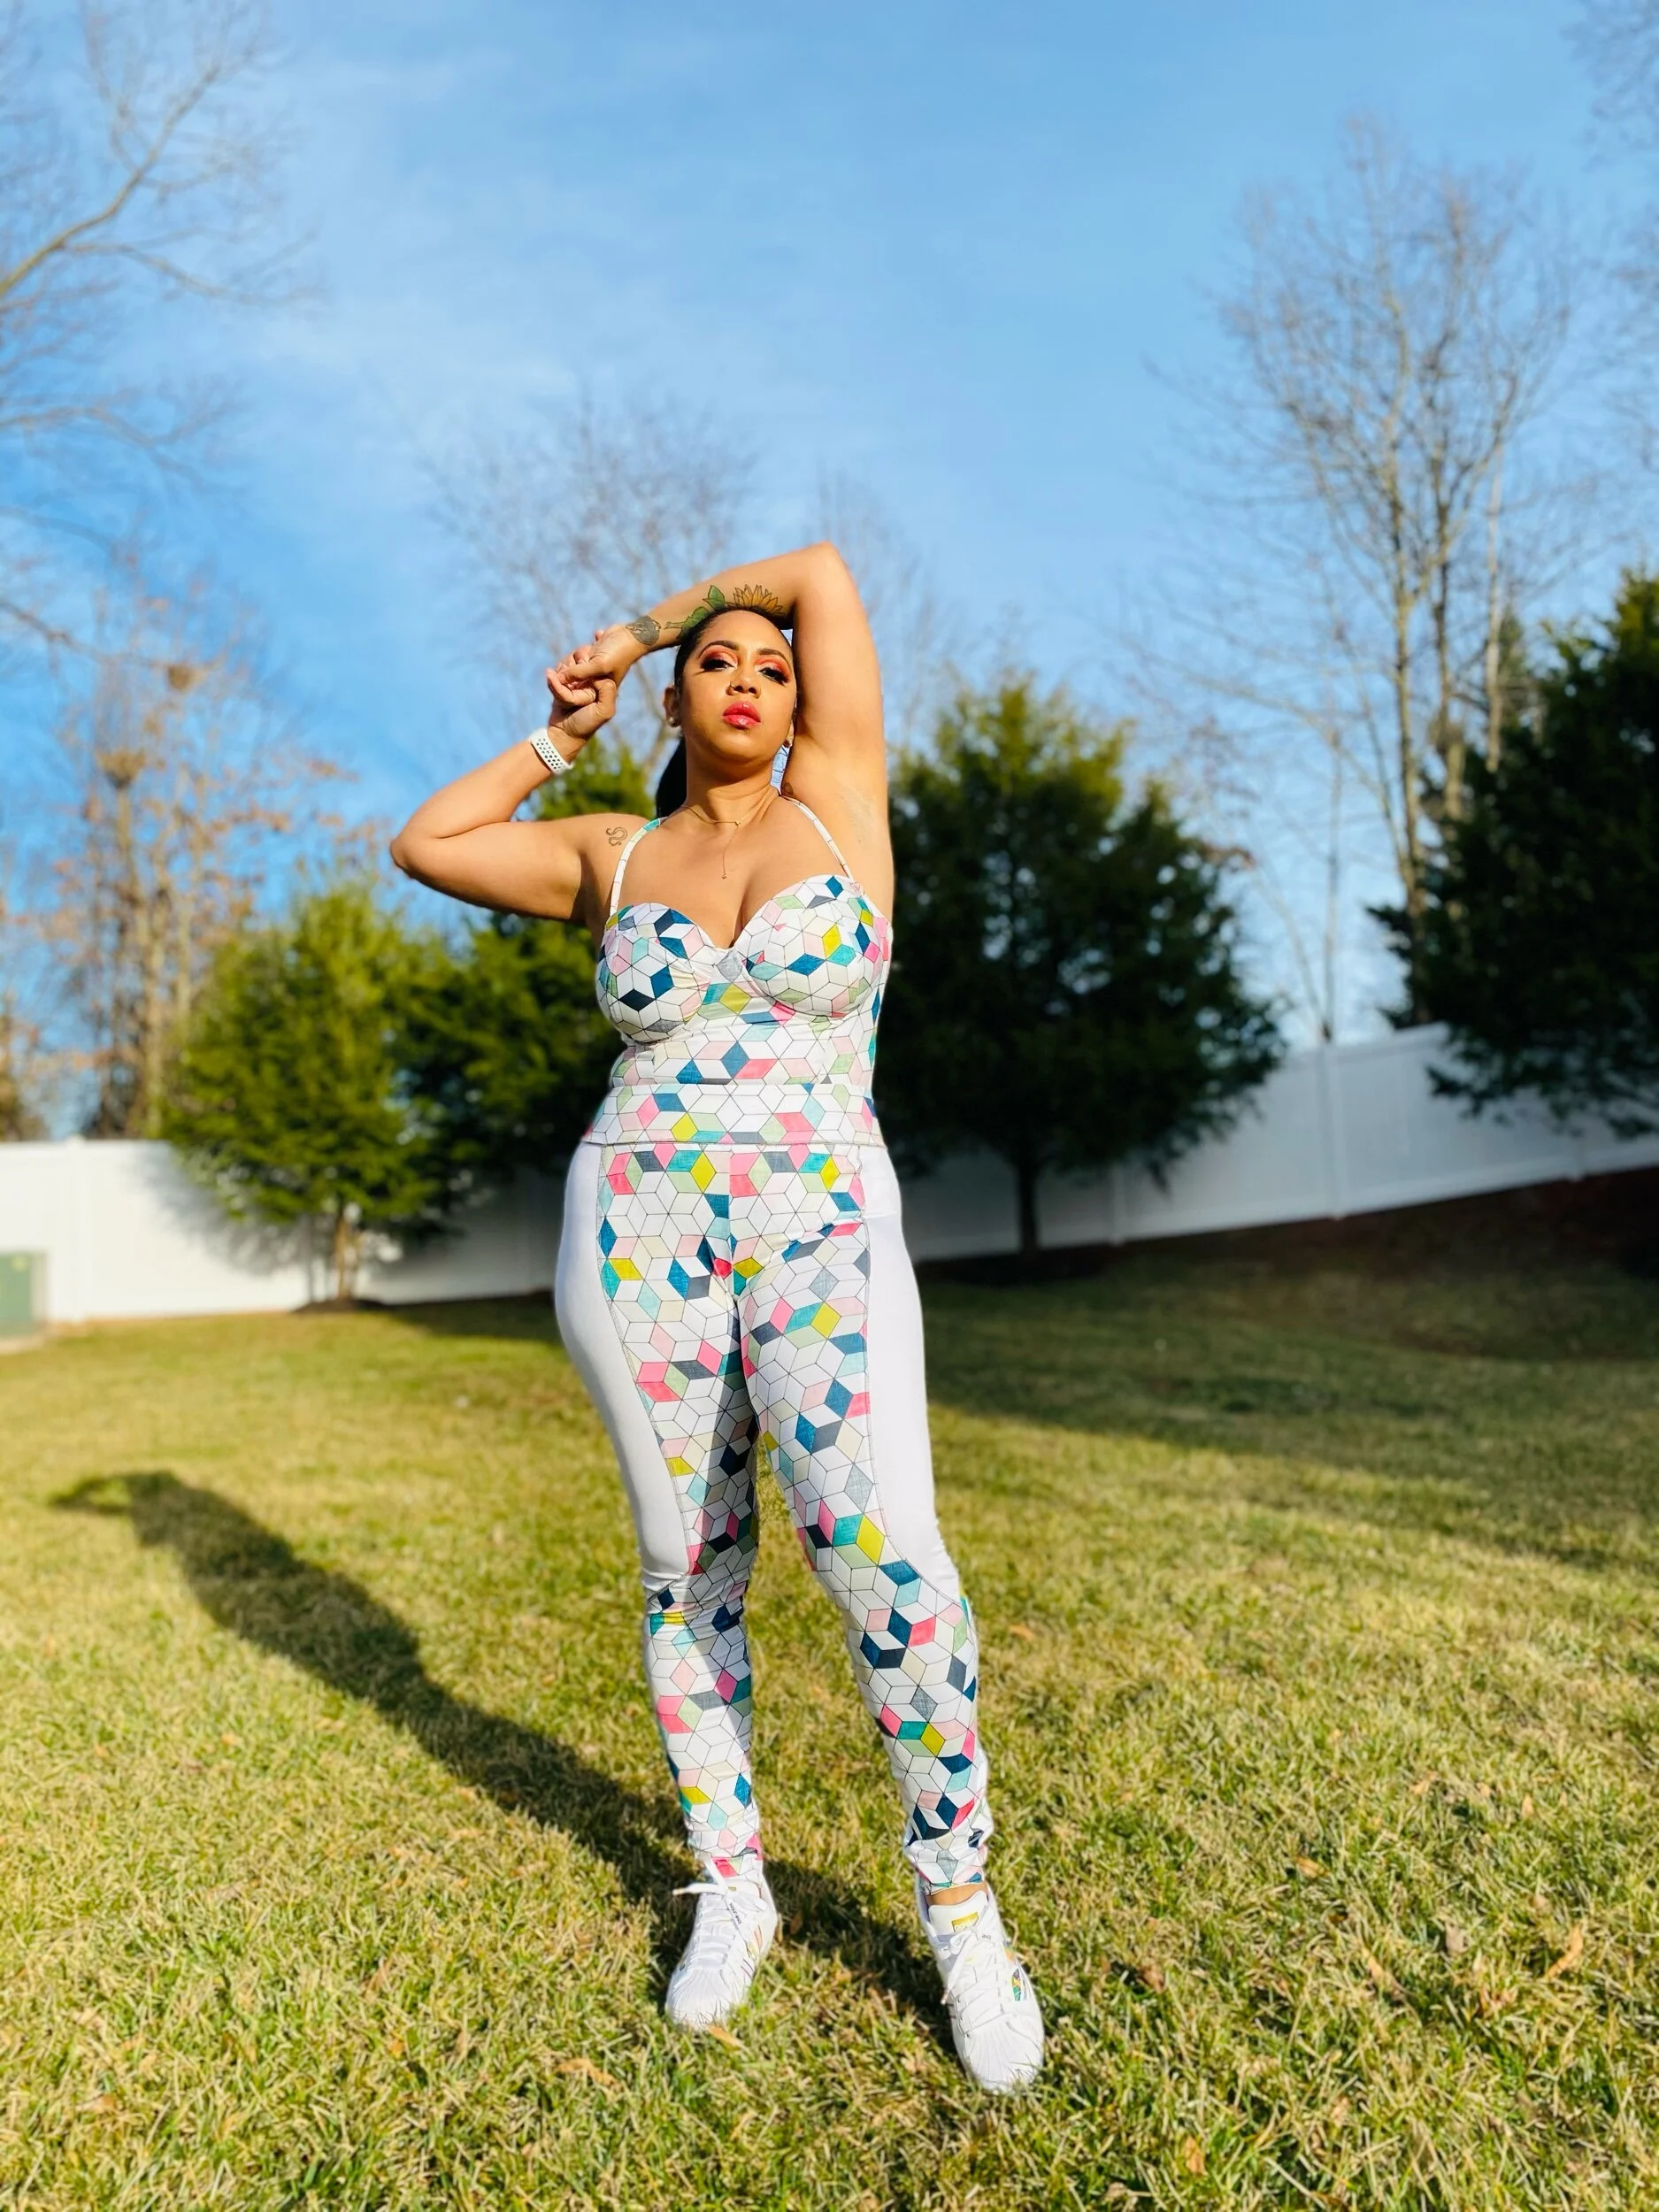
HEXY SET
What’s better than one? Two!
Hey y’all! I pulled out this Spoonflower Sports Lycra™️ to create not one but two of my favorites, swimwear and leggings. For the swimsuit I used the Closet Core Sophie swimsuit pattern and for the leggings I used a TNT Mccalls pattern (more deets on those here). I’m all for a matching set and I was inspired to make these two because I wanted to purchase a similar set from IVY PARK. Well them thangs sold out as quick as you can inhale. So I went to the drawing board and thought how can I achieve this look myself? And here you have…the HEXY SET!
Sophie Construction
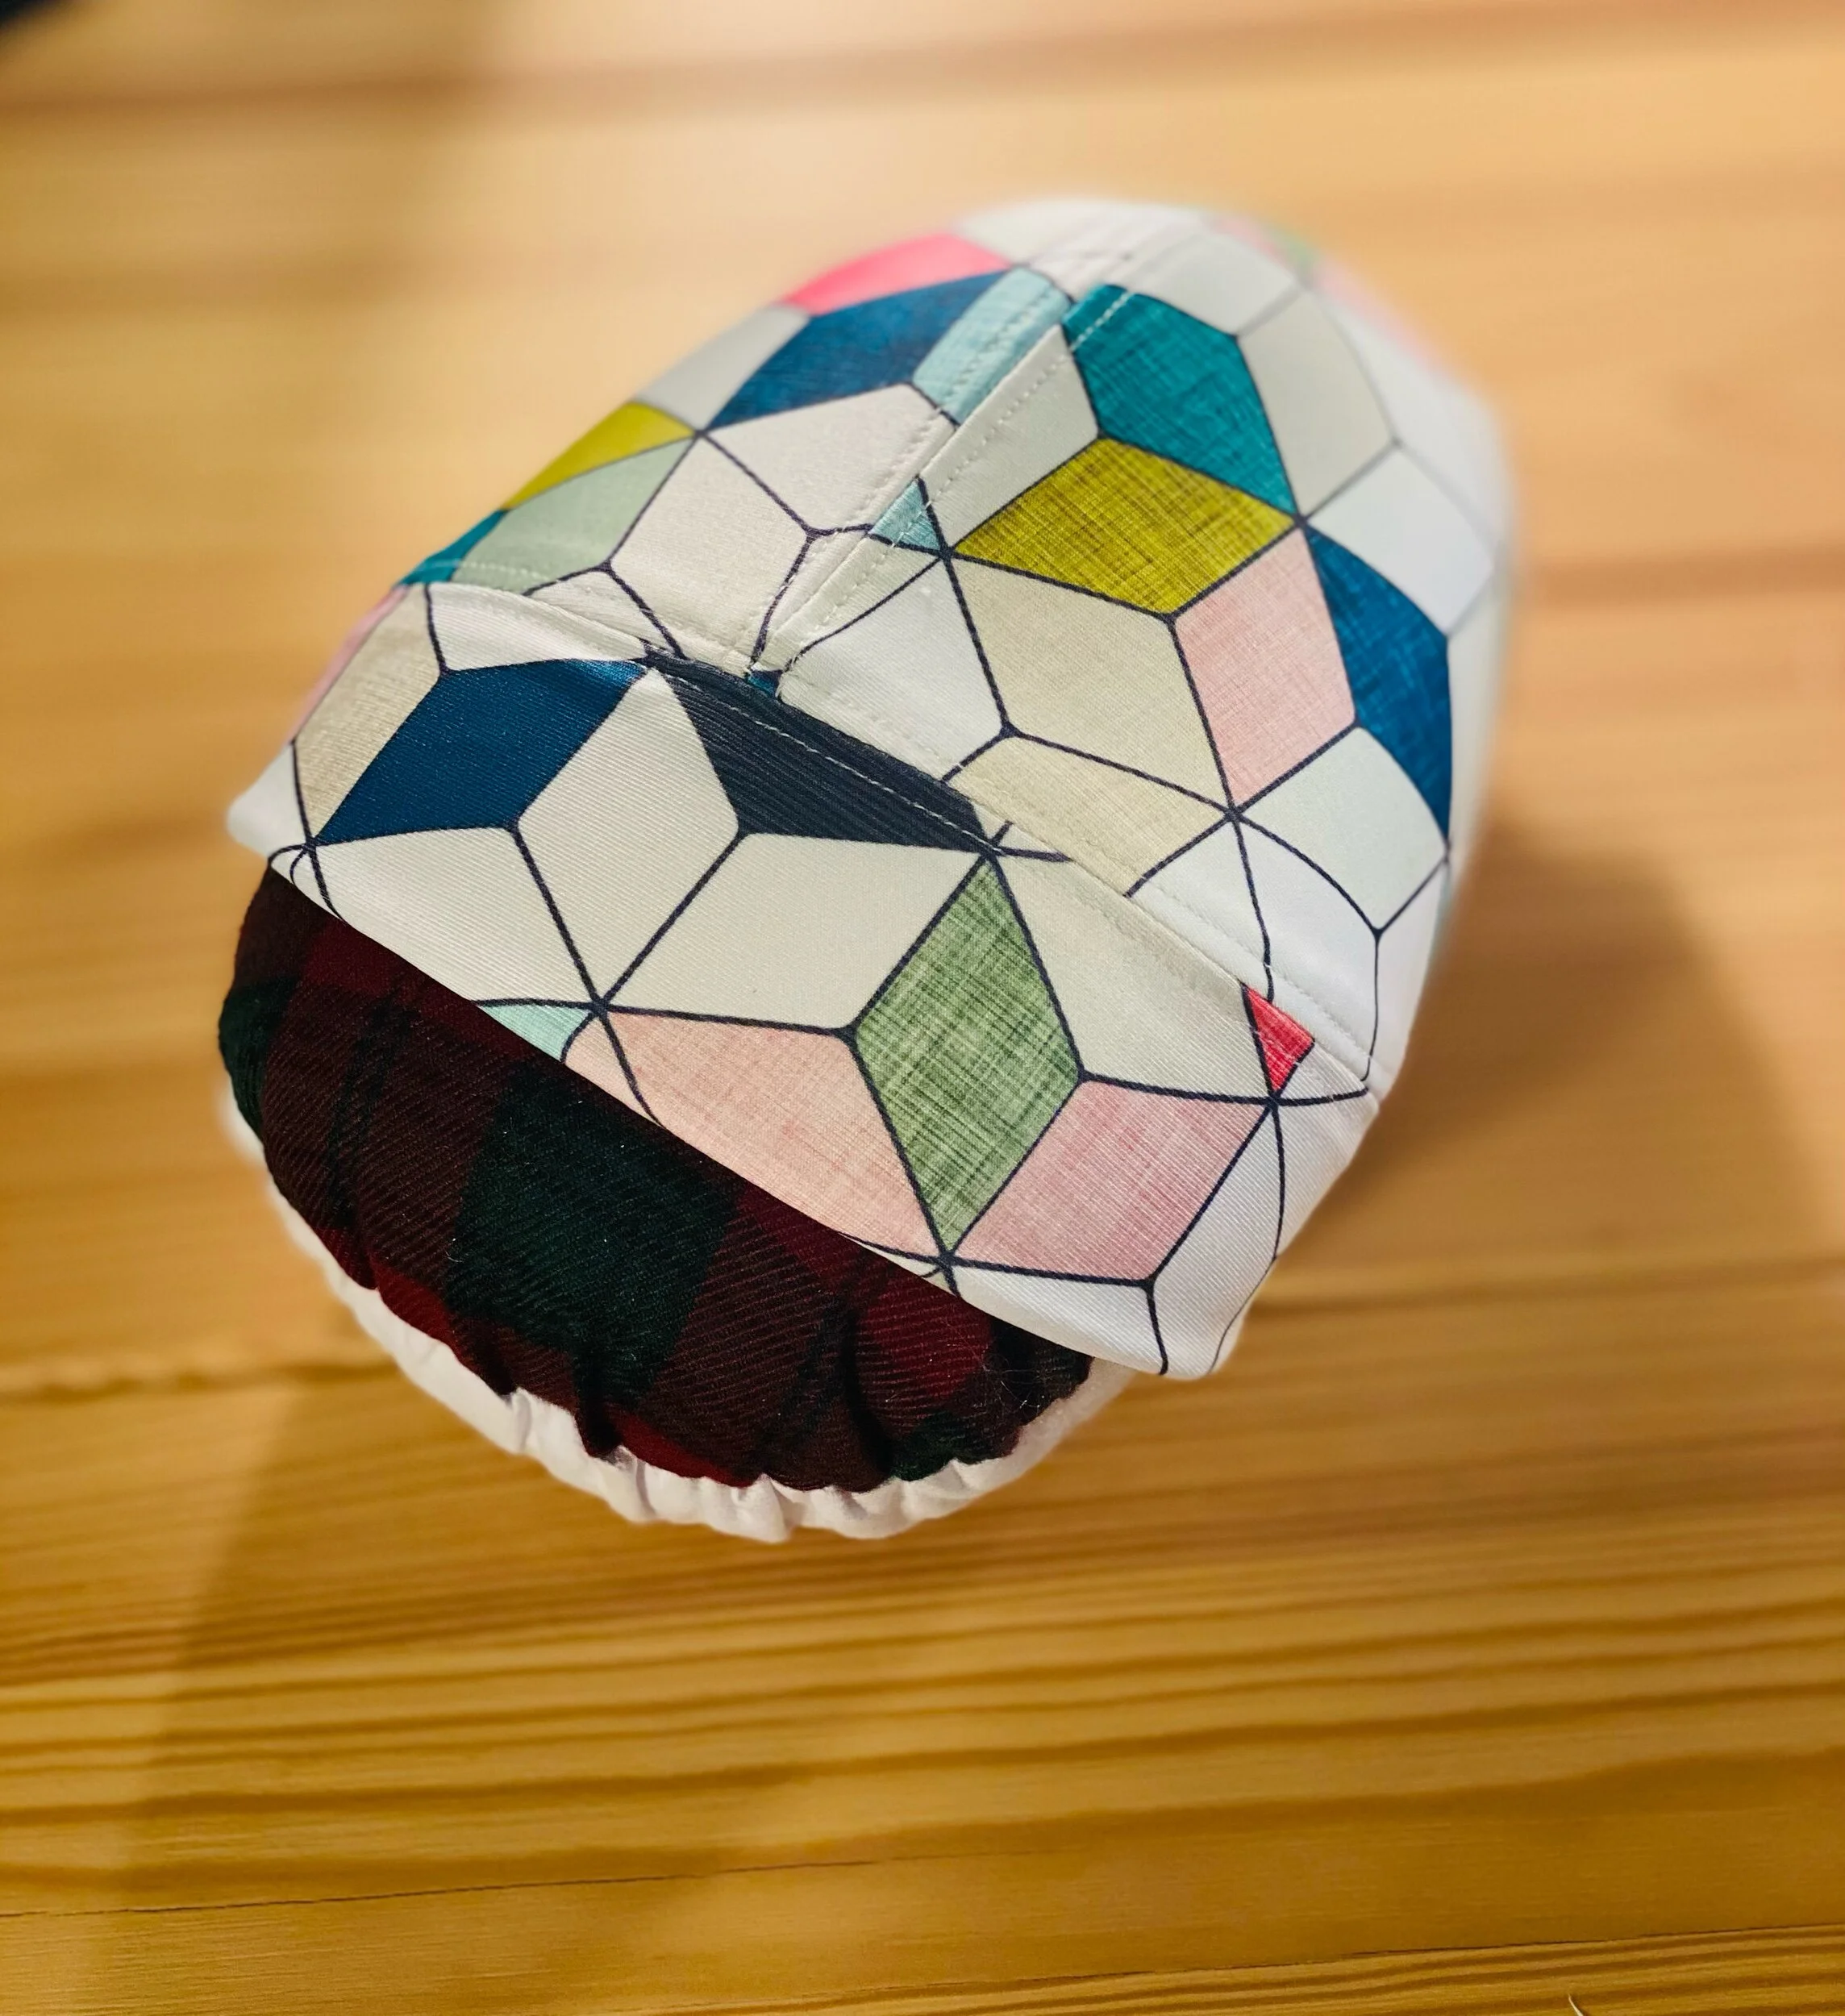
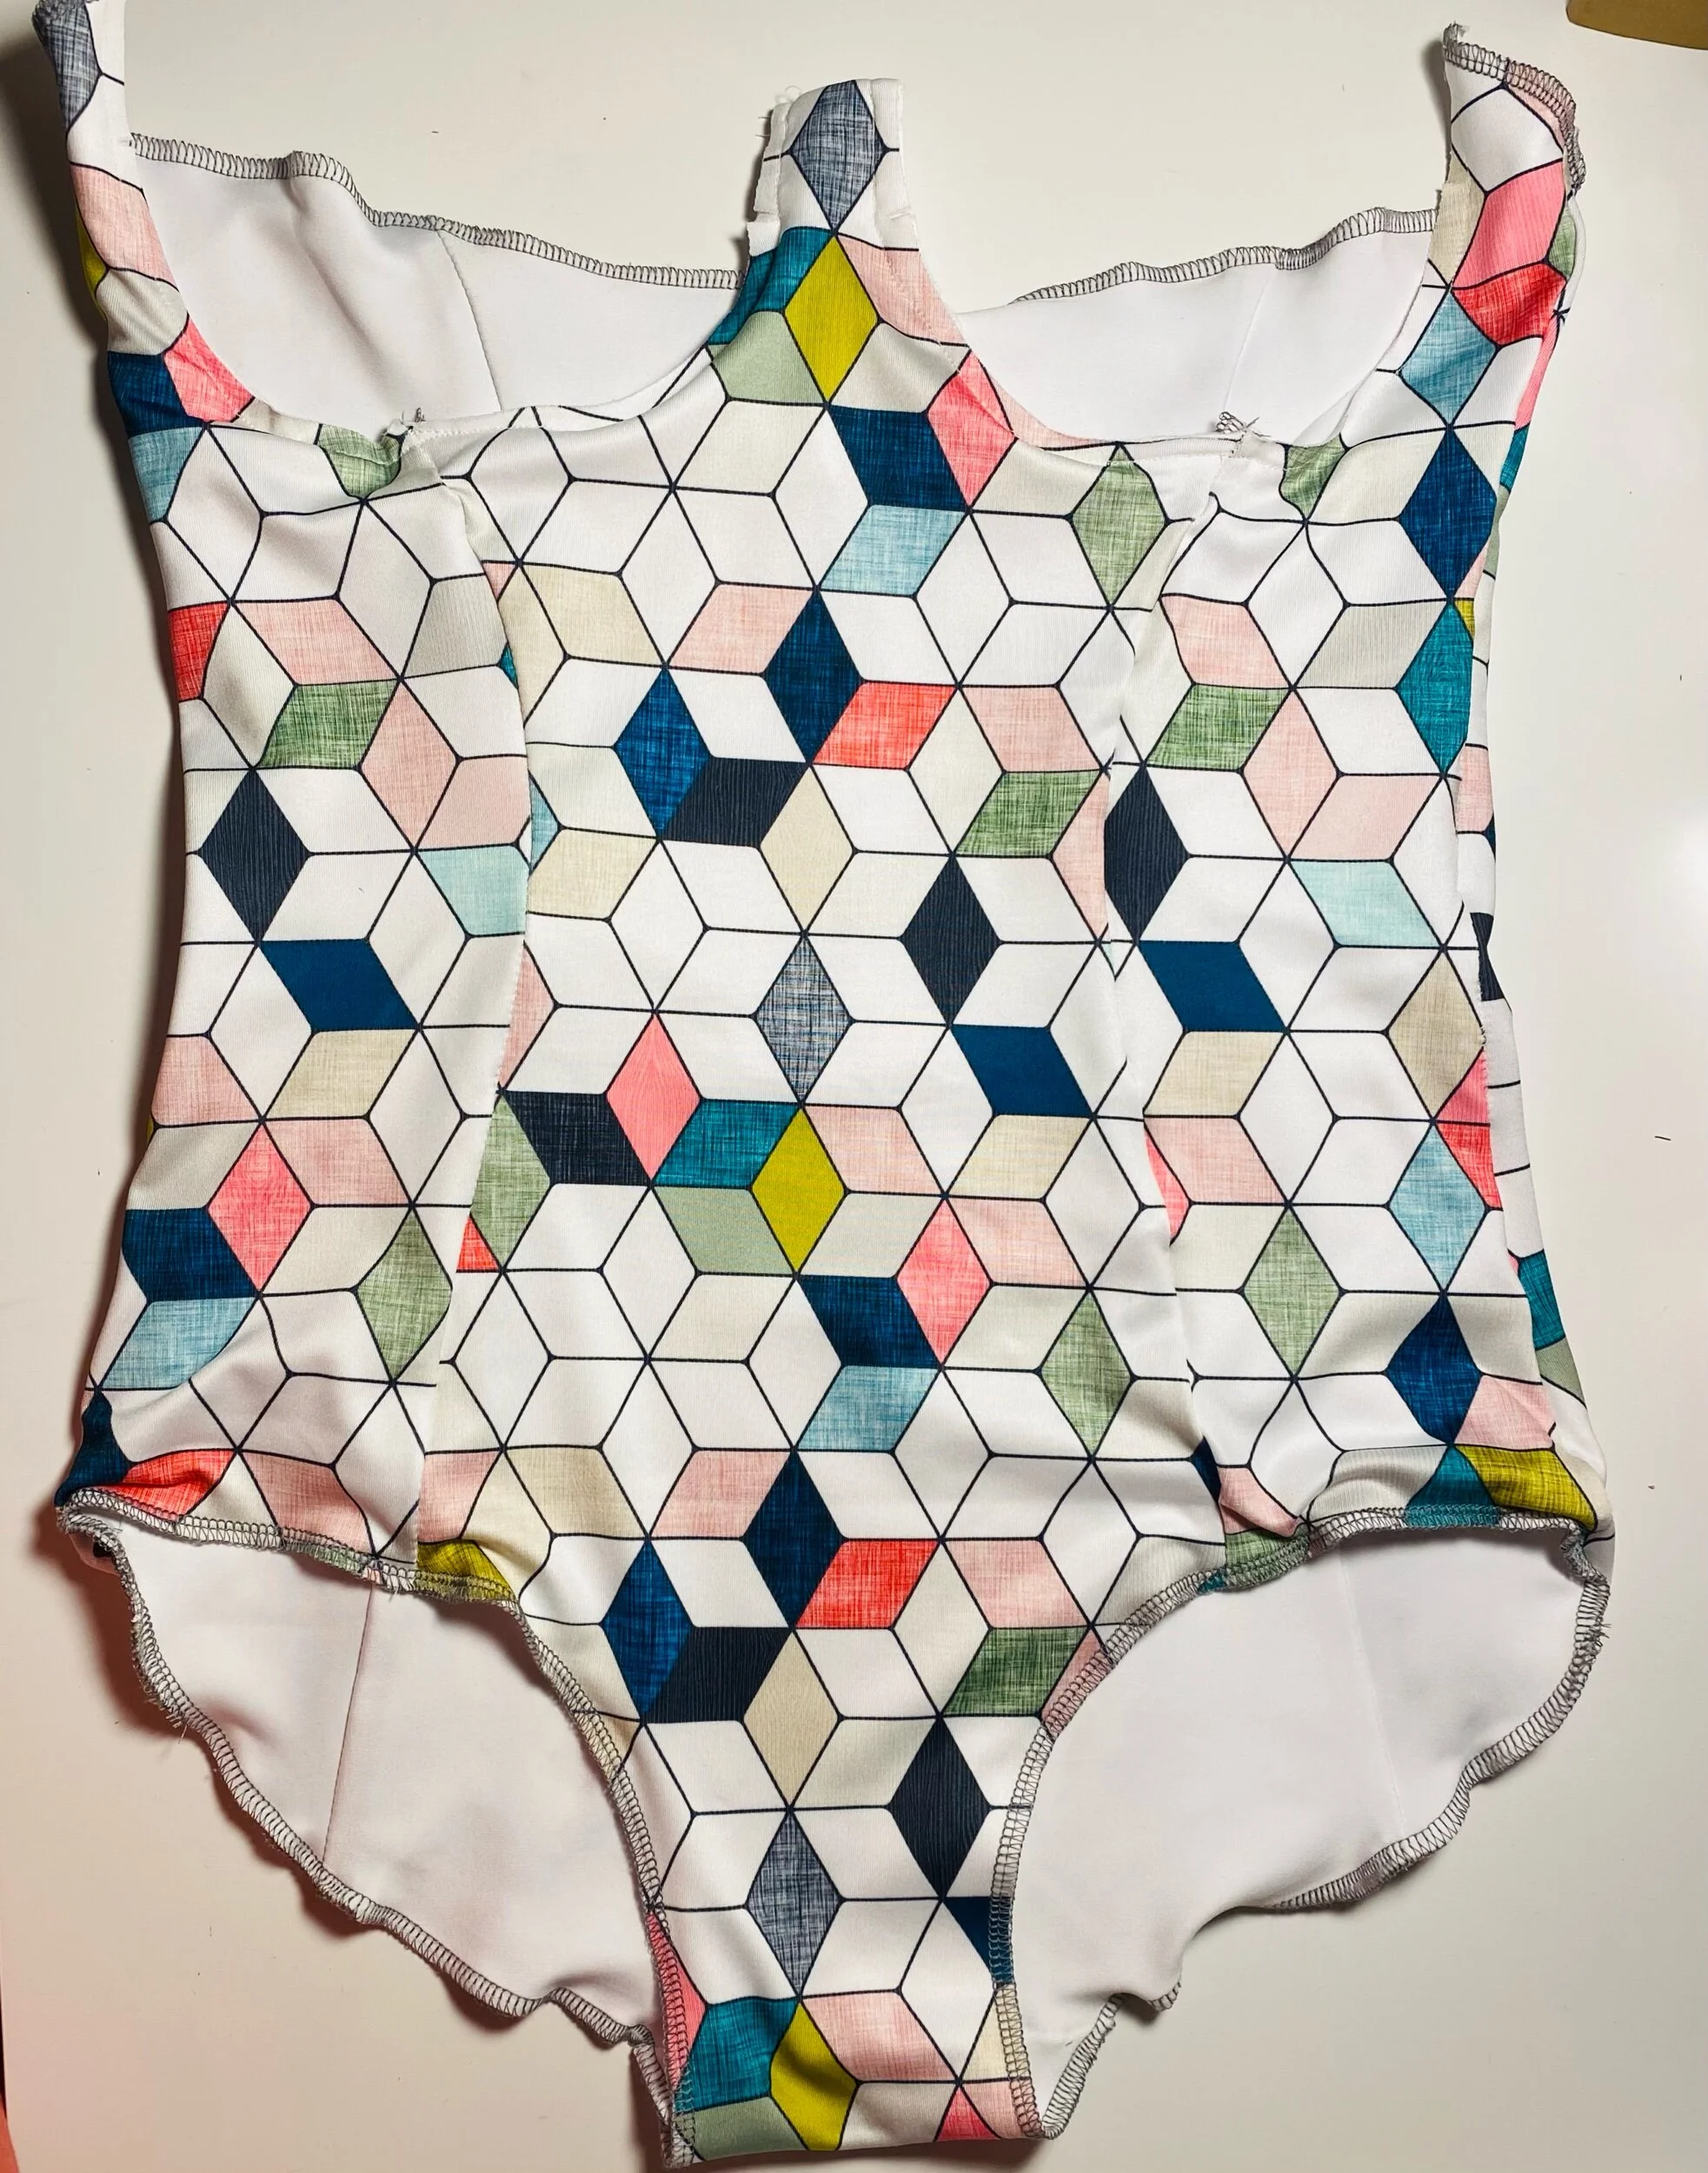
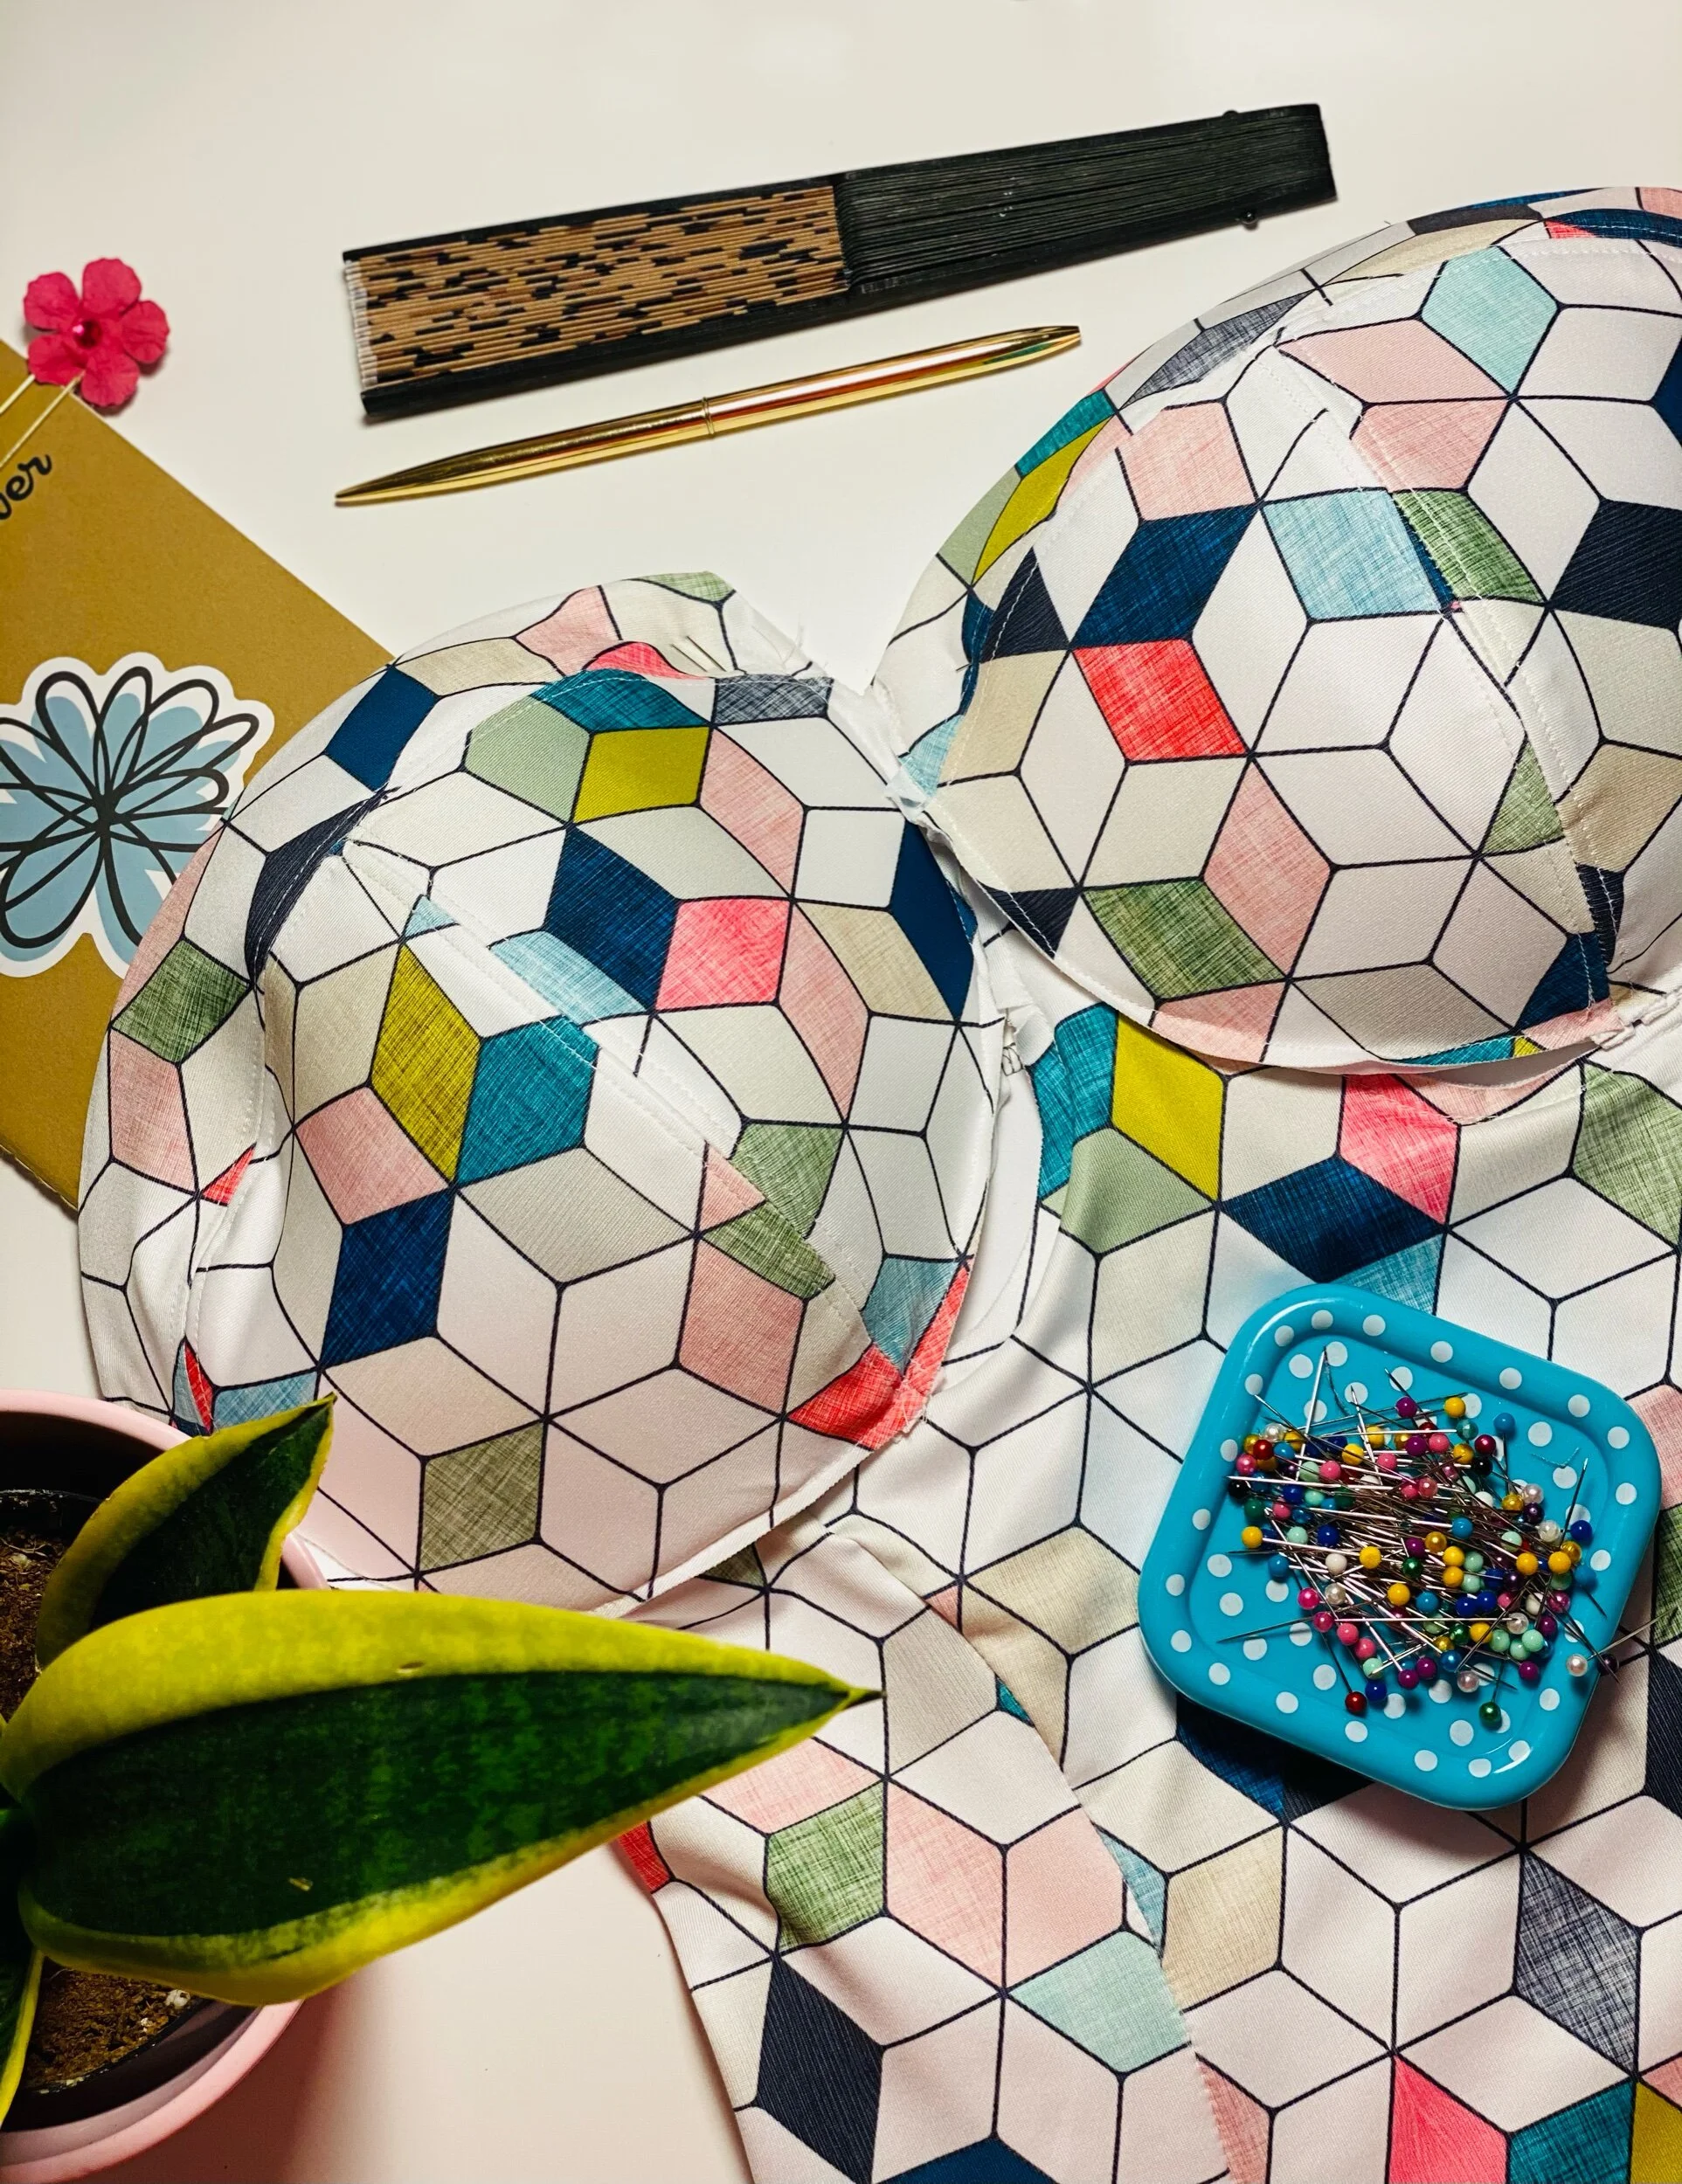
This swimsuit was also an introduction to bra making (more on that journey really soon). Obviously you would need to create bra cups for this look. For me, finding the right cup size was a challenge. I still didn’t get the perfect fit that I was trying to achieve and I even made an initial practice cup that covered about 3 inches of my girls lol, but this will not be my only Sophie swimsuit this season.
I lined the swimsuit with a white Jersey fabric a bit lighter in weight than the Sport Lycra. You can use whatever swimsuit lining you like. My preference is always whatever will hold the tummy in comfortably. You will also need something to shape the cups. I used my tailors ham but I do wish I had something more circular. Maybe next time I’ll use baby watermelons, I mean they’re about the right size lol.
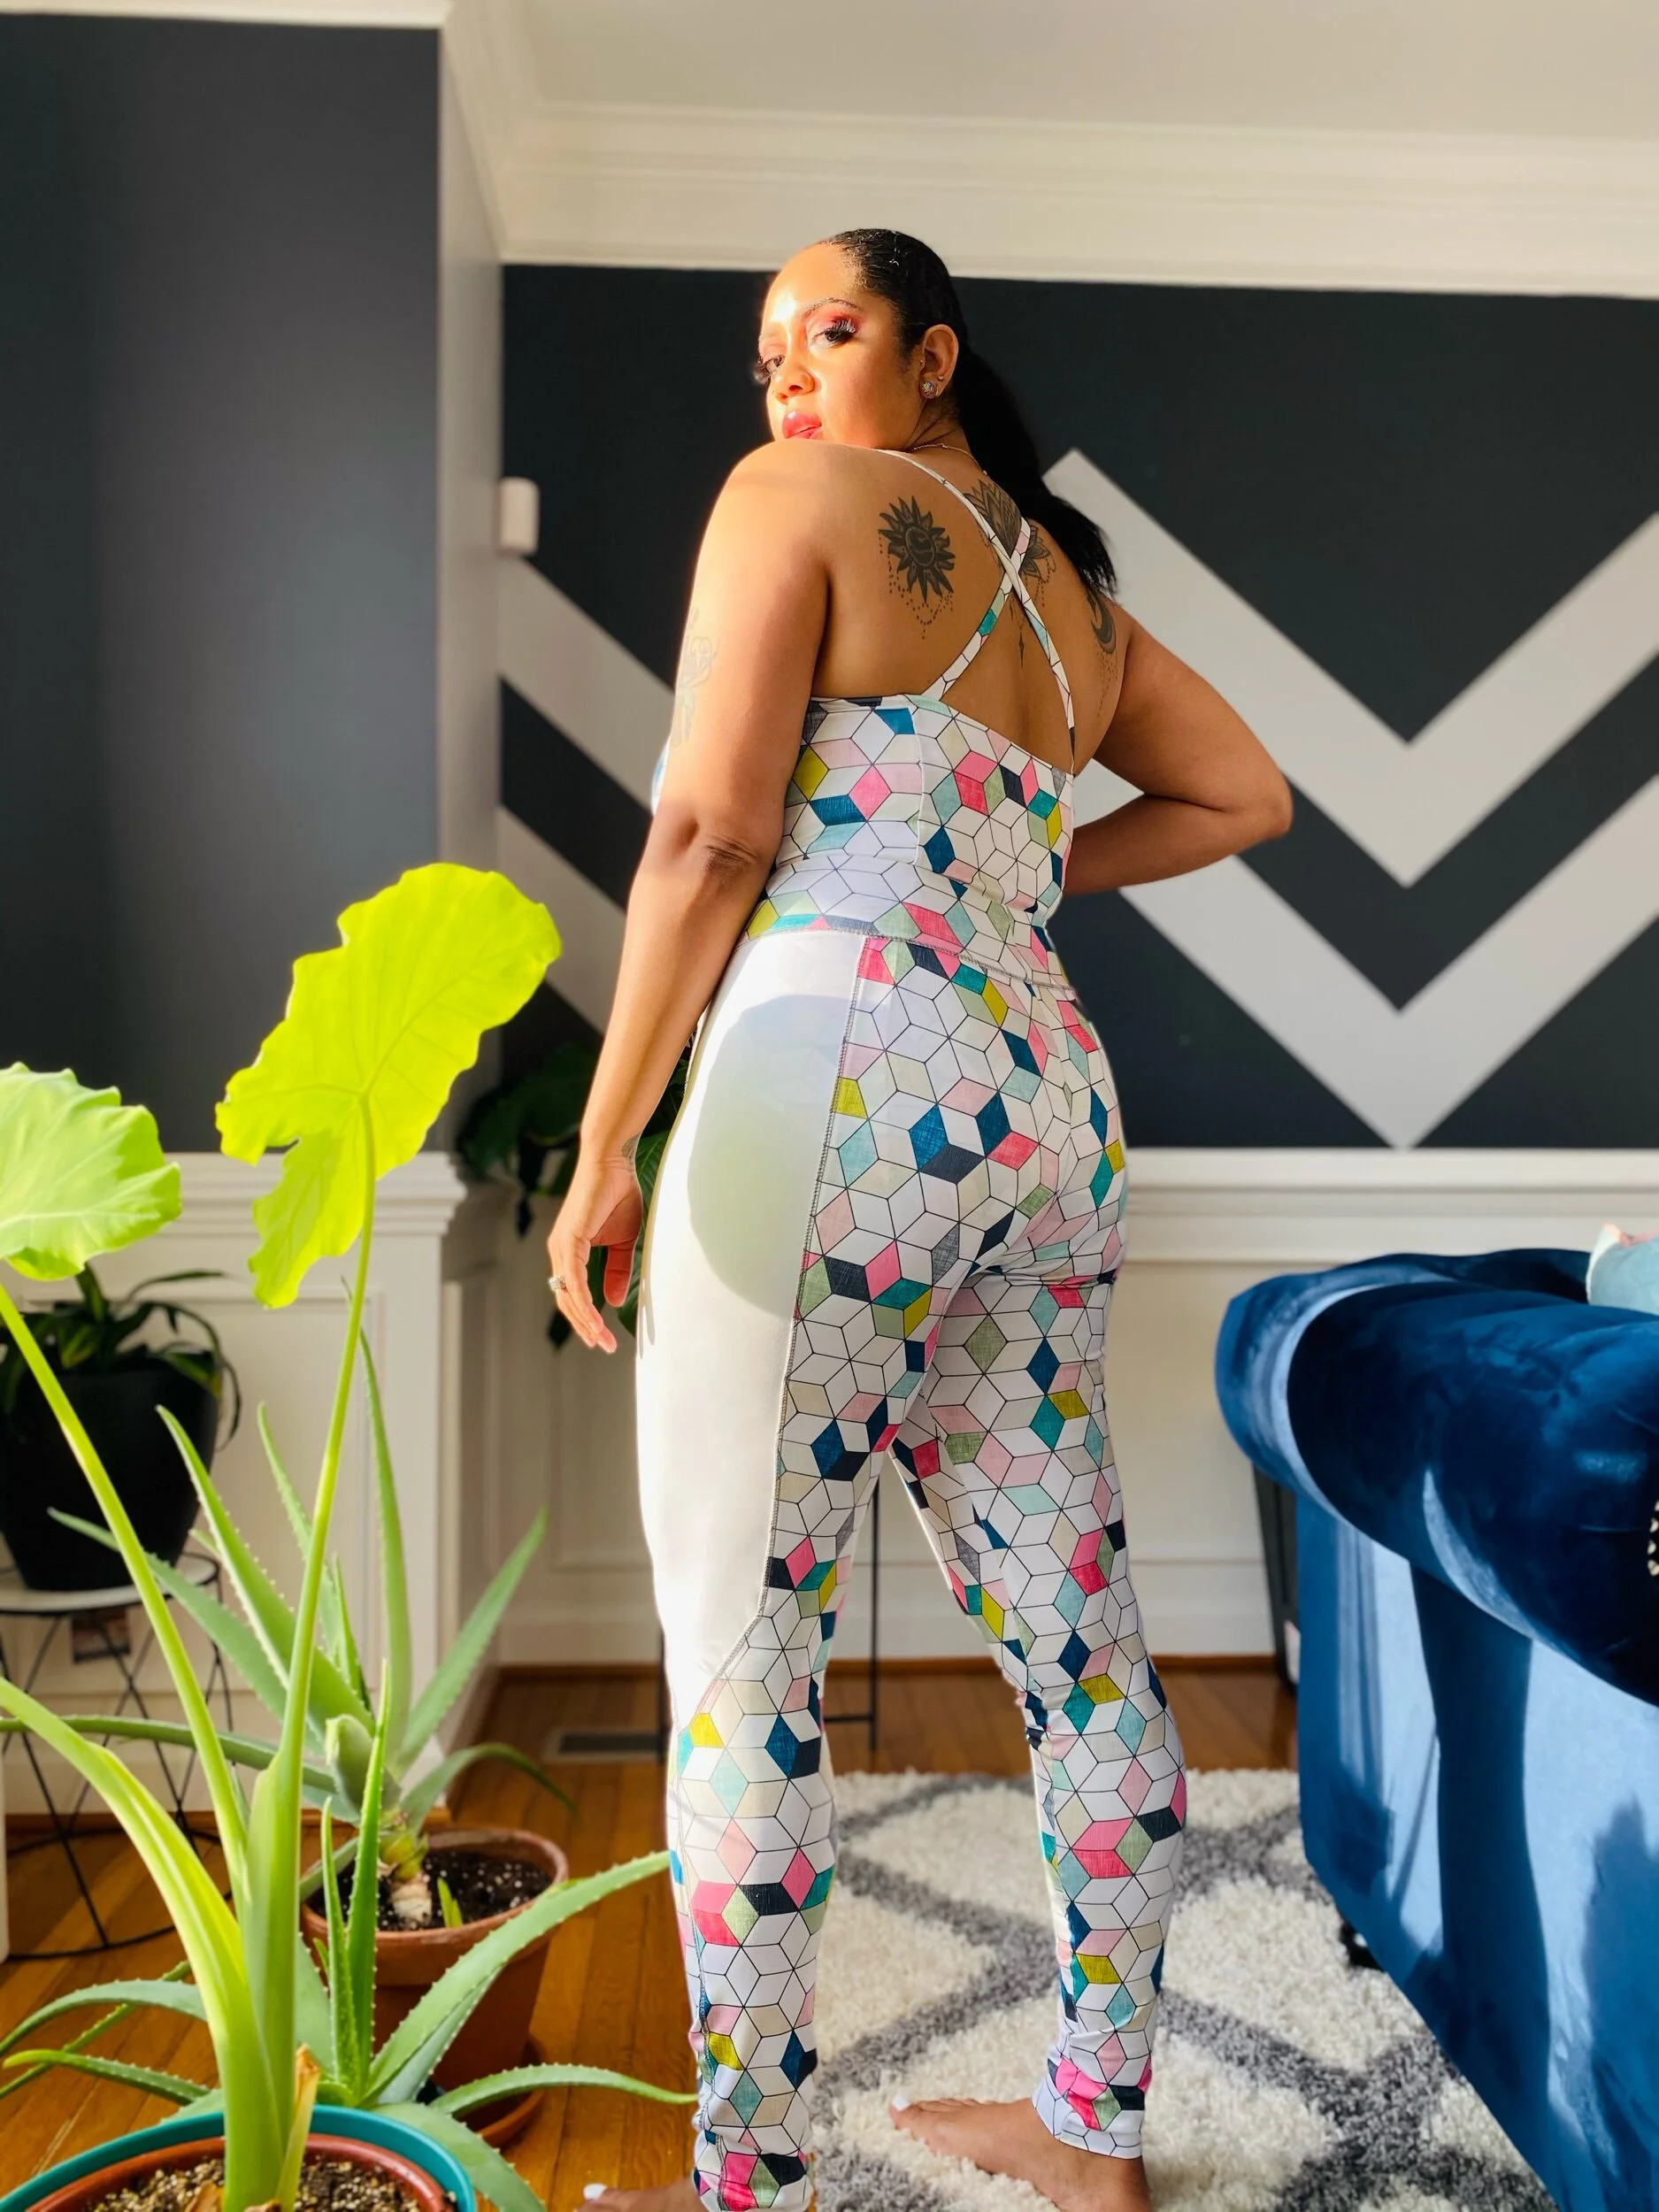
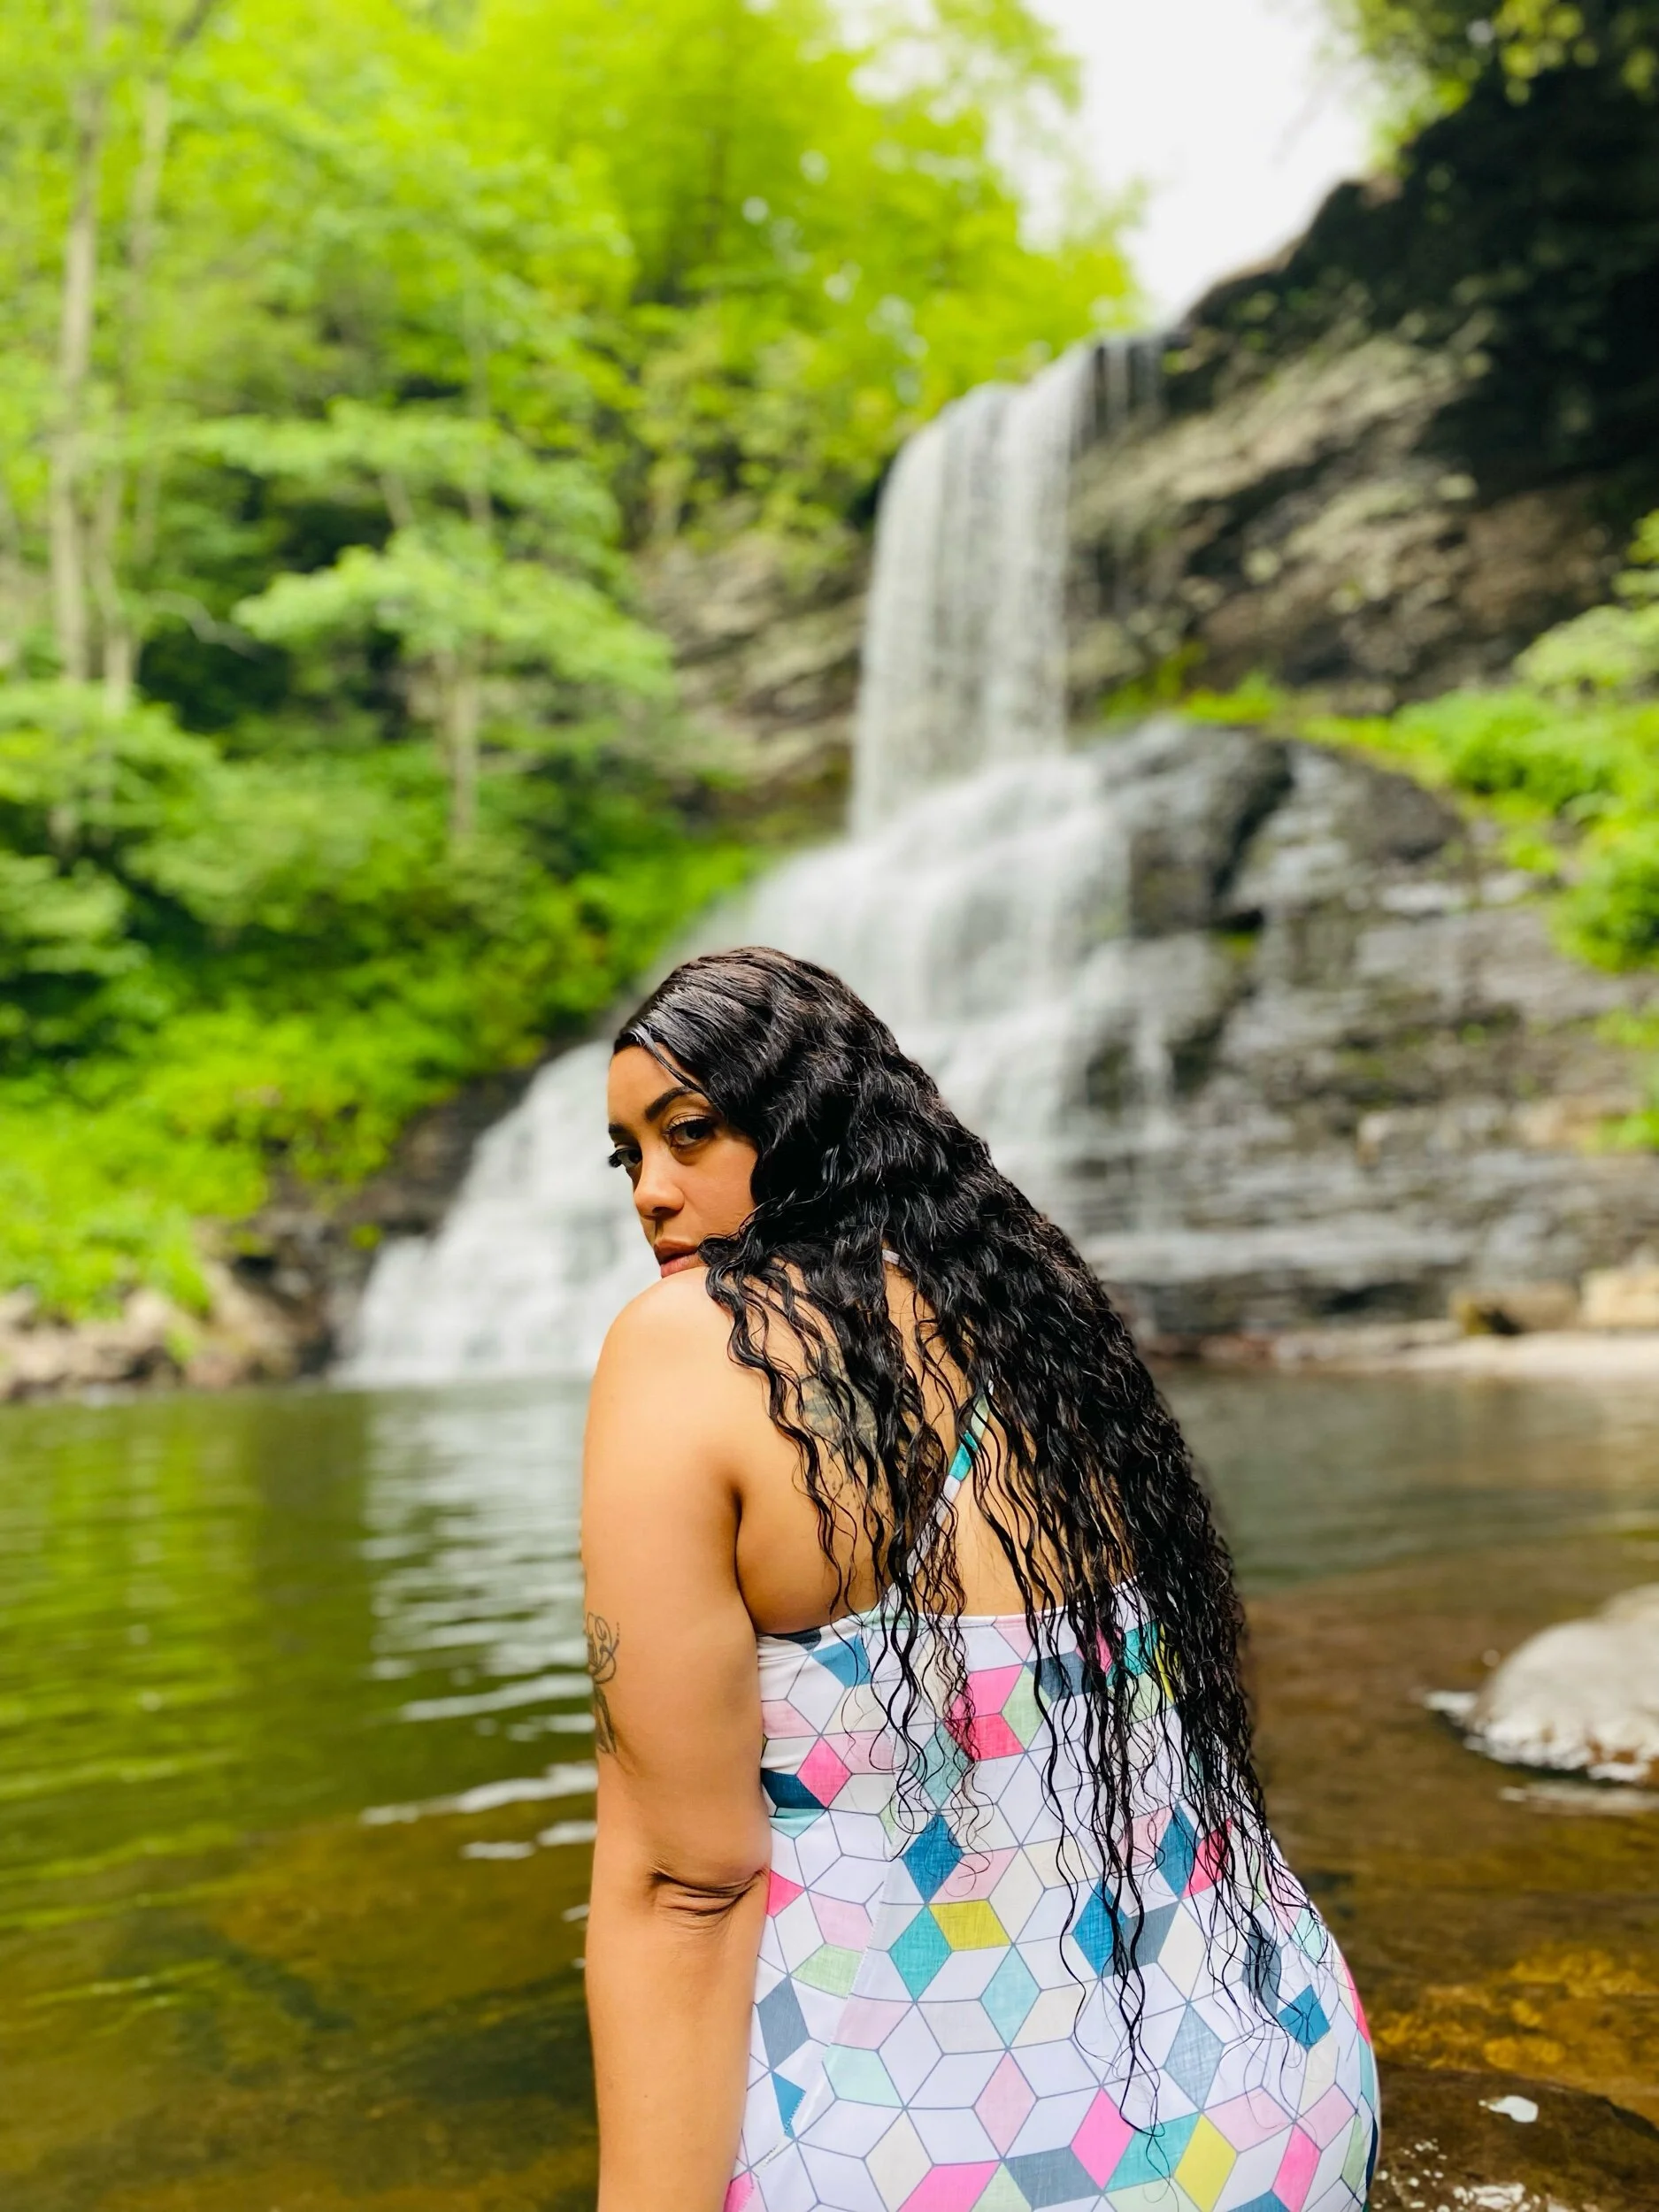
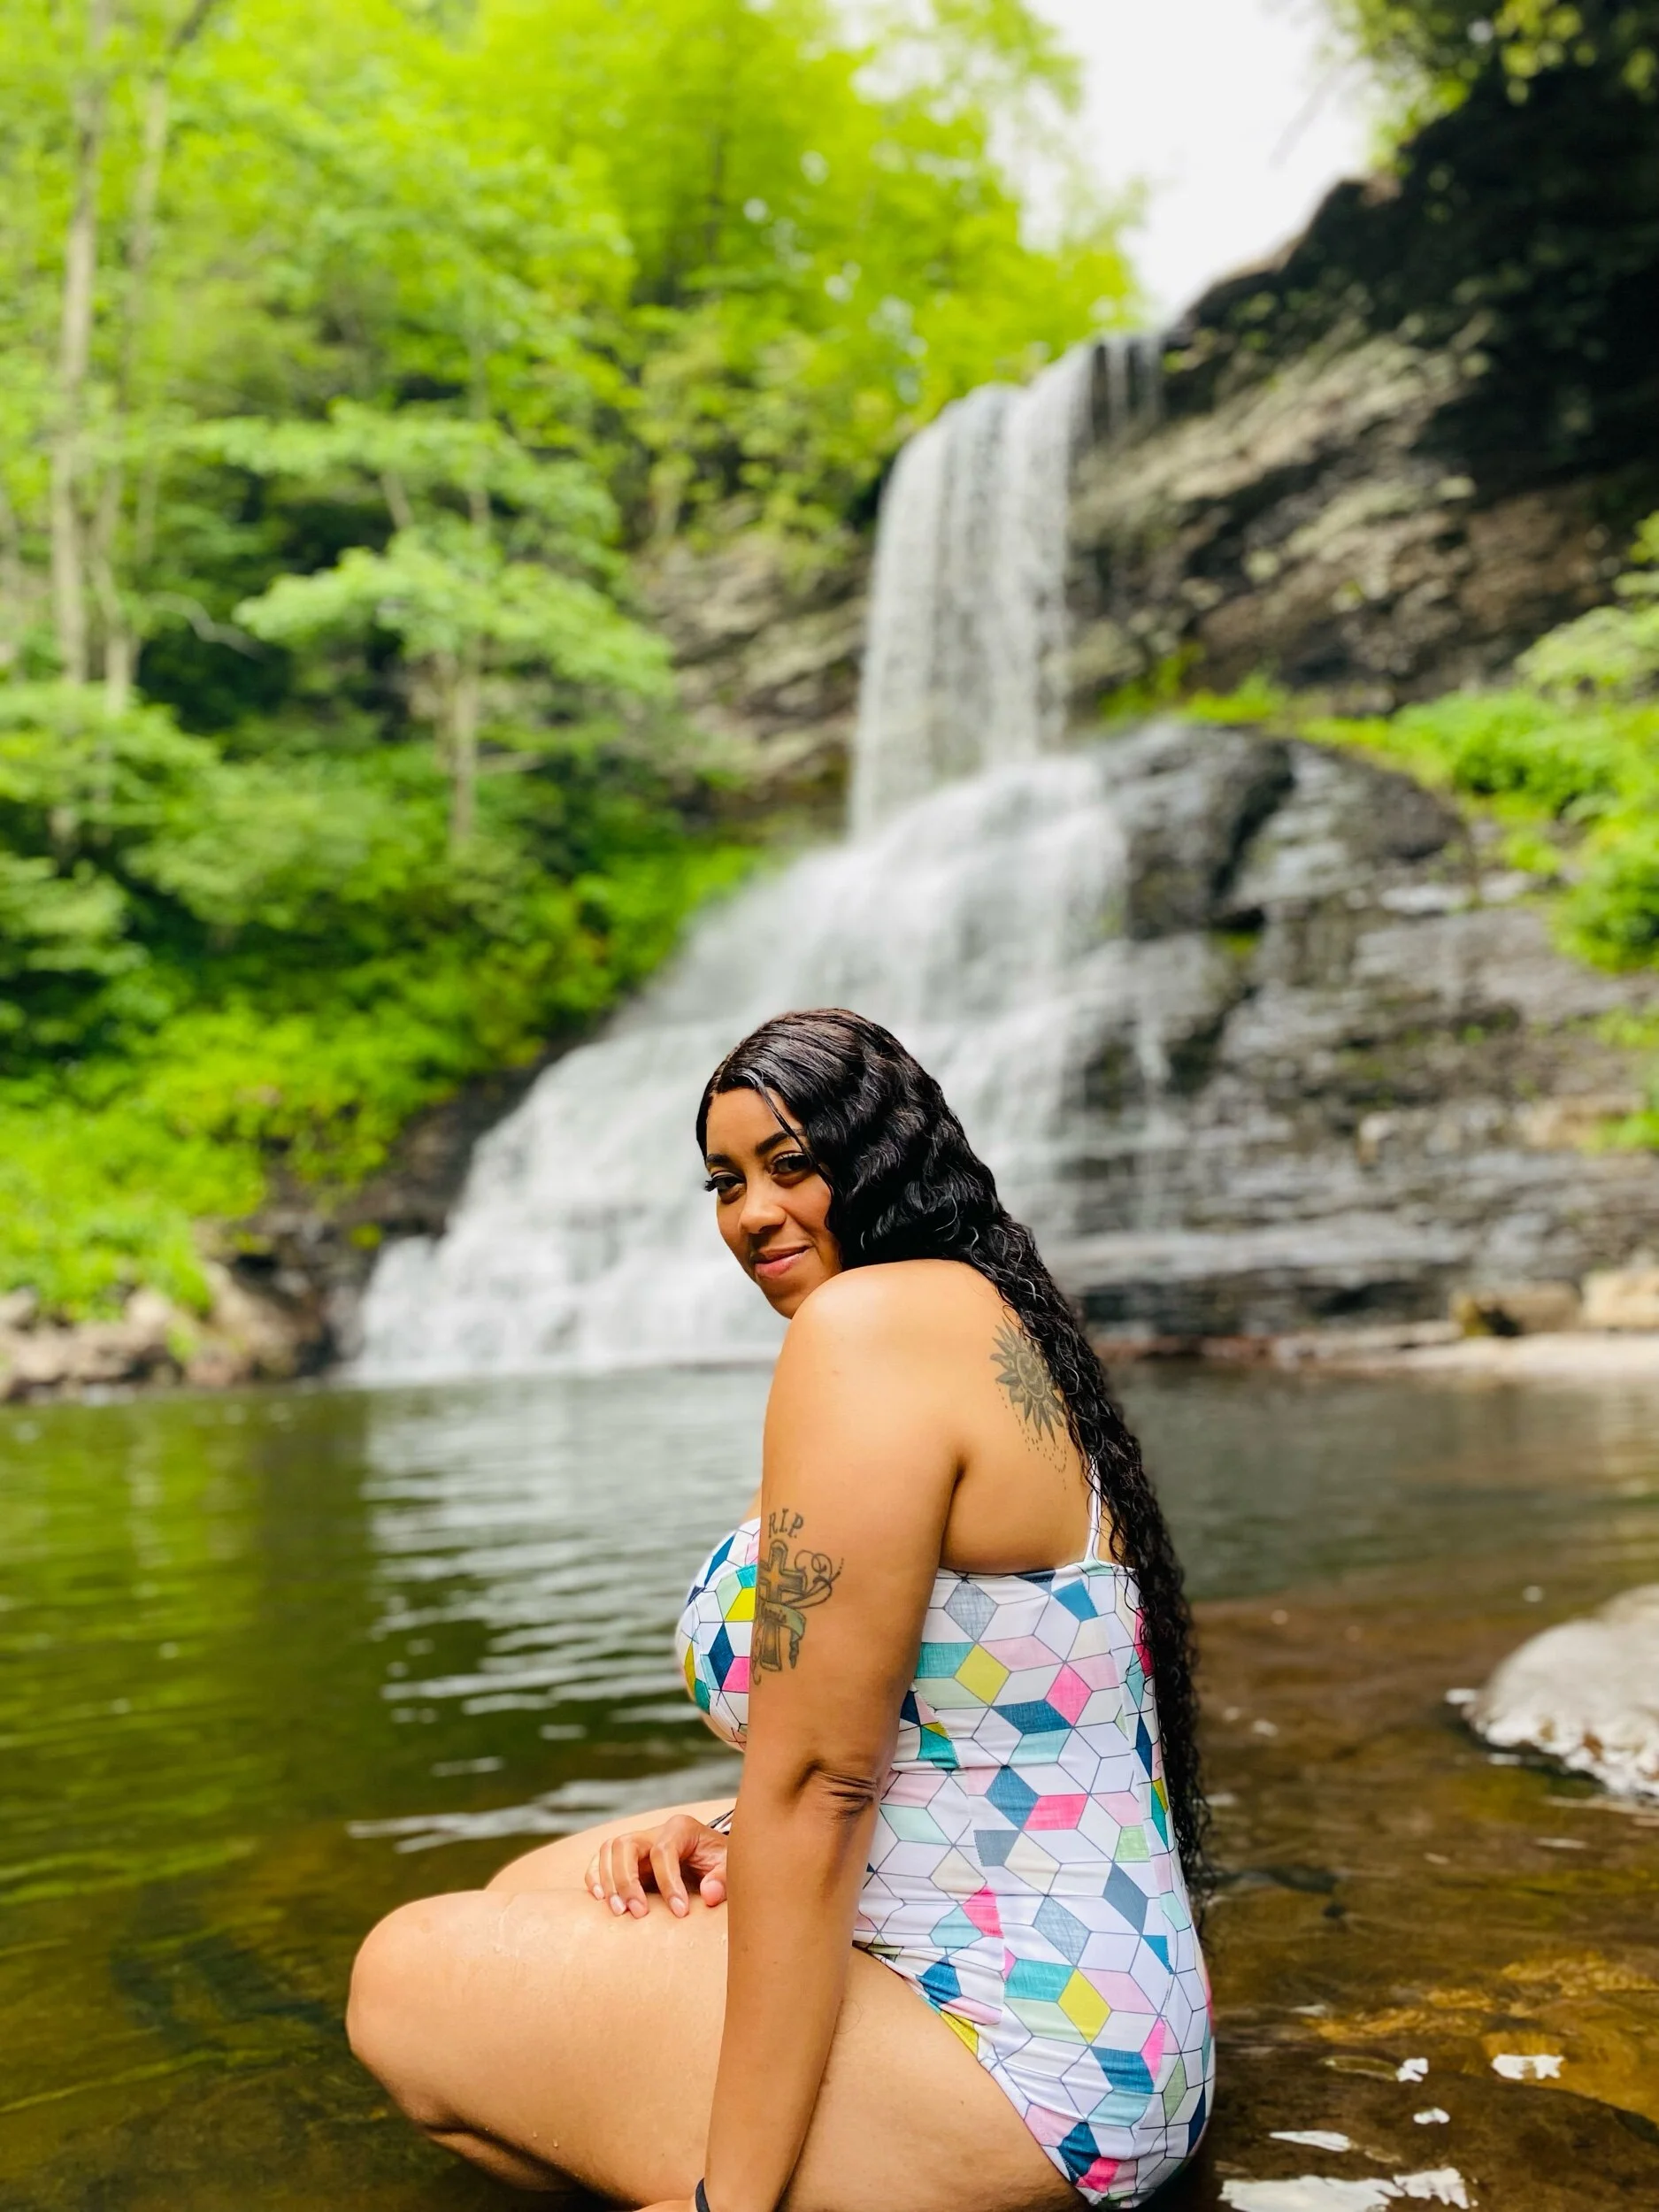
Sophie and WATERFALLS
It’s summer right? Well I’ve had this swimsuit made since winter and this Sophie was literally waiting for the right time and scene to make an appearance. My 1st water outing this season was this beautiful, nature filled hike to and even more beautiful waterfall!


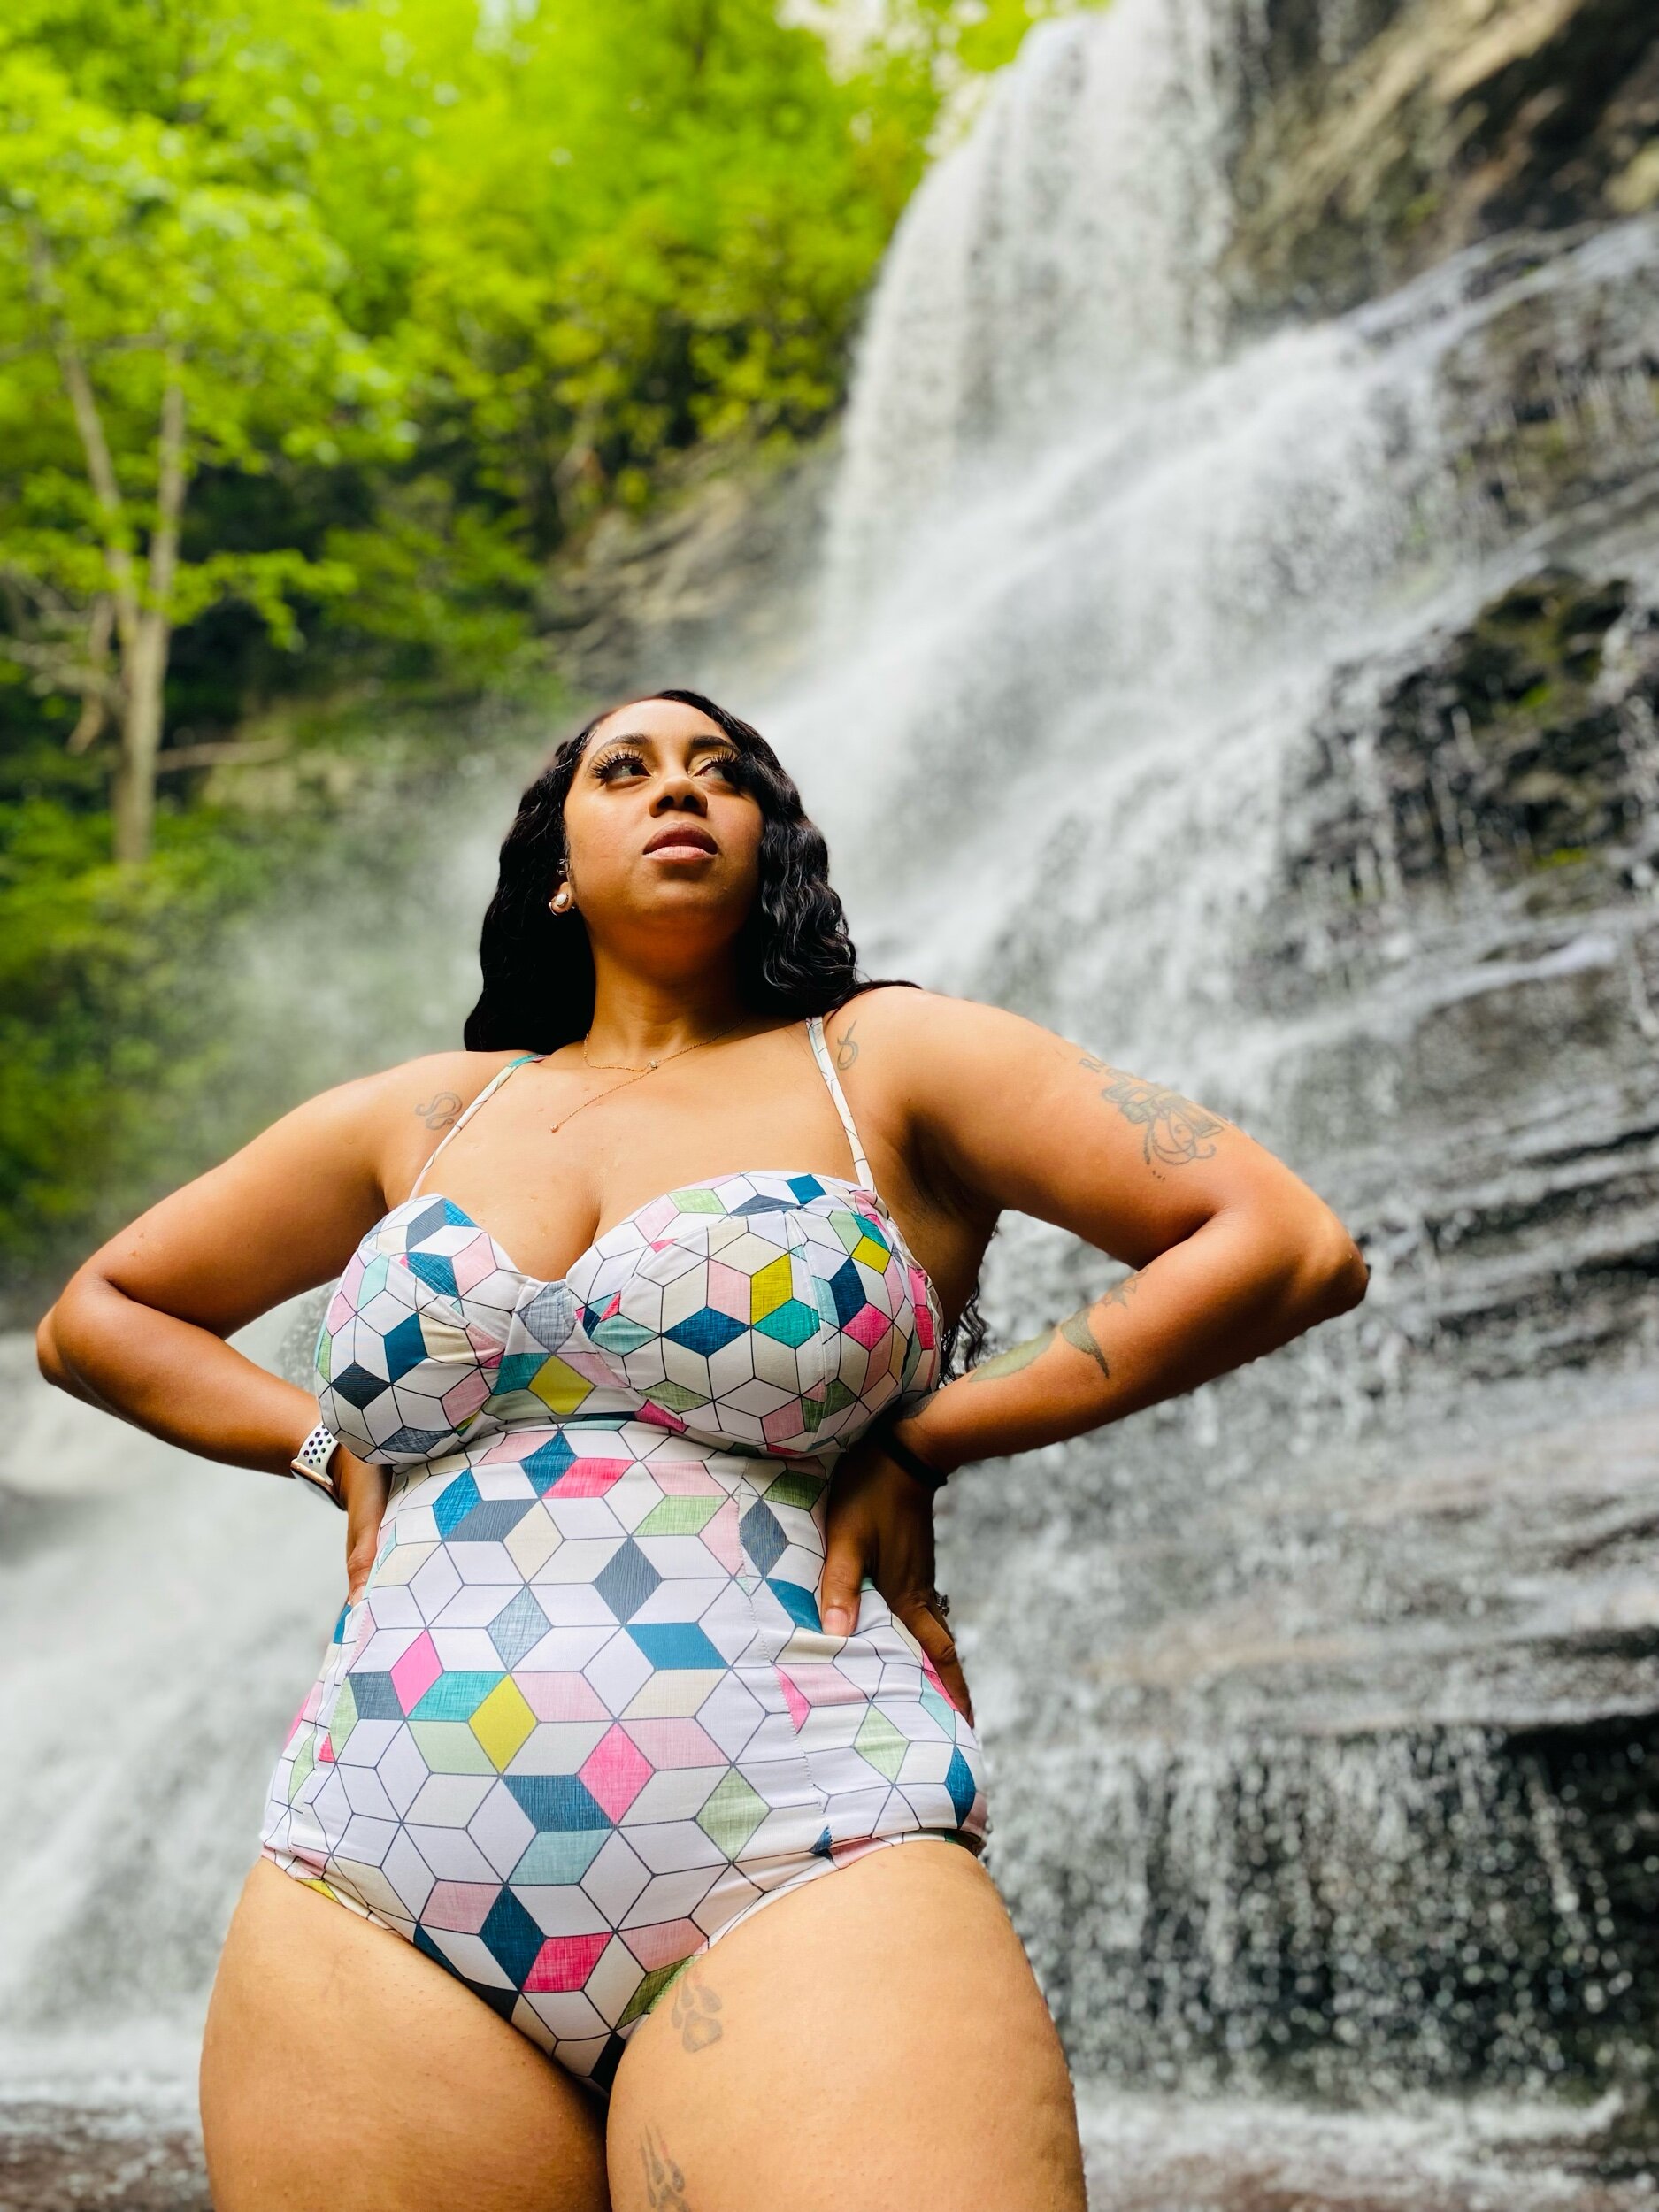
Overall I love this swimsuit and I will definitely make another with a few adjustments to cup size and make the legs more of a bikini cut than full coverage bum. Tell me what you think about my HEXY Set below. As always thanks for stopping by.
Peace & Blessings!
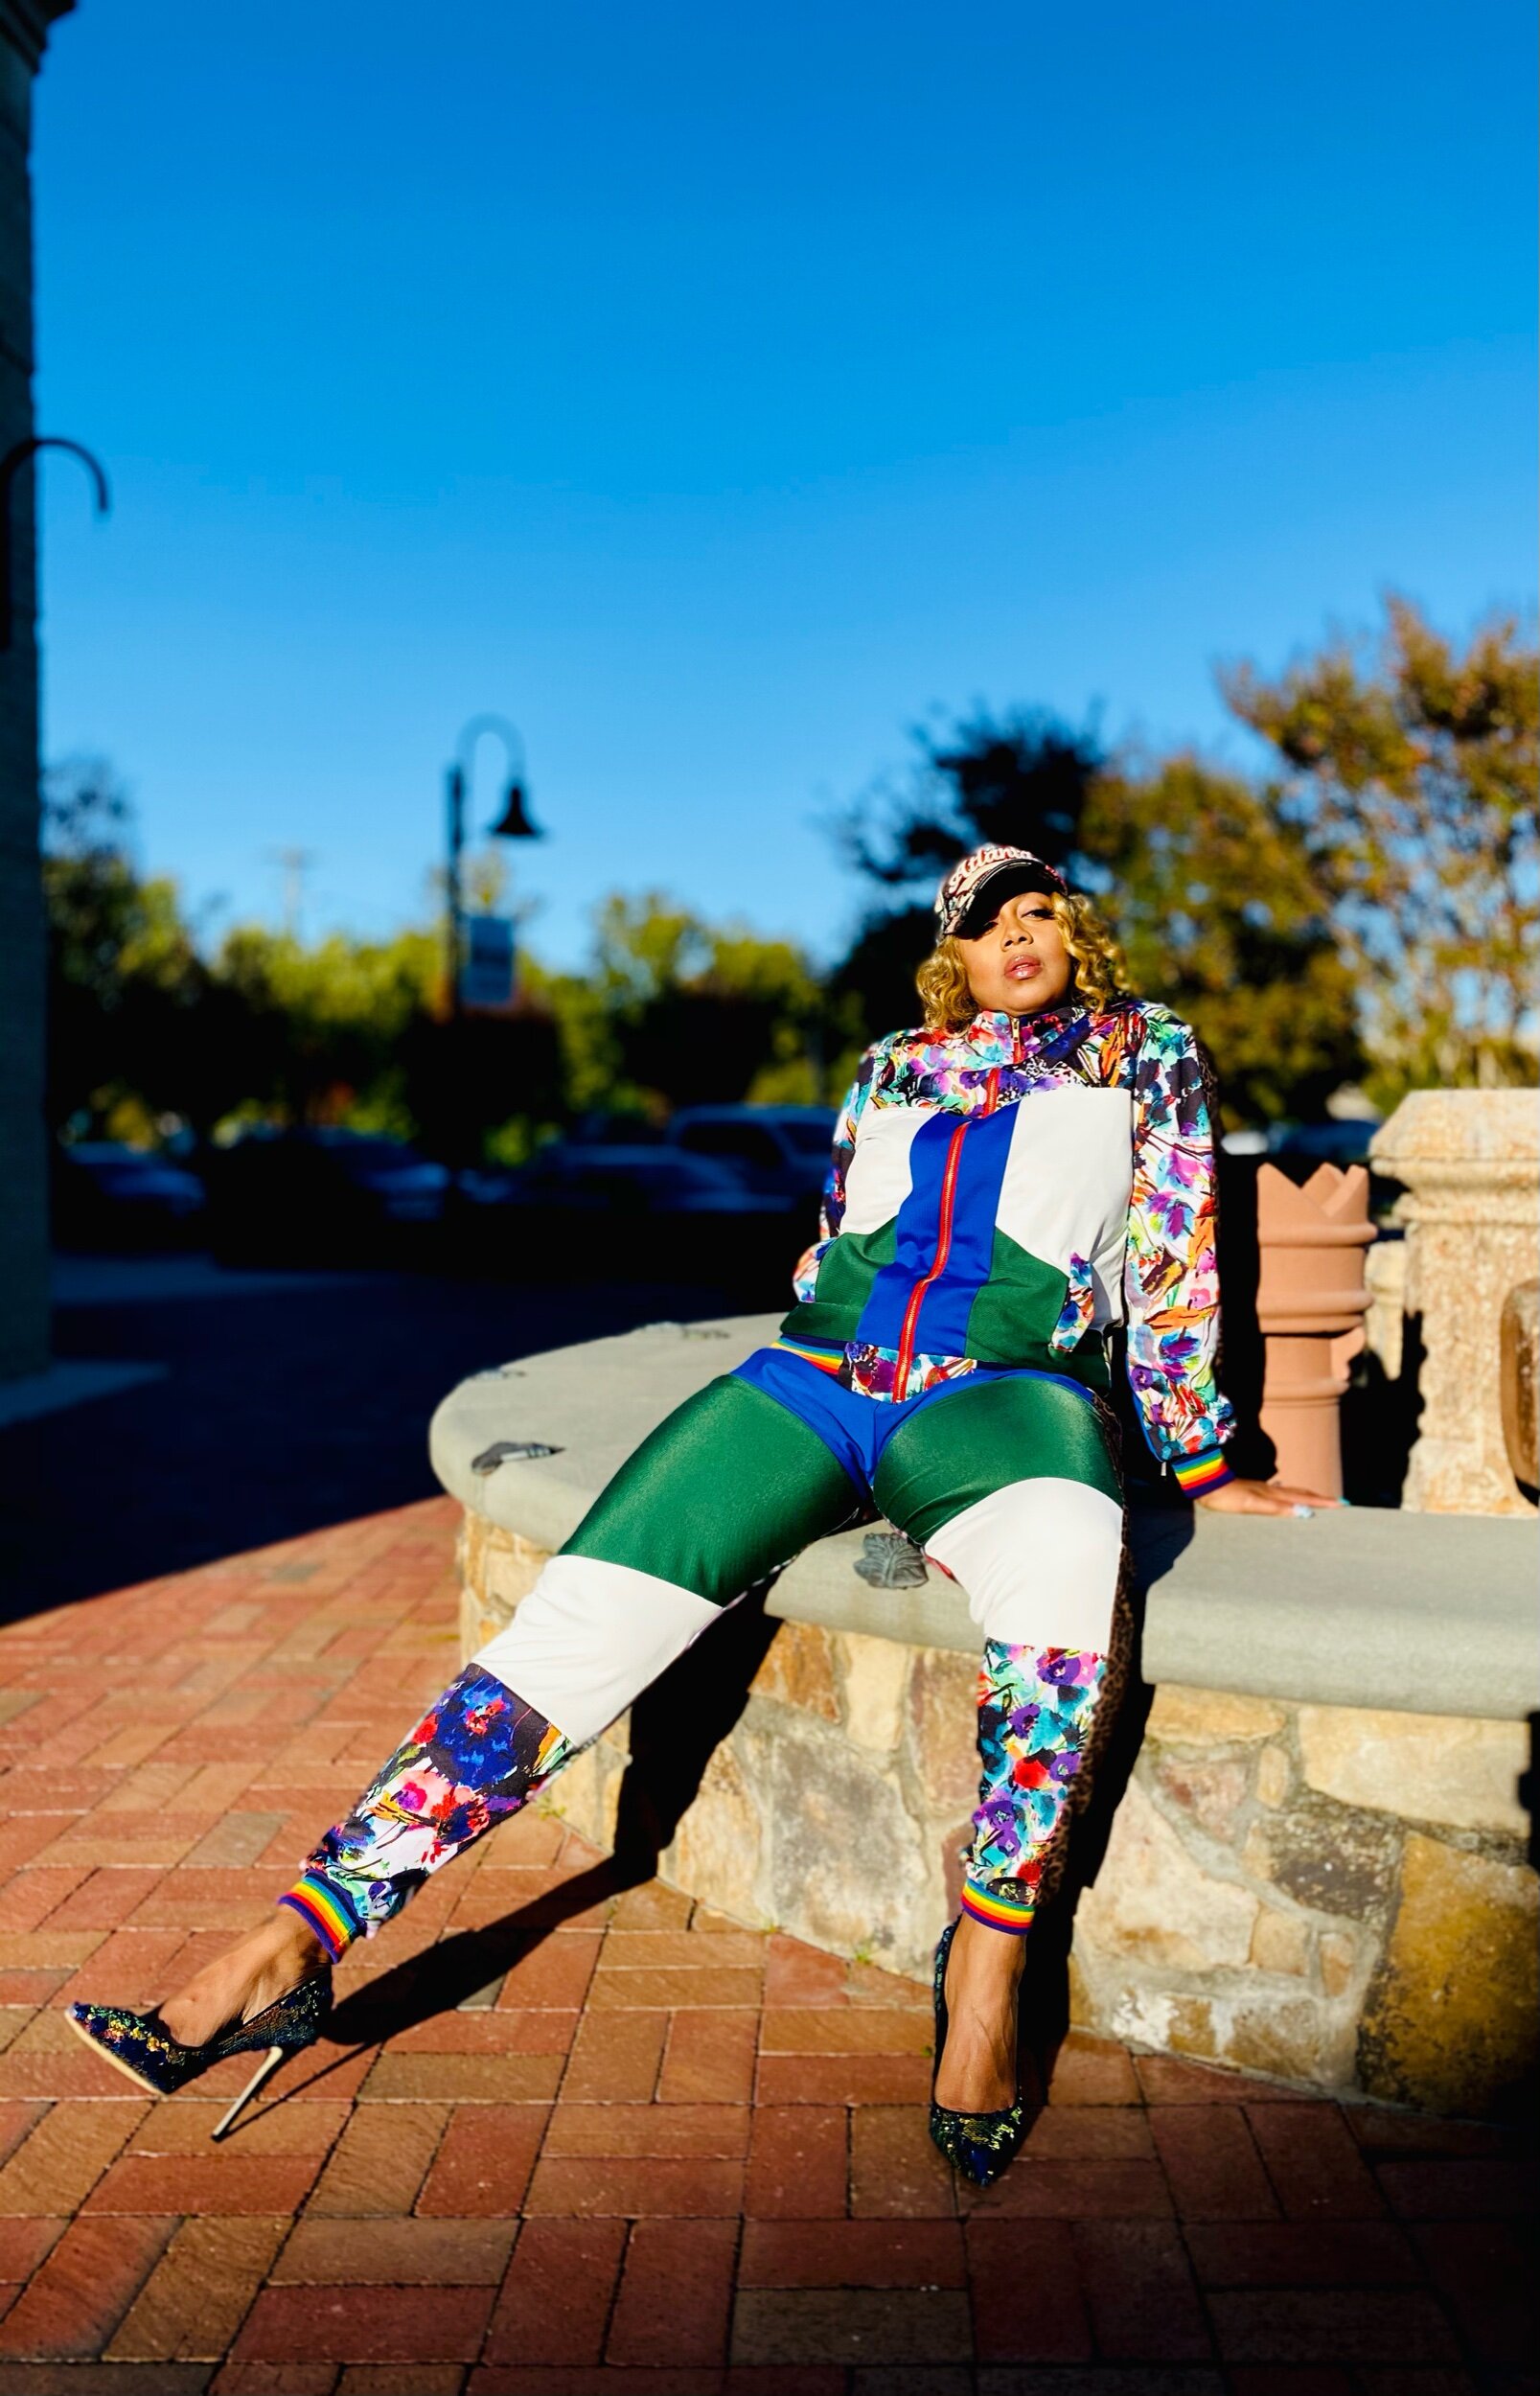
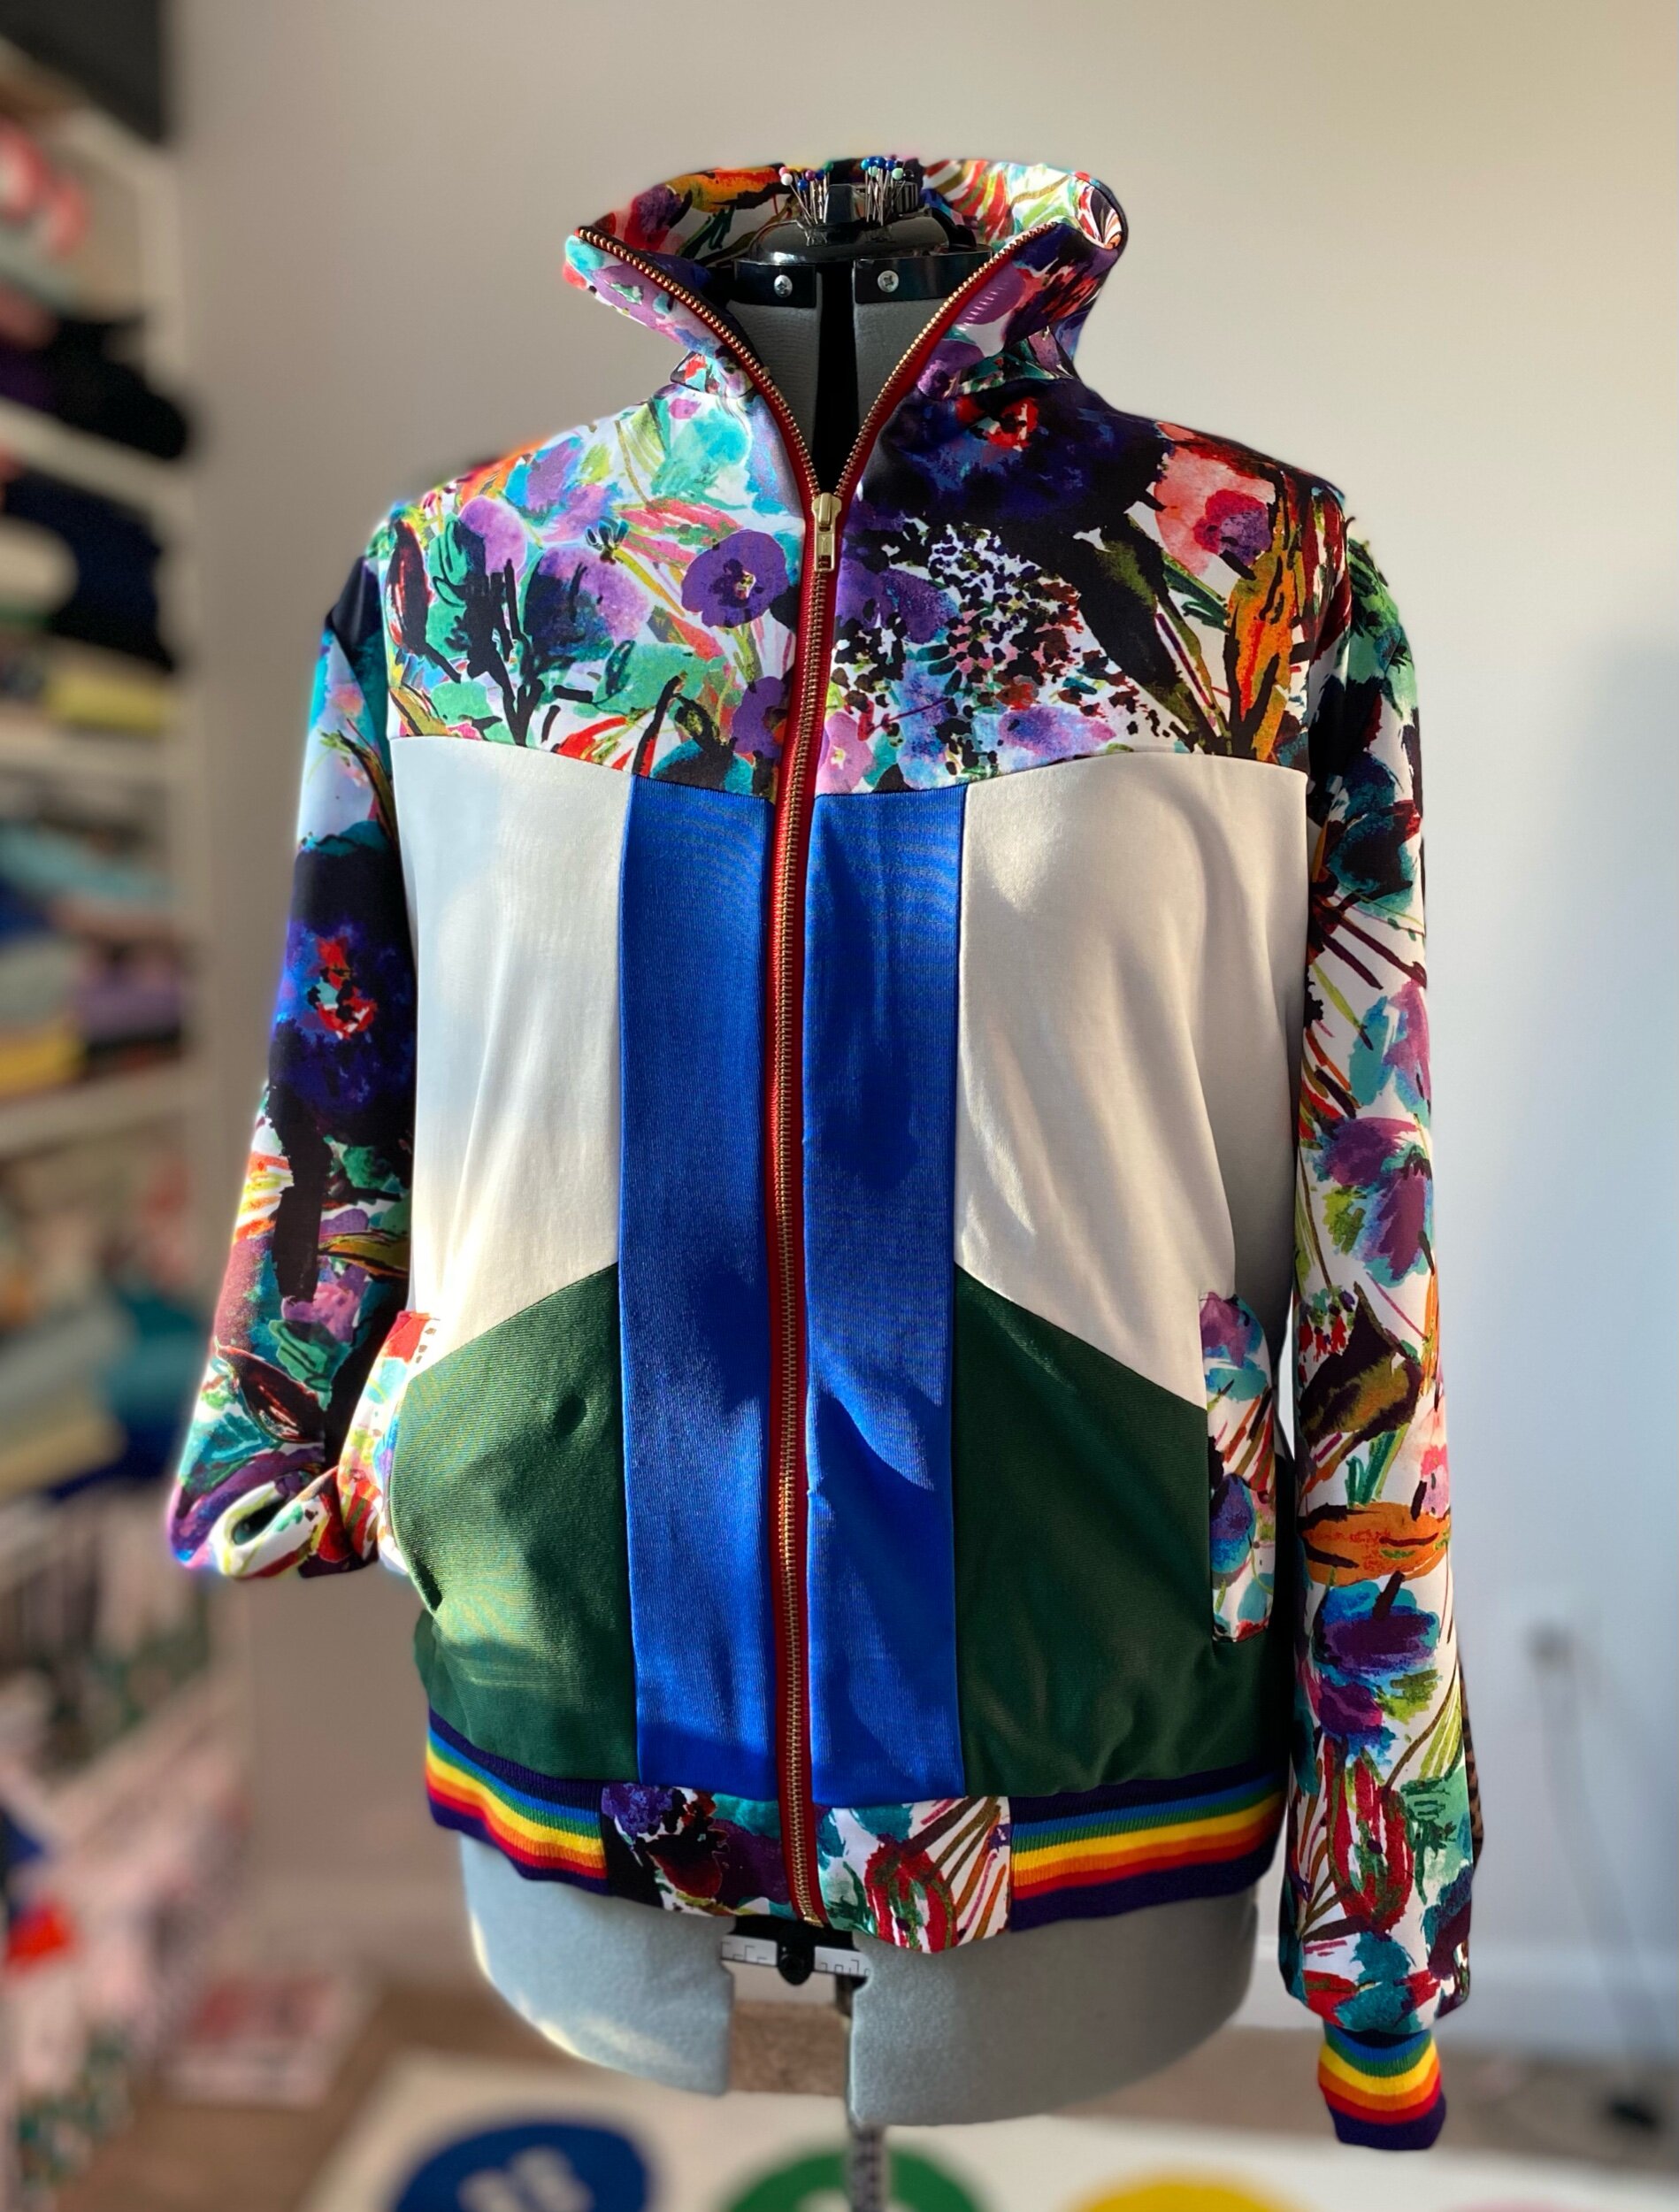
Jogger Season
Jogger Season
I can’t help but want to wear sweats and jogging suits right now but I also need my pumps. That’s the beauty of a jogger set! You can be comfy and sexy all at once or you can dress it down with sneakers. However you choose, these babies are staples in my wardrobe.
When ideas come to life
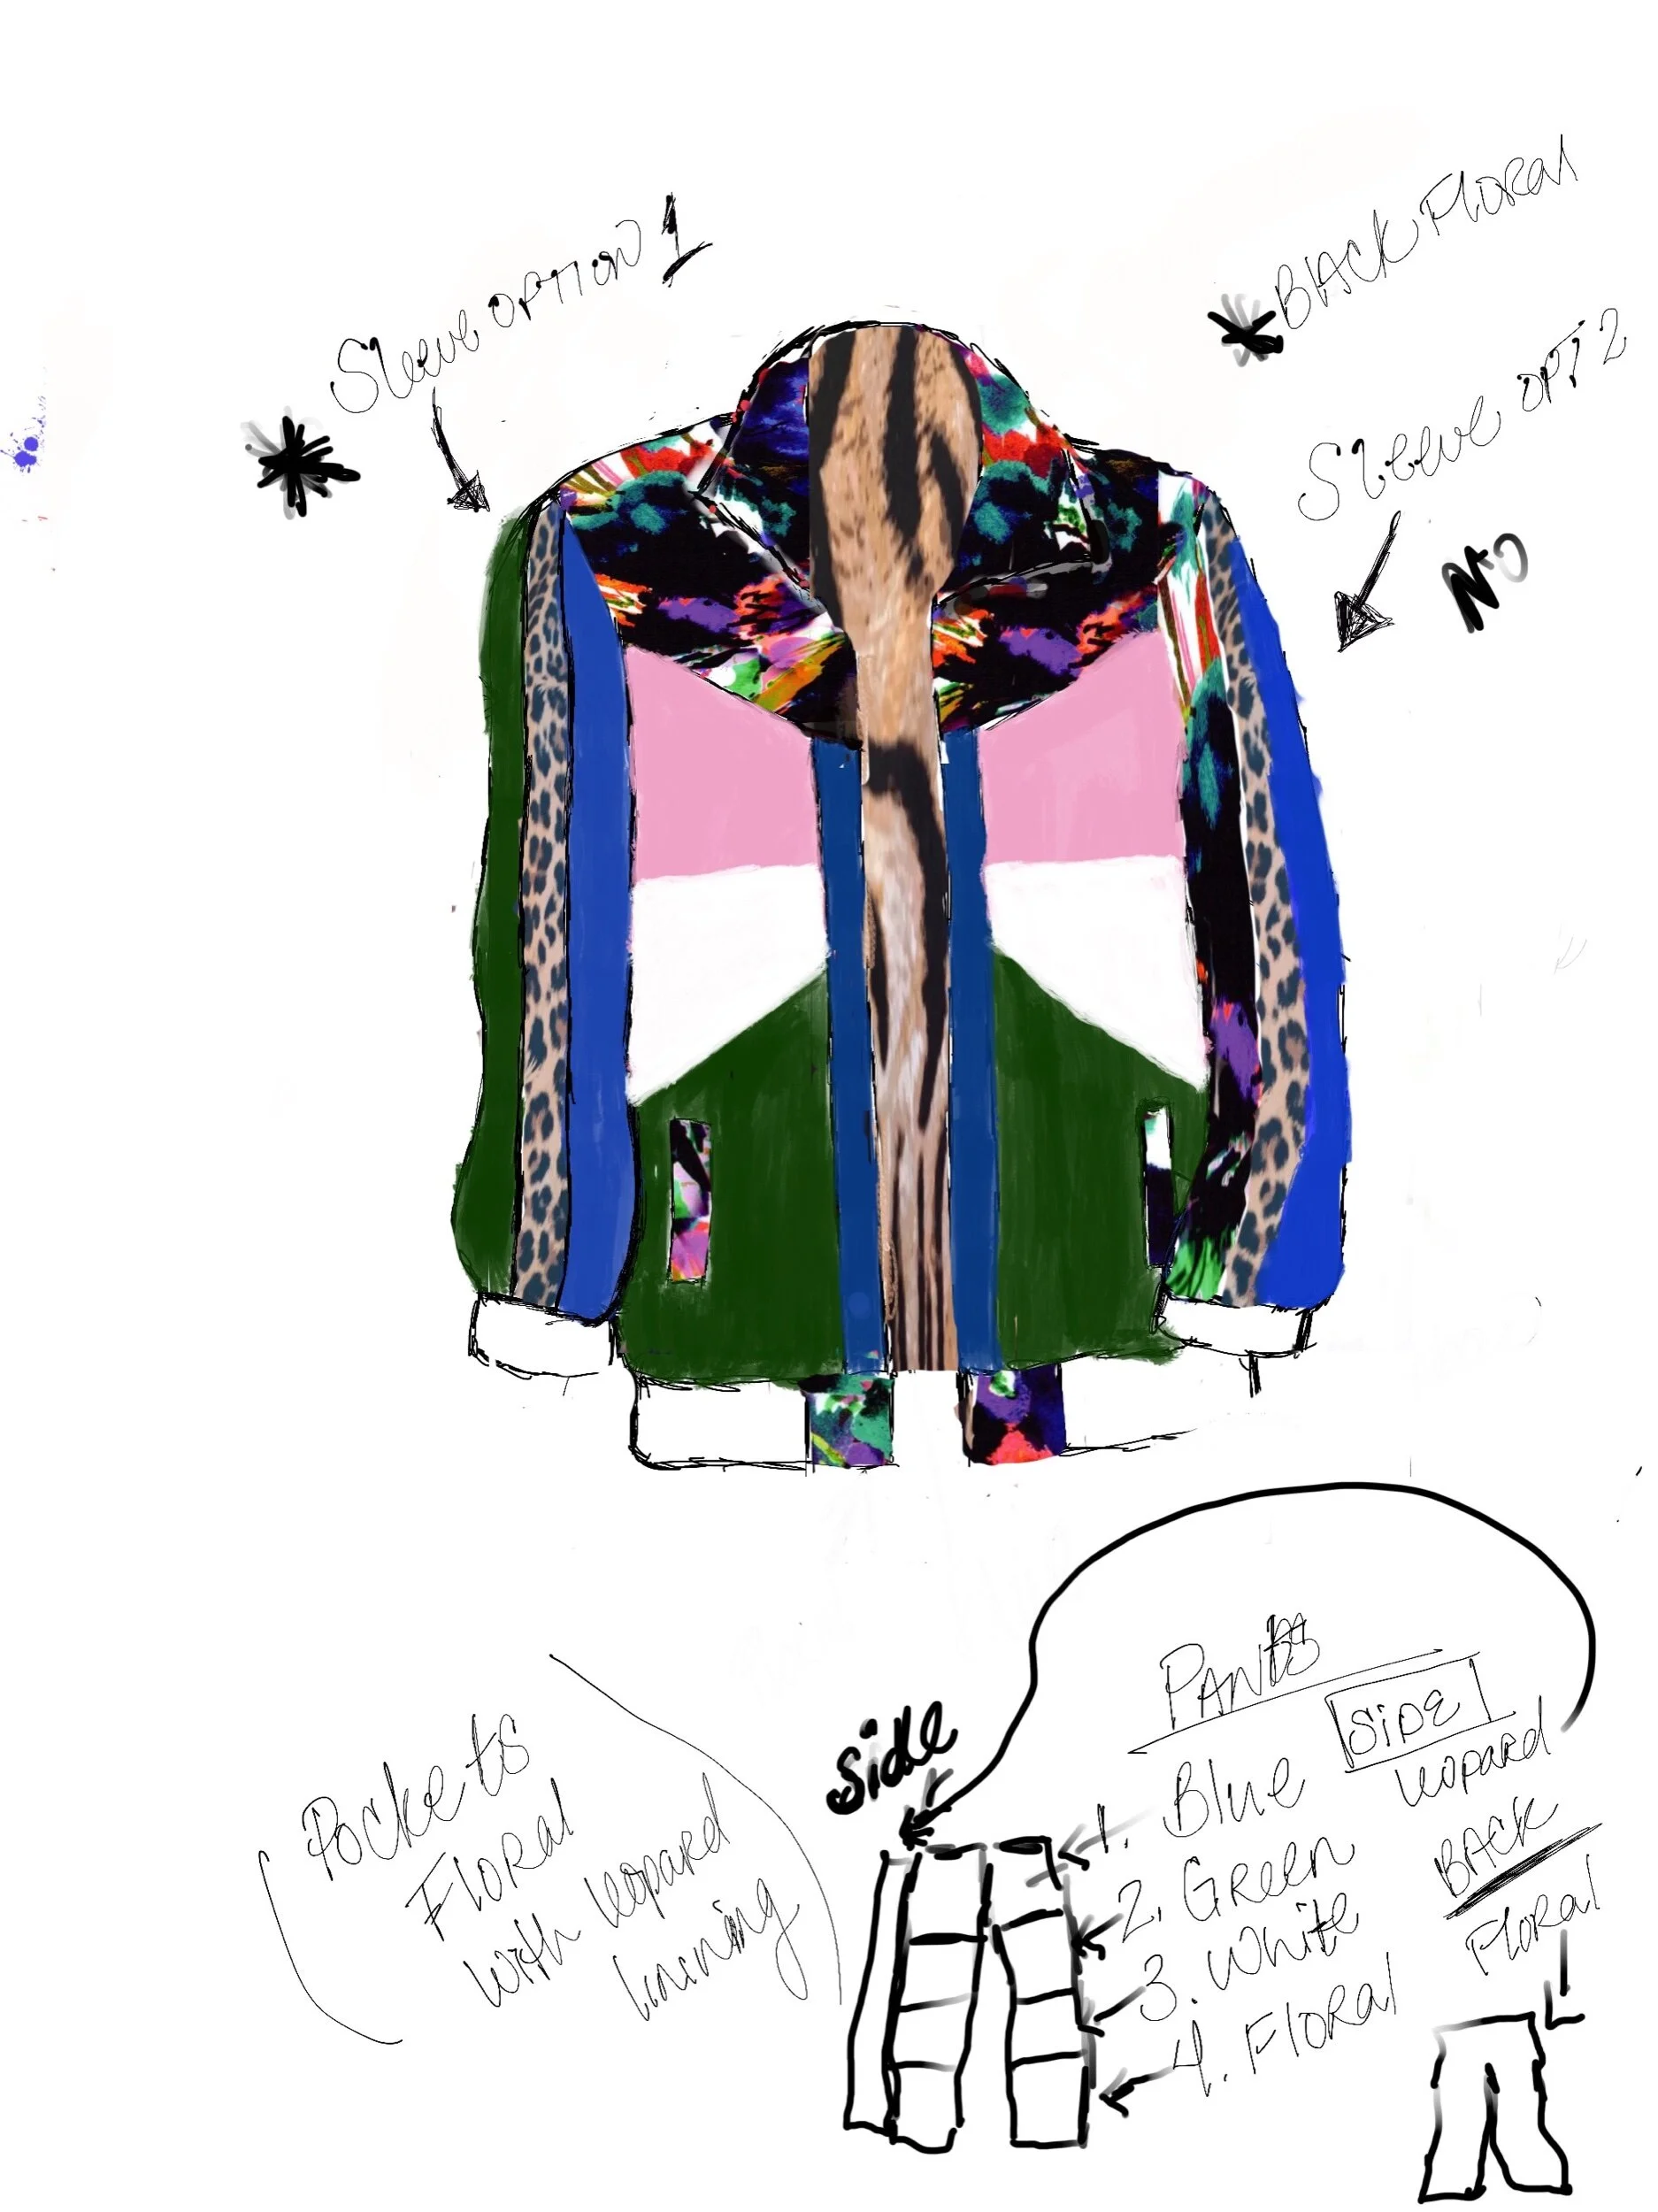
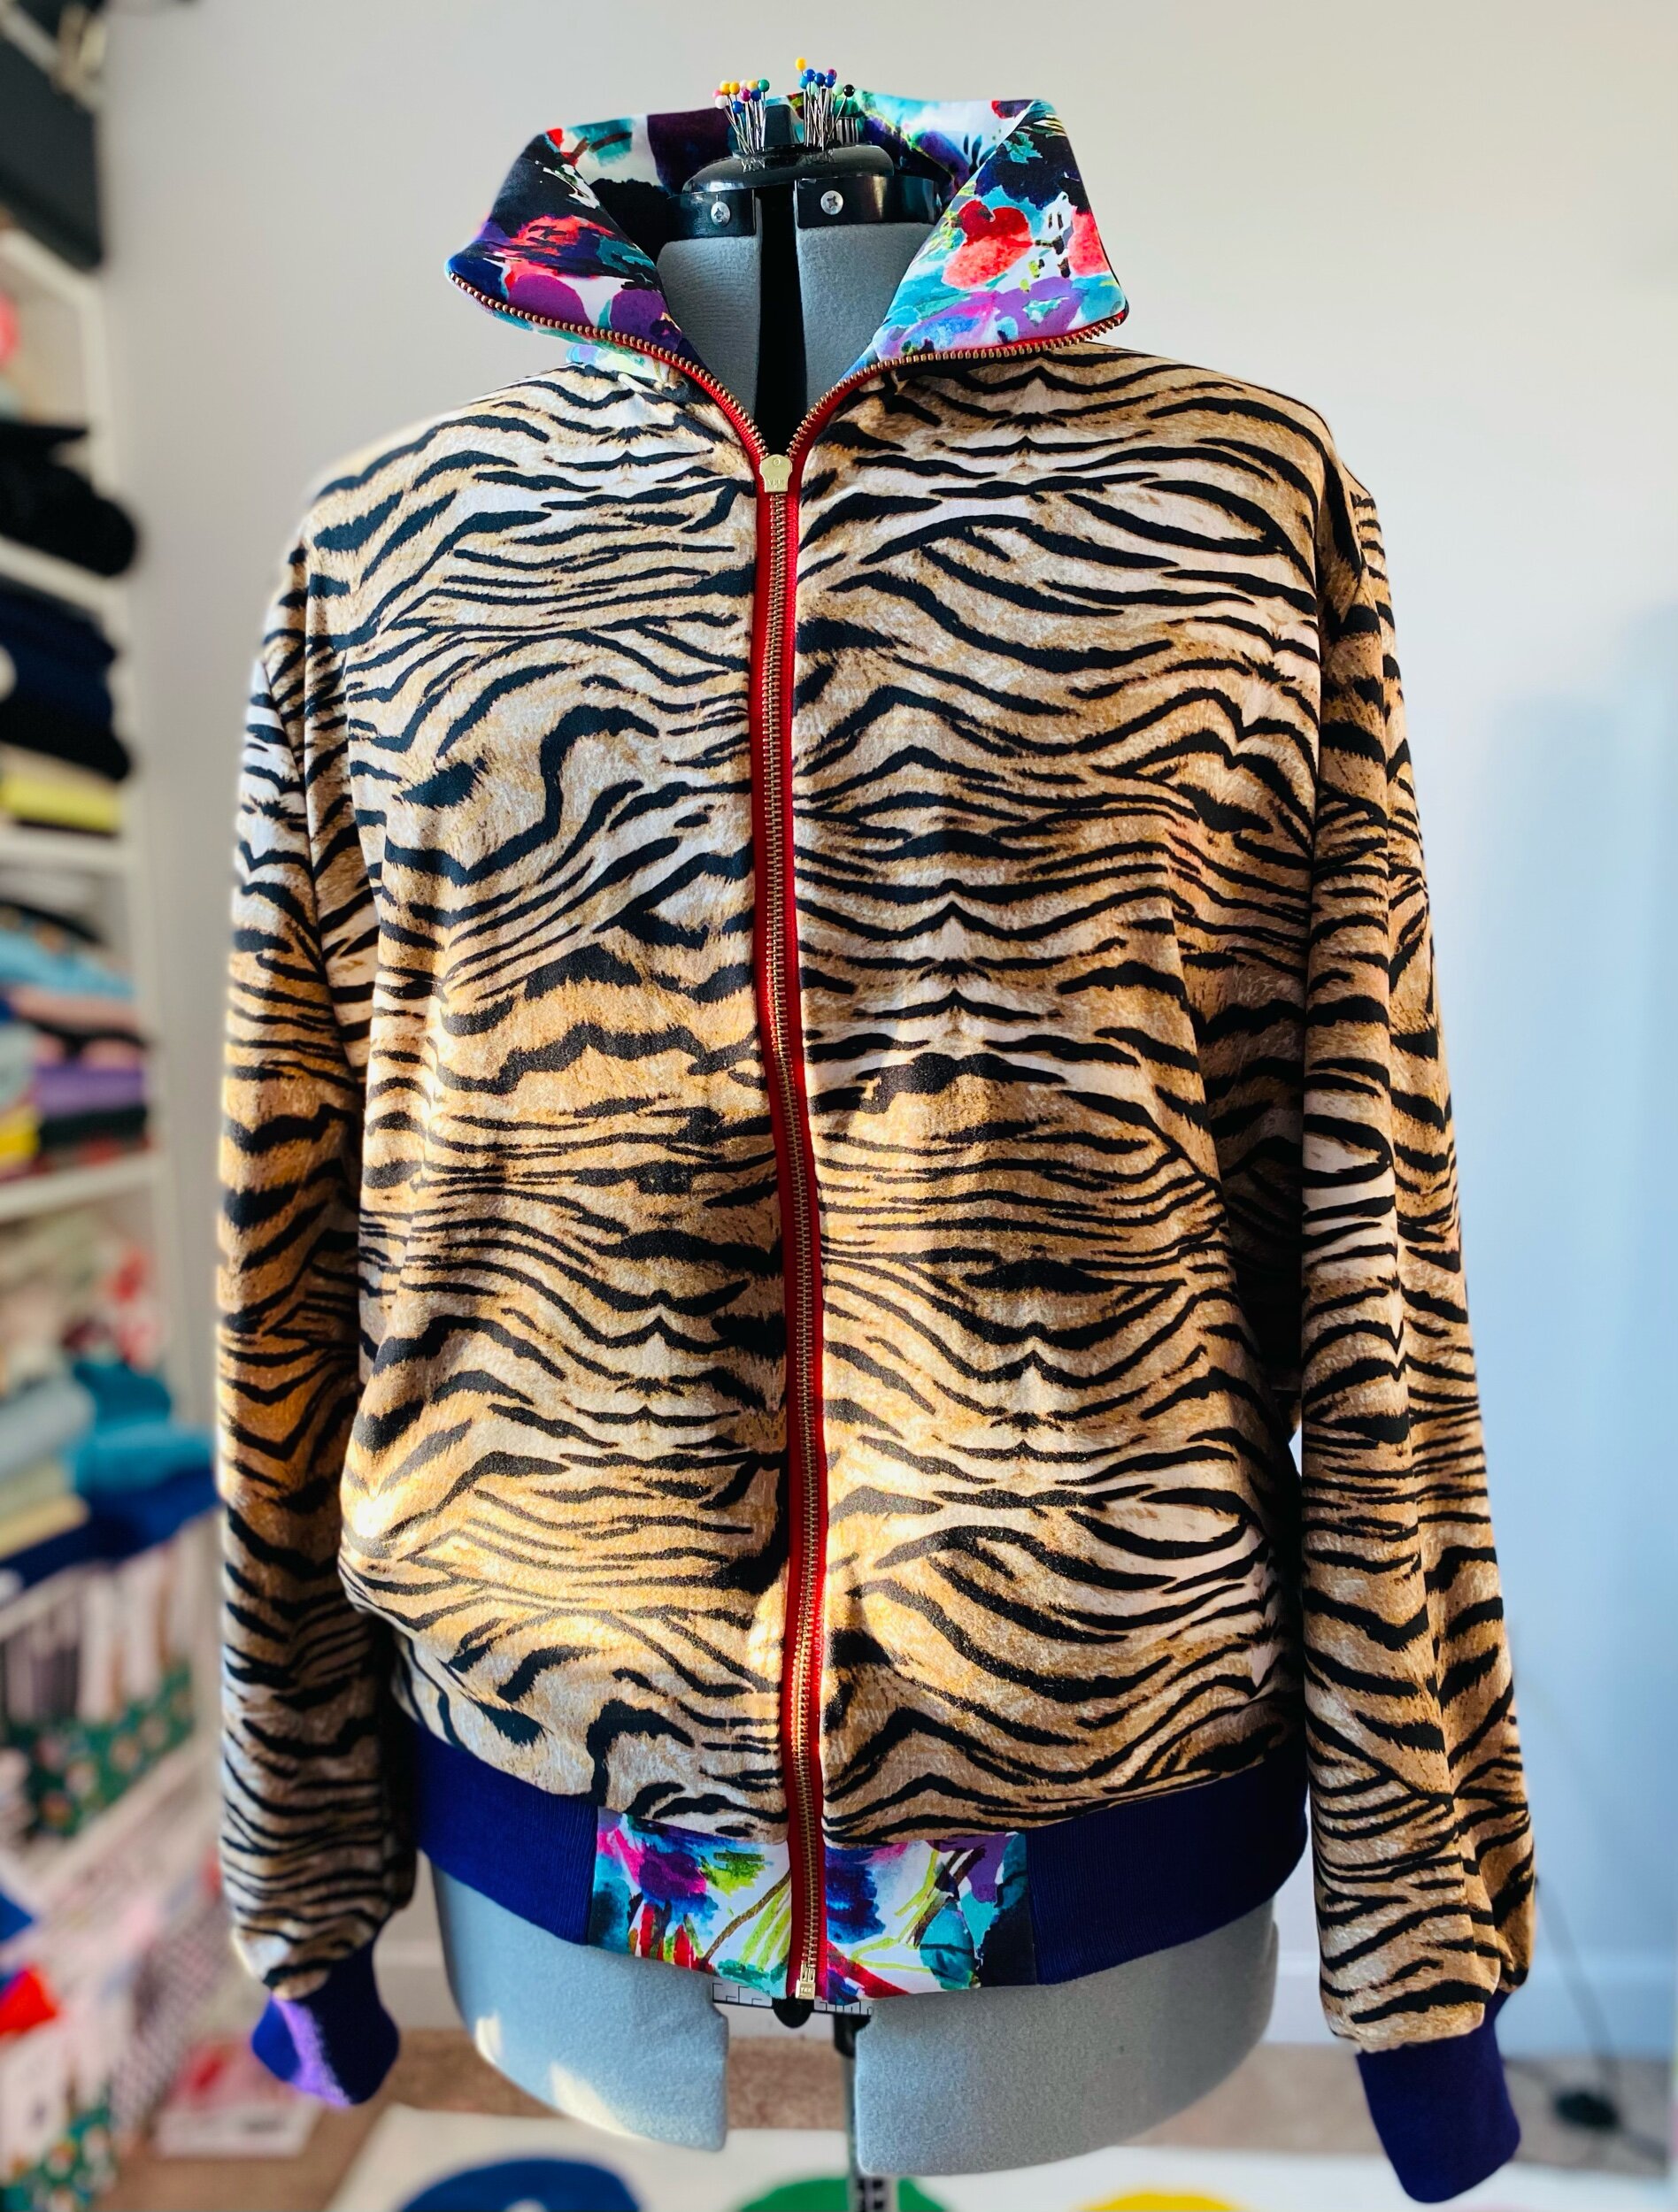
This project started with a sketch but before the sketch I saw an amazing designer named Prep Curry rockin his custom floral jogger set and I knew I had to make one for myself. So I shopped my stash and found floral, green, blue, and white fabric. I have had all these fabrics for a few years now and finally found something to create with them. I sketched out the jacket late last year and just never got around to sewing it up. Most of my ideas for contrasting fabrics arise because I simply don’t have enough fabric to make an entire garment so I think of ways to spice it up. This was the case with the floral print. When I purchased it, I had no idea what I was going to make and when it came time to create I couldn’t find the fabric anywhere (I looked for about 1 day total lol). So I had about 2 yards of the floral fabric and based my sketch off of that. Initially, I didn’t think I had enough floral to add to the sleeves but I’m so happy I was able to squeeze it in. As for my solid color fabrics, I had plenty for this project so I wasn’t playing Tetris. My initial design I added a pink contrast but when I went shopping for this shade I didn’t find the perfect fabric at local stores so I just scratched pink off my design. I also didn’t want to spend much on this project.
I’m often asked how do I come up with contrasting looks, mixing colors, and prints? Well sometimes it’s really me just making what I already have work. Other times I actually plan out color palettes and design and source from there. I really just like to have fun with colors and prints and don’t like following rules.
Let’s Sew
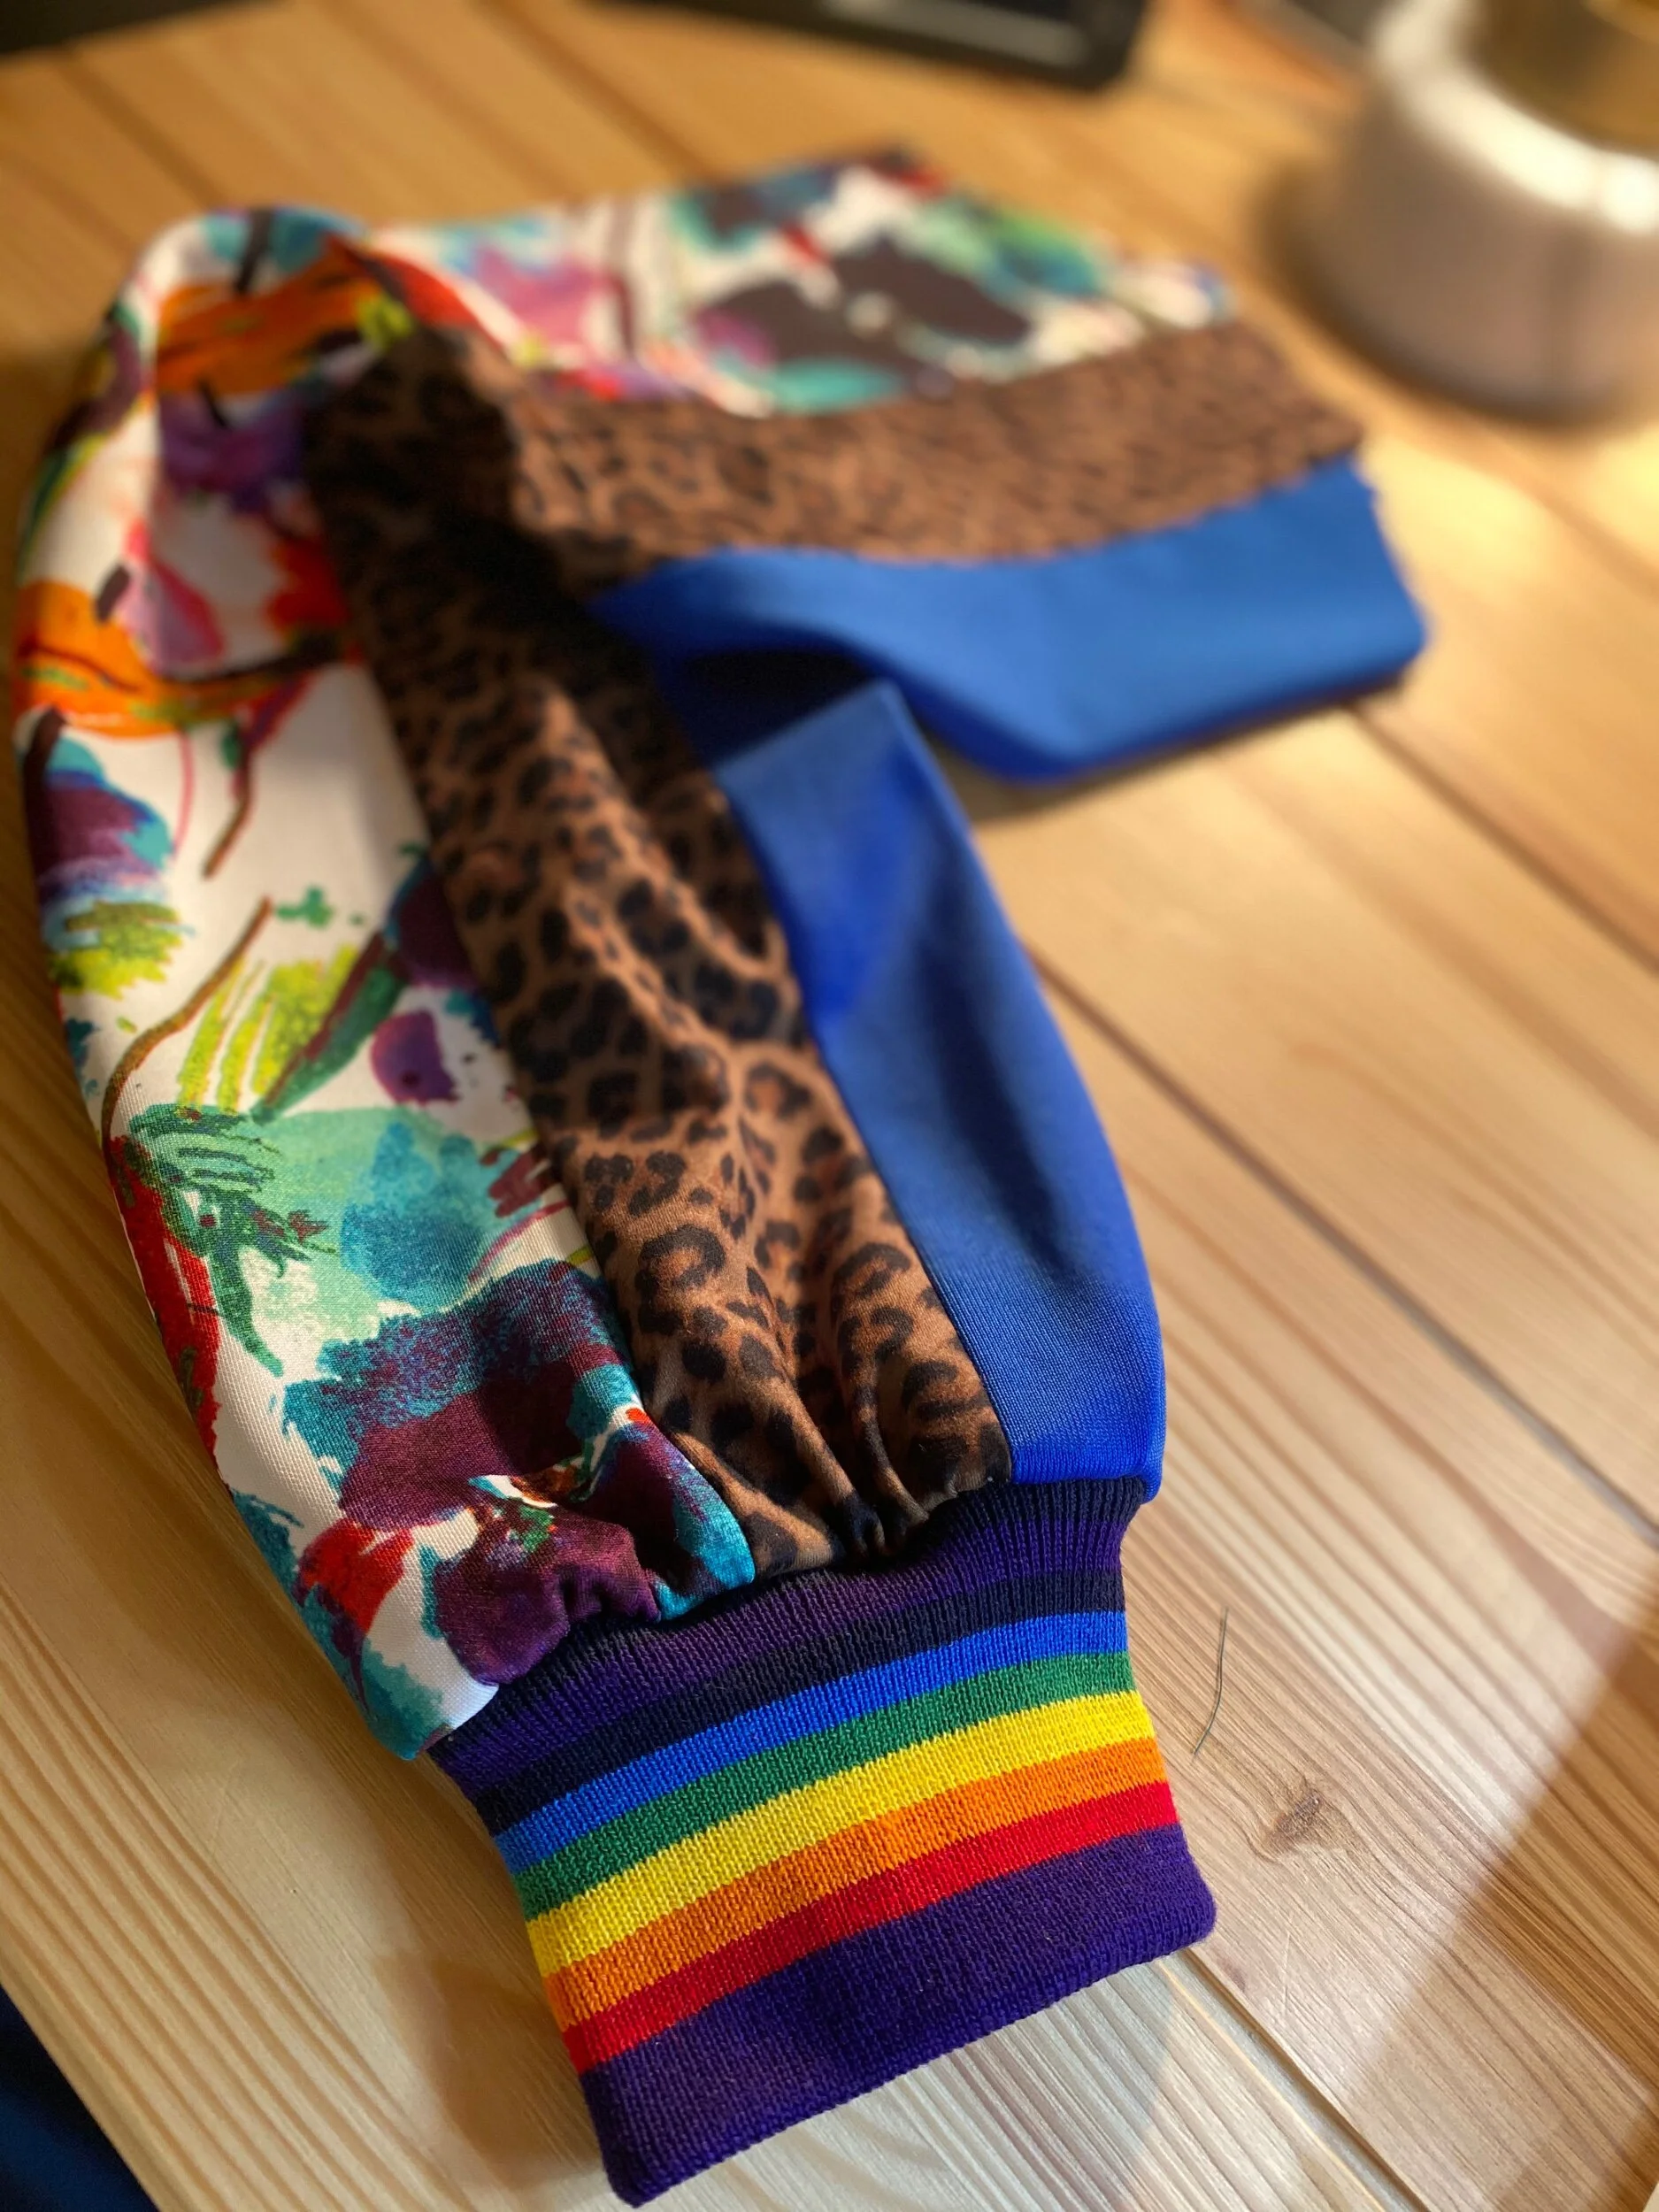
I used Mimi G’s Simplicity pattern 8702 for both the pants and the bomber jacket. I switched up the design in the front for the jacket a bit by cutting and taping pattern pieces in the direction I wanted for each contrast. When doing this type of hack, be sure to add or subtract seem allowance where necessary. It takes a little more time but the outcome is worth it. I shared some of this process for the pants contrast on my Instagram IGTV video here! I serged the side seems on the pants but I used a straight stitch for the contrast to help everything lay flat. The pants for this pattern are meant to be fitted and also have a zipper at the ankle. I went up a size because I wanted a slight loose fit and instead of the zipper on the ankle I added rainbow ribbed knit (purchased on Amazon).
Like majority of Mimi G’s simplicity patterns, there was a video tutorial for the entire set on YouTube. I have made this jogger set once before so I was confident sewing it for the second time.
The pattern doesn’t have pockets and ya girl needs pockets! So I added welt pockets to the bomber jacket. You could even add pockets to the pants. I personally found it easier to just add pockets to the jacket. I would’ve had to get a little more creative with pockets on the pants since the middle side section (animal print) is not perfectly centered for pocket placement on a seem. Whatever your preference, I say do you!

Welt pocket Install


POCKETS PLEASE!
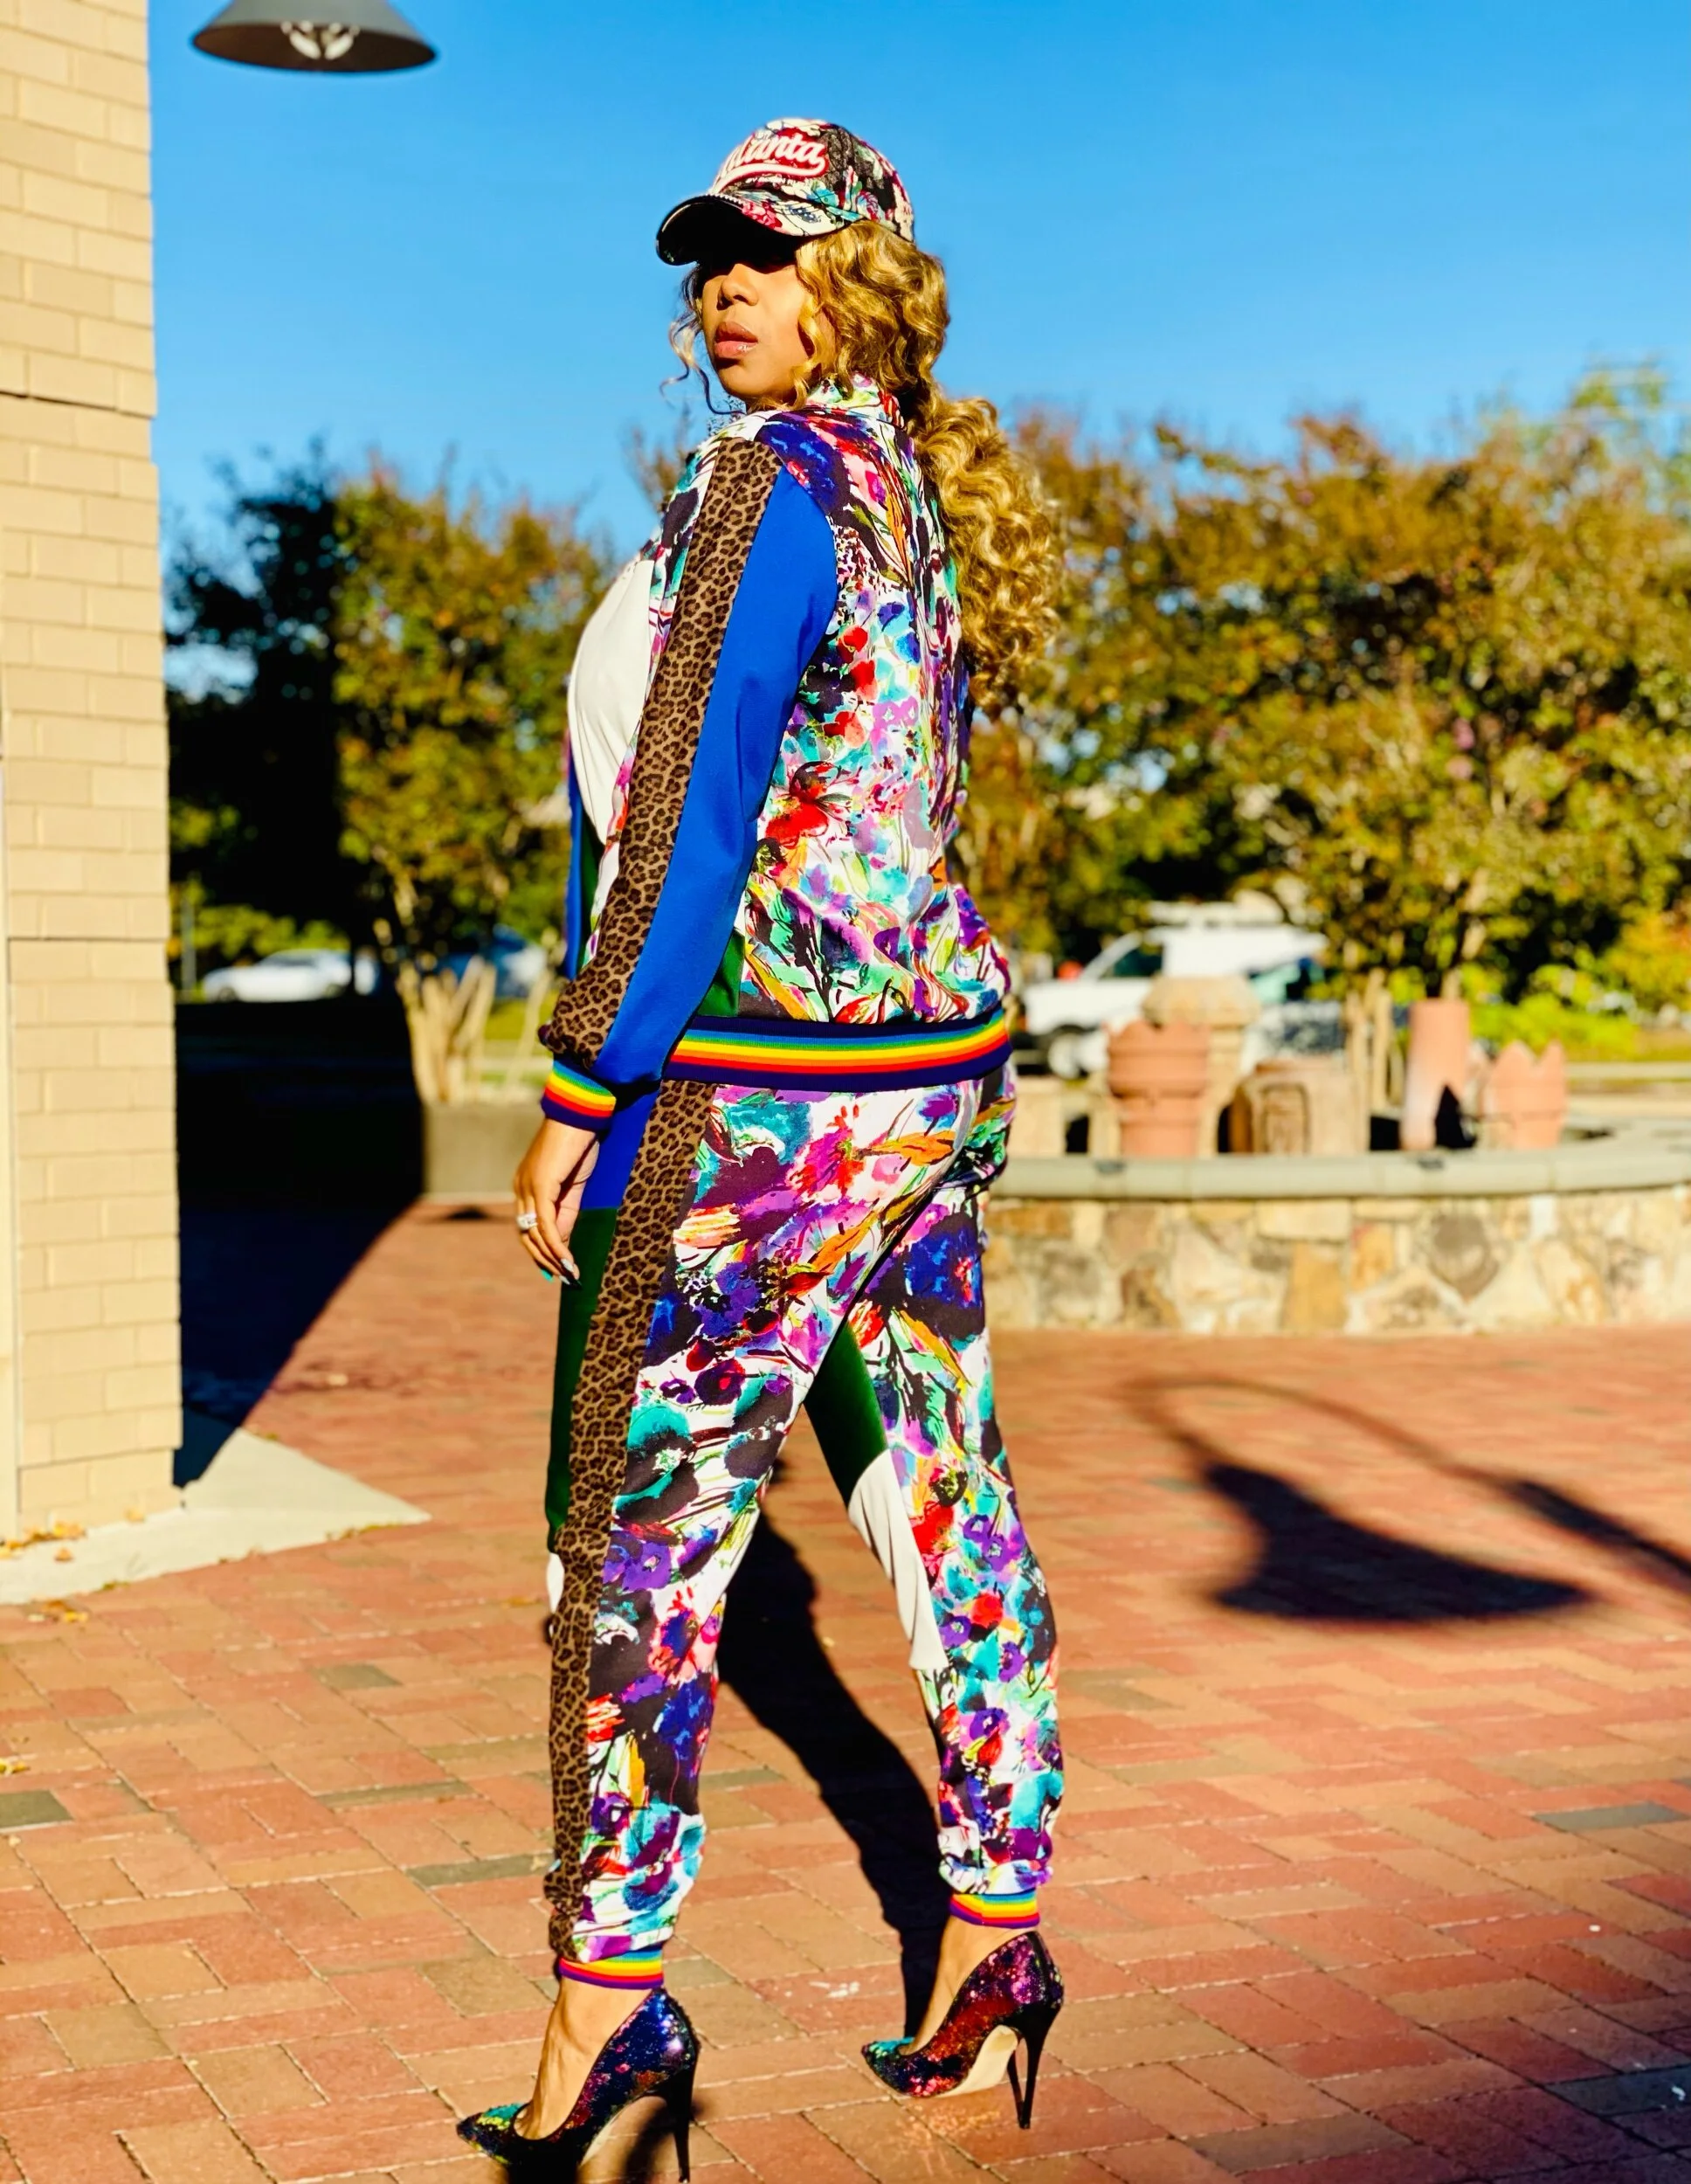


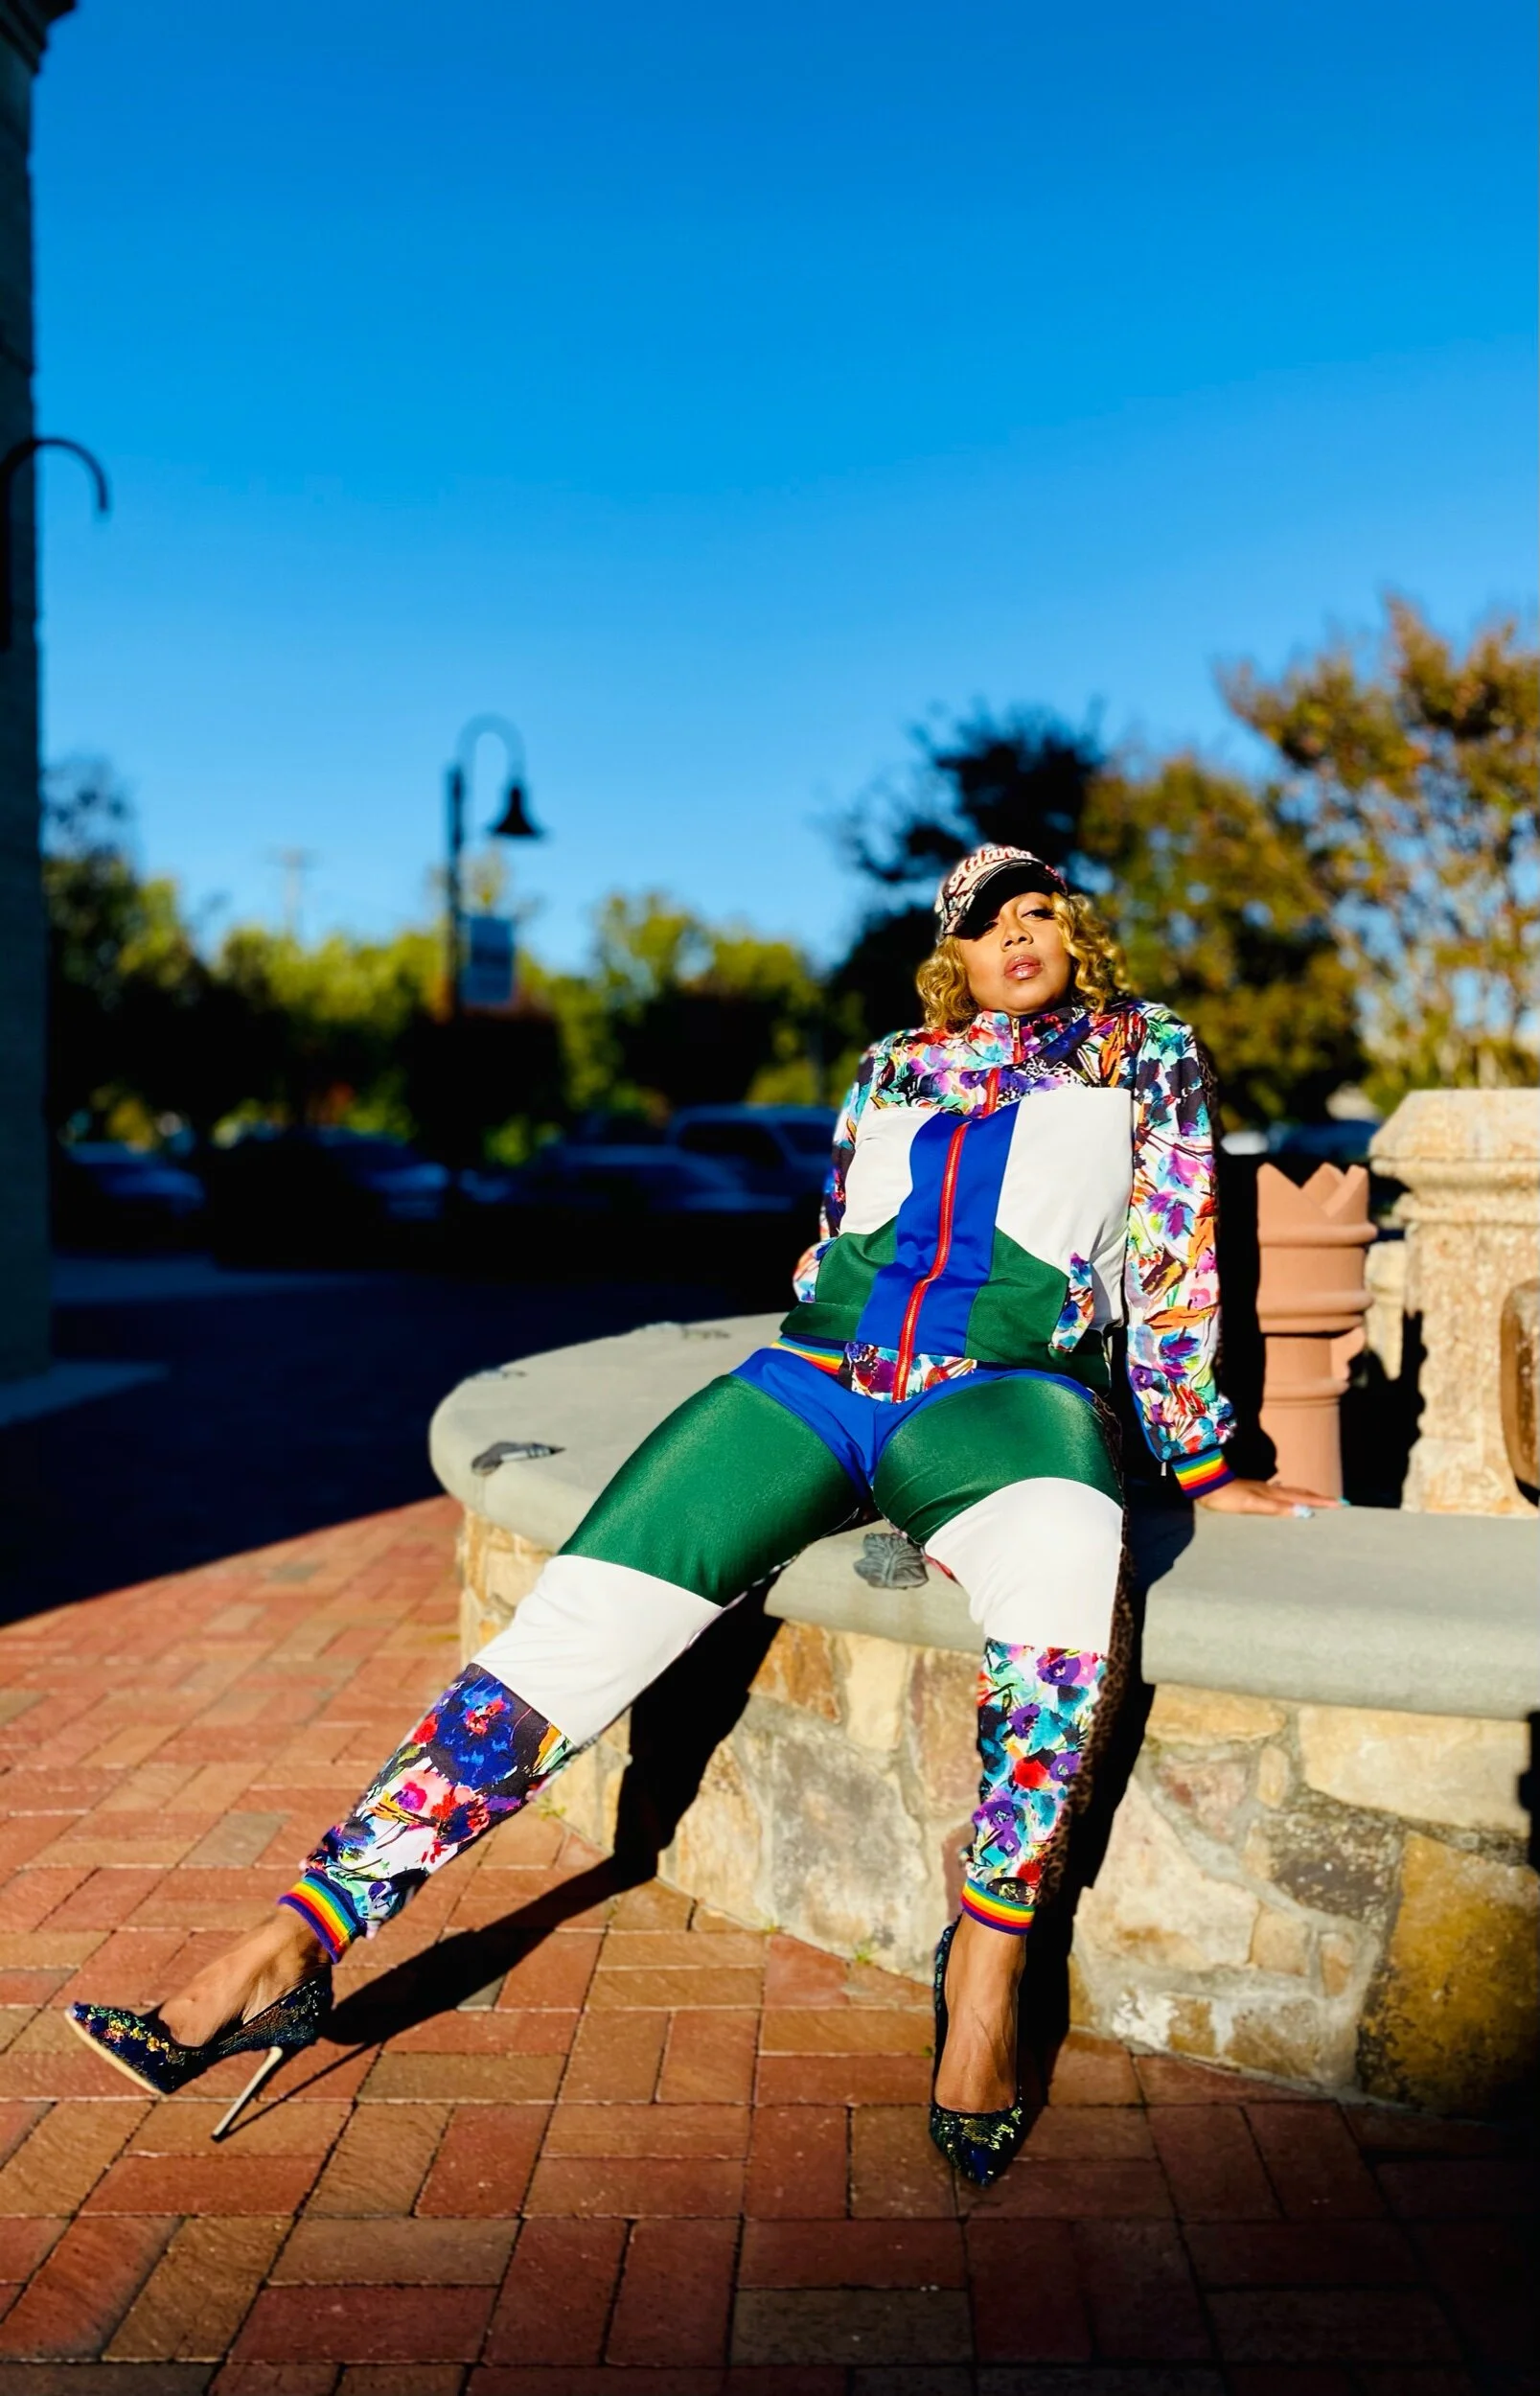
Overall I had so much fun creating this look! The lining gave me the pop I wanted on the inside and I will definitely keep warm wearing this through the winter.
Will I make it for a 3rd time? Absolutely! I feel this pattern can be beginner friendly as long as you don’t get too intimidated by the zippers and follow along with Mimi. I hope you all enjoyed this creation. Tell me what you think below. I’d love to hear from you.
Until next time
Peace & Blessings

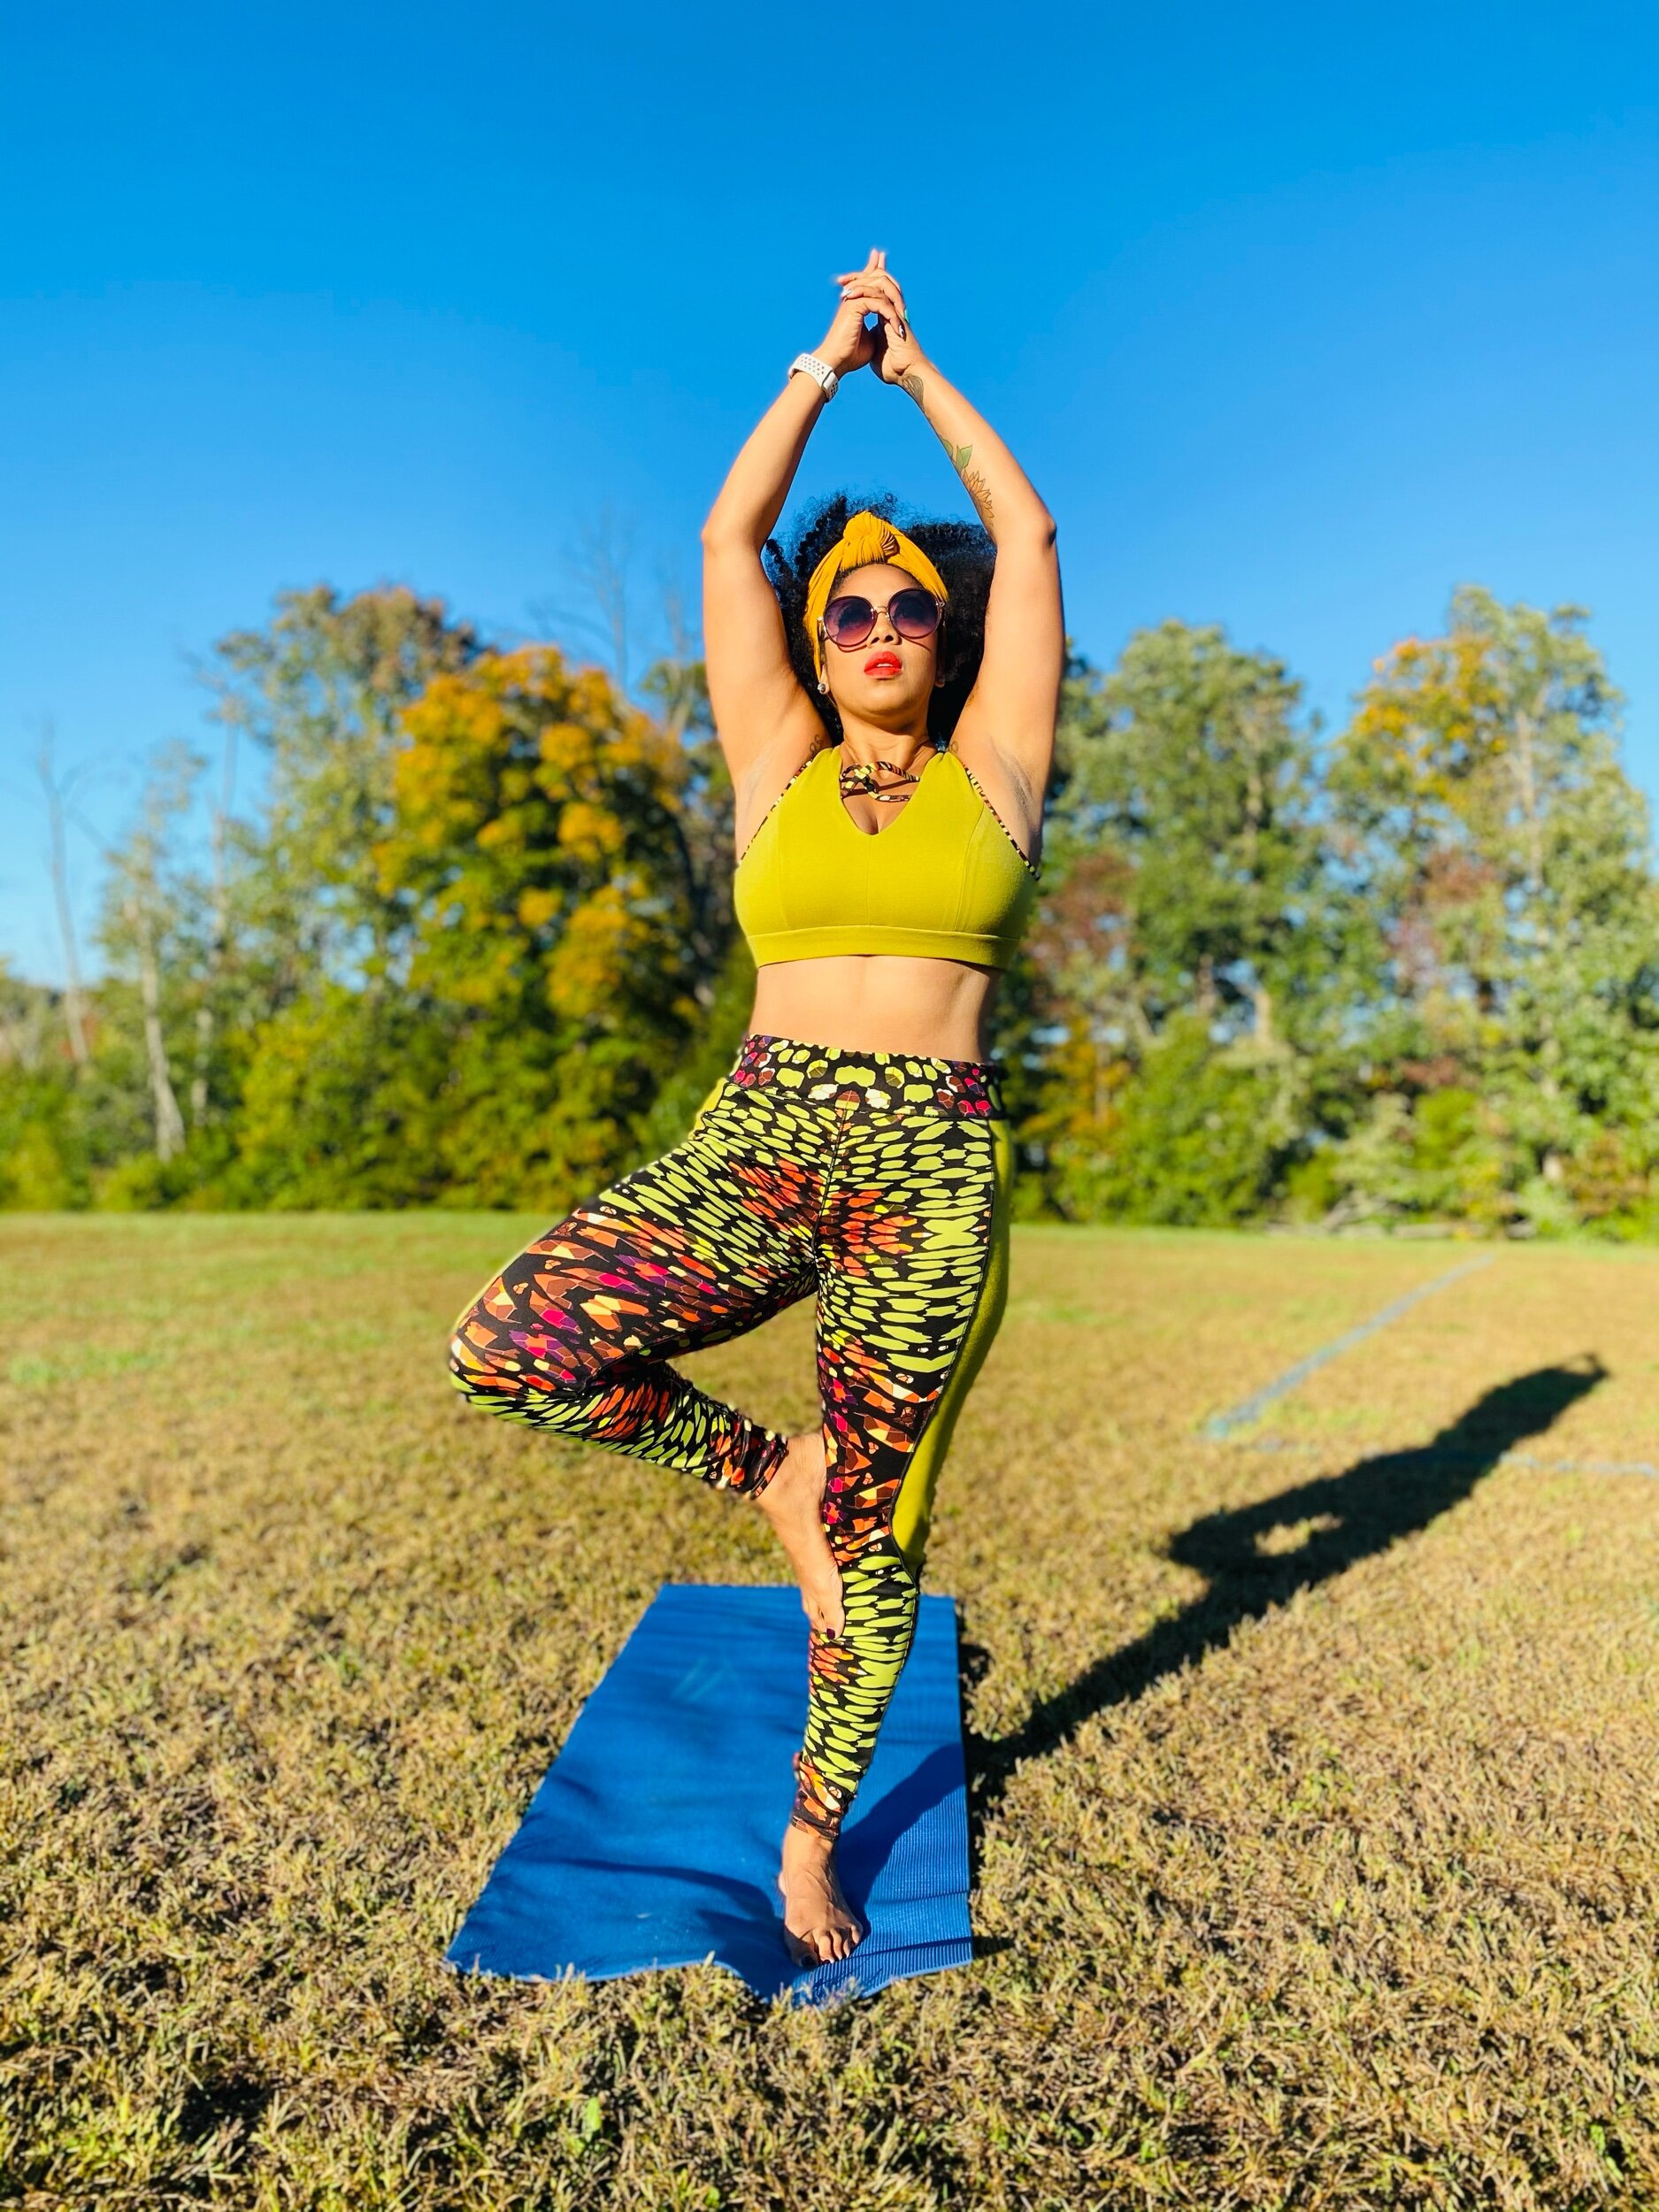
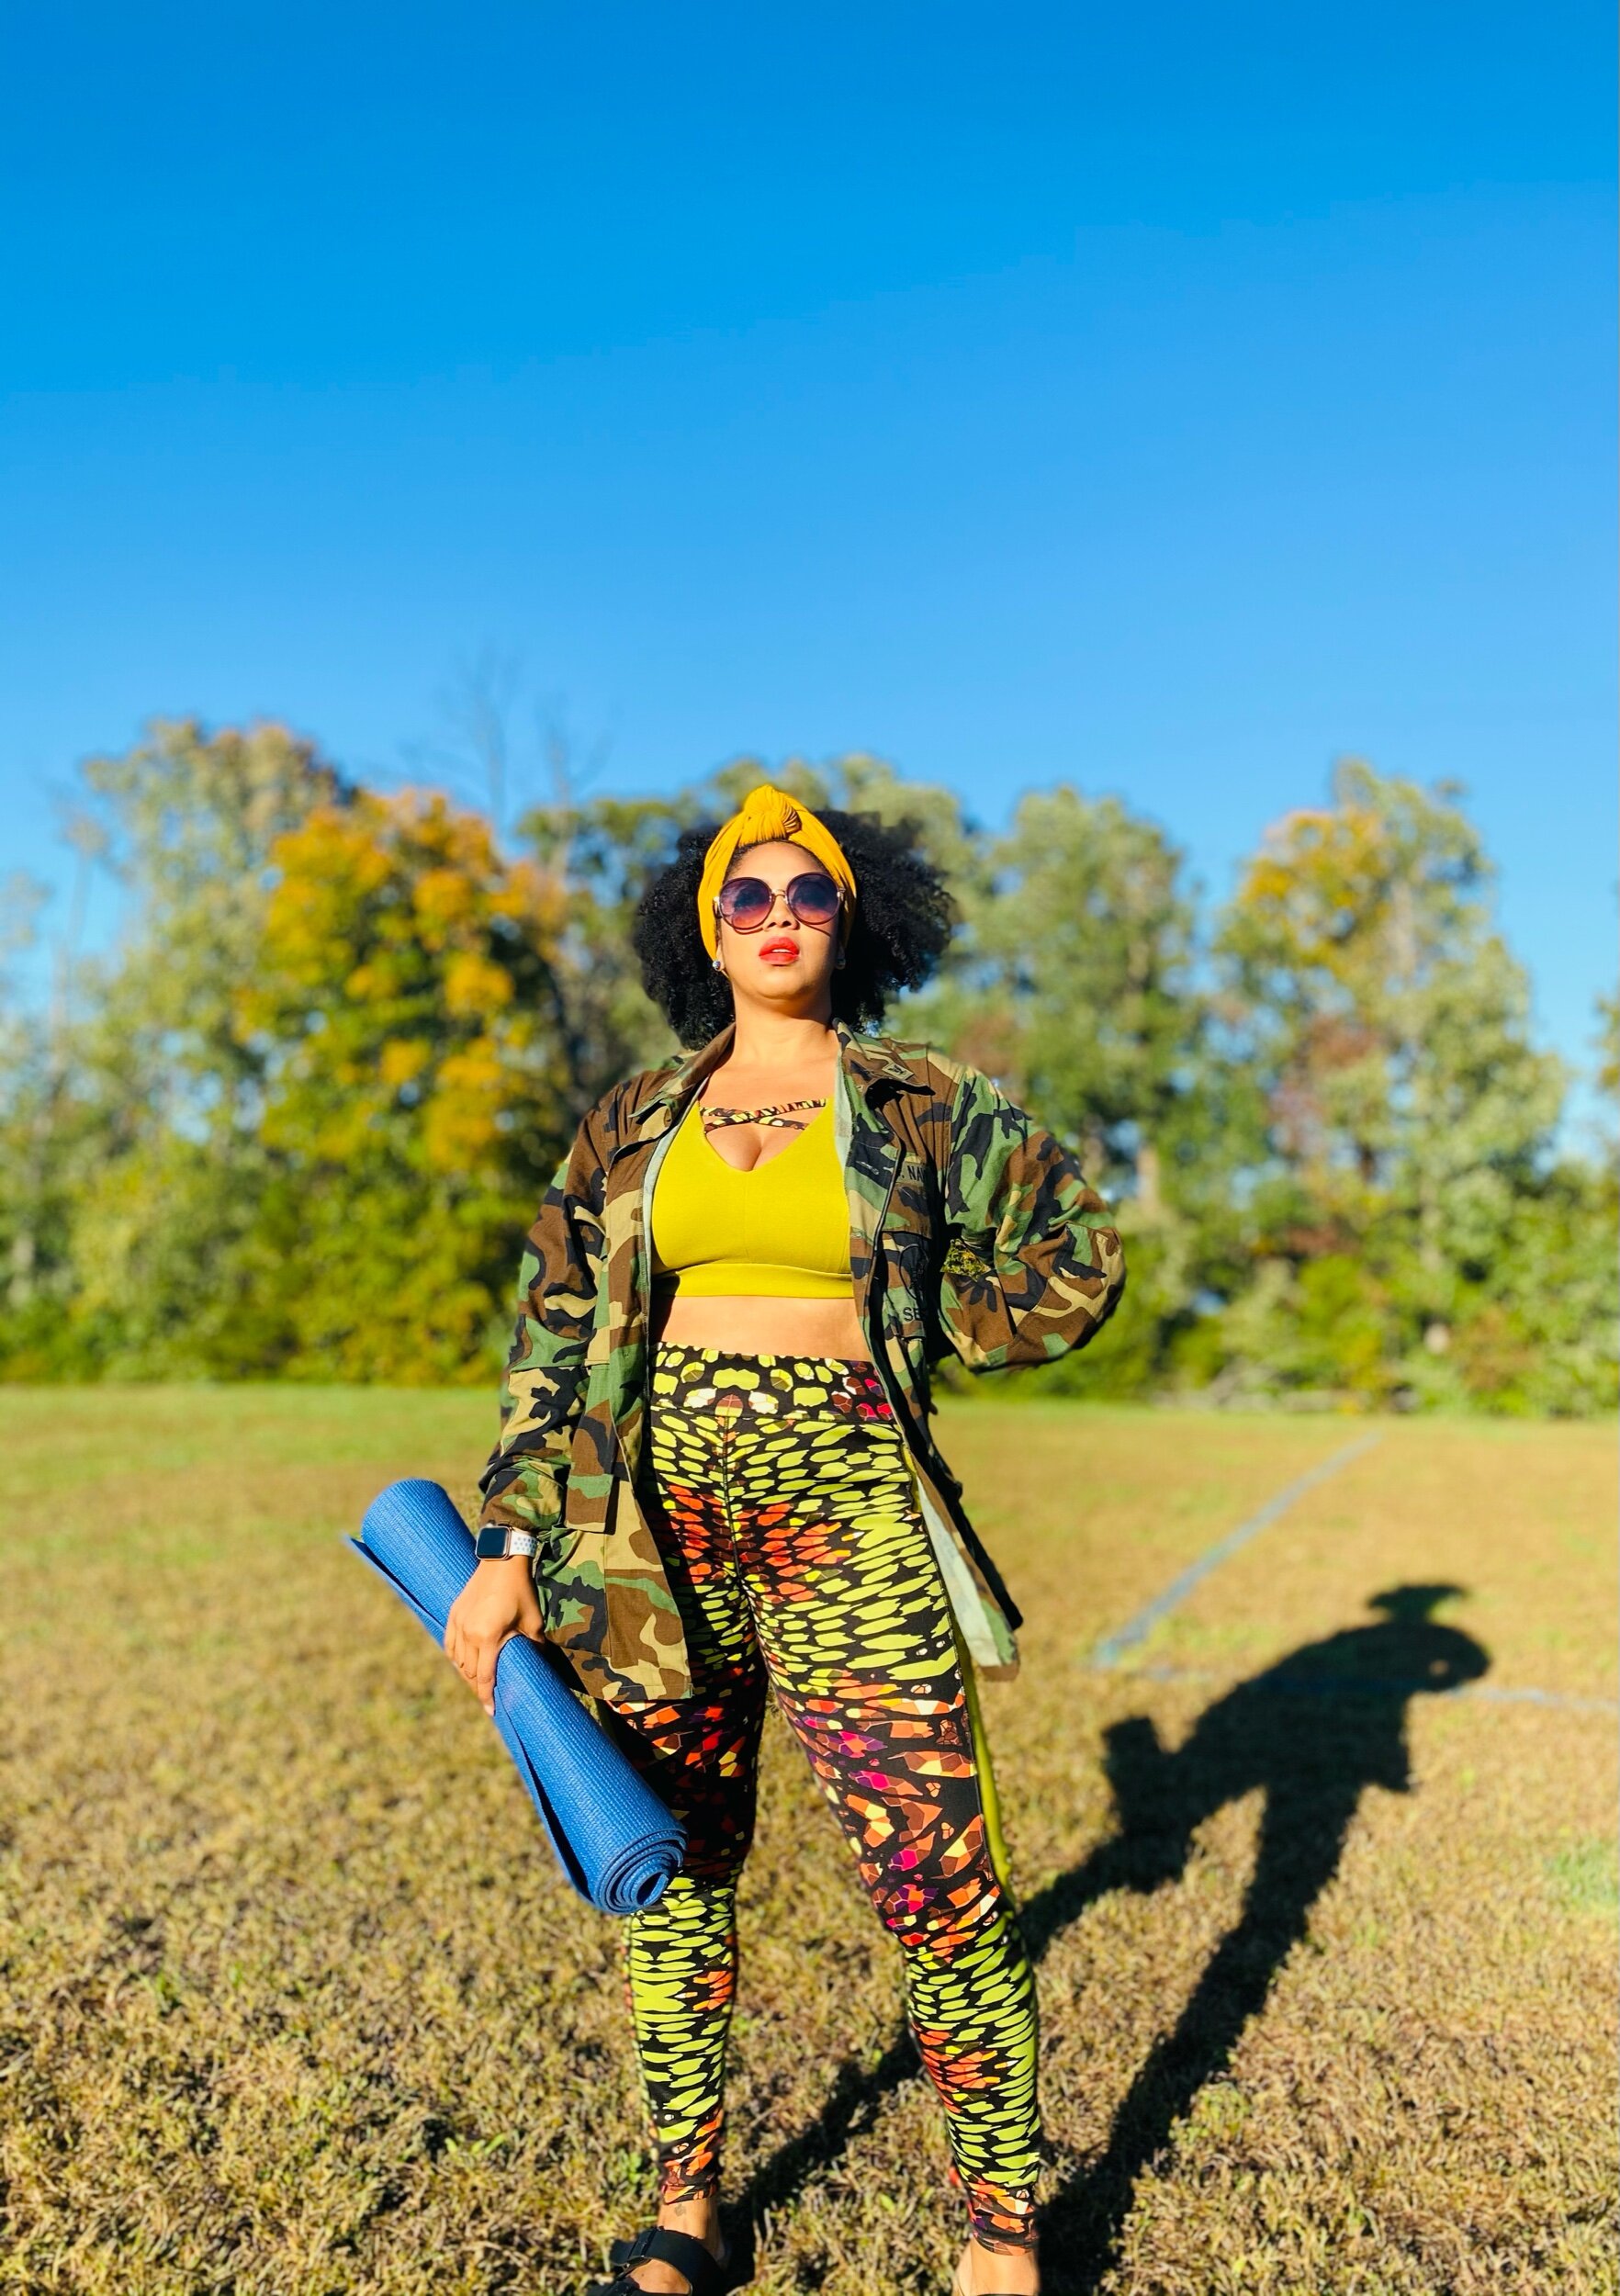
OLIVE OIL
fall ATHLEISURE
Greetings friends! It’s officially fall here and what I love the most about the fall breeze and the beautiful leaves is getting grounded outdoors!
I just recently became the proud owner of a Peloton (oh hey new side abs) and I couldn’t help but crave new workout gear. So I went through my pattern stash and found Simplicity #8560 and Mccalls #7482.

Prep
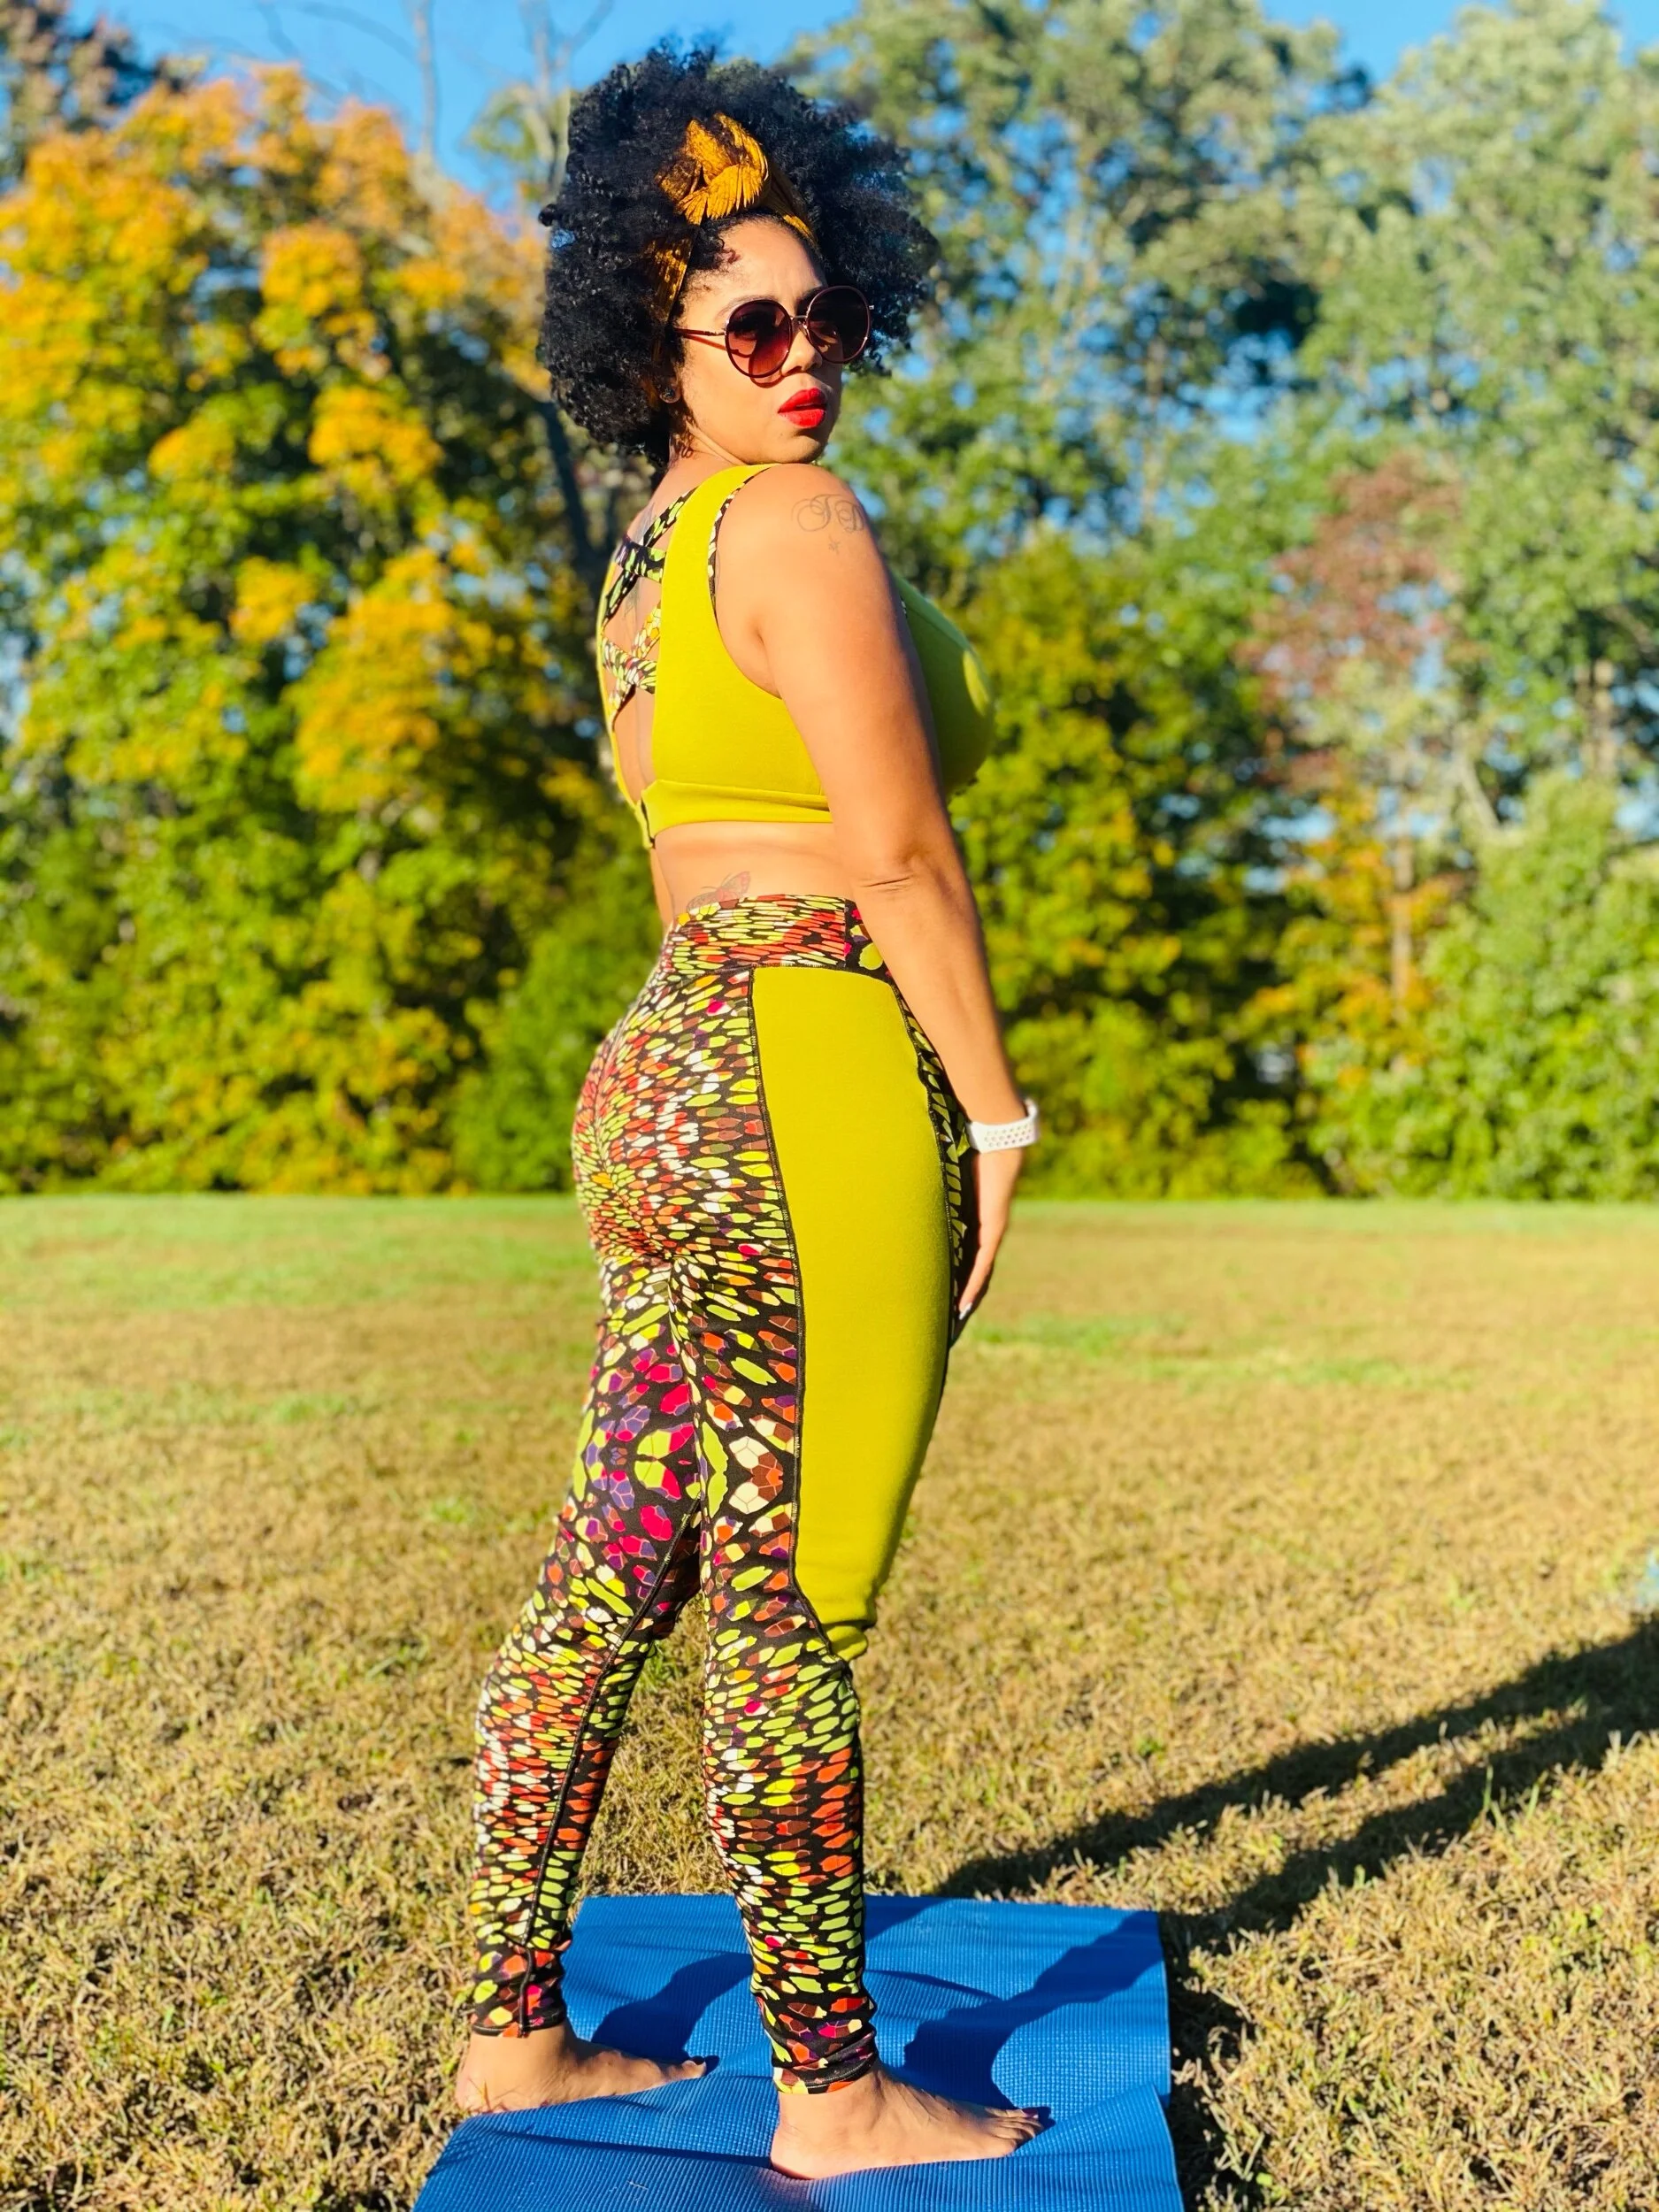
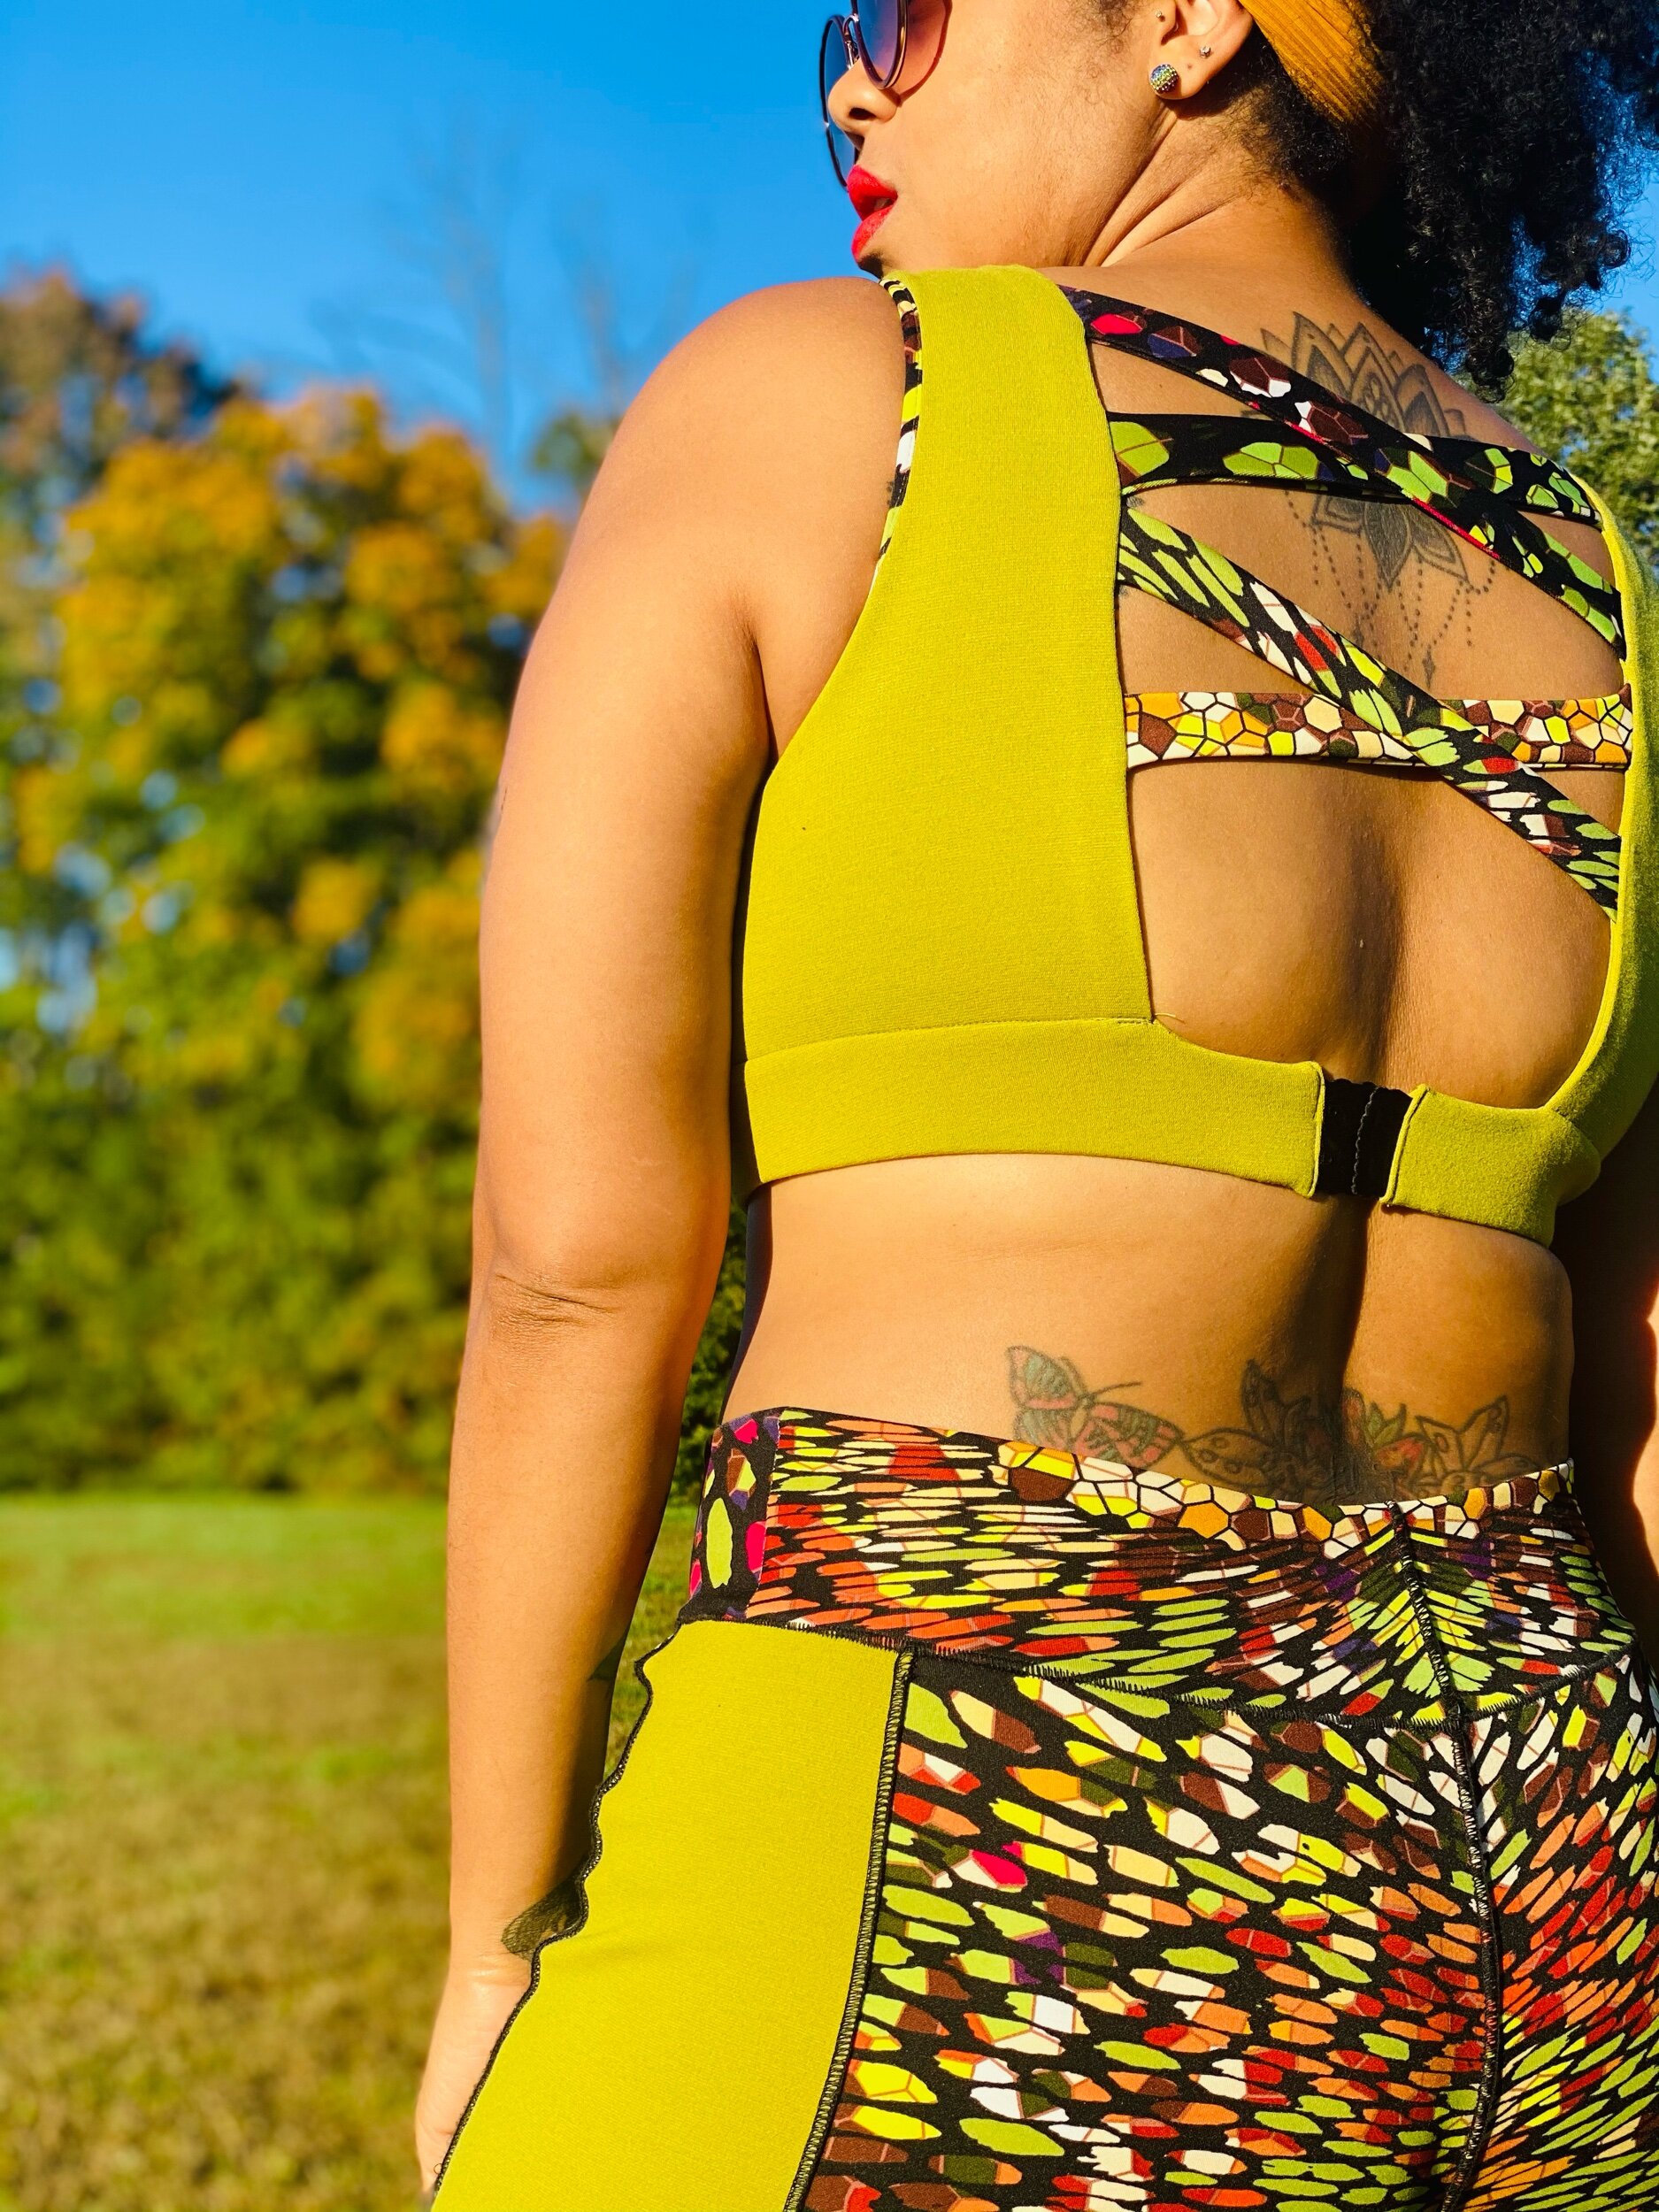
I love this sports bra pattern because it gives the option to change the cup size which is very important for me. I don’t know about y’all but my DD’s don’t always fit comfortably into store bought sports bras. The pattern called for me to use cup size F but I used size 36 with an E cup to test the waters. My bra size is 36DD. For fabric choice, I used an olive green ponte knit I had on hand and a funky, I think neoprene fabric also from my stash. I only had 1.5 yds of the print and I’m stoked I was able to slightly pattern match with the pants (thank God the width of the fabric was 60”).
Okay so now for the fun part, threading my serger to a flatlock stitch! For the entire pants pattern I used Erica Bunker’s M7482 YouTube tutorial. It was a game changer y’all! In this tutorial Erica used a 2-thread flatlock stitch (see here) but my serger wasn’t having it so I went with 3-threads. If you have a serger and don’t have a cover-stitch machine you can definitely pull off the look with these sergering tips. If you’re anything like me you didn’t know the flatlock stitch existed until recently. I also didn’t know how rewarding it would be to pull the seams apart! I’m not kidding, it’s like magic lol.

Construction
I made the pants first and you wouldn’t believe they were actually a very quick make going along with Erica’s tutorial but keep in mind the higher the tension on your serger, the more likely you are to experience the thread popping. Hell, I know mind did and it was not fun doing the entire seam over or pulling out the seam ripper (insert red mad face emoji).
For my sports bra I did not use the flatlock stitch. For the very first seam on the bust I tested out a stretch stitch suggested for knits on my Bernina and I didn’t like the way the seam laid. I thought about serging the entire bra but decided not to. When you’re sewing knits you normally use the zig-zag stitch or serger and I did not on a few seams. One seam being the bust and side seam. I used 3.2 stitch length and it worked out fine for me. I like to think the straight stitch in the bust helped to support the girls better. Keep in mind the stretch is different for every knit fabric type. A straight stitch might not be the best option for you. I made a second sports bra with swimwear jersey and serged every stitch and the support is not as strong. Honestly this is something you have to test out for yourself. I used view A and view C because I loved the crisscross front and back. I went without the topstitching around the edges because that’s my business, lol. I cut the back straps out at size 36 but I would suggest going down a size or two for the back straps (they were not as fitted as I expected).
Technically, the sports bra is lined but I used the same olive green fabric for the lining and I know that also added support. This is also a preference and you can choose to use performance stretch lining or a mesh stretch fabric.
I found a few old bras I could no longer wear and cut the closures off of them. The pattern calls for the closures to be more hidden and only has one row of closures. I used 2 rows, also preference. I got lazy and did not hand sew back connectors to the closures. If your machine gets close enough and you don’t break needles, go for it but handsewing is best. For my second sports bra with this same pattern, I only use 1 row of closures and I did handsew….it looks a lot neater lol.


Overall
You can conquer athleisure/workout gear! Is my first sports bra perfect? Not quite. But guess what? Practice makes better, makes perfect! I know lots don’t usually want to try their sewing hands at knits and activewear but you’ve gotta start somewhere. The tips and tools are out there for help and you don’t have to have a coverstitch or even a serger to sew activewear but if you have either, just do it! My hope is to inspire you to give it a go or pull out that UFO you gave up on years ago and practice.
As always thanks for stopping by. Tell me your thoughts on sewing activewear in the comments. I’d love to hear about it!
Peace & Blessings!
