

Pink Cord
Pink Corduroy takes Flight
Okay, for real, for real. This isn’t ya girls first jumpsuit and it won’t be the last. It is however, my first flight-suit, so let’s get into it!
If you’ve been following my IG then you know I am no stranger to corduroy. Over the past two years I have created 5 makes with corduroy you can check out one I actually blogged about here.

GET INTO IT
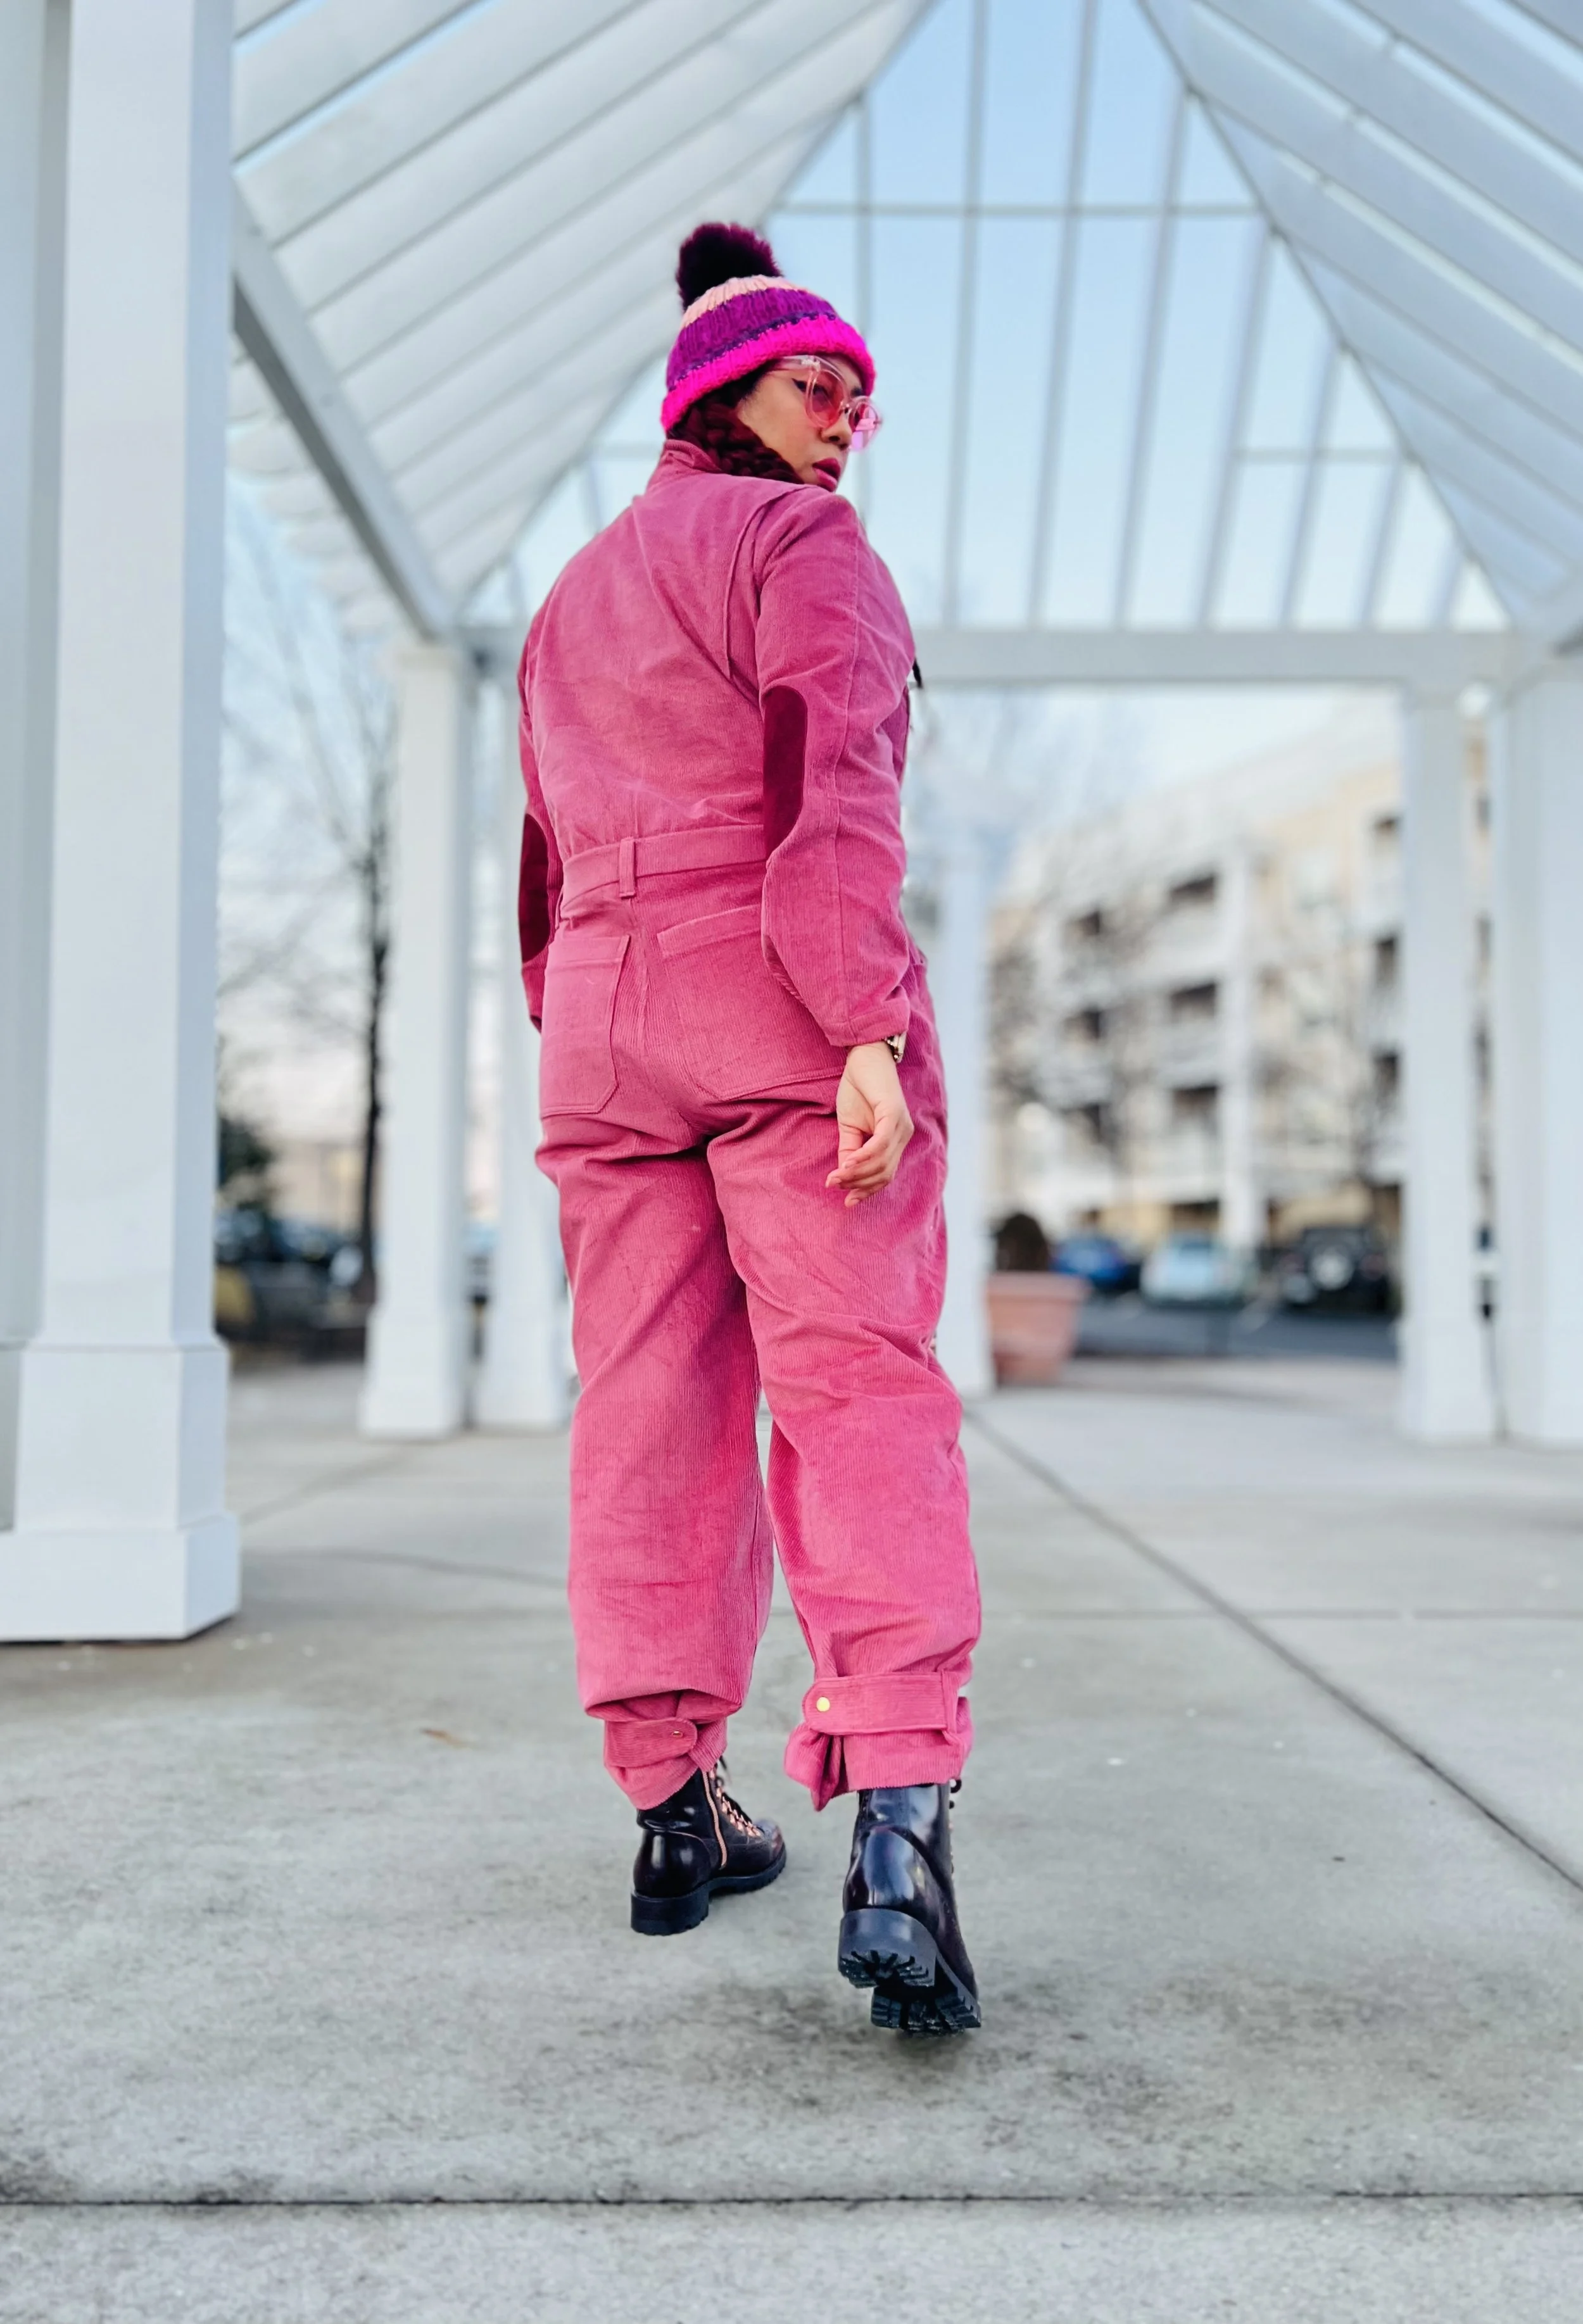
I decided to use the Blanca Flight Suit by Closet Core Patterns. I have had this pattern for at least a year and it has been a year too long. I’ve made other jumpsuits but this flight suit is by far my favorite fit! While I choose a baggy fit for sizing this pattern, it would also be perfect for a more fitted jumpsuit.
FABRIC AND CARE
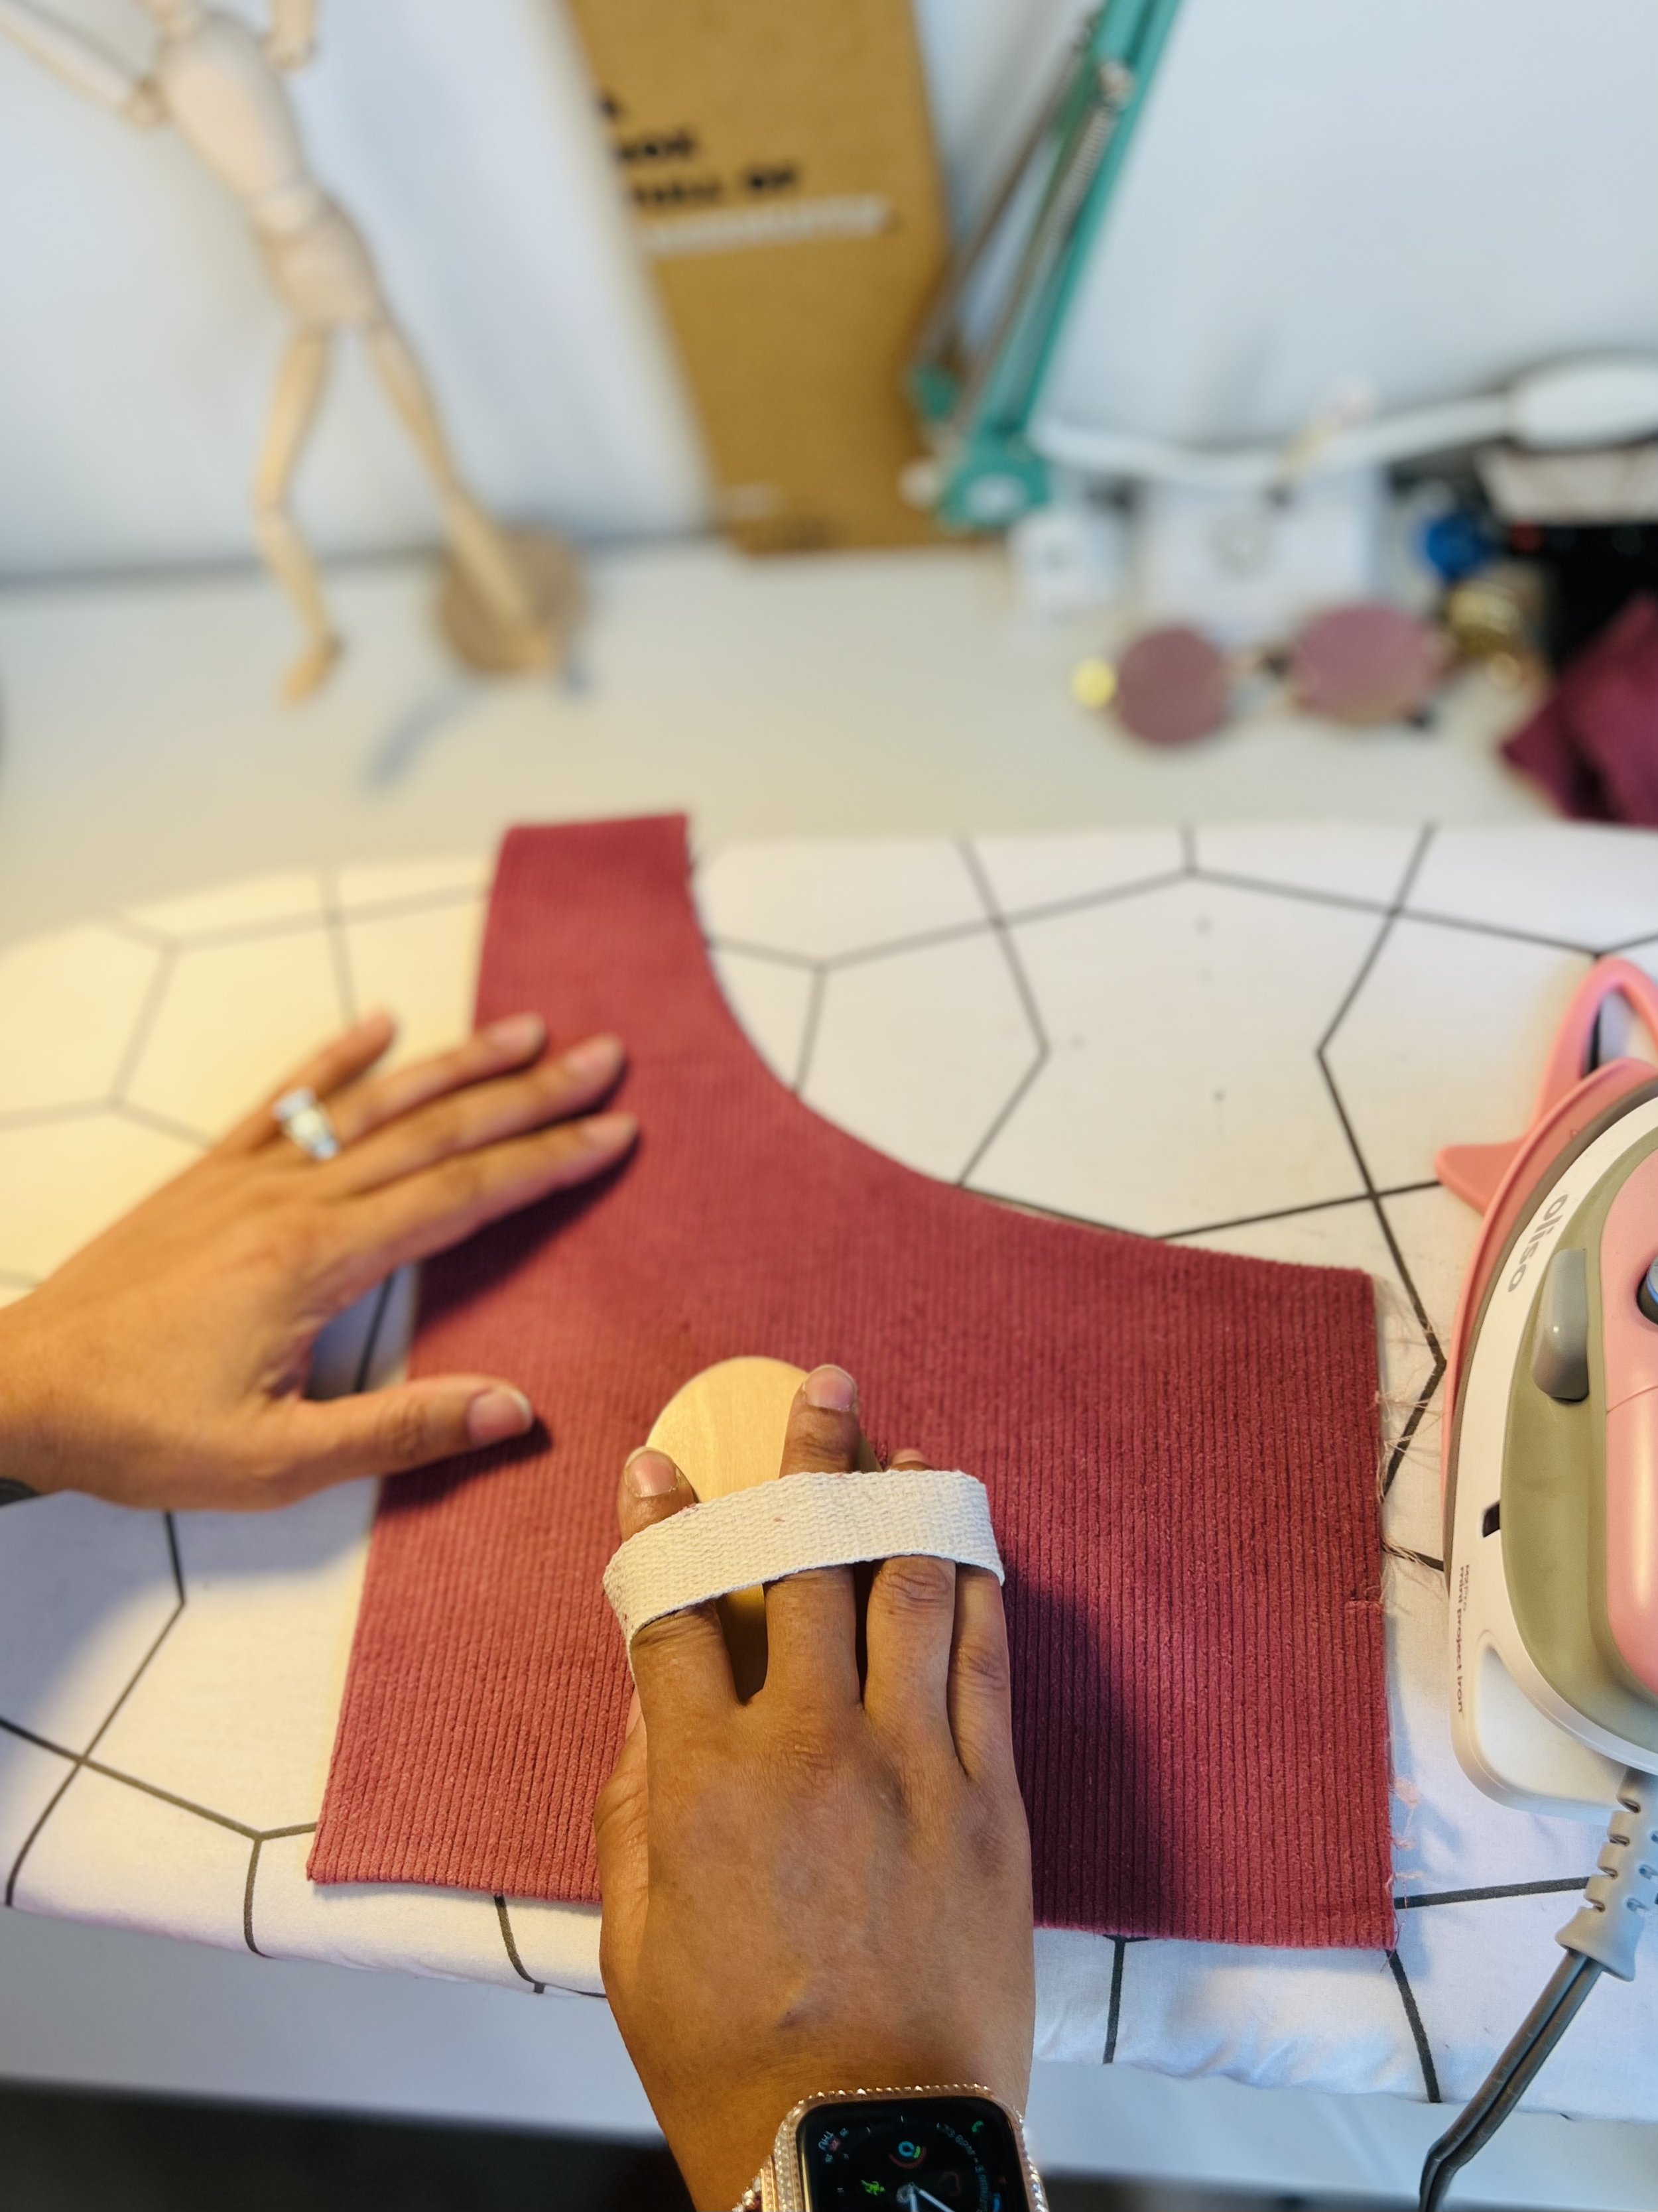
I found this pink corduroy at Hobby Lobby. It has a slight stretch to it and man can it hold some lint, lol. I’m sure there are proper corduroy pile brushes out there but I settled for a skin dry brushing brush I had on hand. If you’re not already aware, when sewing with and caring for corduroy, you shouldn’t press directly on the pile (you can smash it and that doesn’t look good and you can’t get it back). I press on the wrong side only and refrain from using a hot heat setting.
Pattern options
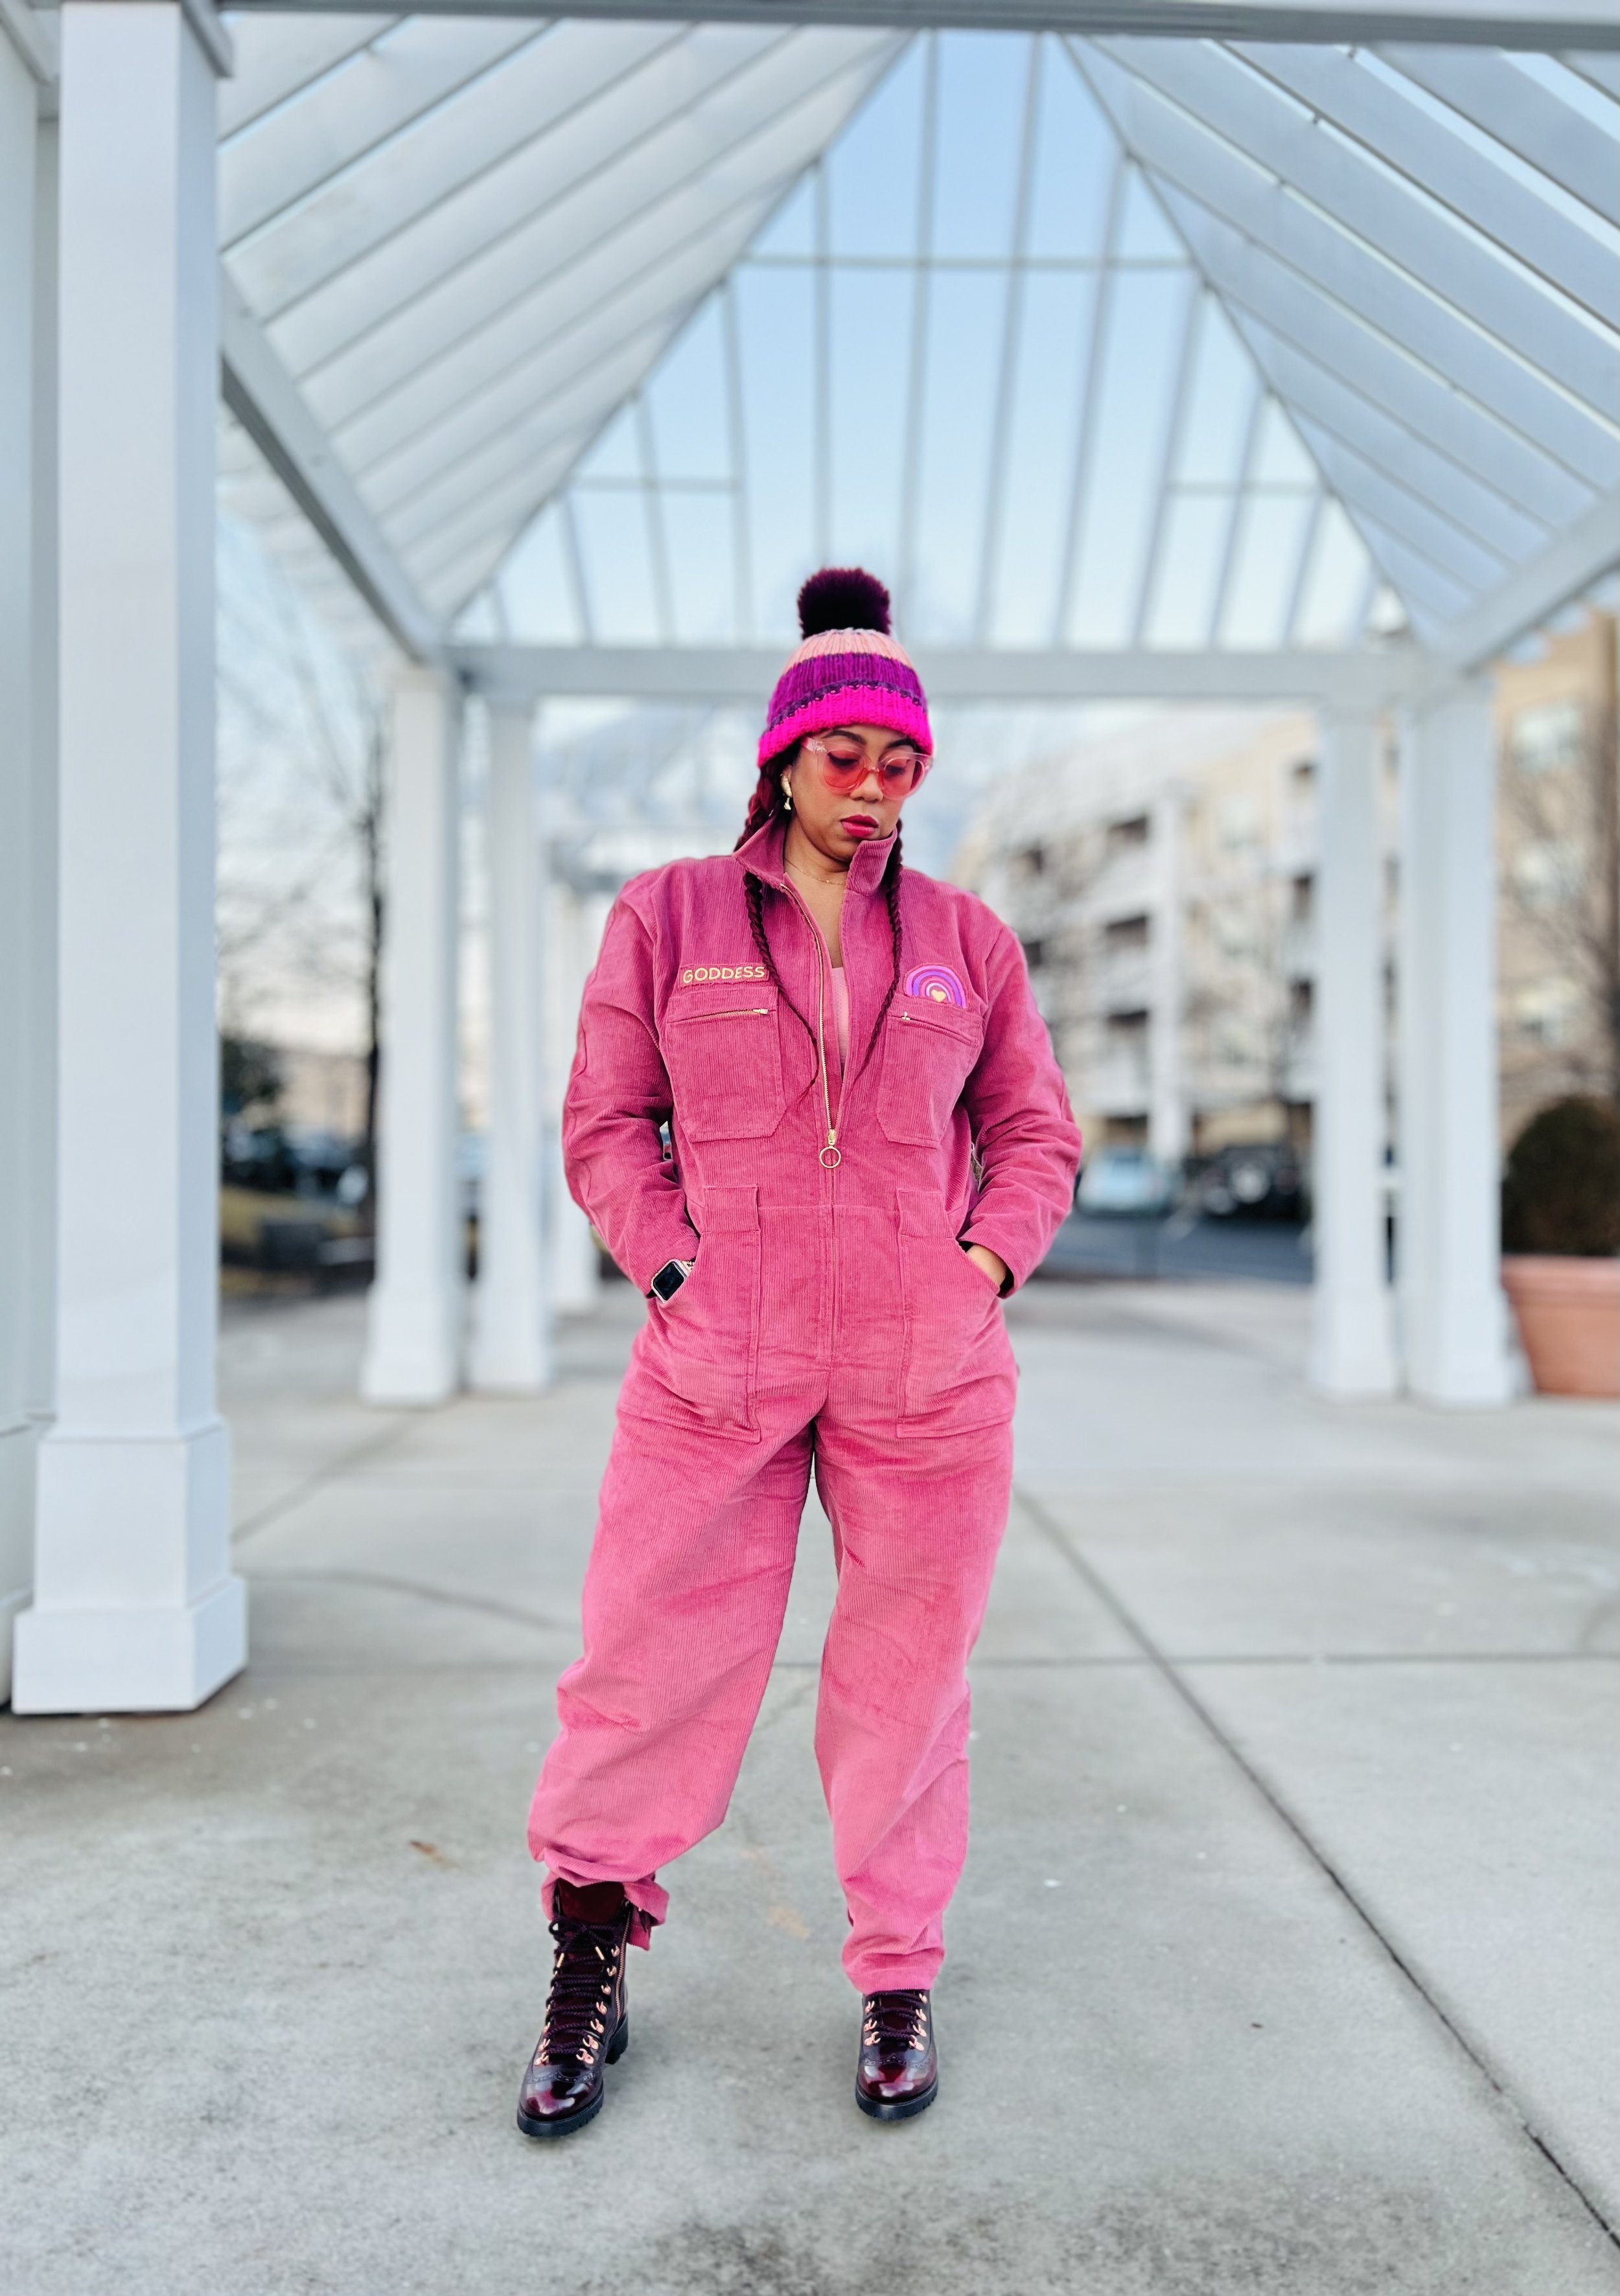
The Blanca has a few options you can choose from like zipper chest pockets, snaps on the sleeves, and tapered legs. I decided to add all three options. If you are on the fence and have never done these types of add-ons don’t fear, the pattern has instructions for them as well. There is a zipper facing on one side but I feel a front facing on both sides and zipper facing is a nice touch. You can opt out of front facing on both sides and simply add binding on the edge of the zipper for nice clean insides.


Customizing Your Flightsuit
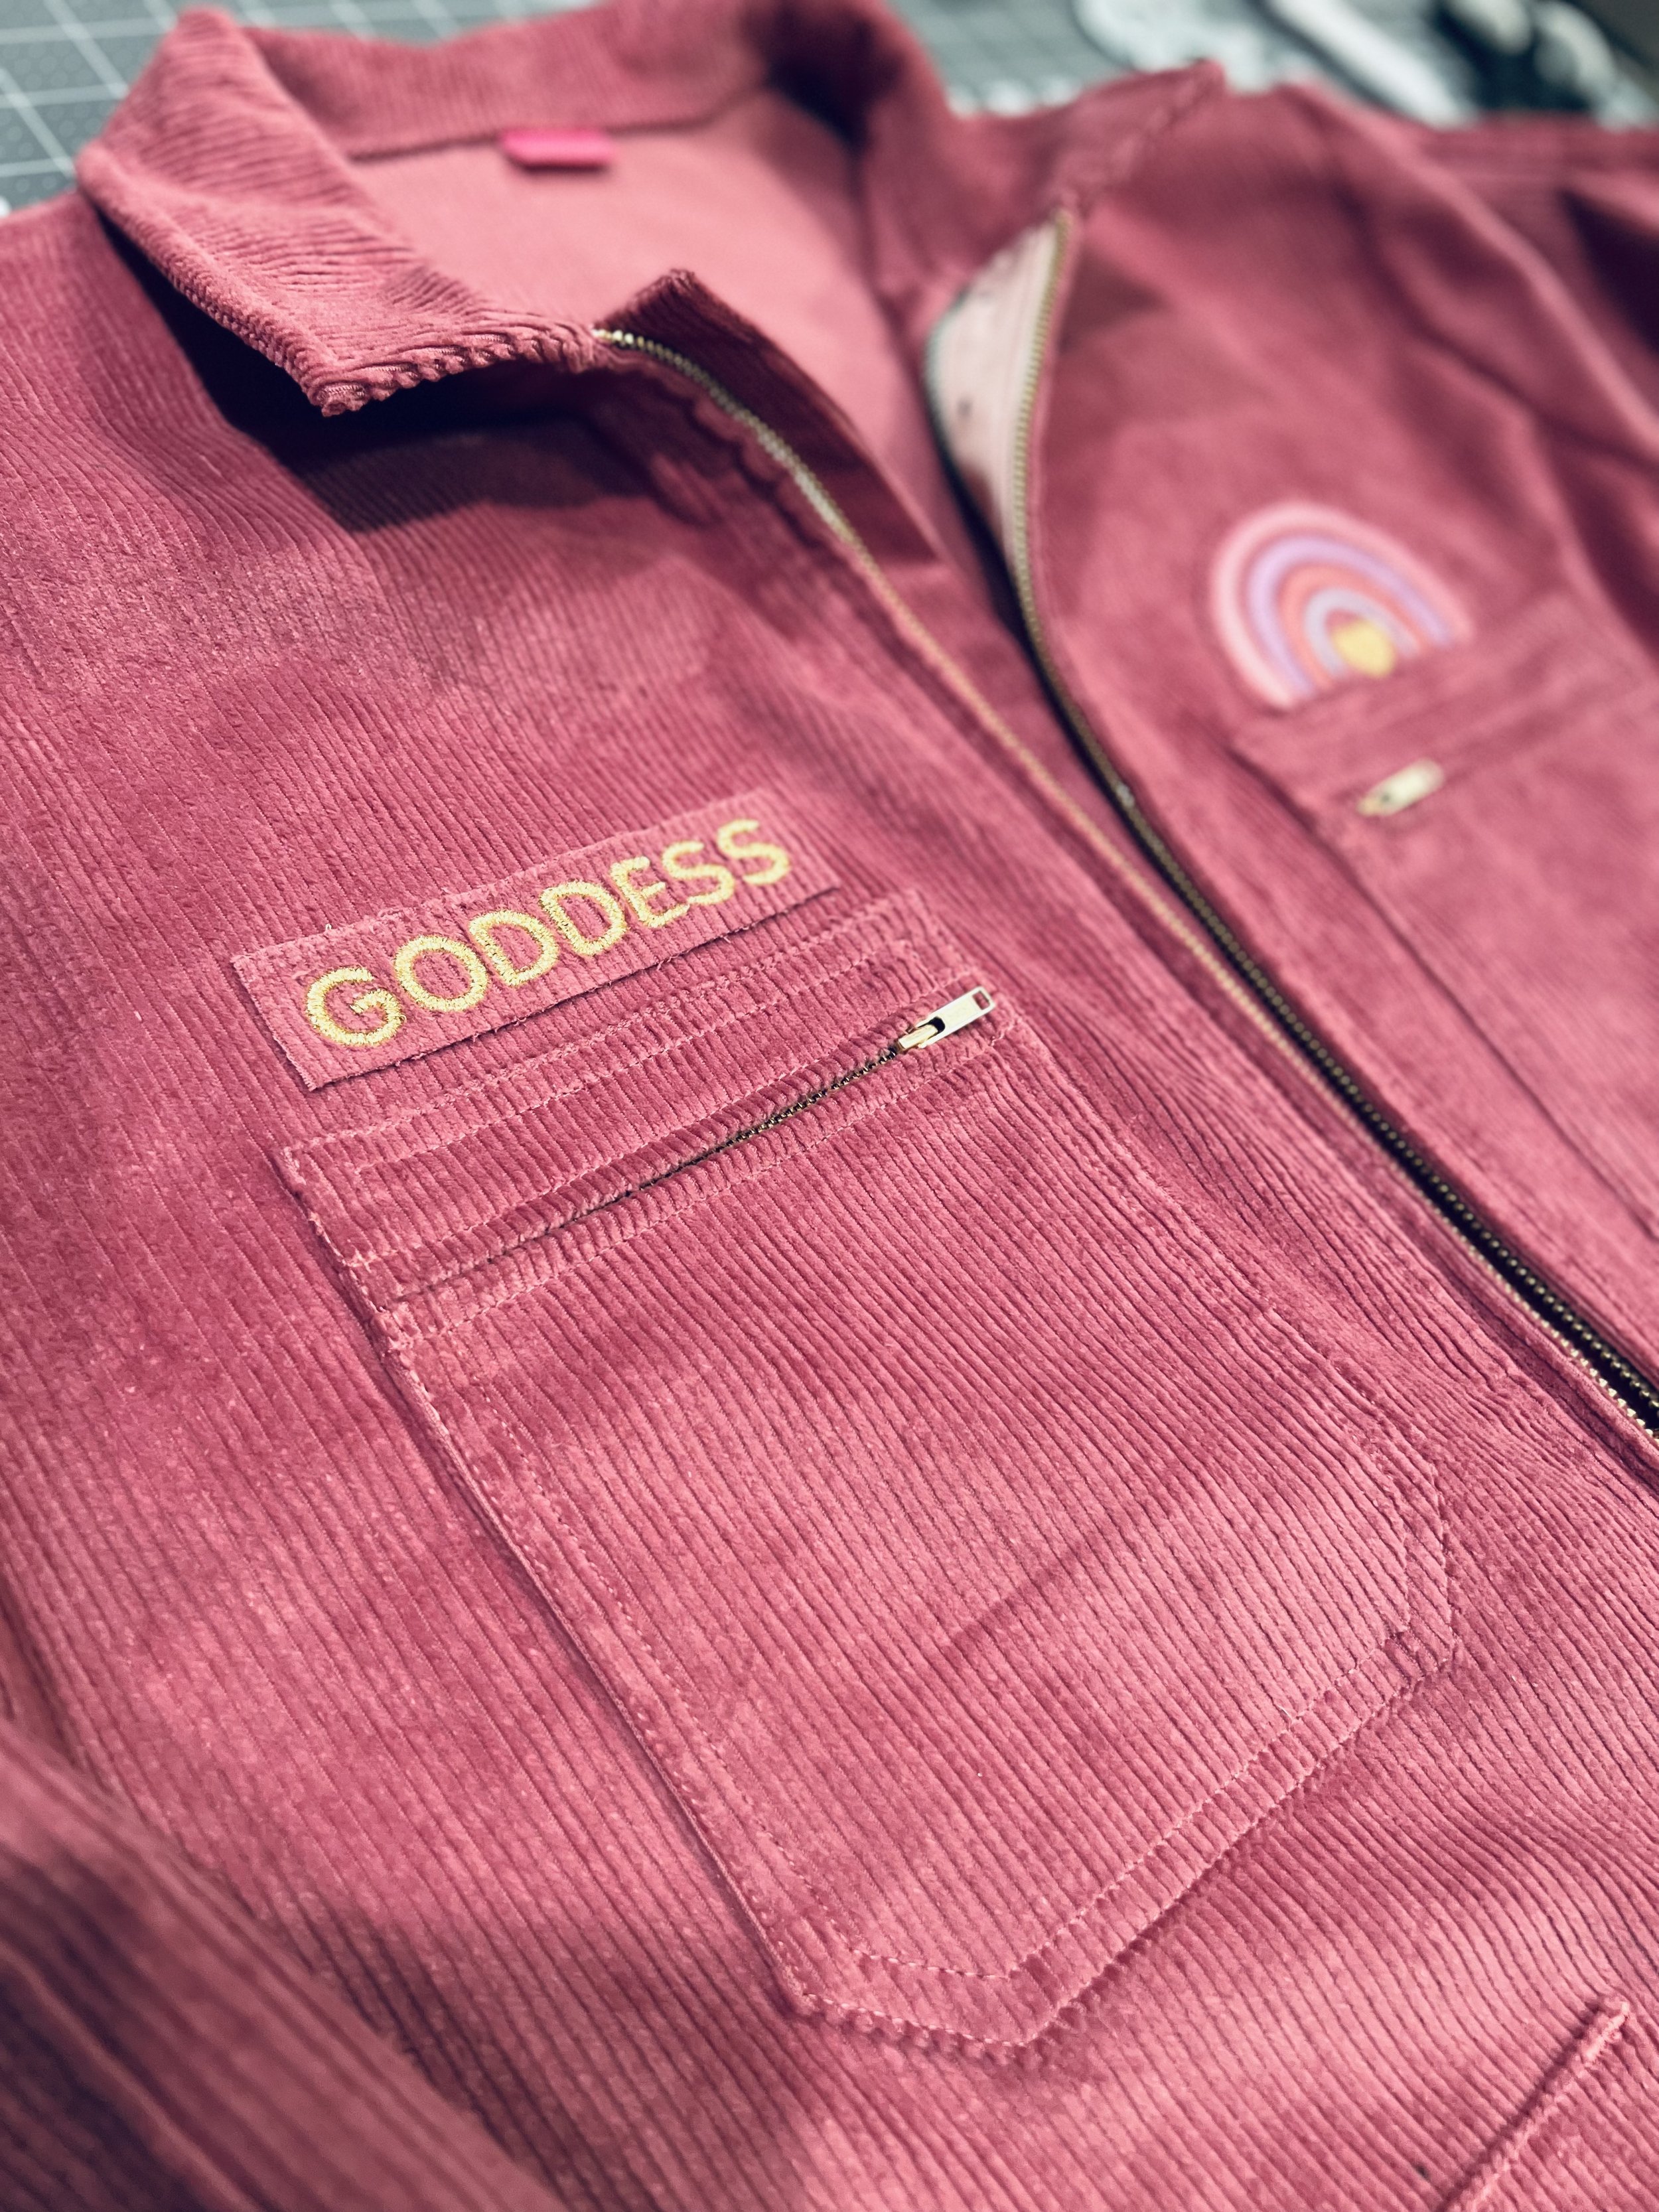
Patches are a given when I think of flightsuits. When I thought about the amount of patches and flare I wanted on my corduroy jumpsuit I decided less is more. Trust me, I could’ve went overboard here. There’s no right or wrong way to the amount of patches you add to your flightsuit but for me, I wanted the flare to be subtle.
I purchased the rainbow embroidery design file from Etsy and I played with the sizing on my BERNINA. I wanted to stick with the patch look so I used scrap pieces of the corduroy to create both the rainbow and the goddess patches. For the goddess patch, I simply used one of the fonts on my 880 and sized to fit above the chest pockets. The patches have a slight fray which is the look I was going for.
If you are interested in seeing more behind the seams with my embroidery projects let me know in the comment section.


I used the hardware from an old belt and spray painted gold. You can check that out on my TikTok below!


Overall
Do I recommend this pattern? Absolutely! Difficulty? Advanced. Wearability? Until the end of time, lol!
I also knitted for the first time and made this hat but I will save that for another blog. Stay tuned and let me know what you think about my Pink Corduroy Flightsuit in the comments!
until next time,
Peace & Blessings

Fall Florals
Fall Florals

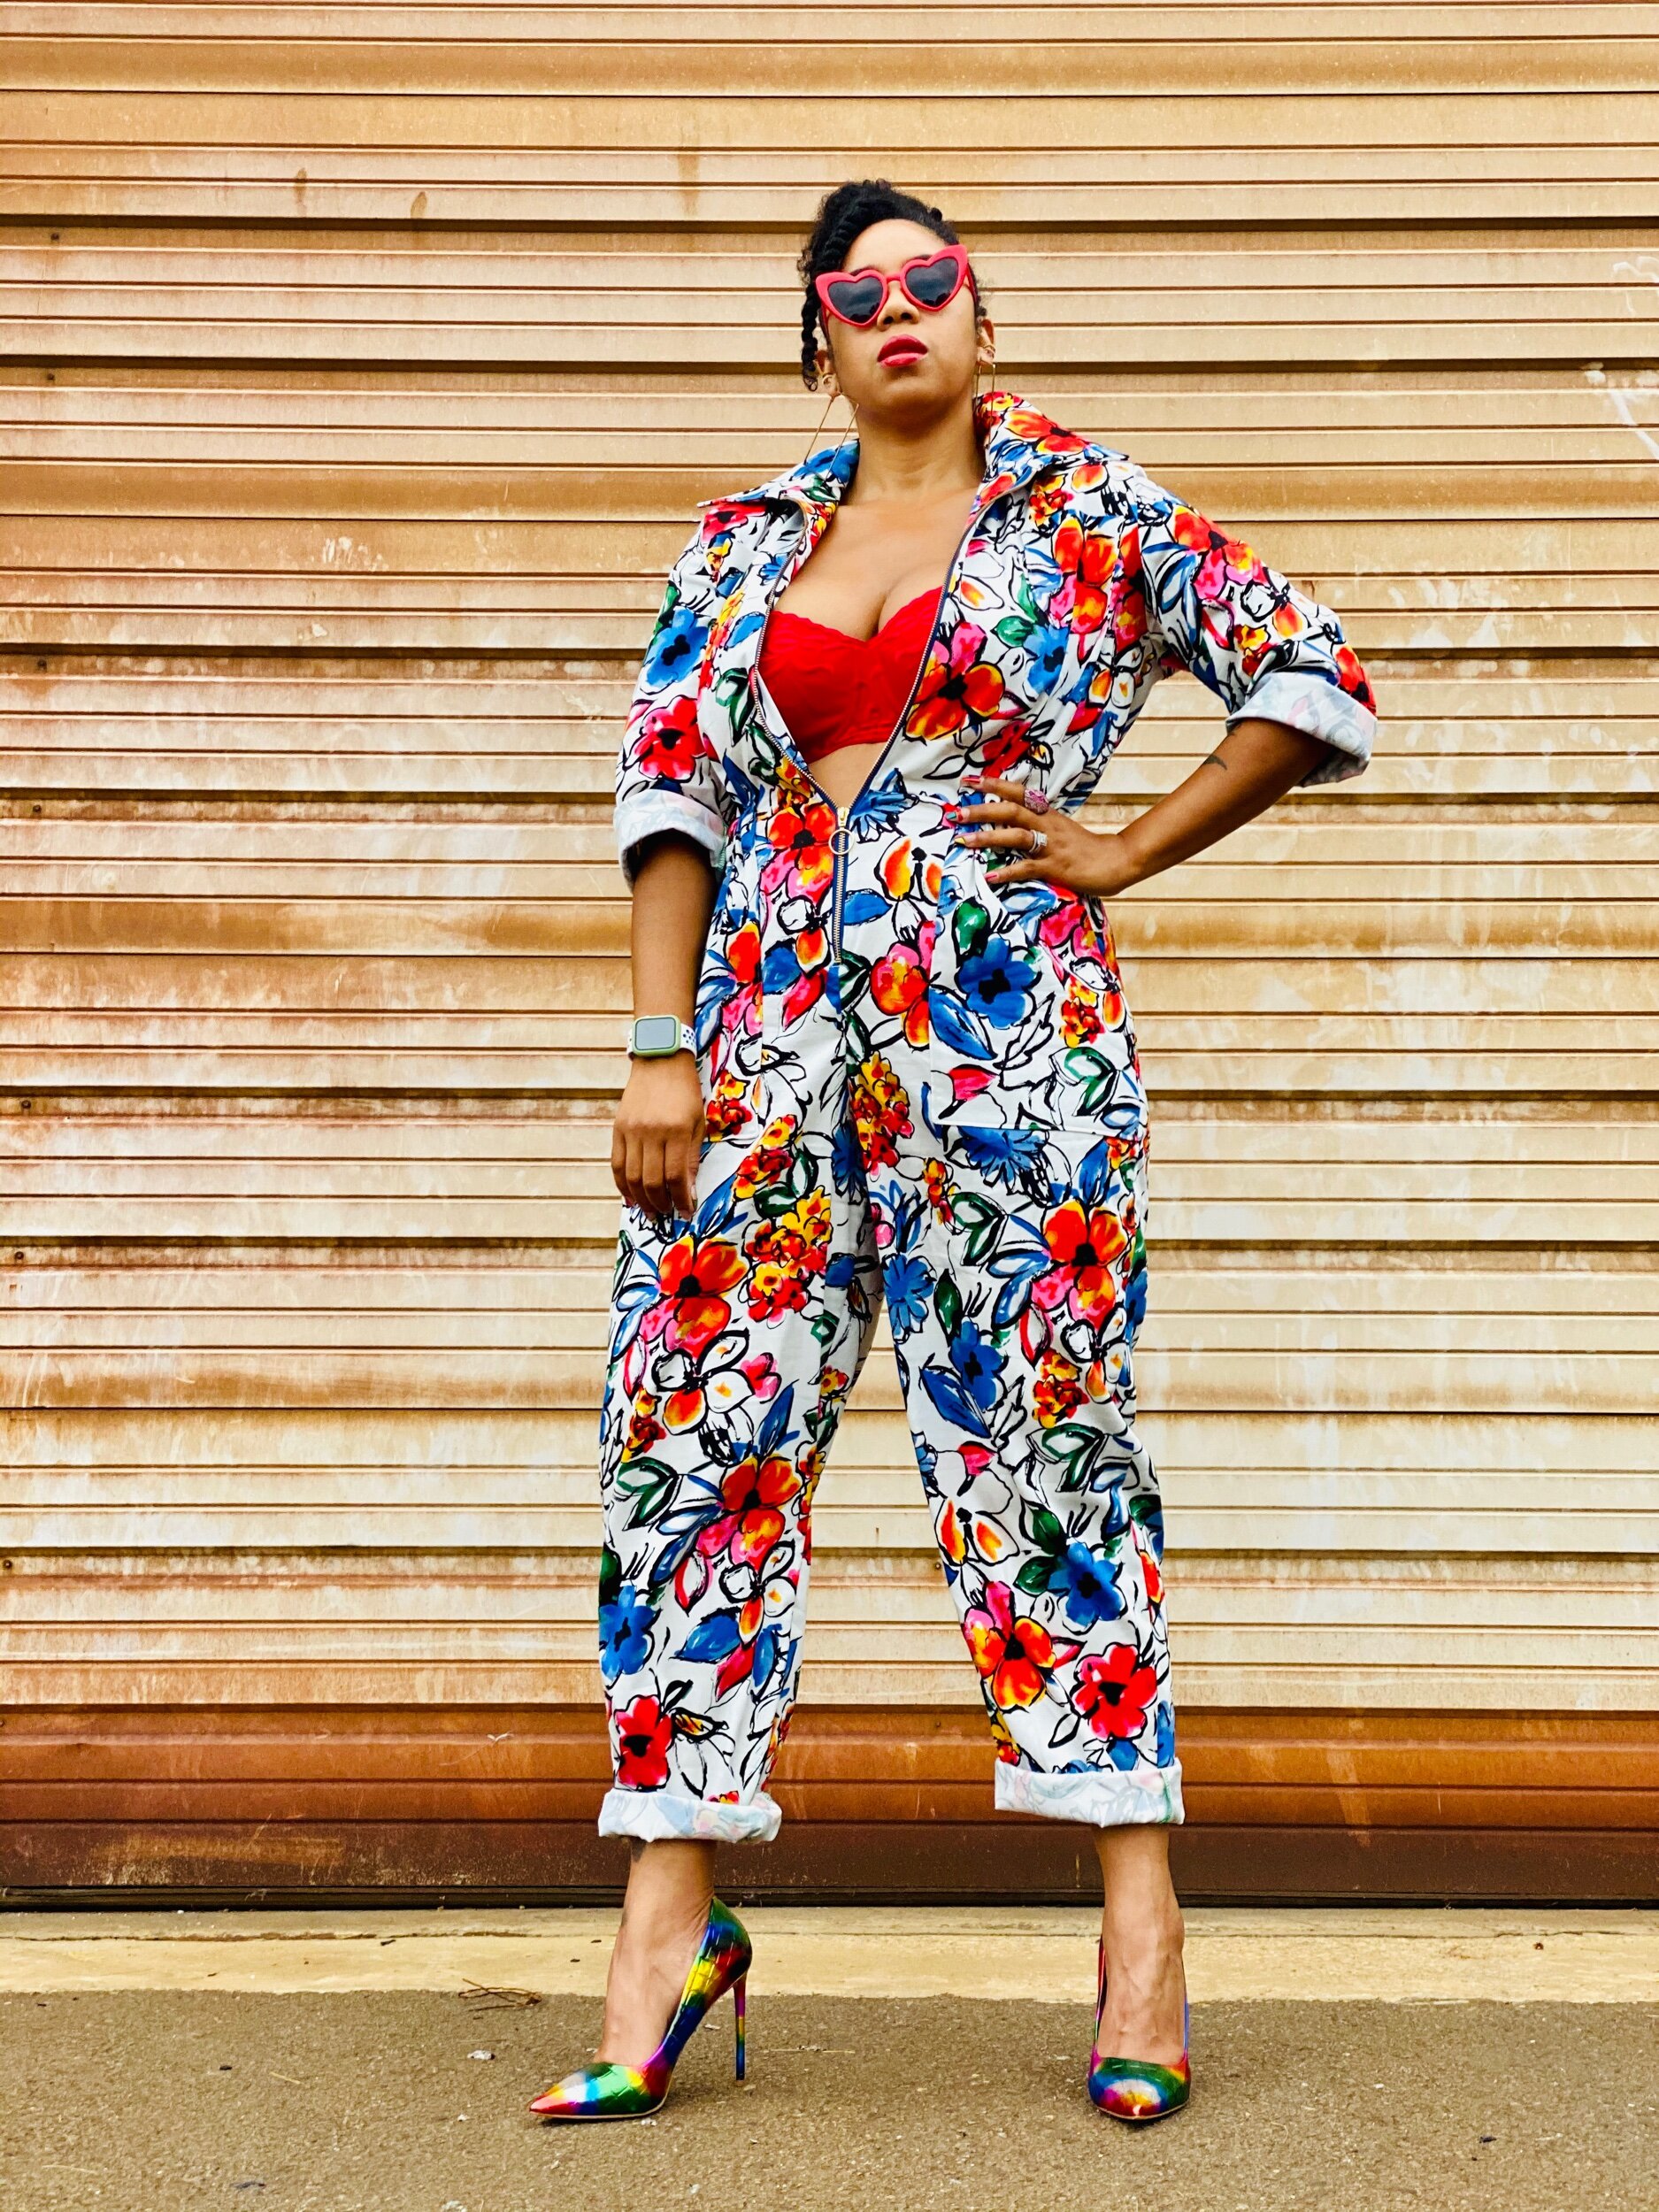
Who says you can’t be colourful in the Fall?
Greetings! It’s finally fall and I like to migrate my vivid summer colours all year round. So for my first official fall make I wanted to use this Telio denim cotton from fabricdotcom. I had to have it (I also snagged it in yellow). So what to make? I have 8 yards of this amazing fabric and the first thing I thought of was a jumpsuit!
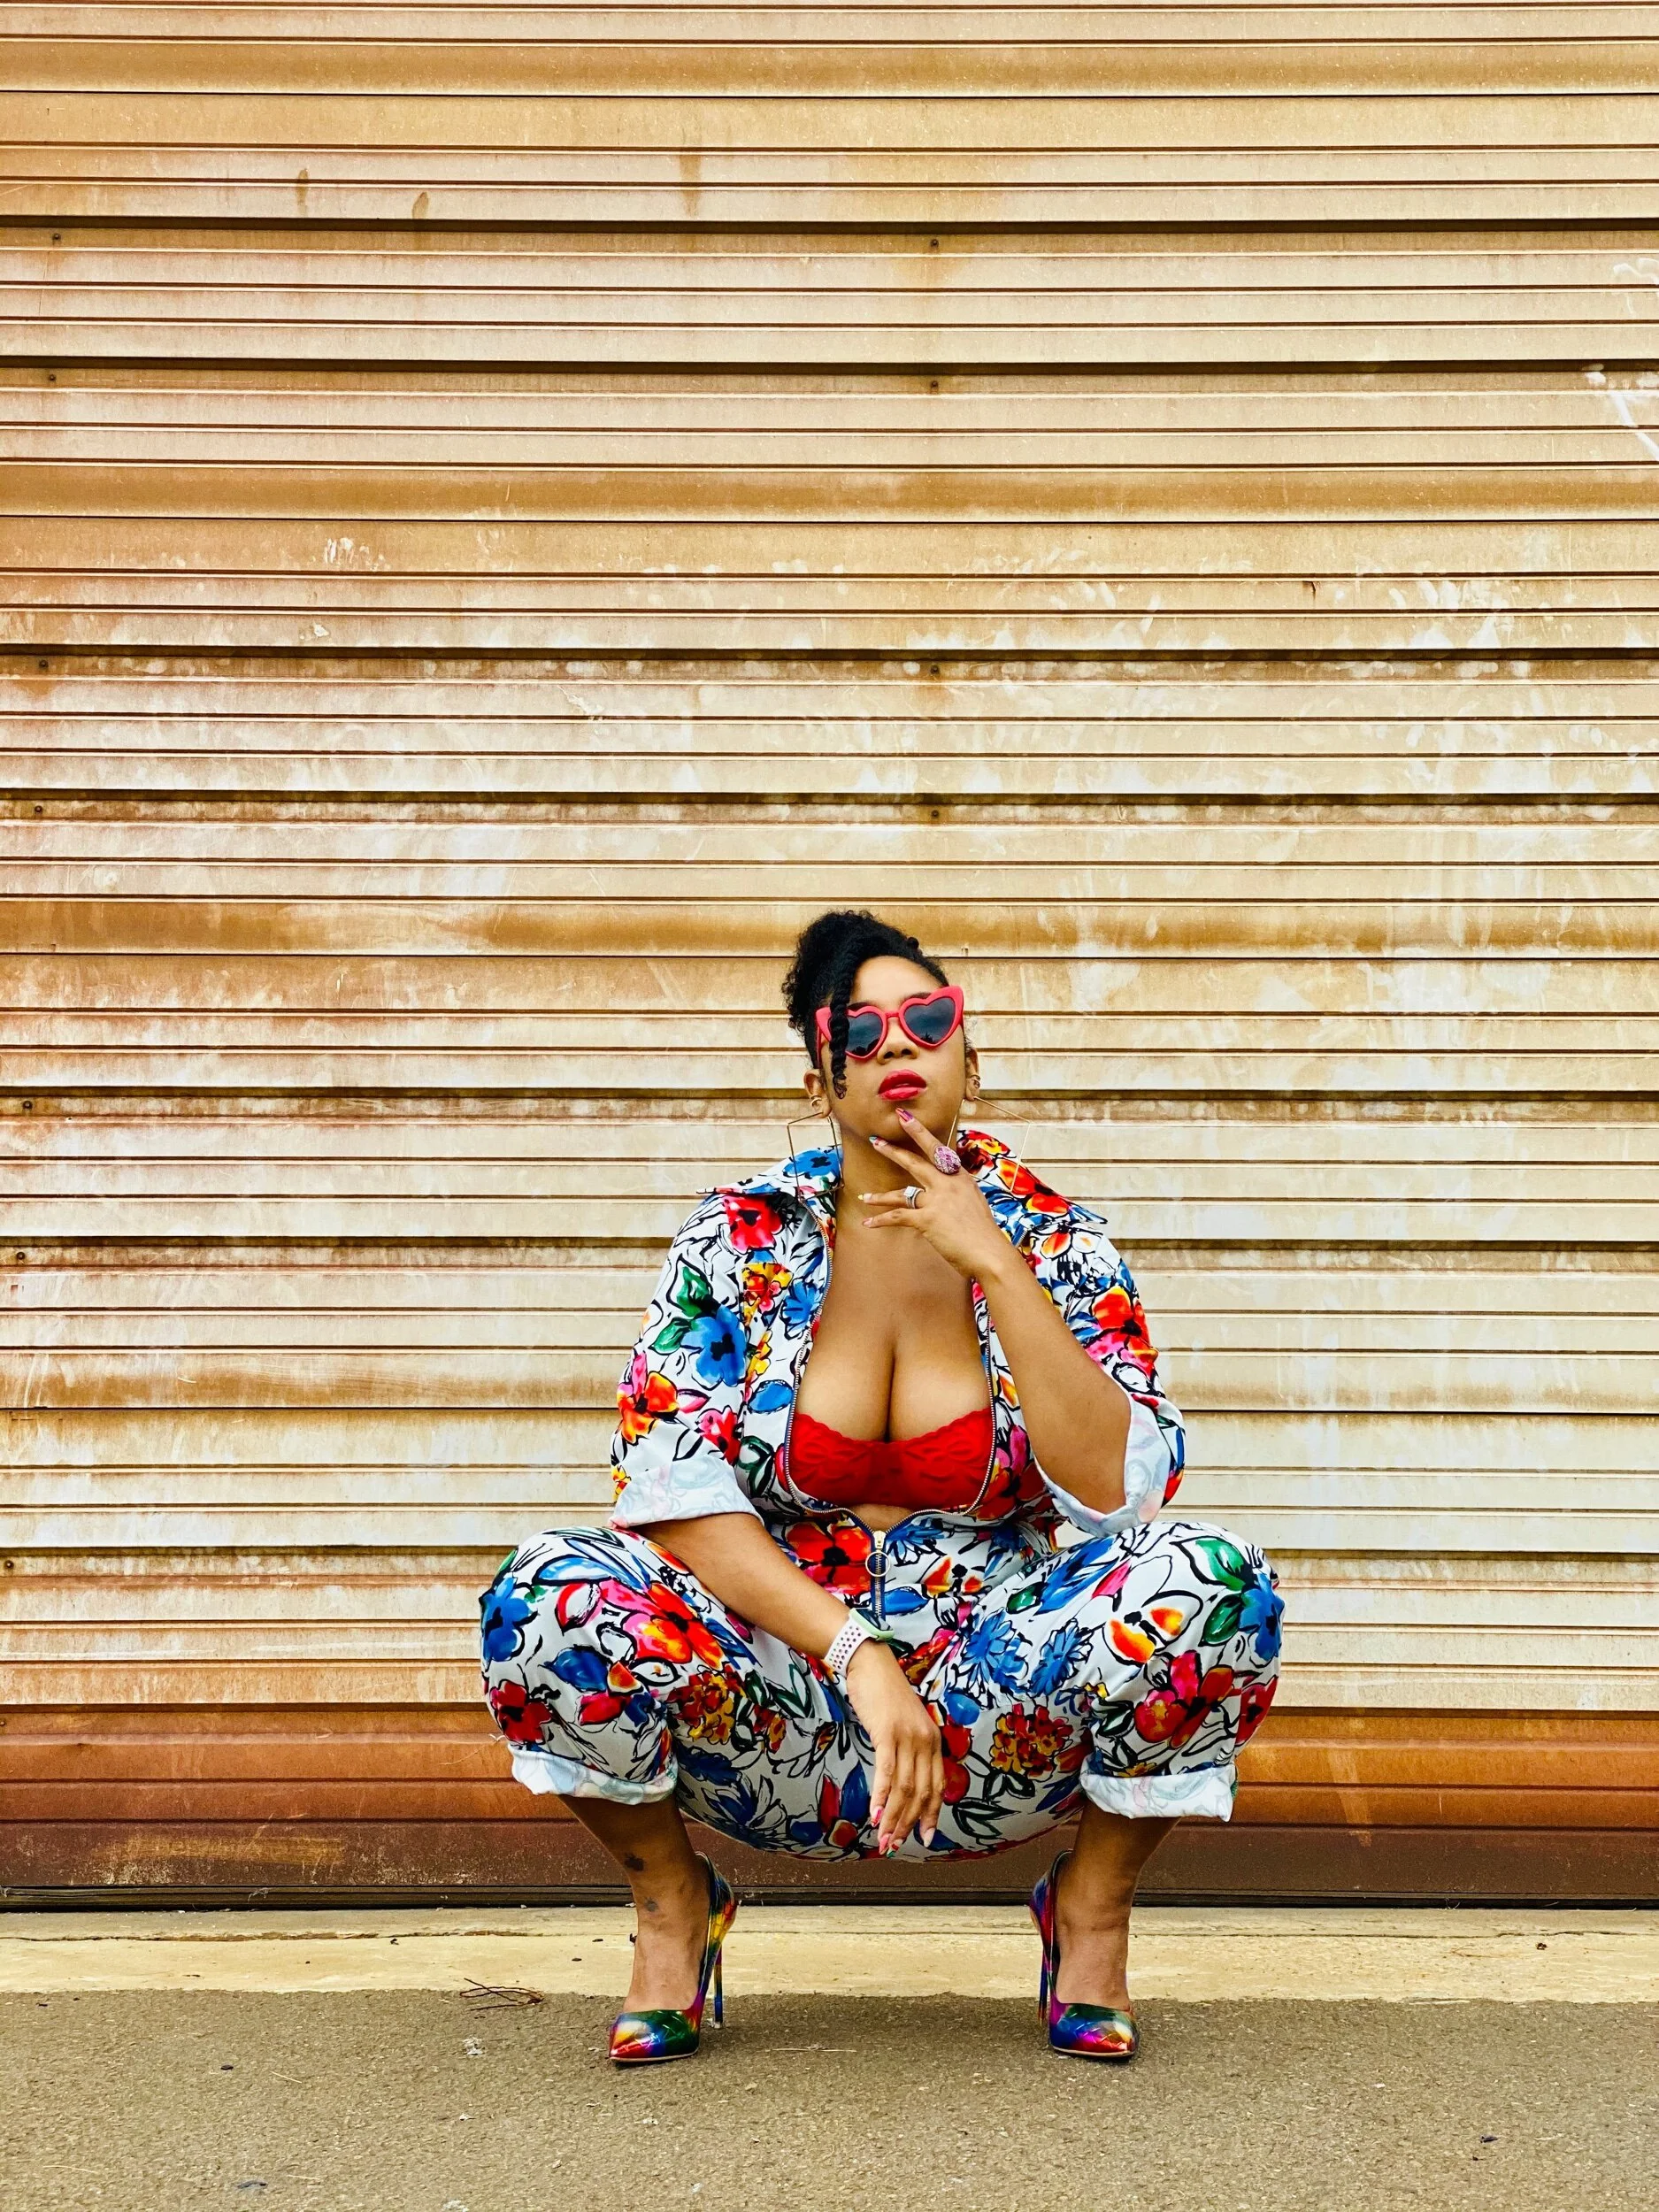
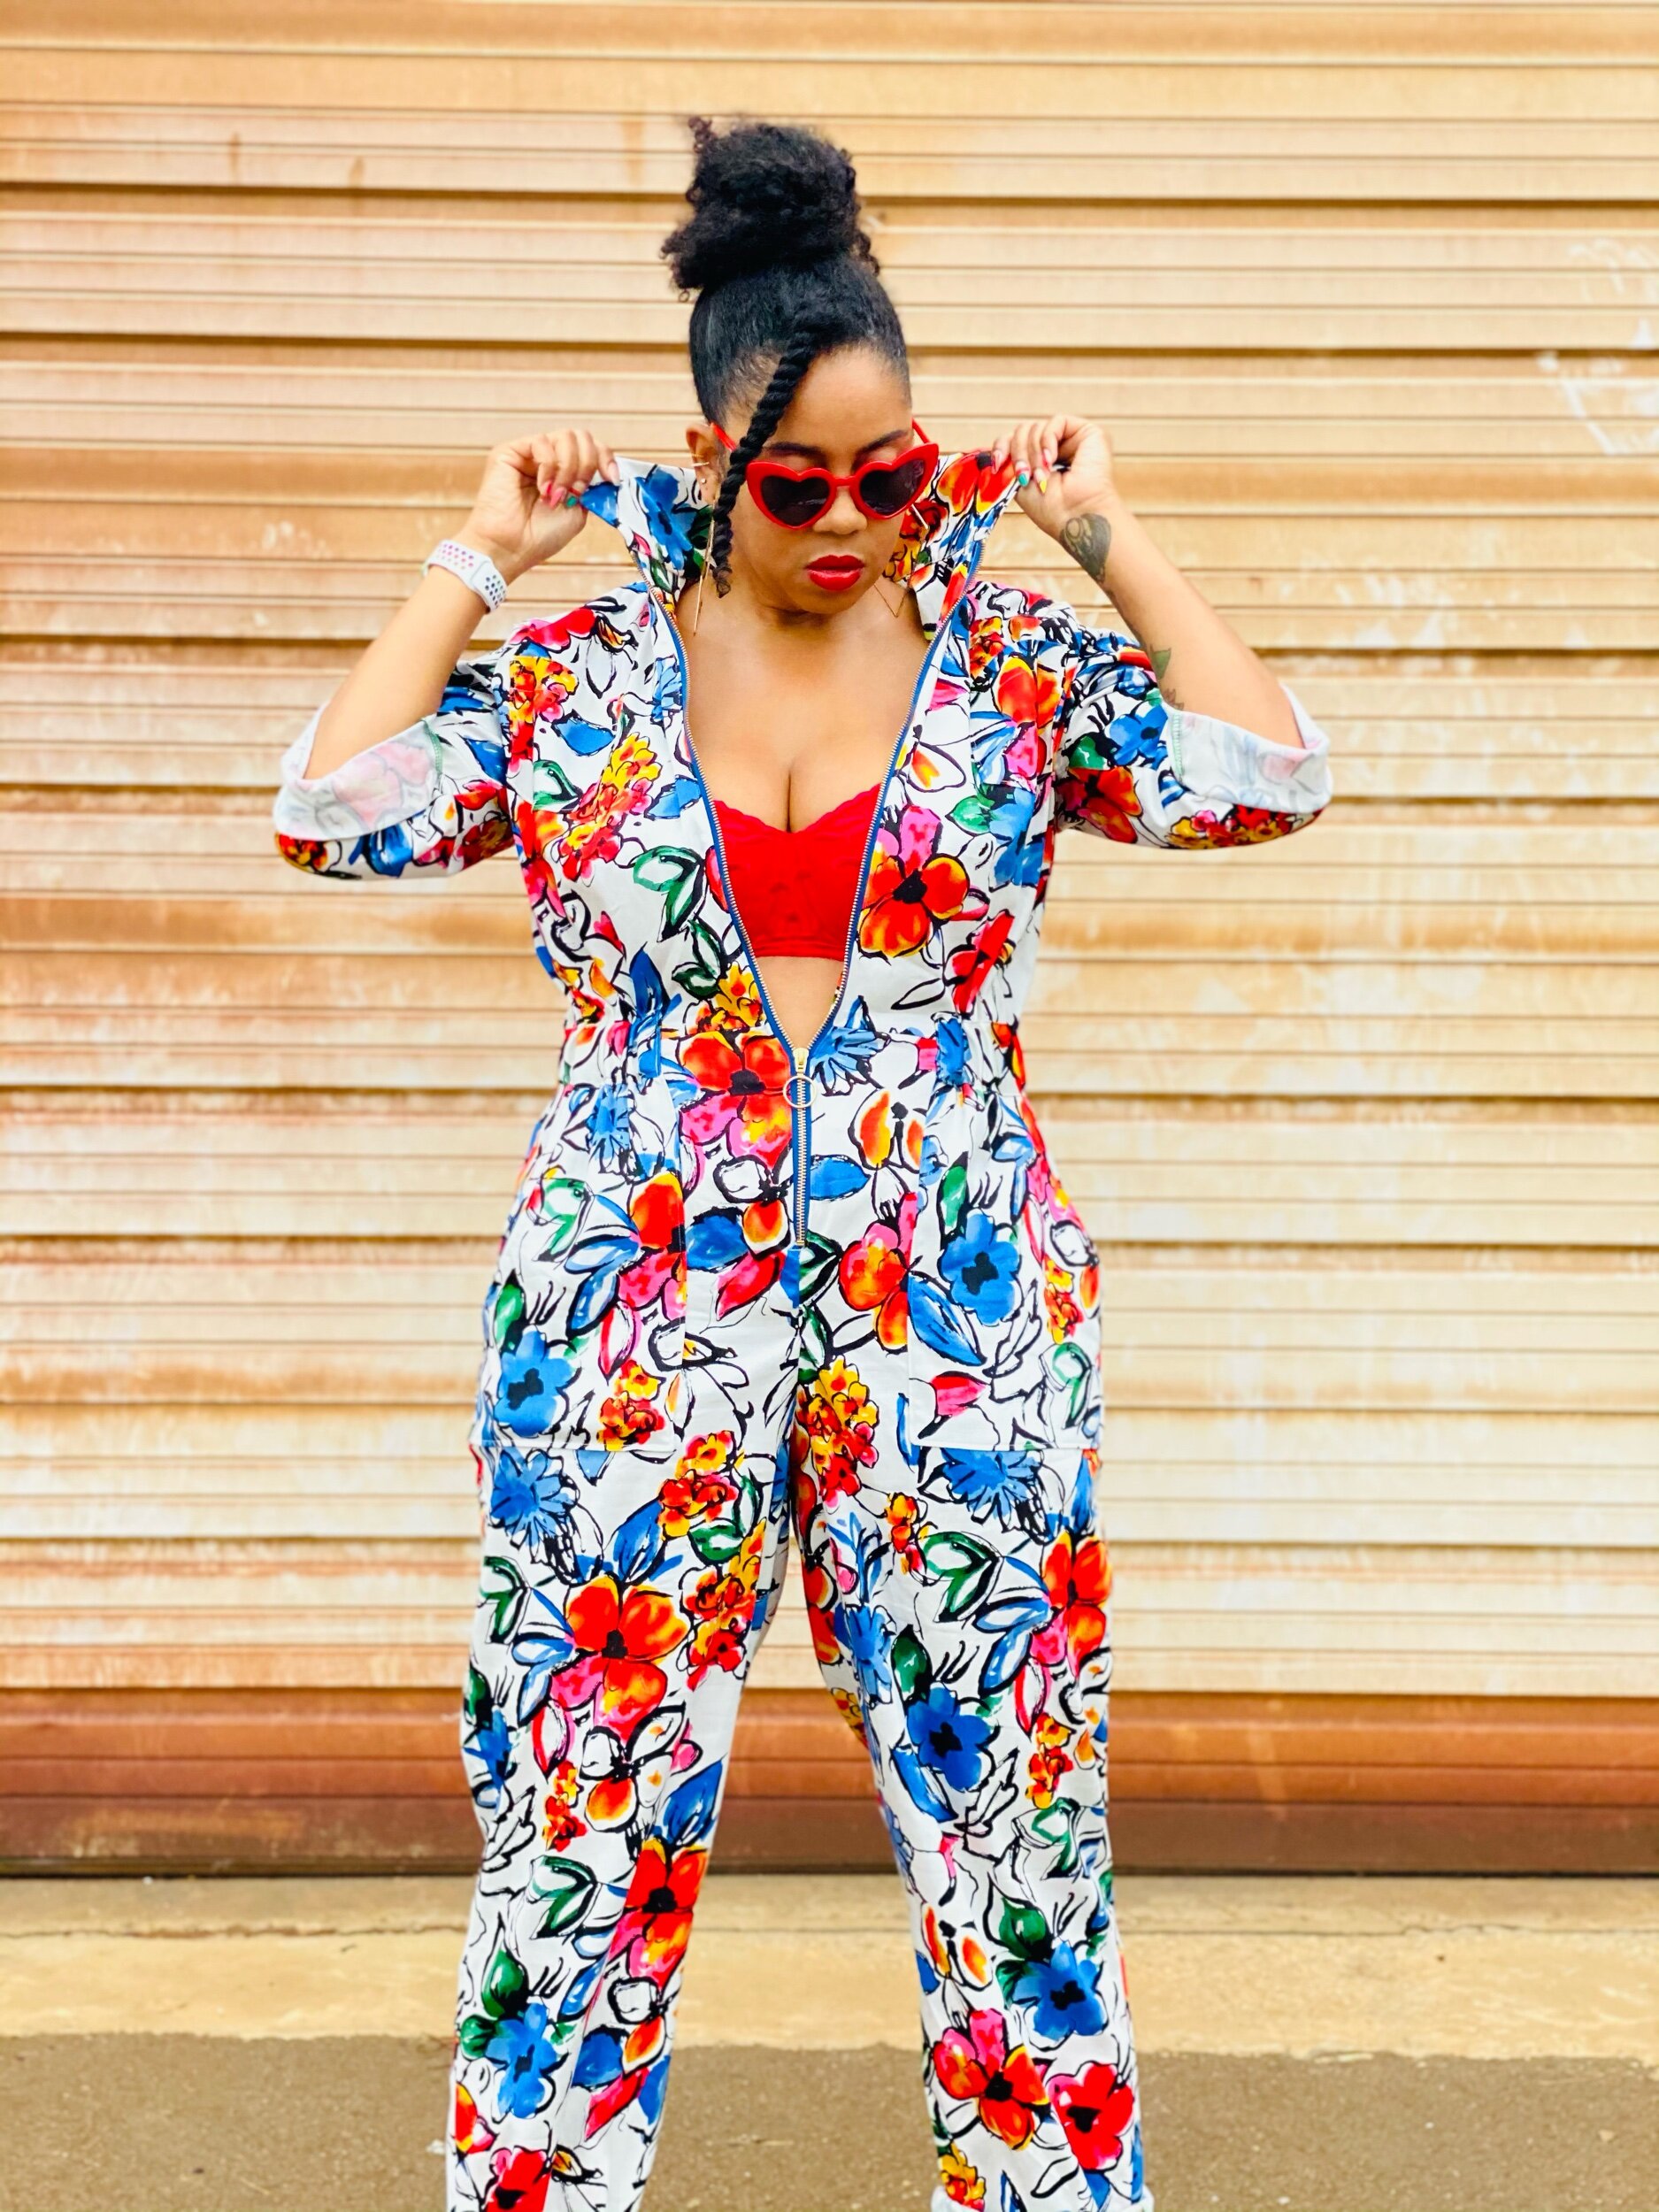
I choose the Intrepid Boiler Suit by Alice & Co with the zipper and elastic waist option. What I love about this PDF pattern and the instructions is that it has a few different options for creating this jumpsuit. The main option is with an exposed zipper. You can also add a facing for inside the zipper and the instructions break down how. I added the zipper facing and bias binding to majority of my seam allowances for a more detailed look on the inside.


I won’t get too heavy into the construction of the pattern because I feel the instructions were pretty good. I did notice that when attaching the pants to the bodice there is more than enough space to make adjustments. I personally added 1.5 inches to the waist length of my pants because I have long legs. Even with adding the extra inches, I still needed to bring down the seam allowance for the bodice and pants seam. What I noticed for myself is, I needed a baggier fit in the booty and sewing based on the instructions, my boiler suit was definitely giving me more of a wedgie.
Tip: Until you see what seam allowance width is best for your body, this would be a seam to baste stitch instead of stitching at regular stitch length.
Tip: select a longer zipper if you’re taller so you can remove this jumpsuit easier for bathroom trips! I usually use a zipper 2-4” longer than what the pattern calls for. If it’s too long you can always remove teeth and shorten but if it’s too short…well, you’ll be upset you have to get a longer zipper.


I have made this boiler suit once before and have yet to wear it because I want to add bigger pockets for the butt (the original pocket do seem small to me). As far as additions and spicing this boiler suit up a bit, I plan on creating another version with pocket flaps, a loop to catch the the sleeves when folded, and instead of elastic in the waist try a tie belt. I hope you all enjoyed this look and I would love to hear your thoughts on this pattern. Are you jumping on the Boiler suit train? I hope you are welcoming Fall with lots of colour! Until next time,
Peace & Blessings!