Details Honey
Here we are in the thick of Spring!
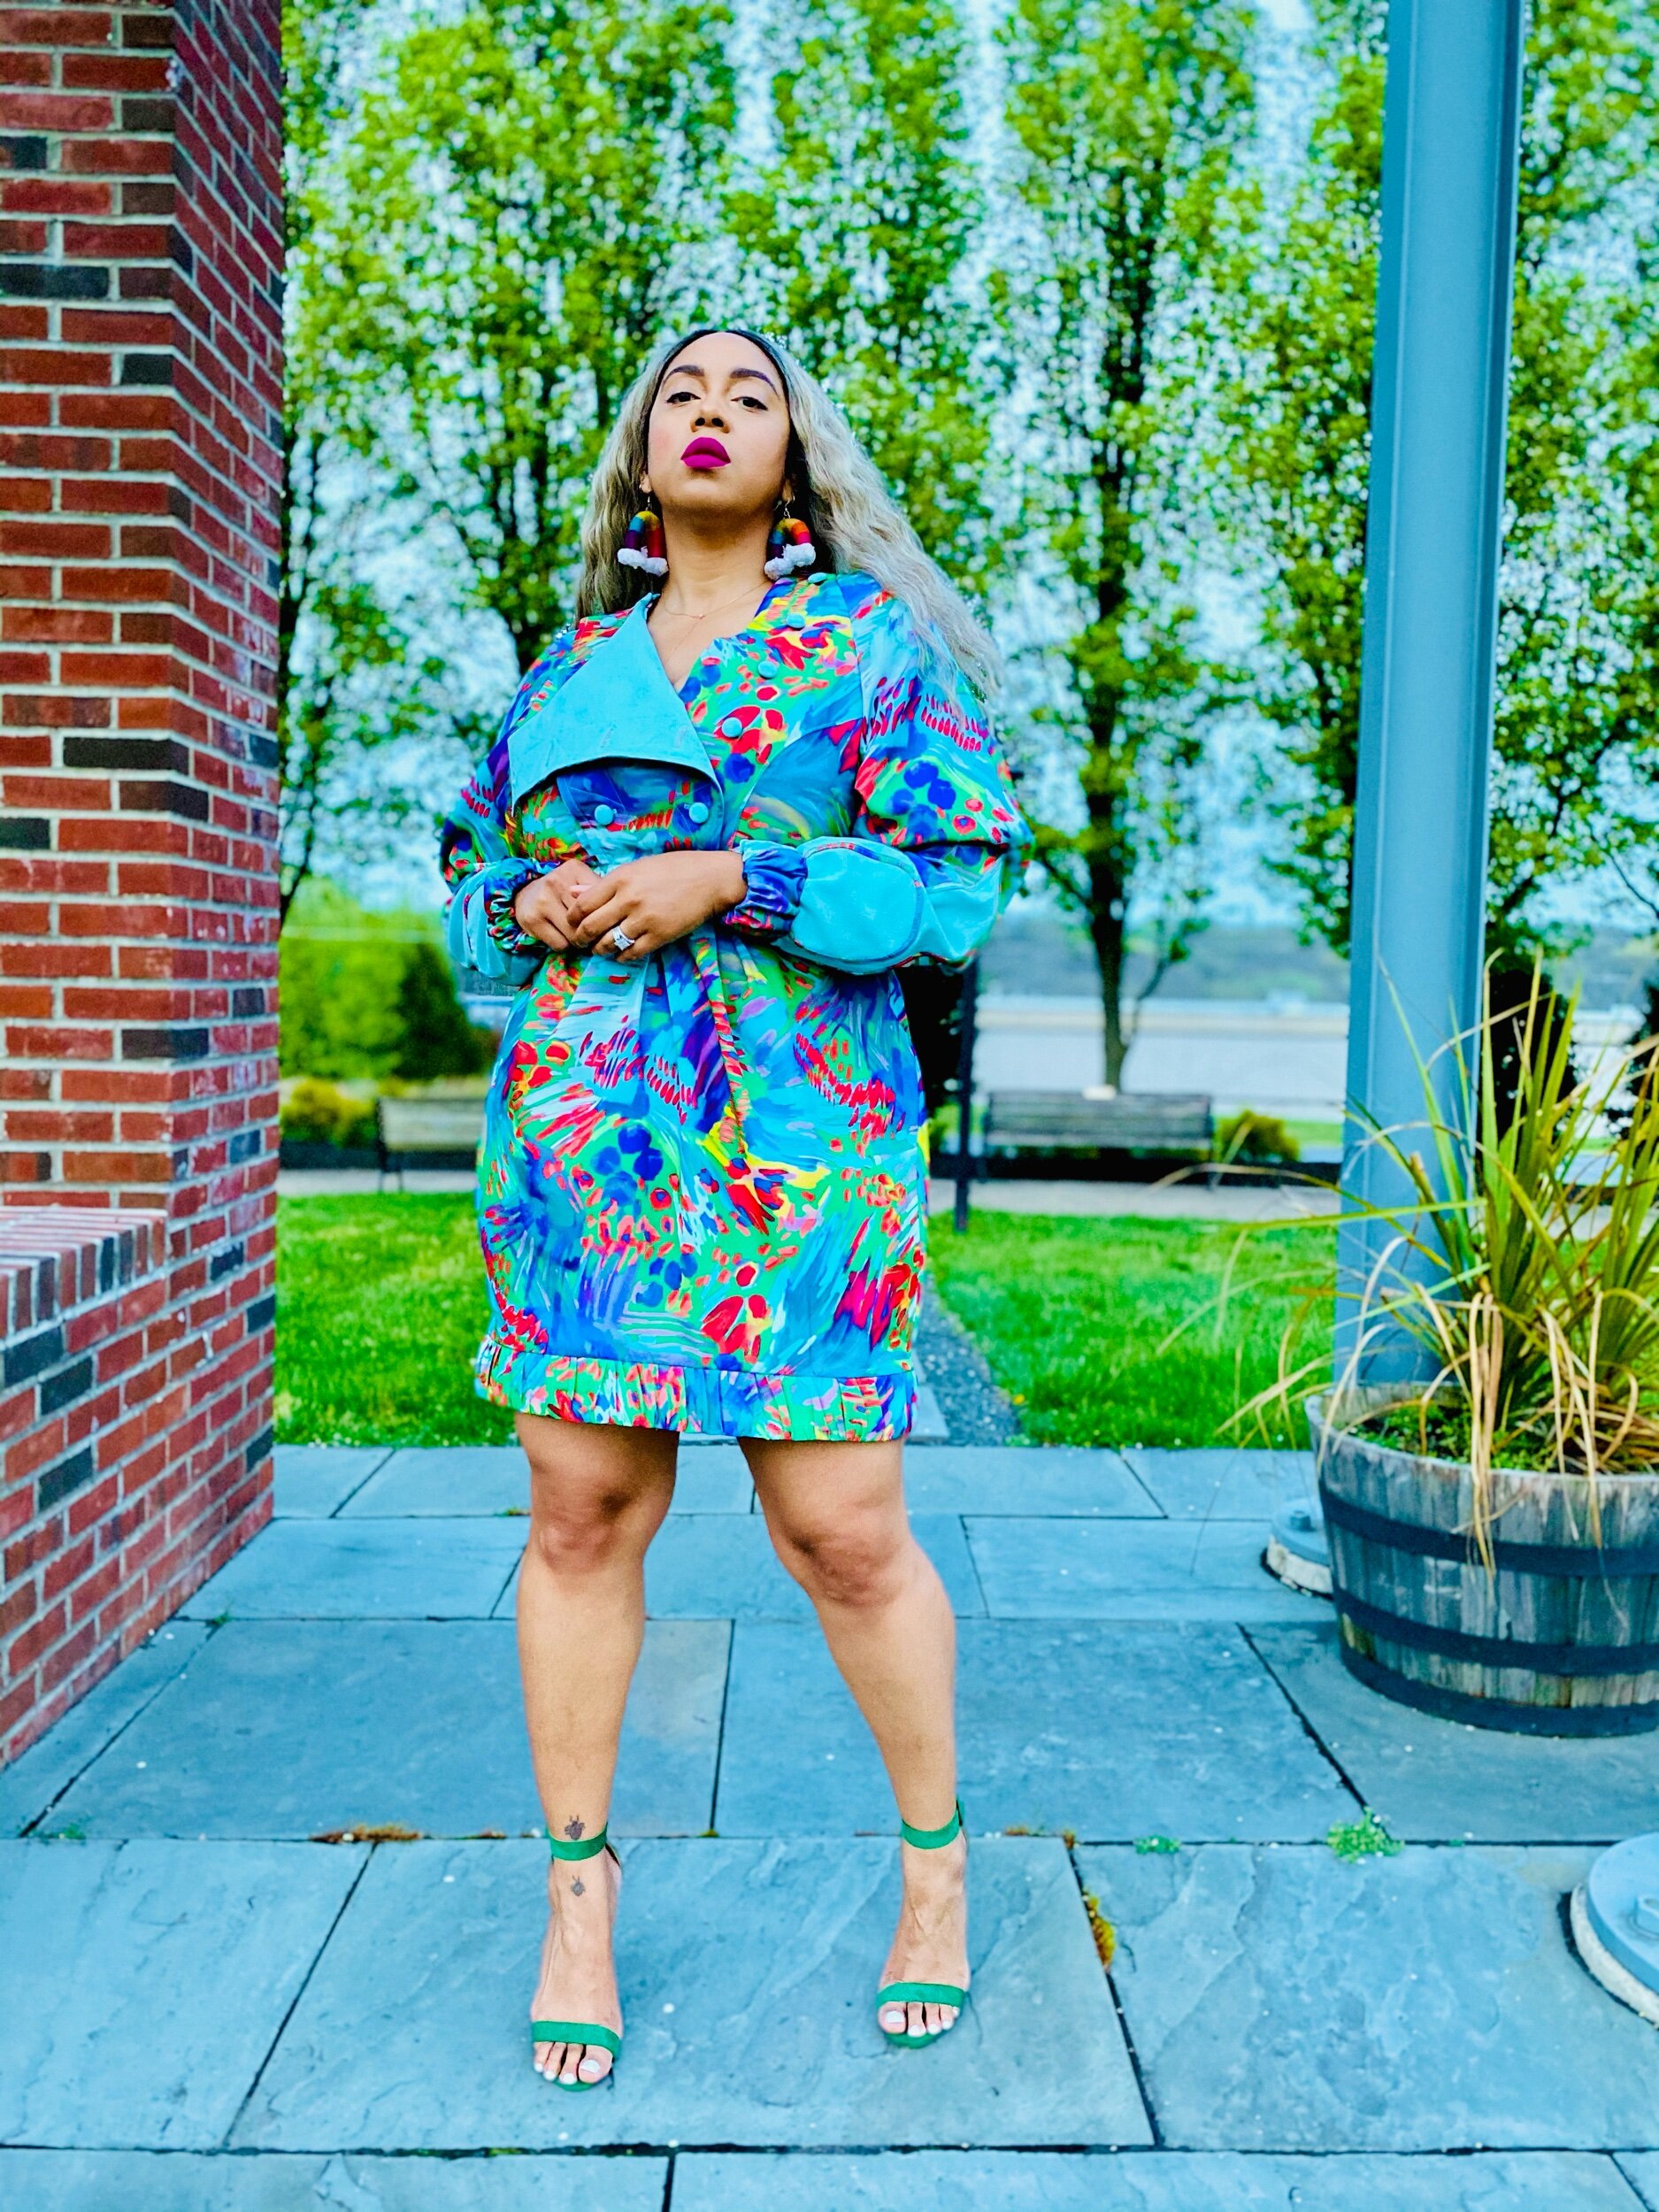
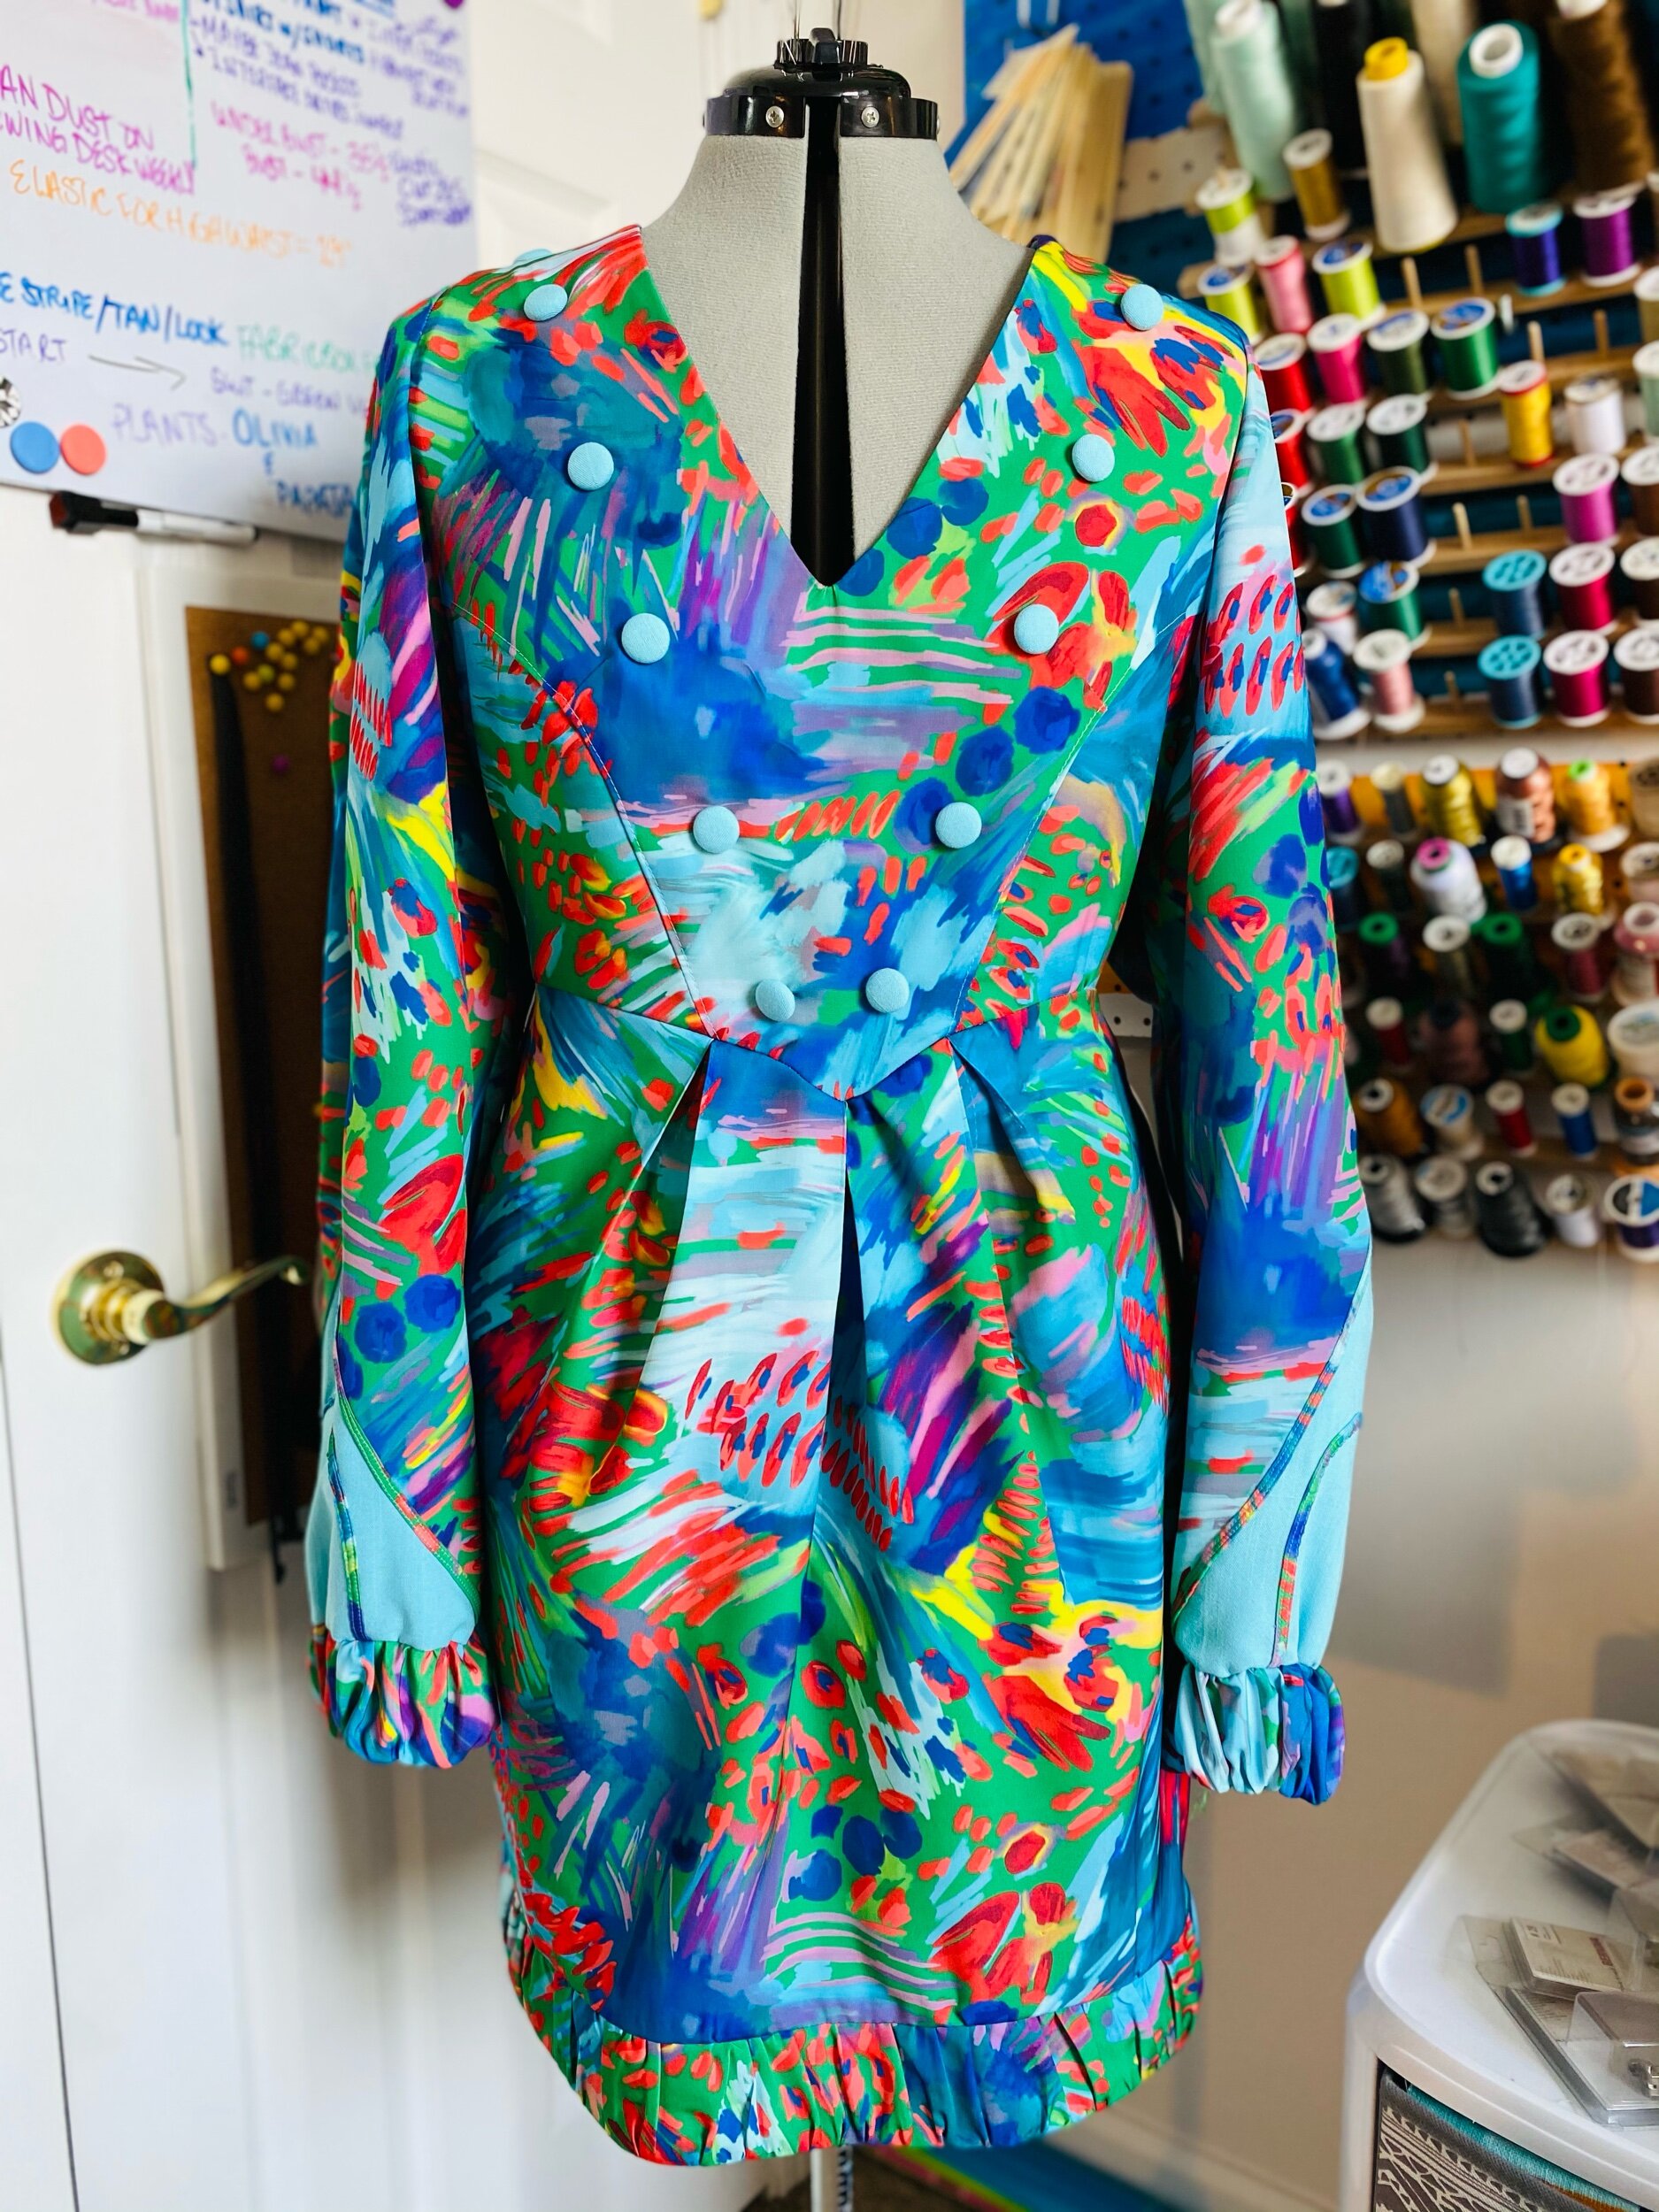
I have dreamed of the perfect fabric for this Vogue 1548 Guy Laroche pattern for quite some time. The model on the pattern is wearing this dress in white which to me was very chic but not bold enough. It was then I realized I didn’t want to use a solid this go round. Just before I became a Spoonflower Ambassador I racked up on a few prints I had my eye on. A few of those prints were obviously my sis Katie Kortman. So I had this Spoonflower Silky Faille that I never used and my machine was ready!
Designing
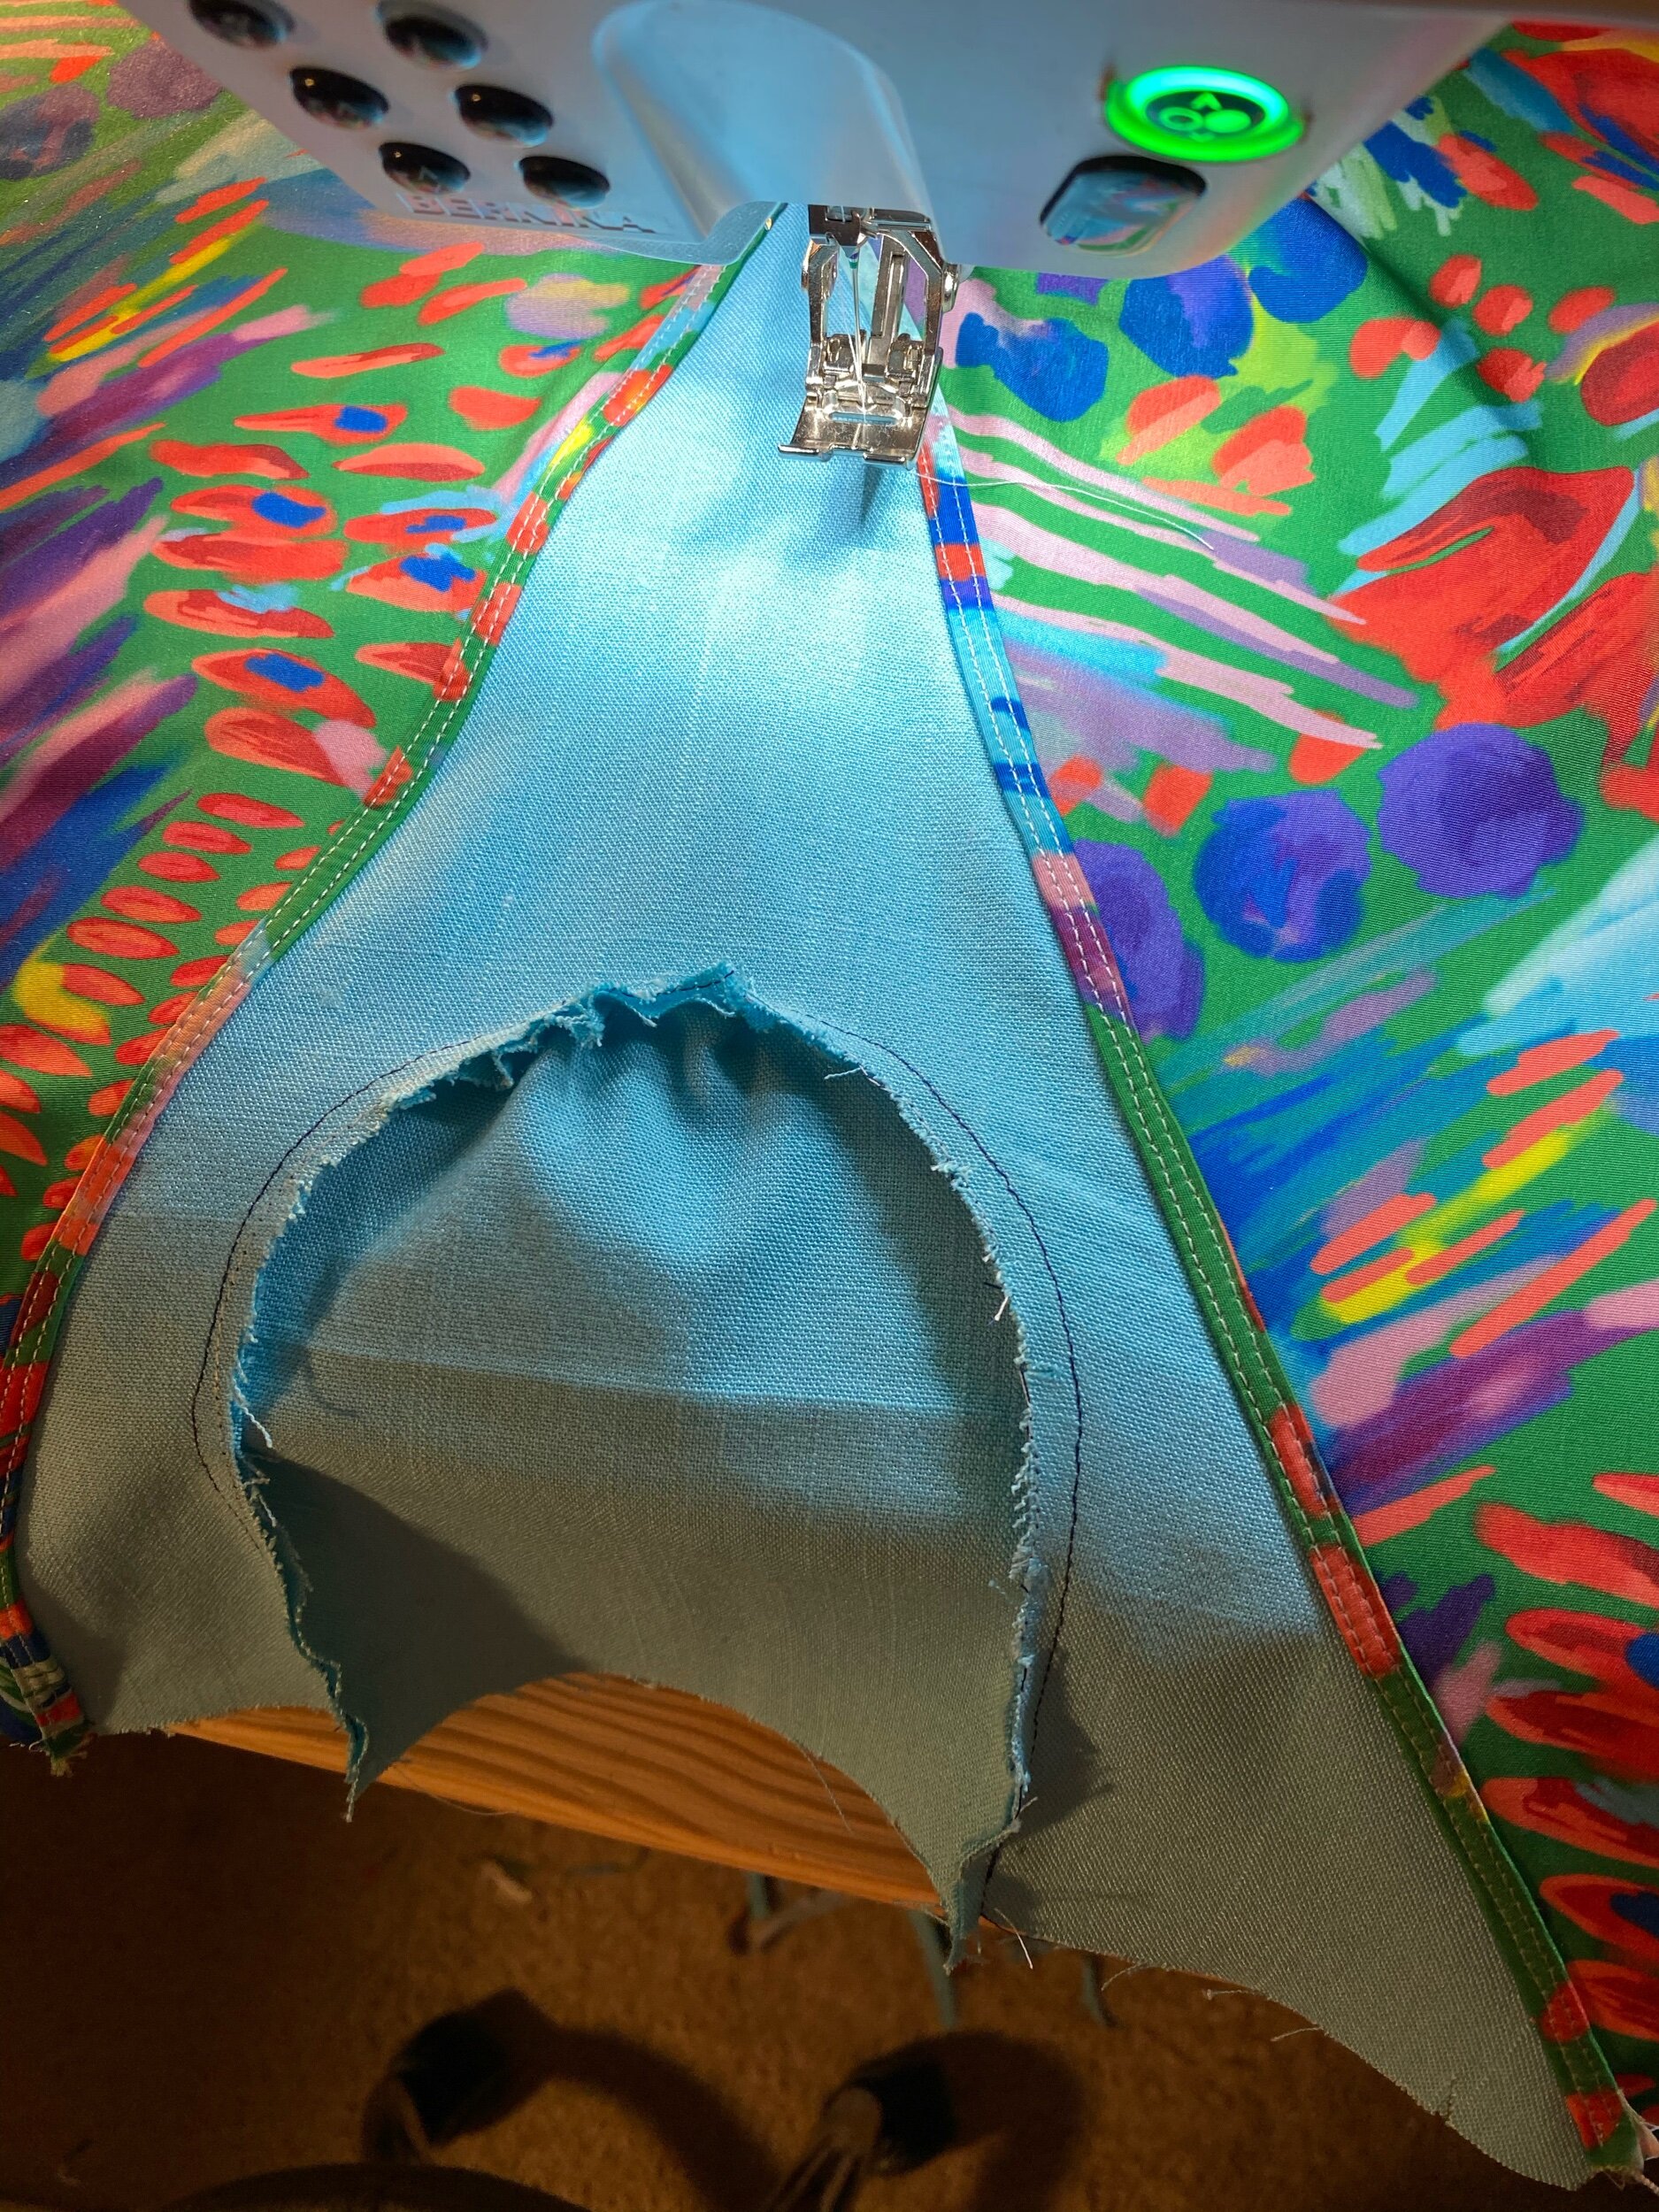
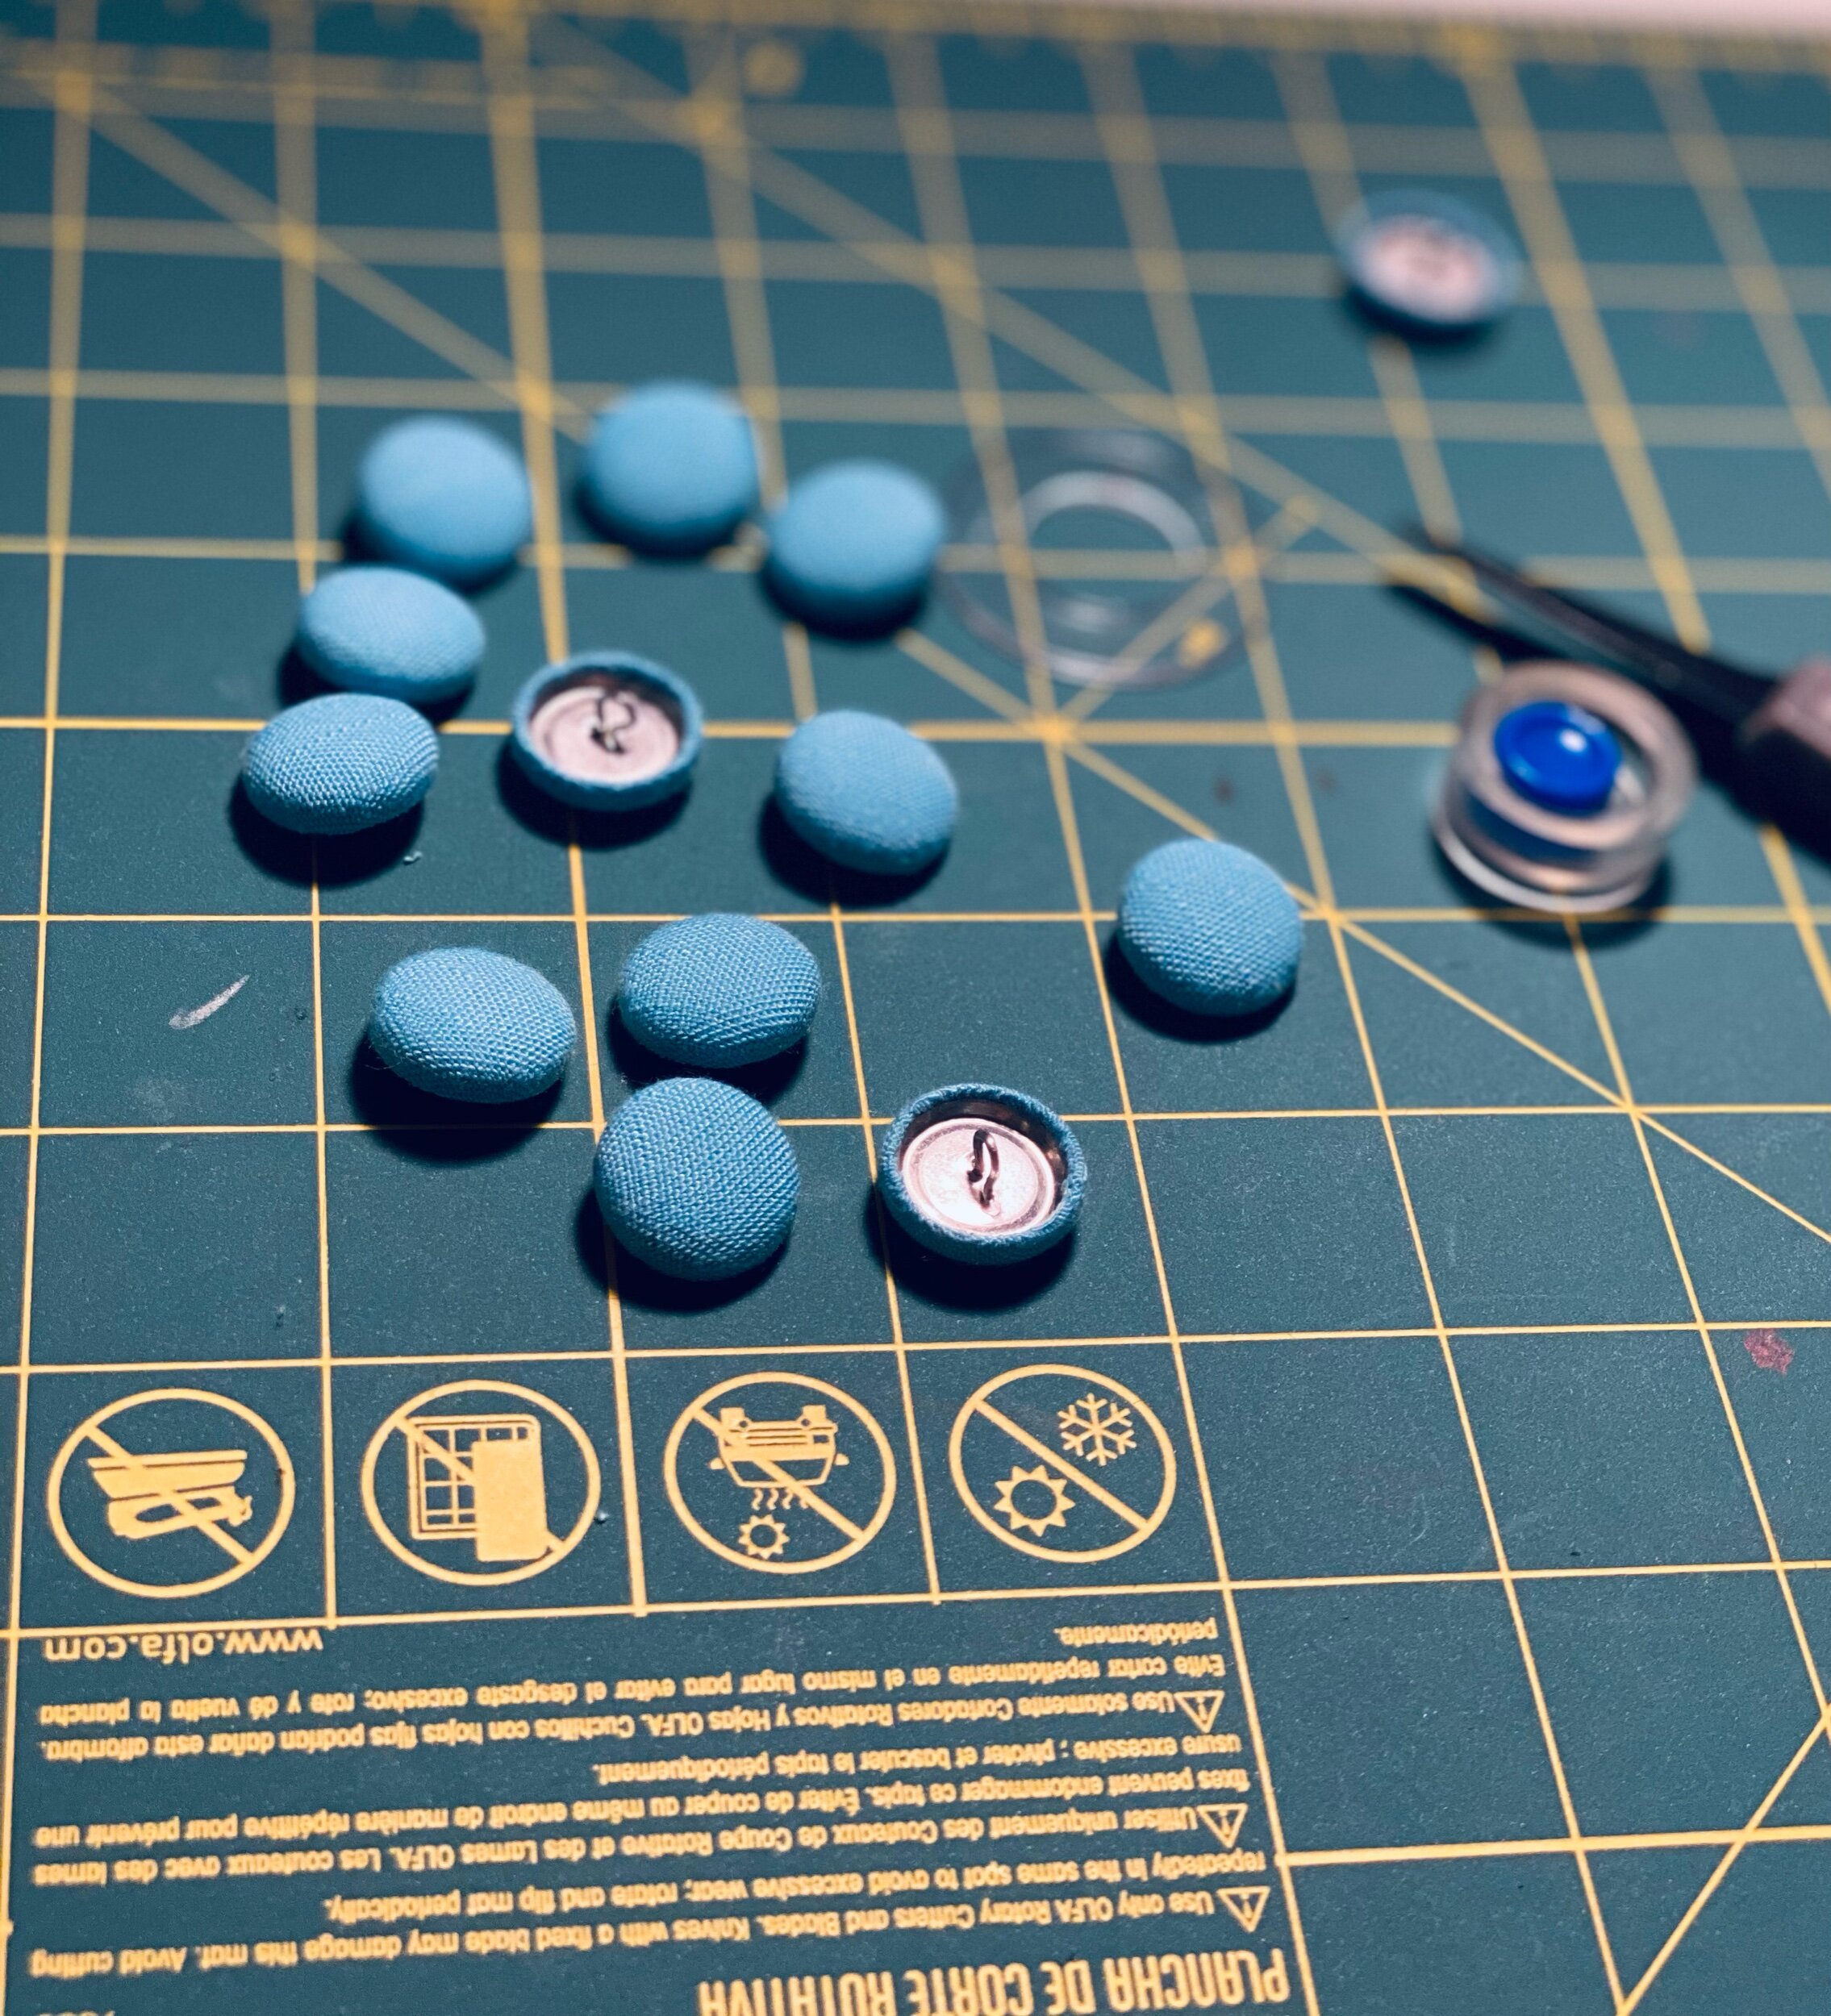
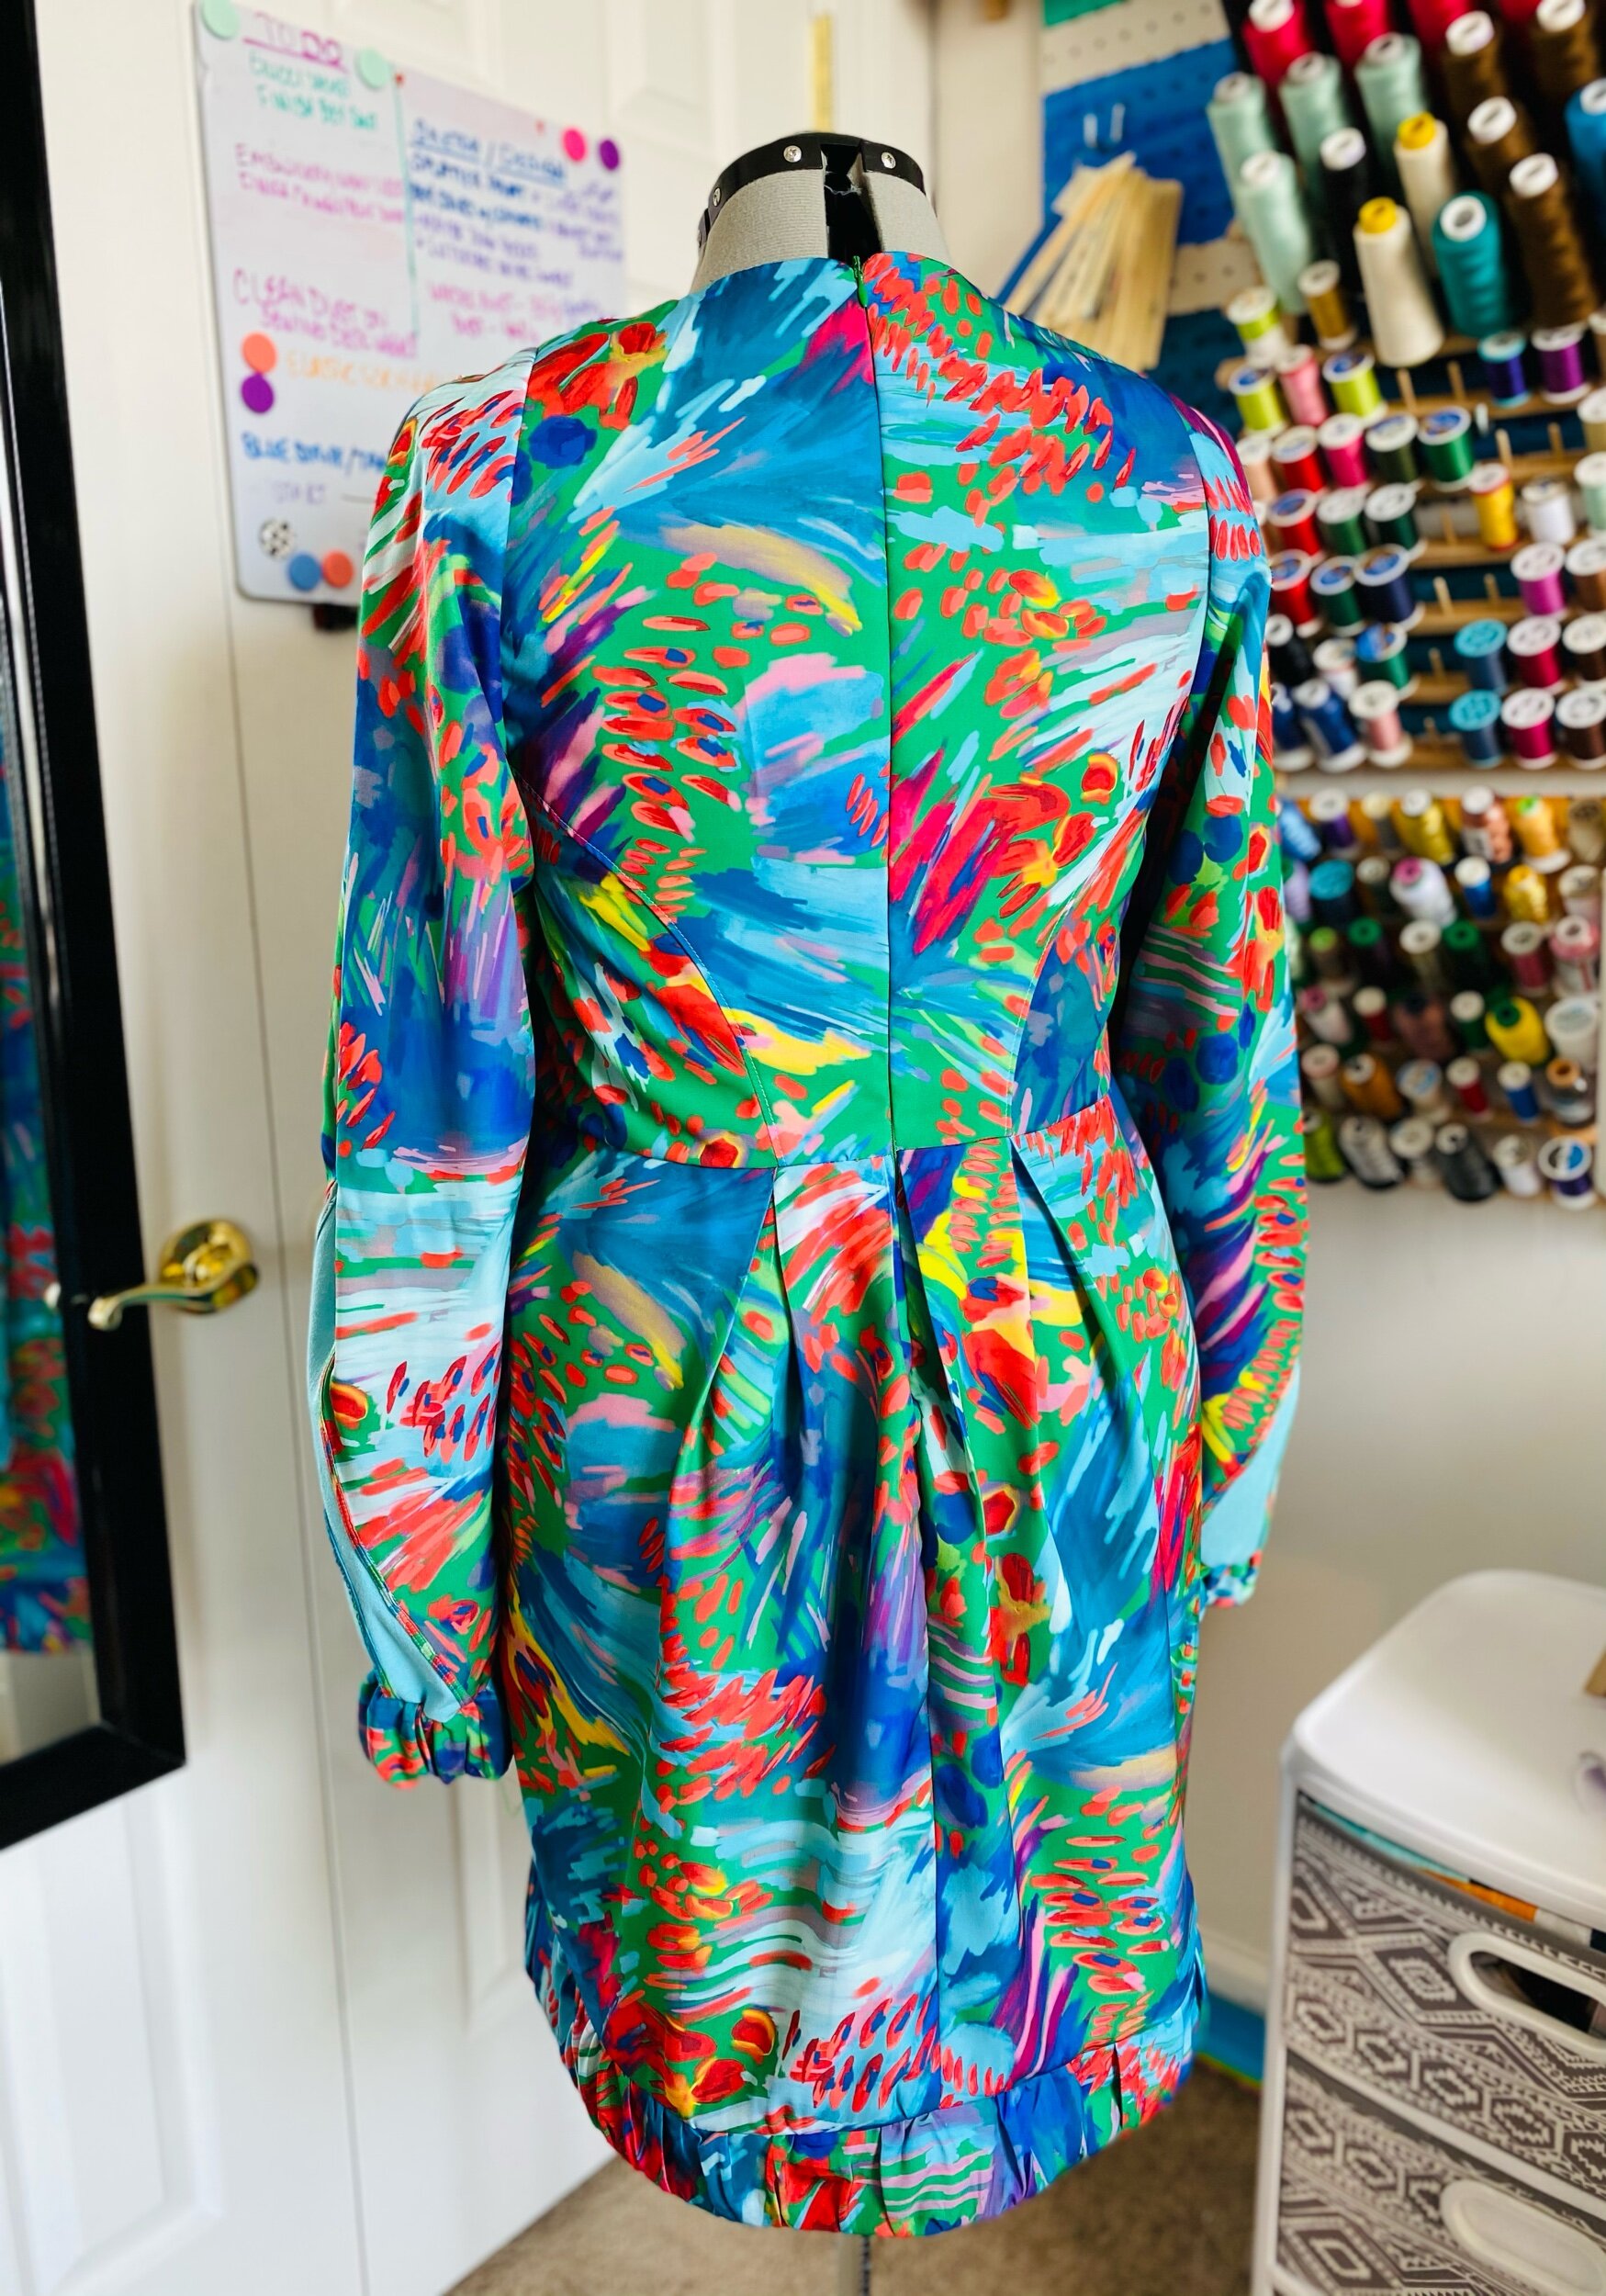
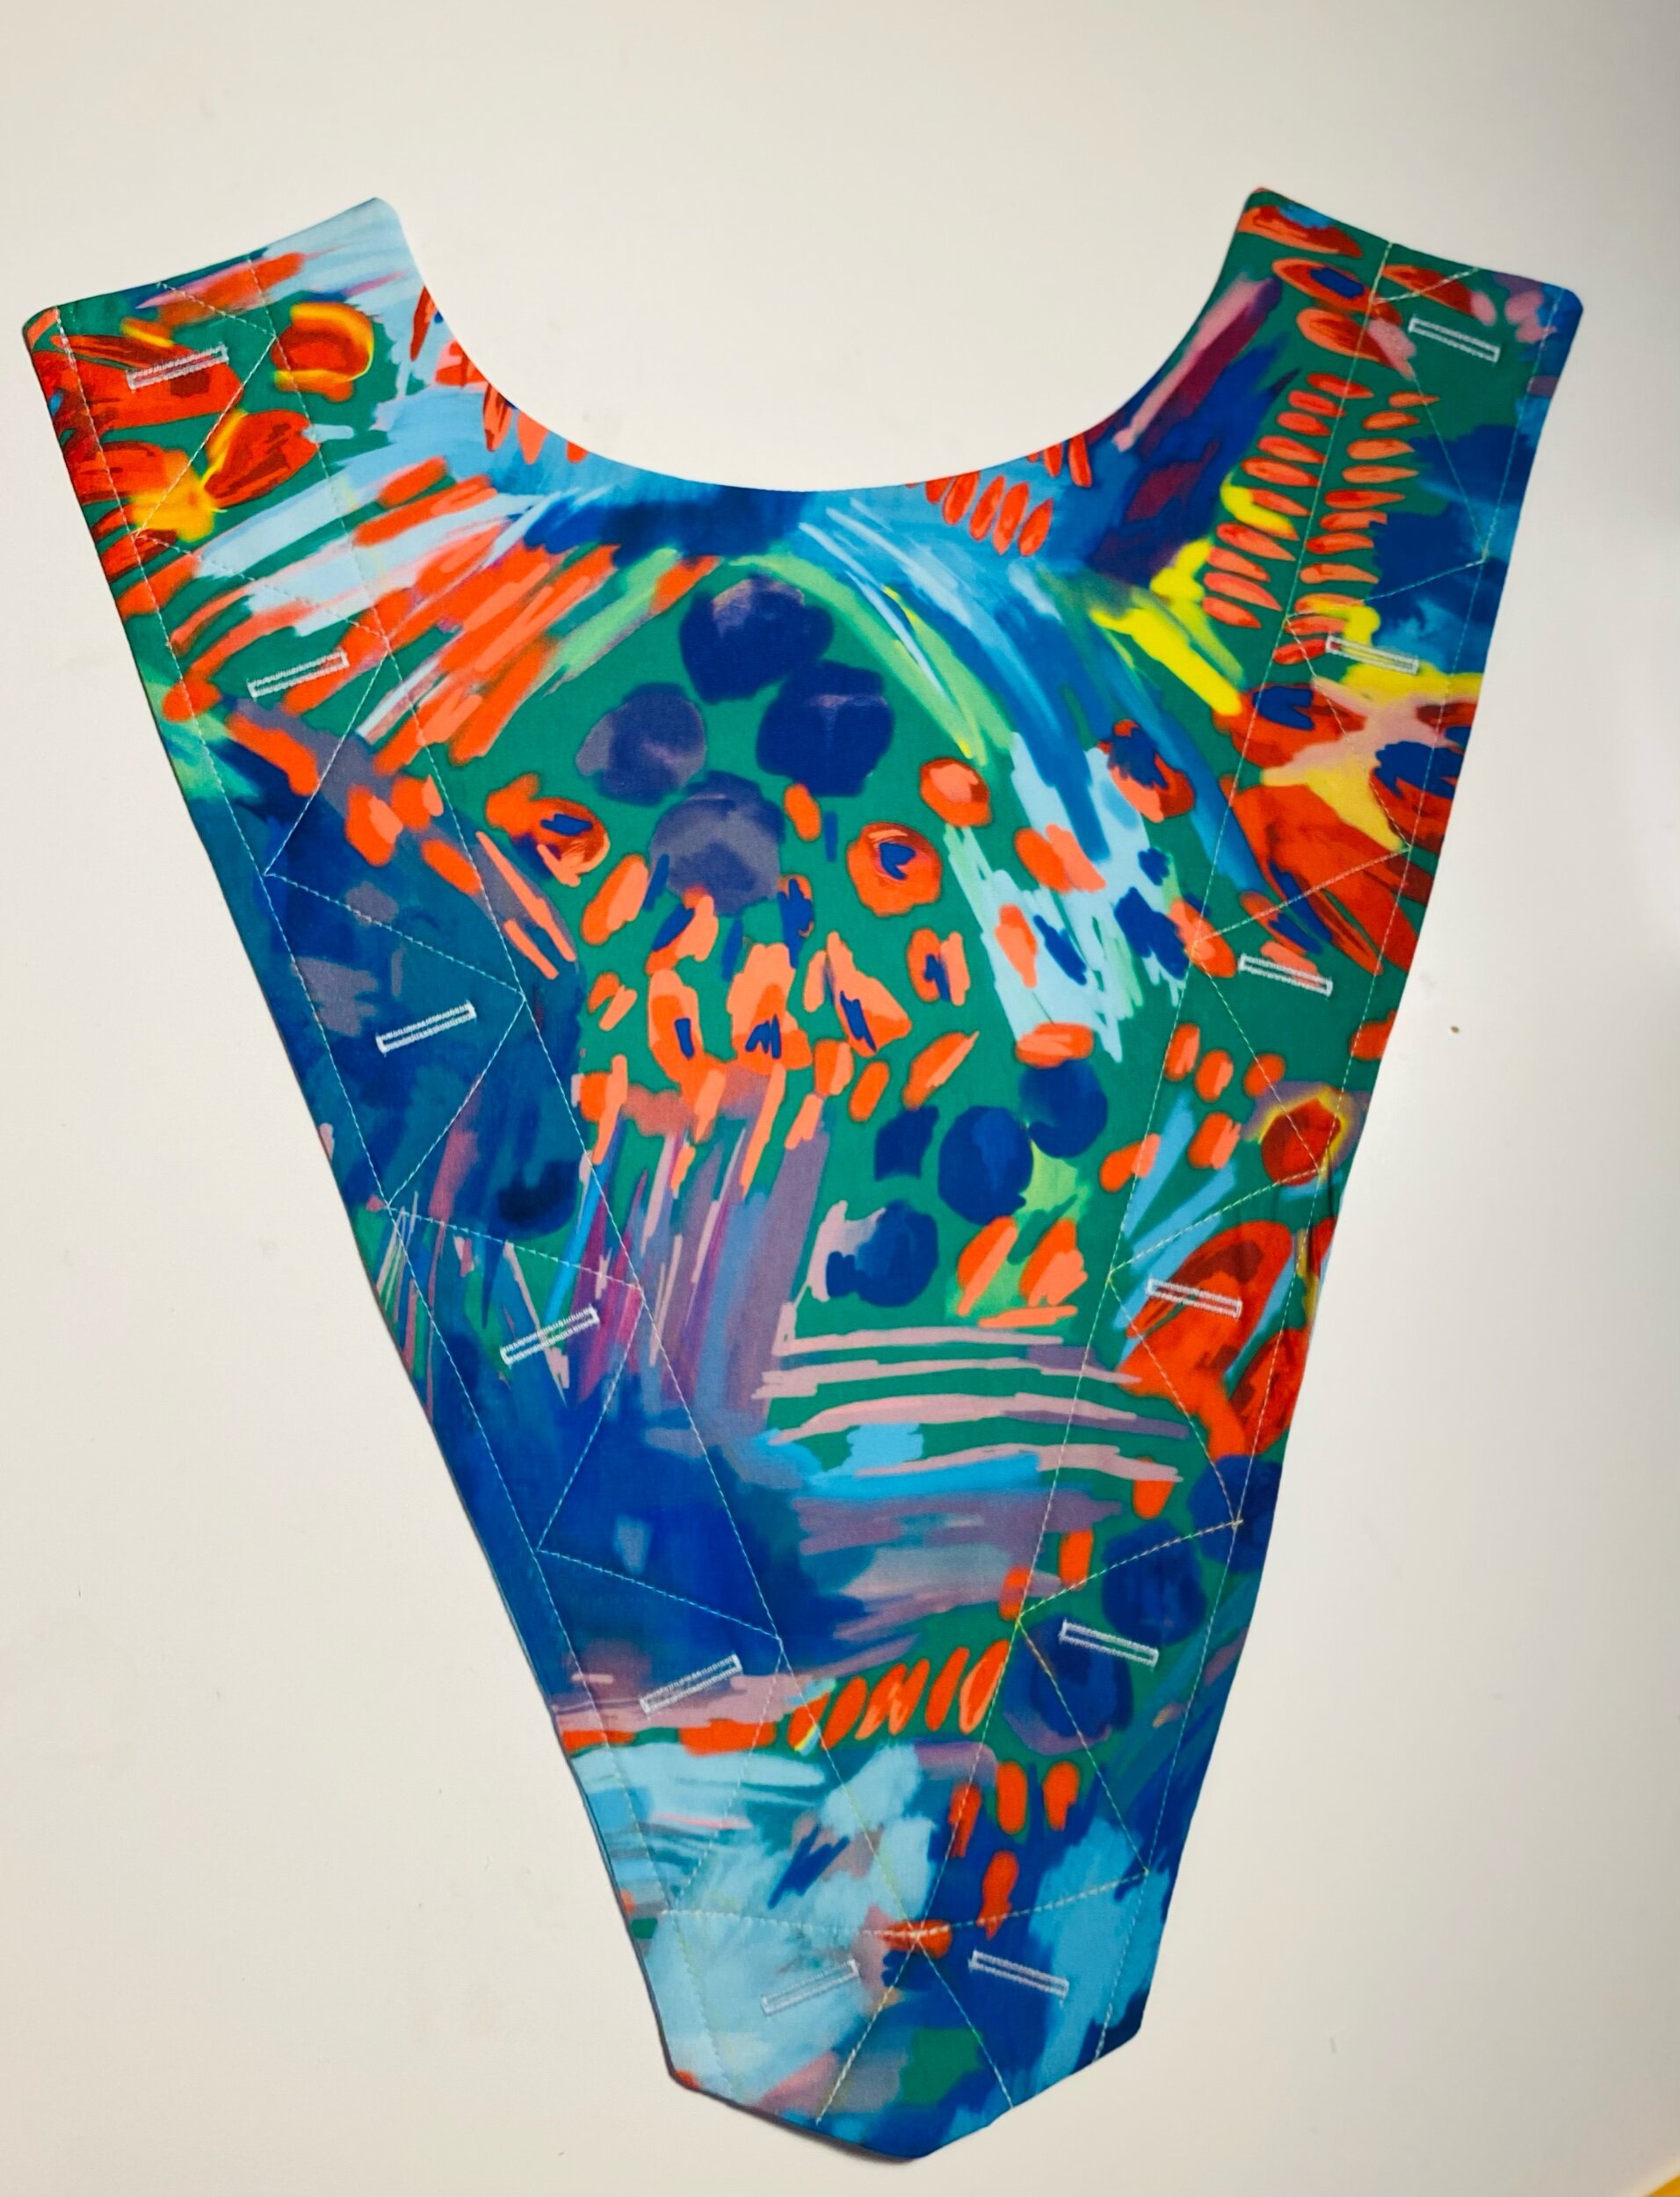
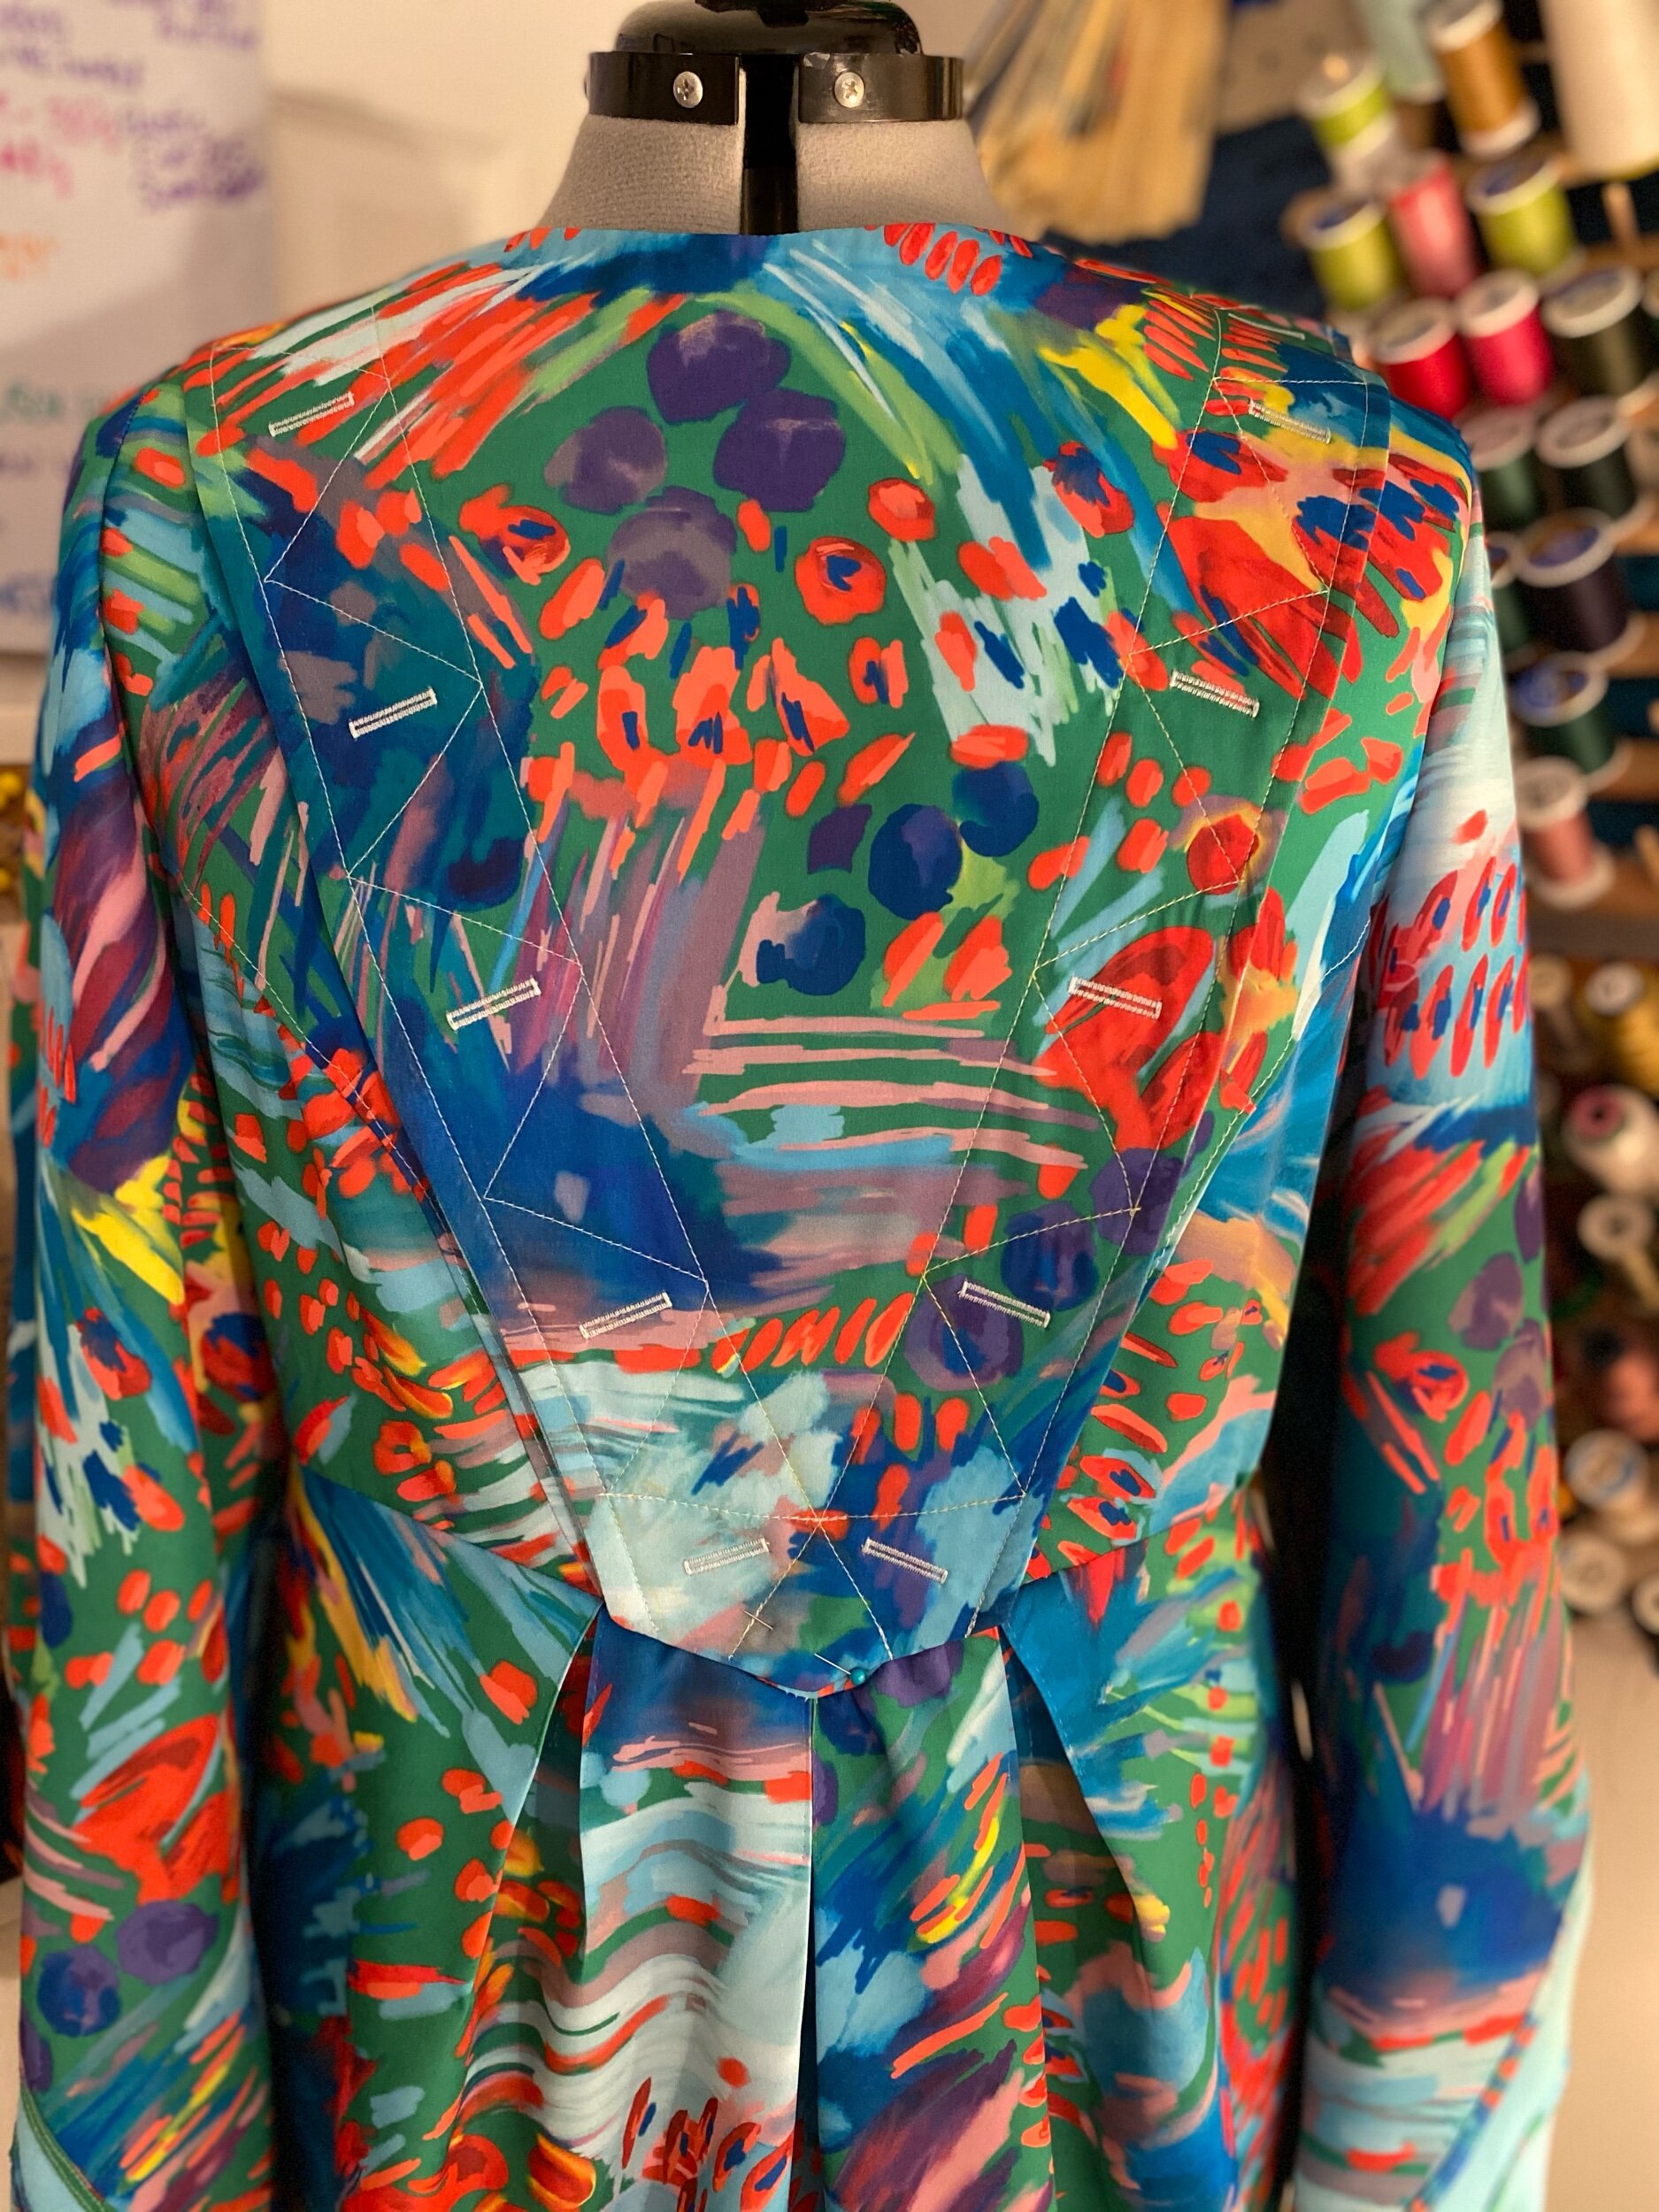
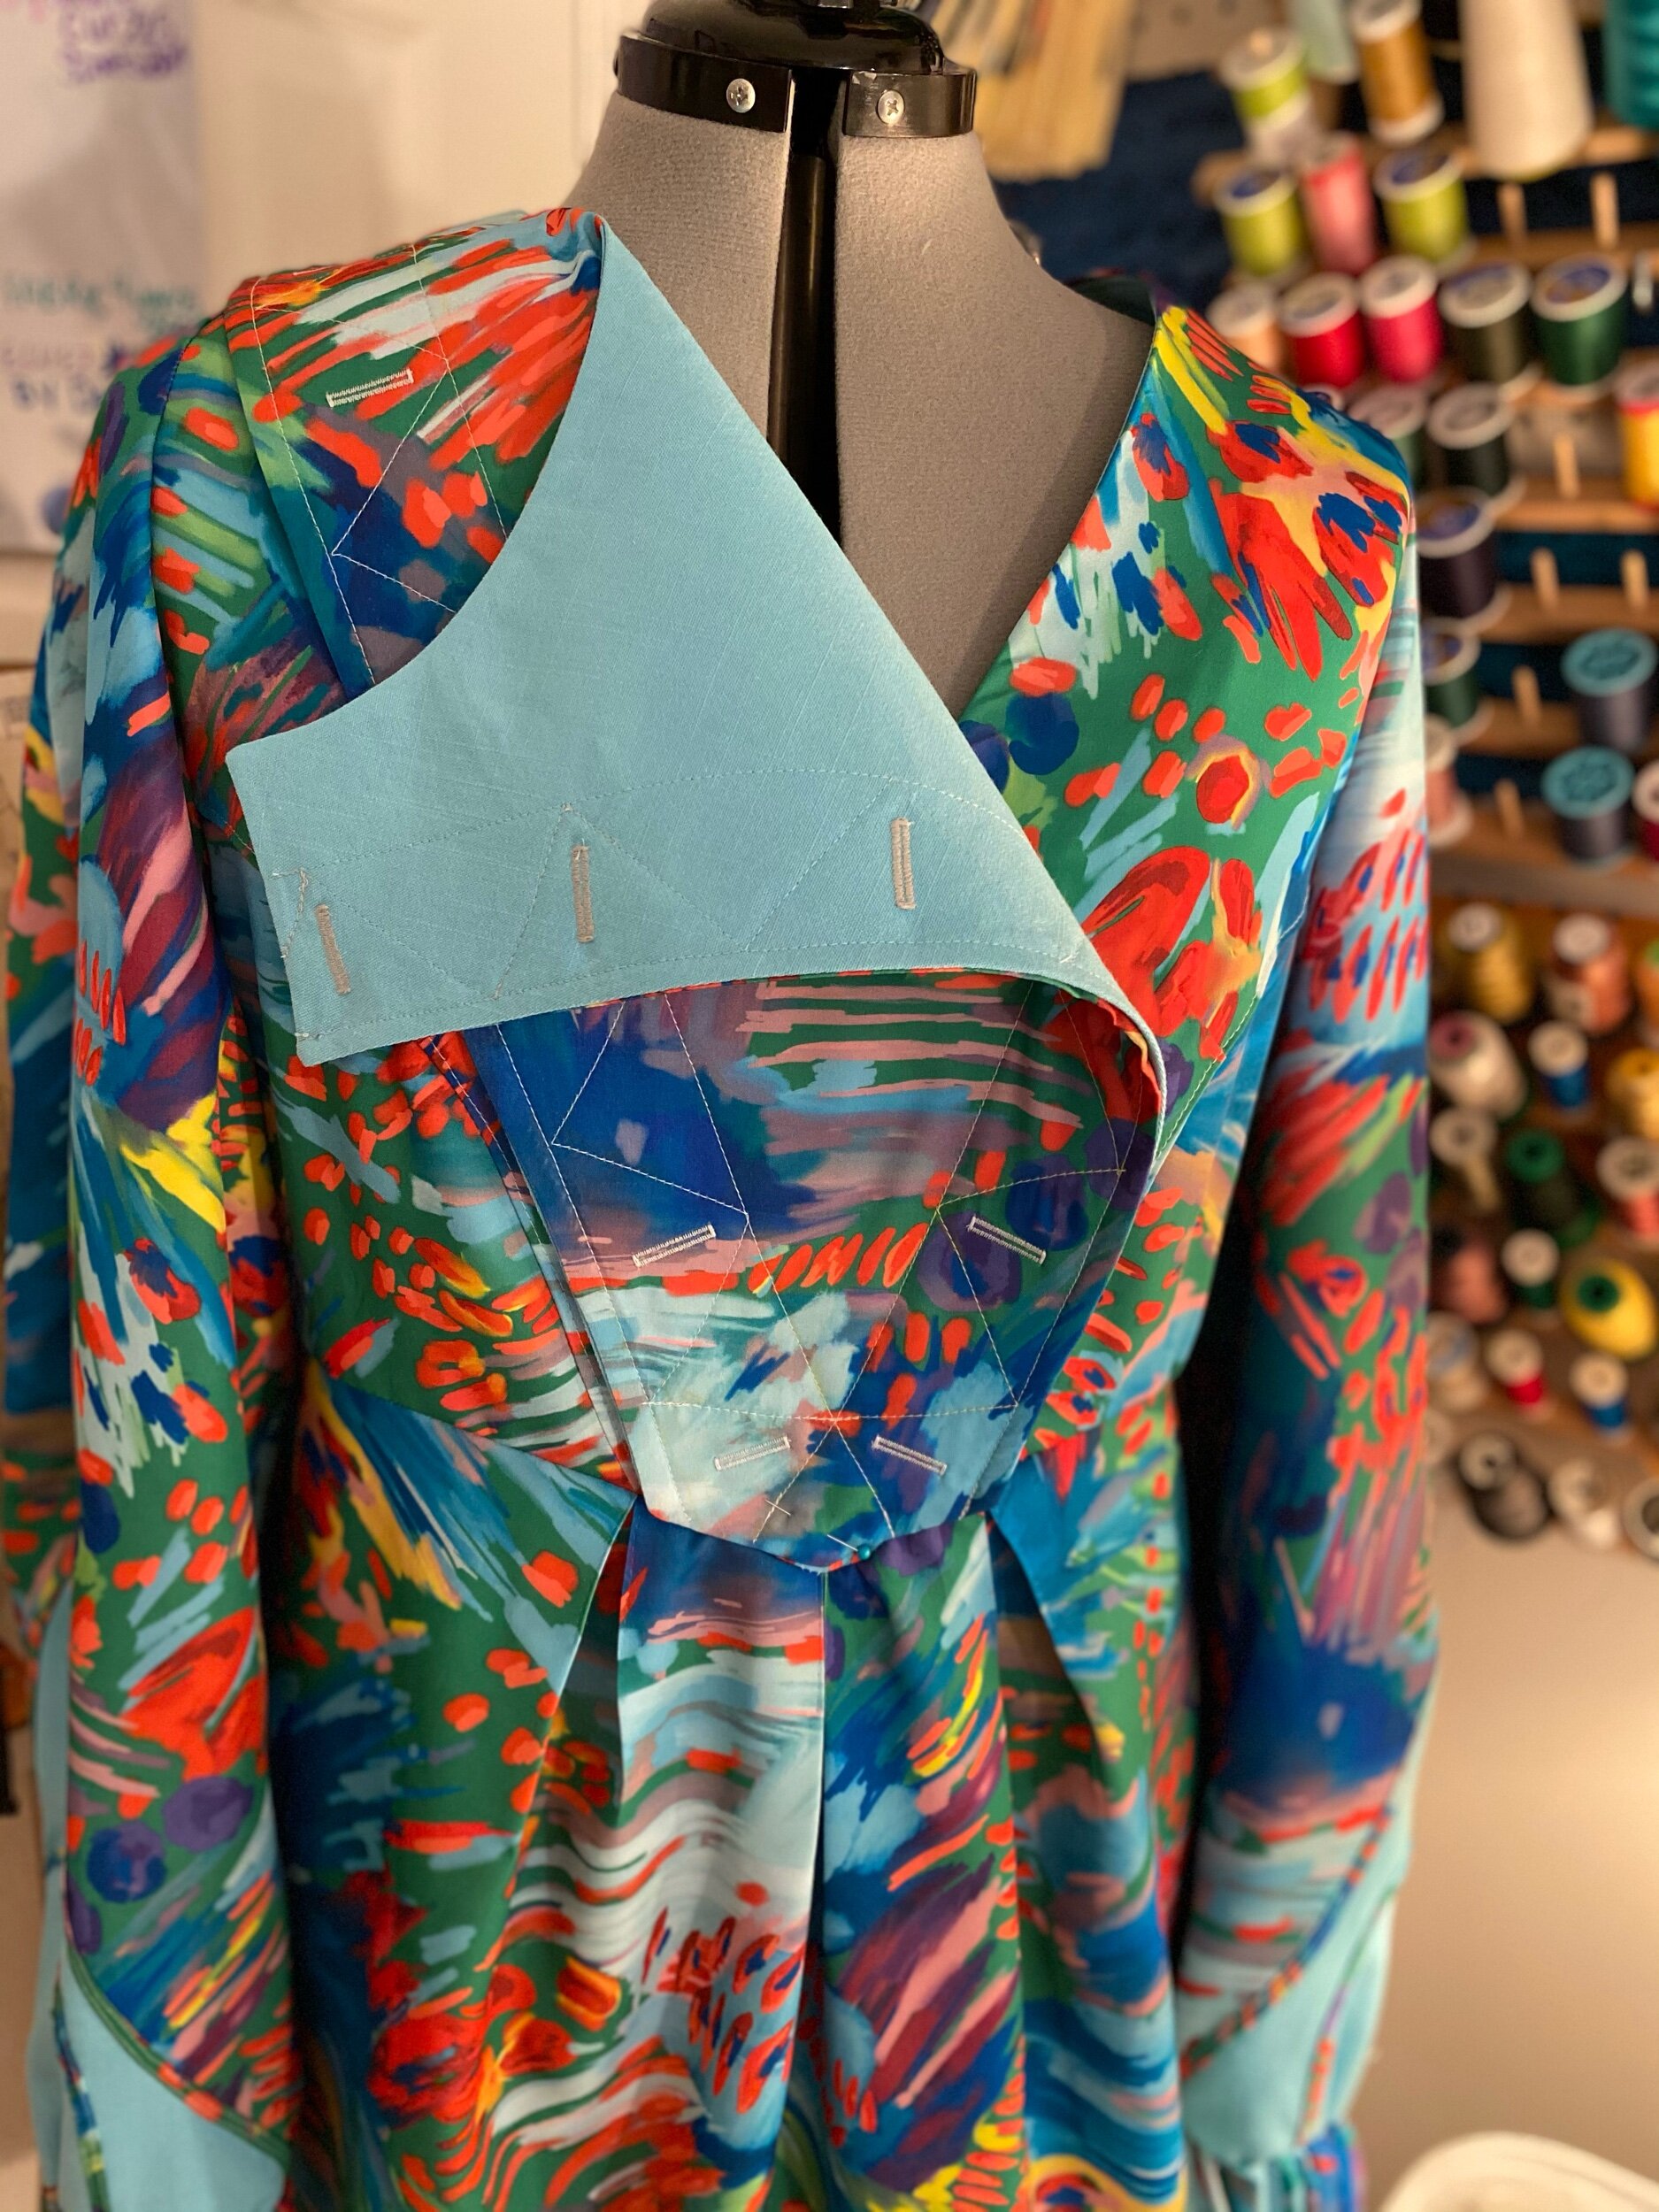
This pattern has lots of details; topstitching, making bias binding, covered buttons, pleats, invisible zipper, gathered hems, fully lined, and a good bit of hand sewing and I really wanted to highlight as much of these details as I could. If you don’t already know, I’ll usually start with a contrast. So I happened to have some sky blue linen on hand and it was perfect to contrast with this Katie Kortman print. The hard part was deciding which areas would be sky blue contrast and which wouldn’t. The binding on the sleeves were definitely an area I wanted to bring attention to so light blue on the sleeves it is. The overlay is another must for contrasting and when the dress isn’t completely buttoned up you get this peekaboo of blue and it makes me so happy. I also wanted to add the blue linen to the hem of the sleeves and the dress but I changed my mind (I wanted to use every inch of this Silky Faille).


Construction
This dress is not beginner level friendly!
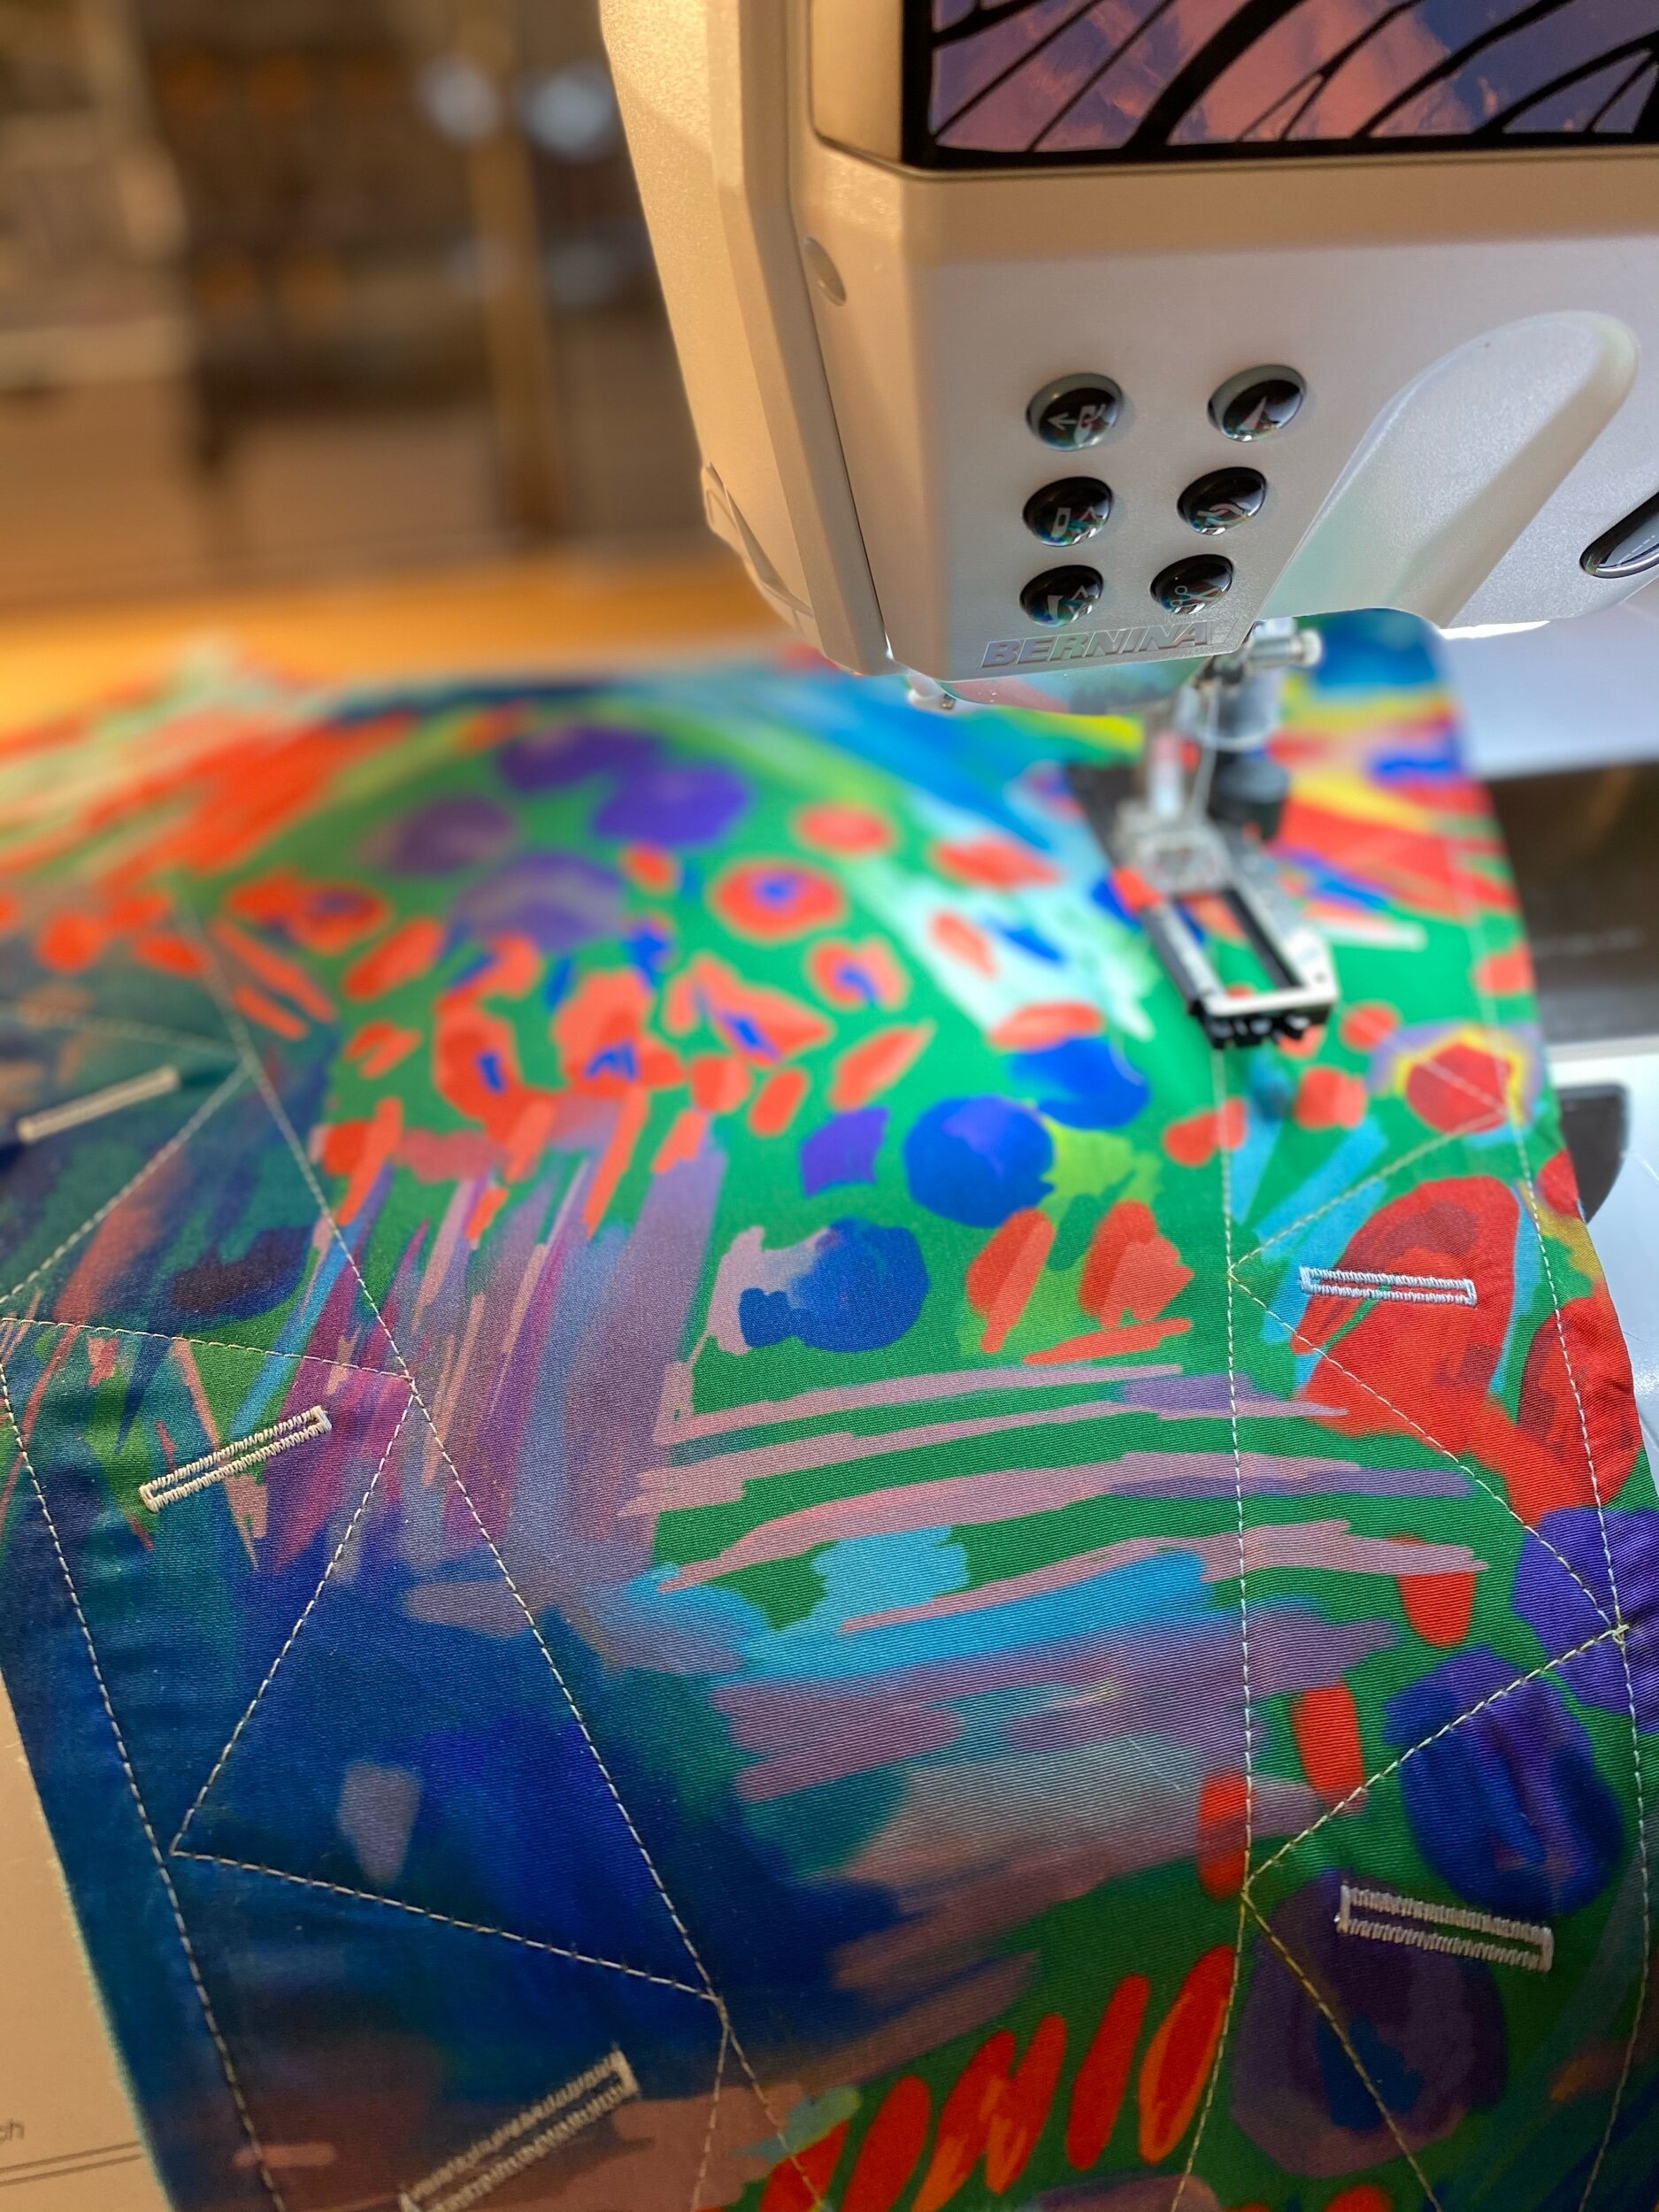
The binding was one of the more tedious steps but I managed to cut down a little time with using my bias binding tool.
Tip: Be sure to always change your needles for new projects. Topstitching the binding on the sleeves are thick layers and this Spoonflower Silky Faille likes my Schmetz Chrome needle the most.
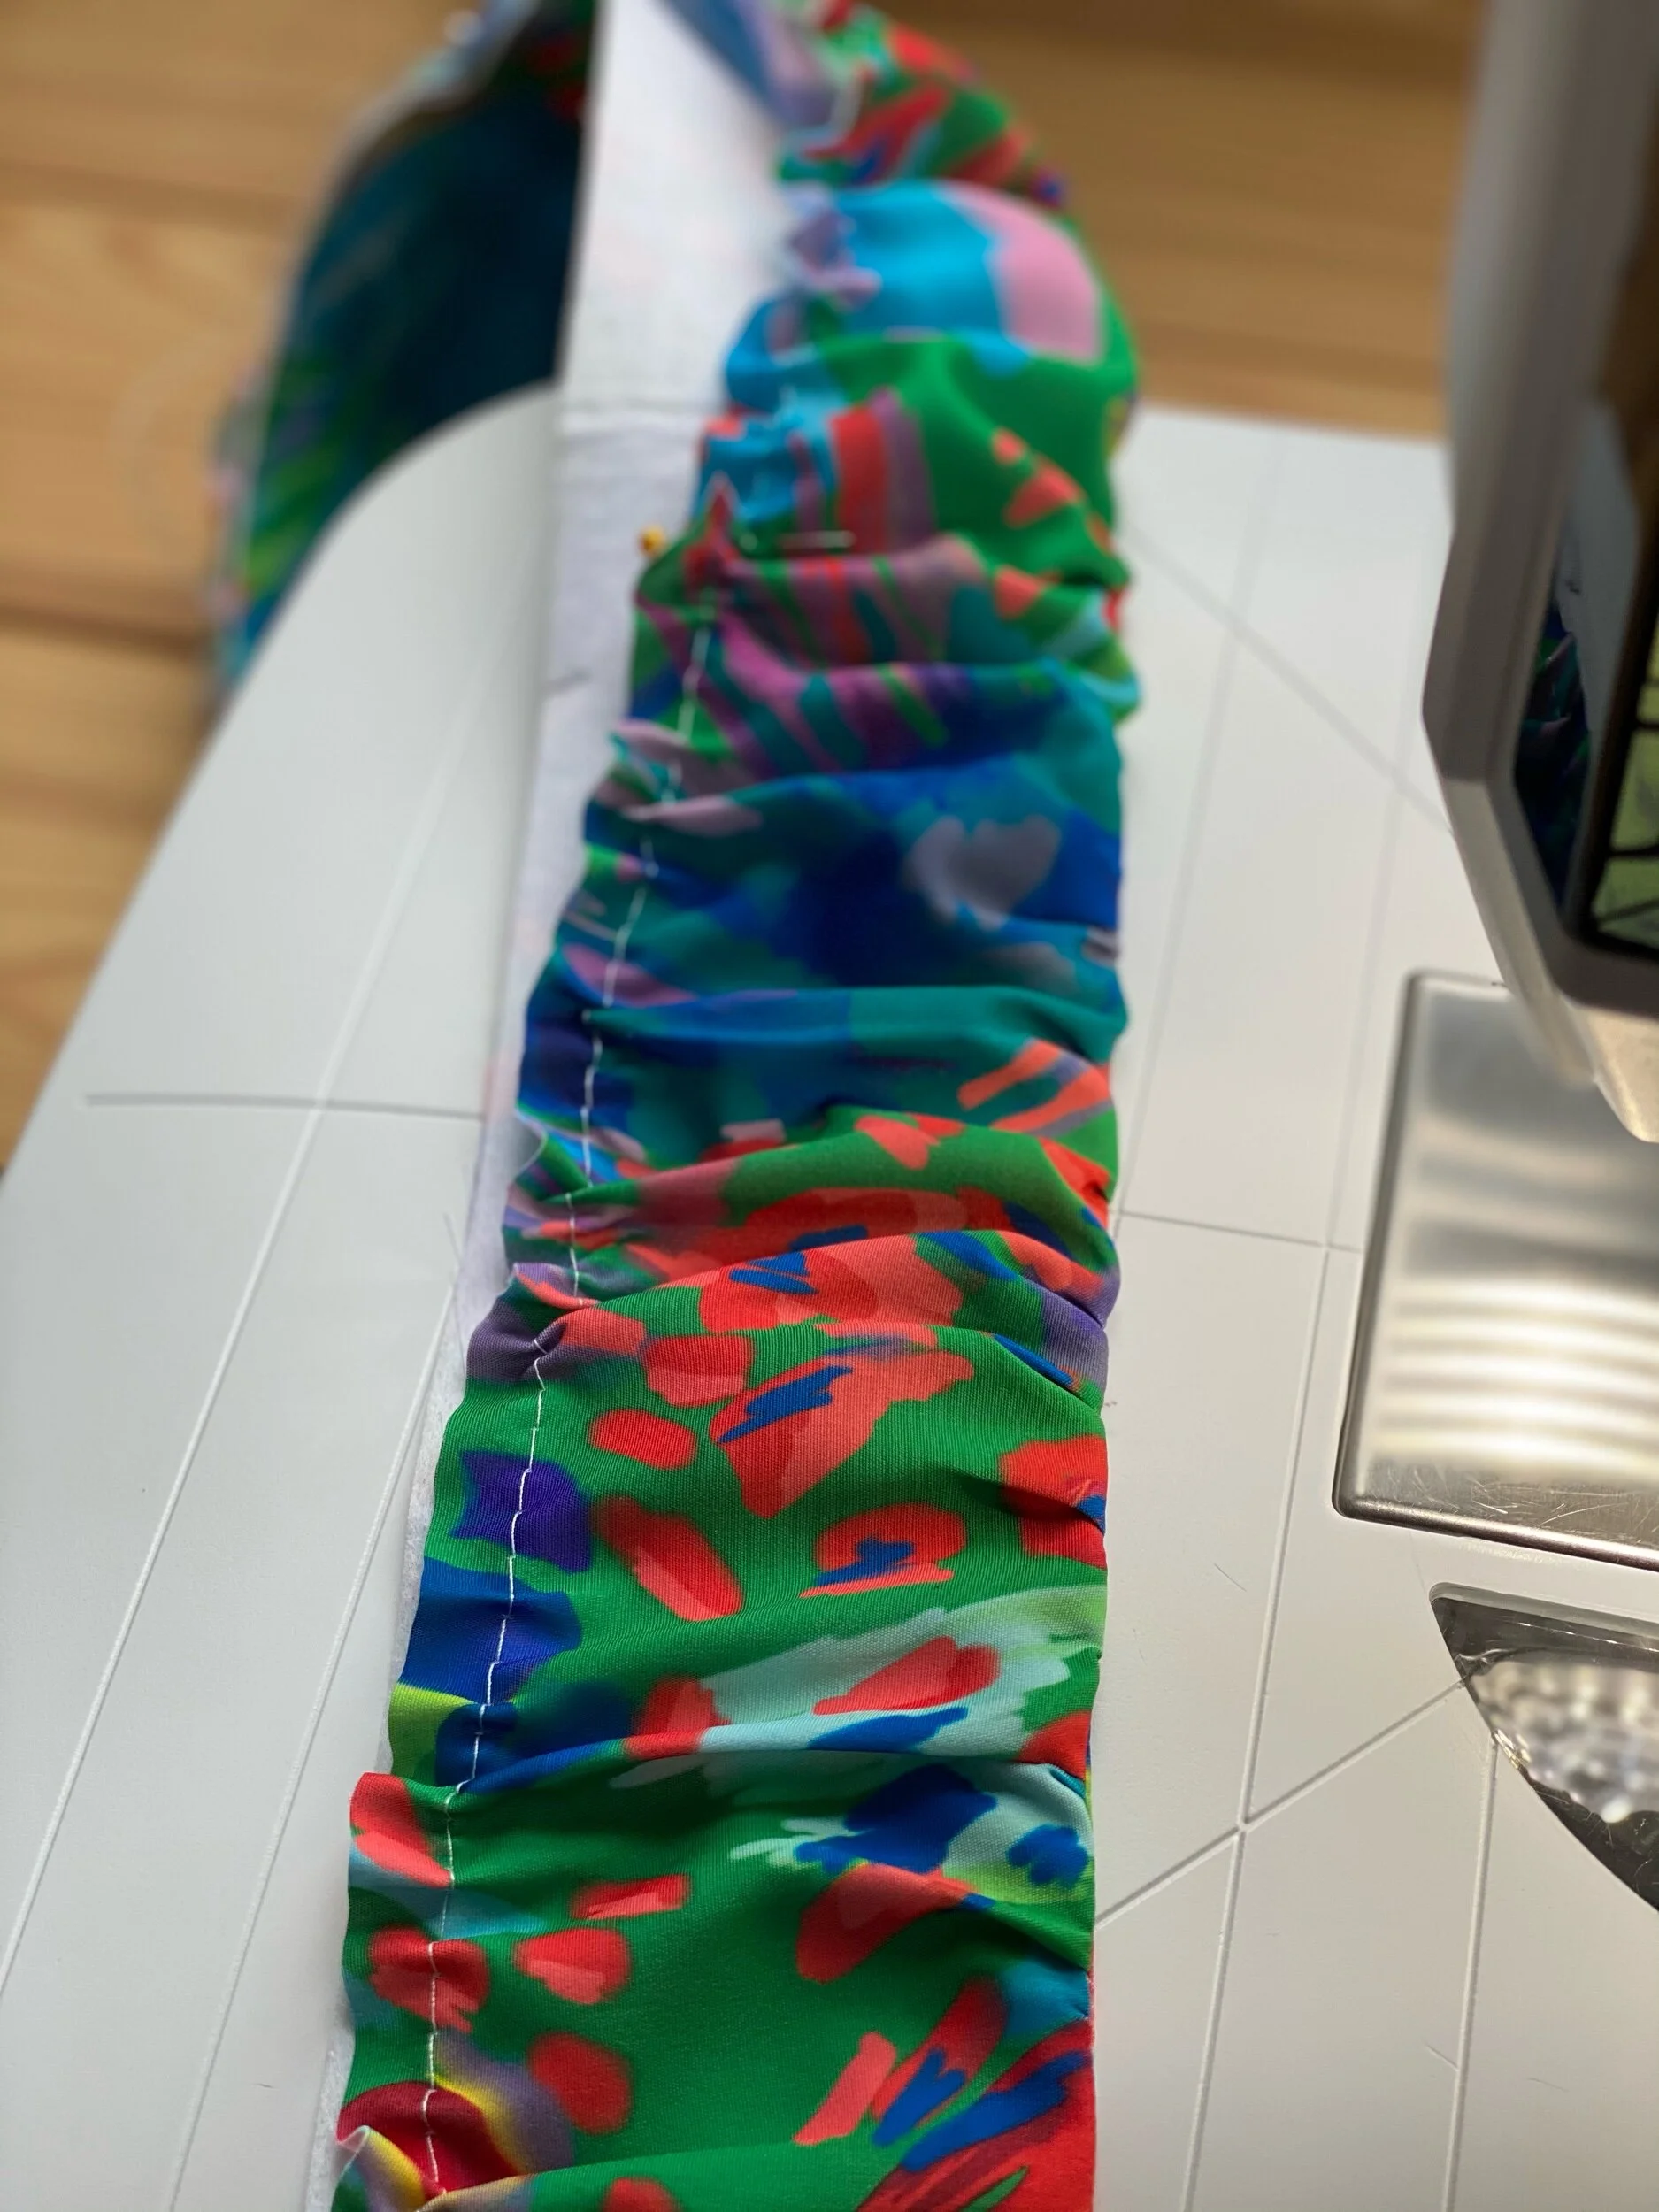
At first glance I thought that the gathered hem was achieved using elastic. Instead your gathering the outside only. I made a slight change to the sleeves and actually added elastic because the fit around the wrist was too baggy for me. This is totally by preference.


As always thanks for stopping by. I do hope you enjoyed this colorful Guy Larouche Dress.
Peace & Blessings
Lush & Wild
Lush & Wild
I had the pleasure of receiving Katie Kortman’s Lush & Wild double gauze fabric in this beautiful print before it was released April 19th on Fabricdotcom. Click the link here to view the entire collection. Let’s just say I absolutely love these prints
The fabric choices include double gauze, sateen, canvas, and quilting cotton. The hand on the double gauze is a nice soft drape and perfect for Spring and Summer. After sharing a sneak peak of this look on my IG, this print sold out on the 1st day lol. But don’t worry they will print more and it will be available again soon.

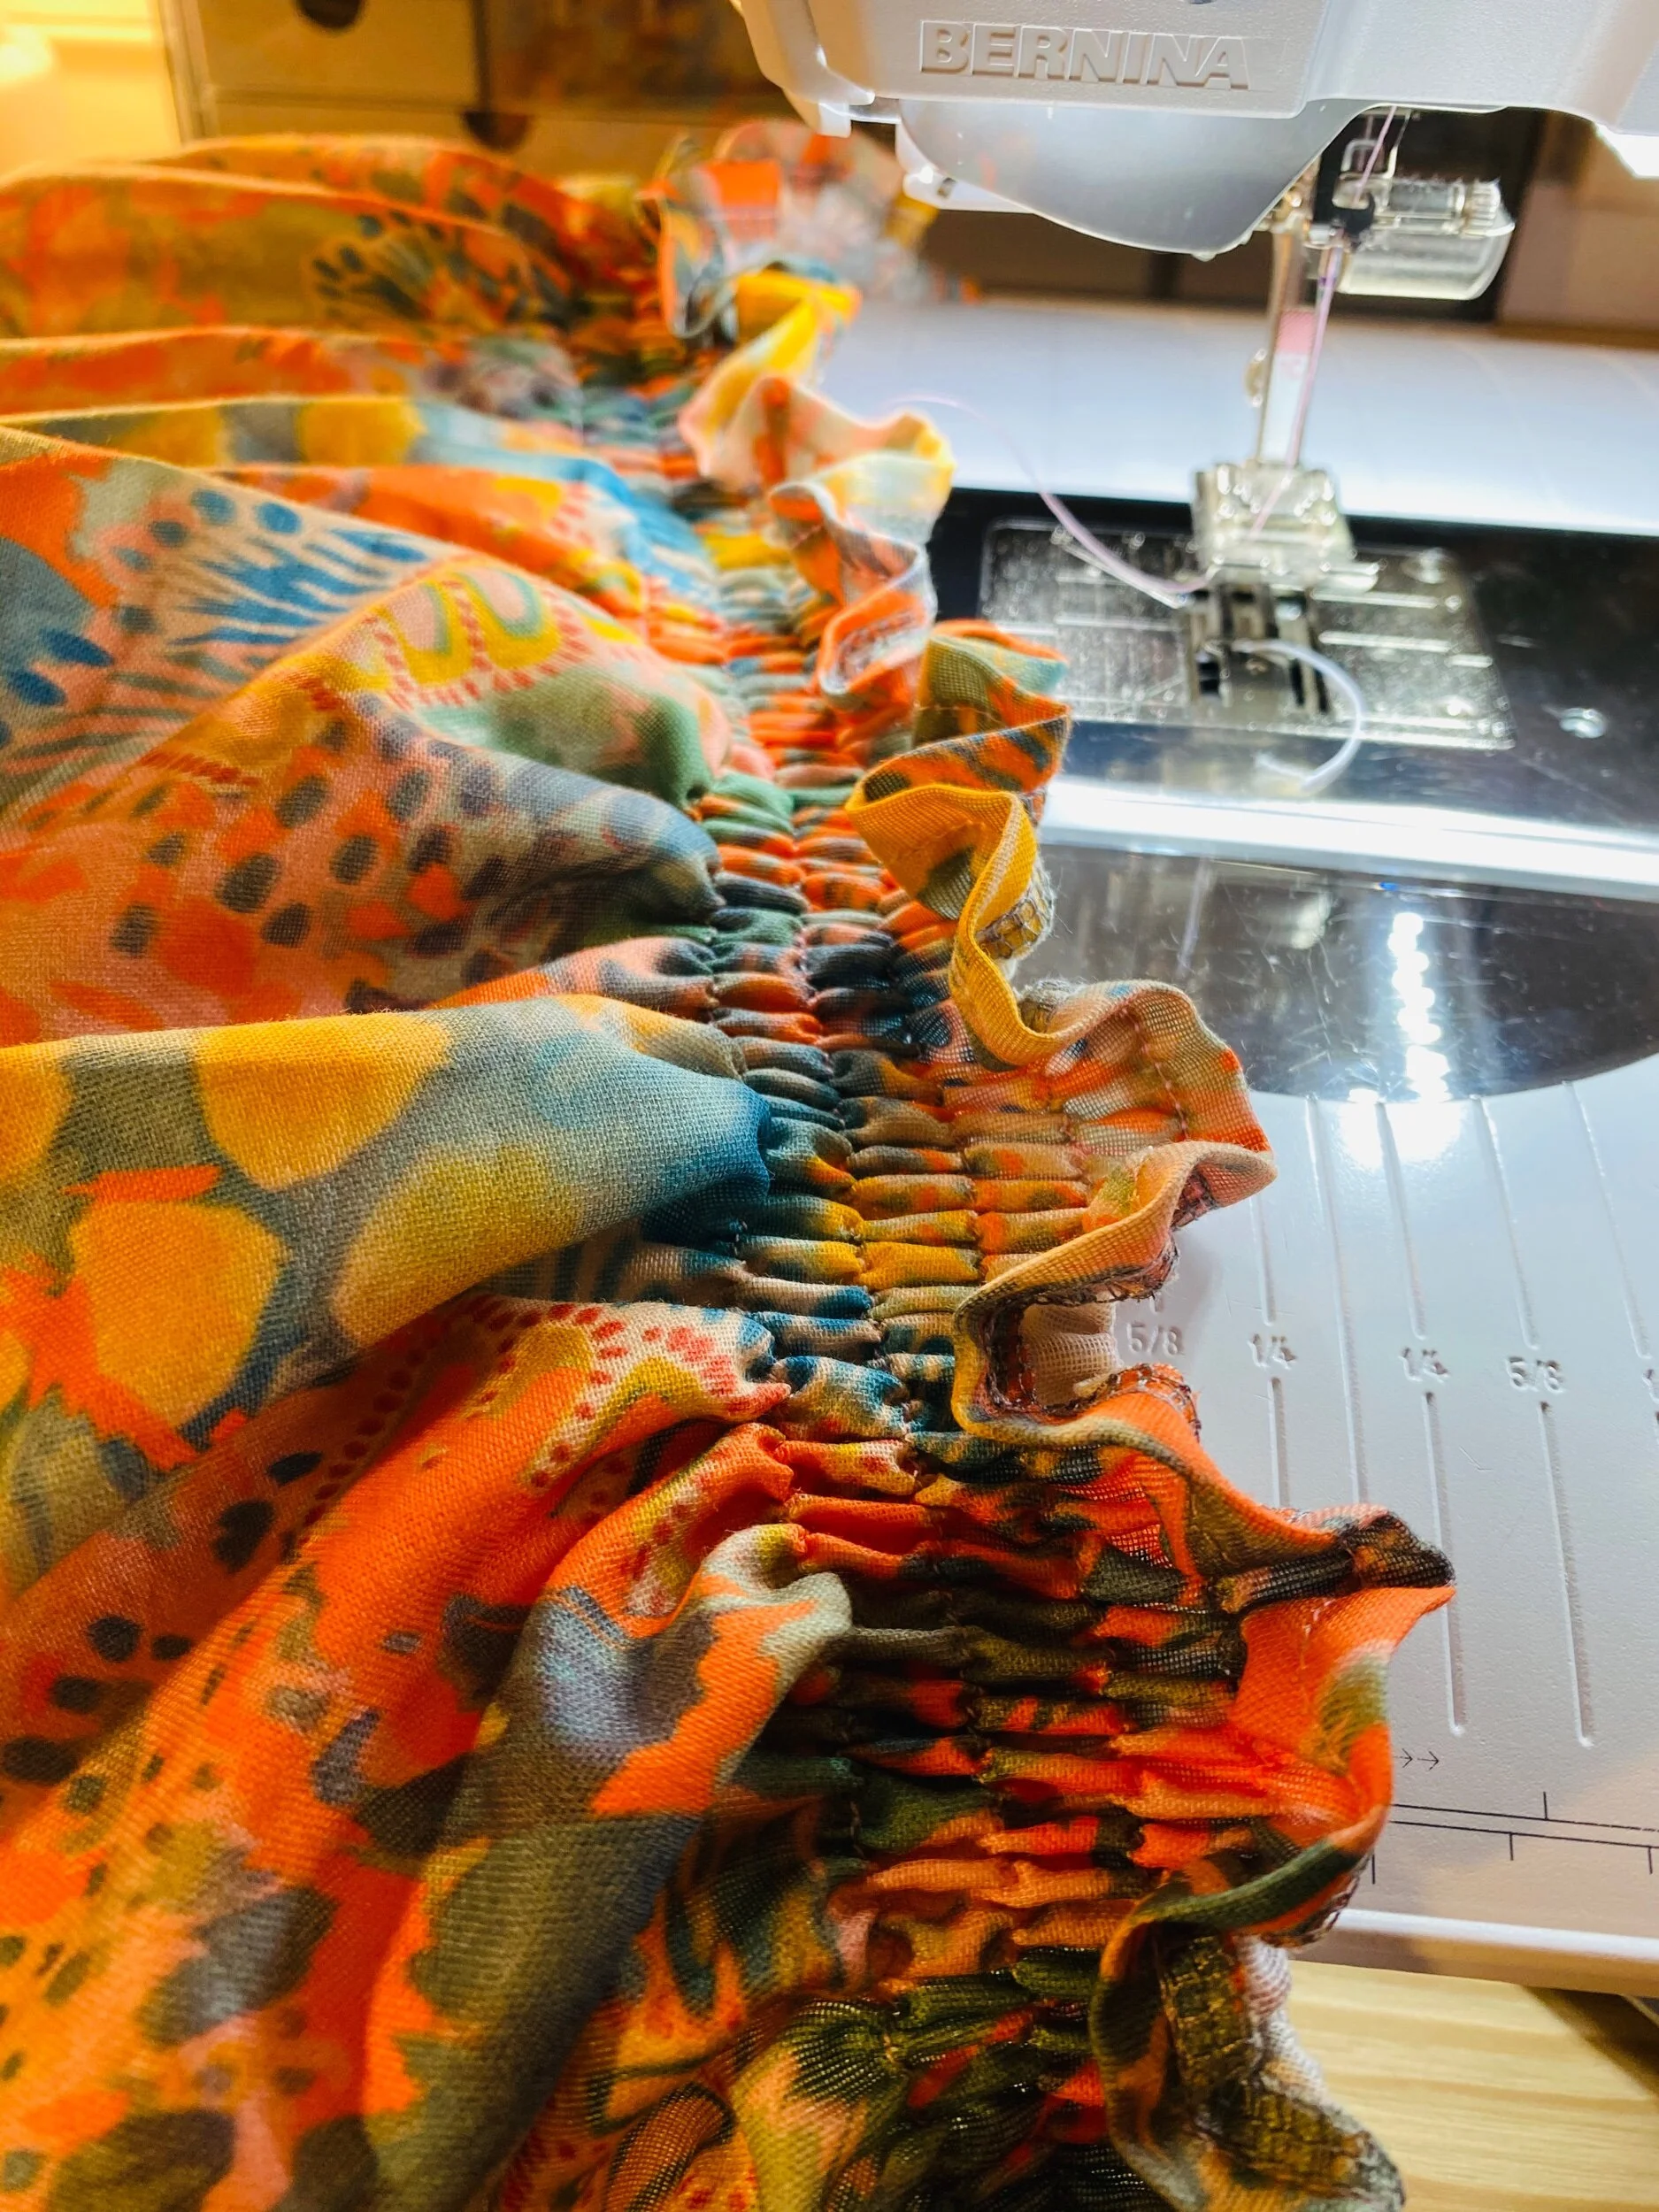
Shirring
I had never tried shirring and with the 4 yards of fabric I had, I figured I could squeeze out shirring, big sleeves, and a gathered skirt. Luckily I was able to finish this dress with about 1/4 of a yard to spare.
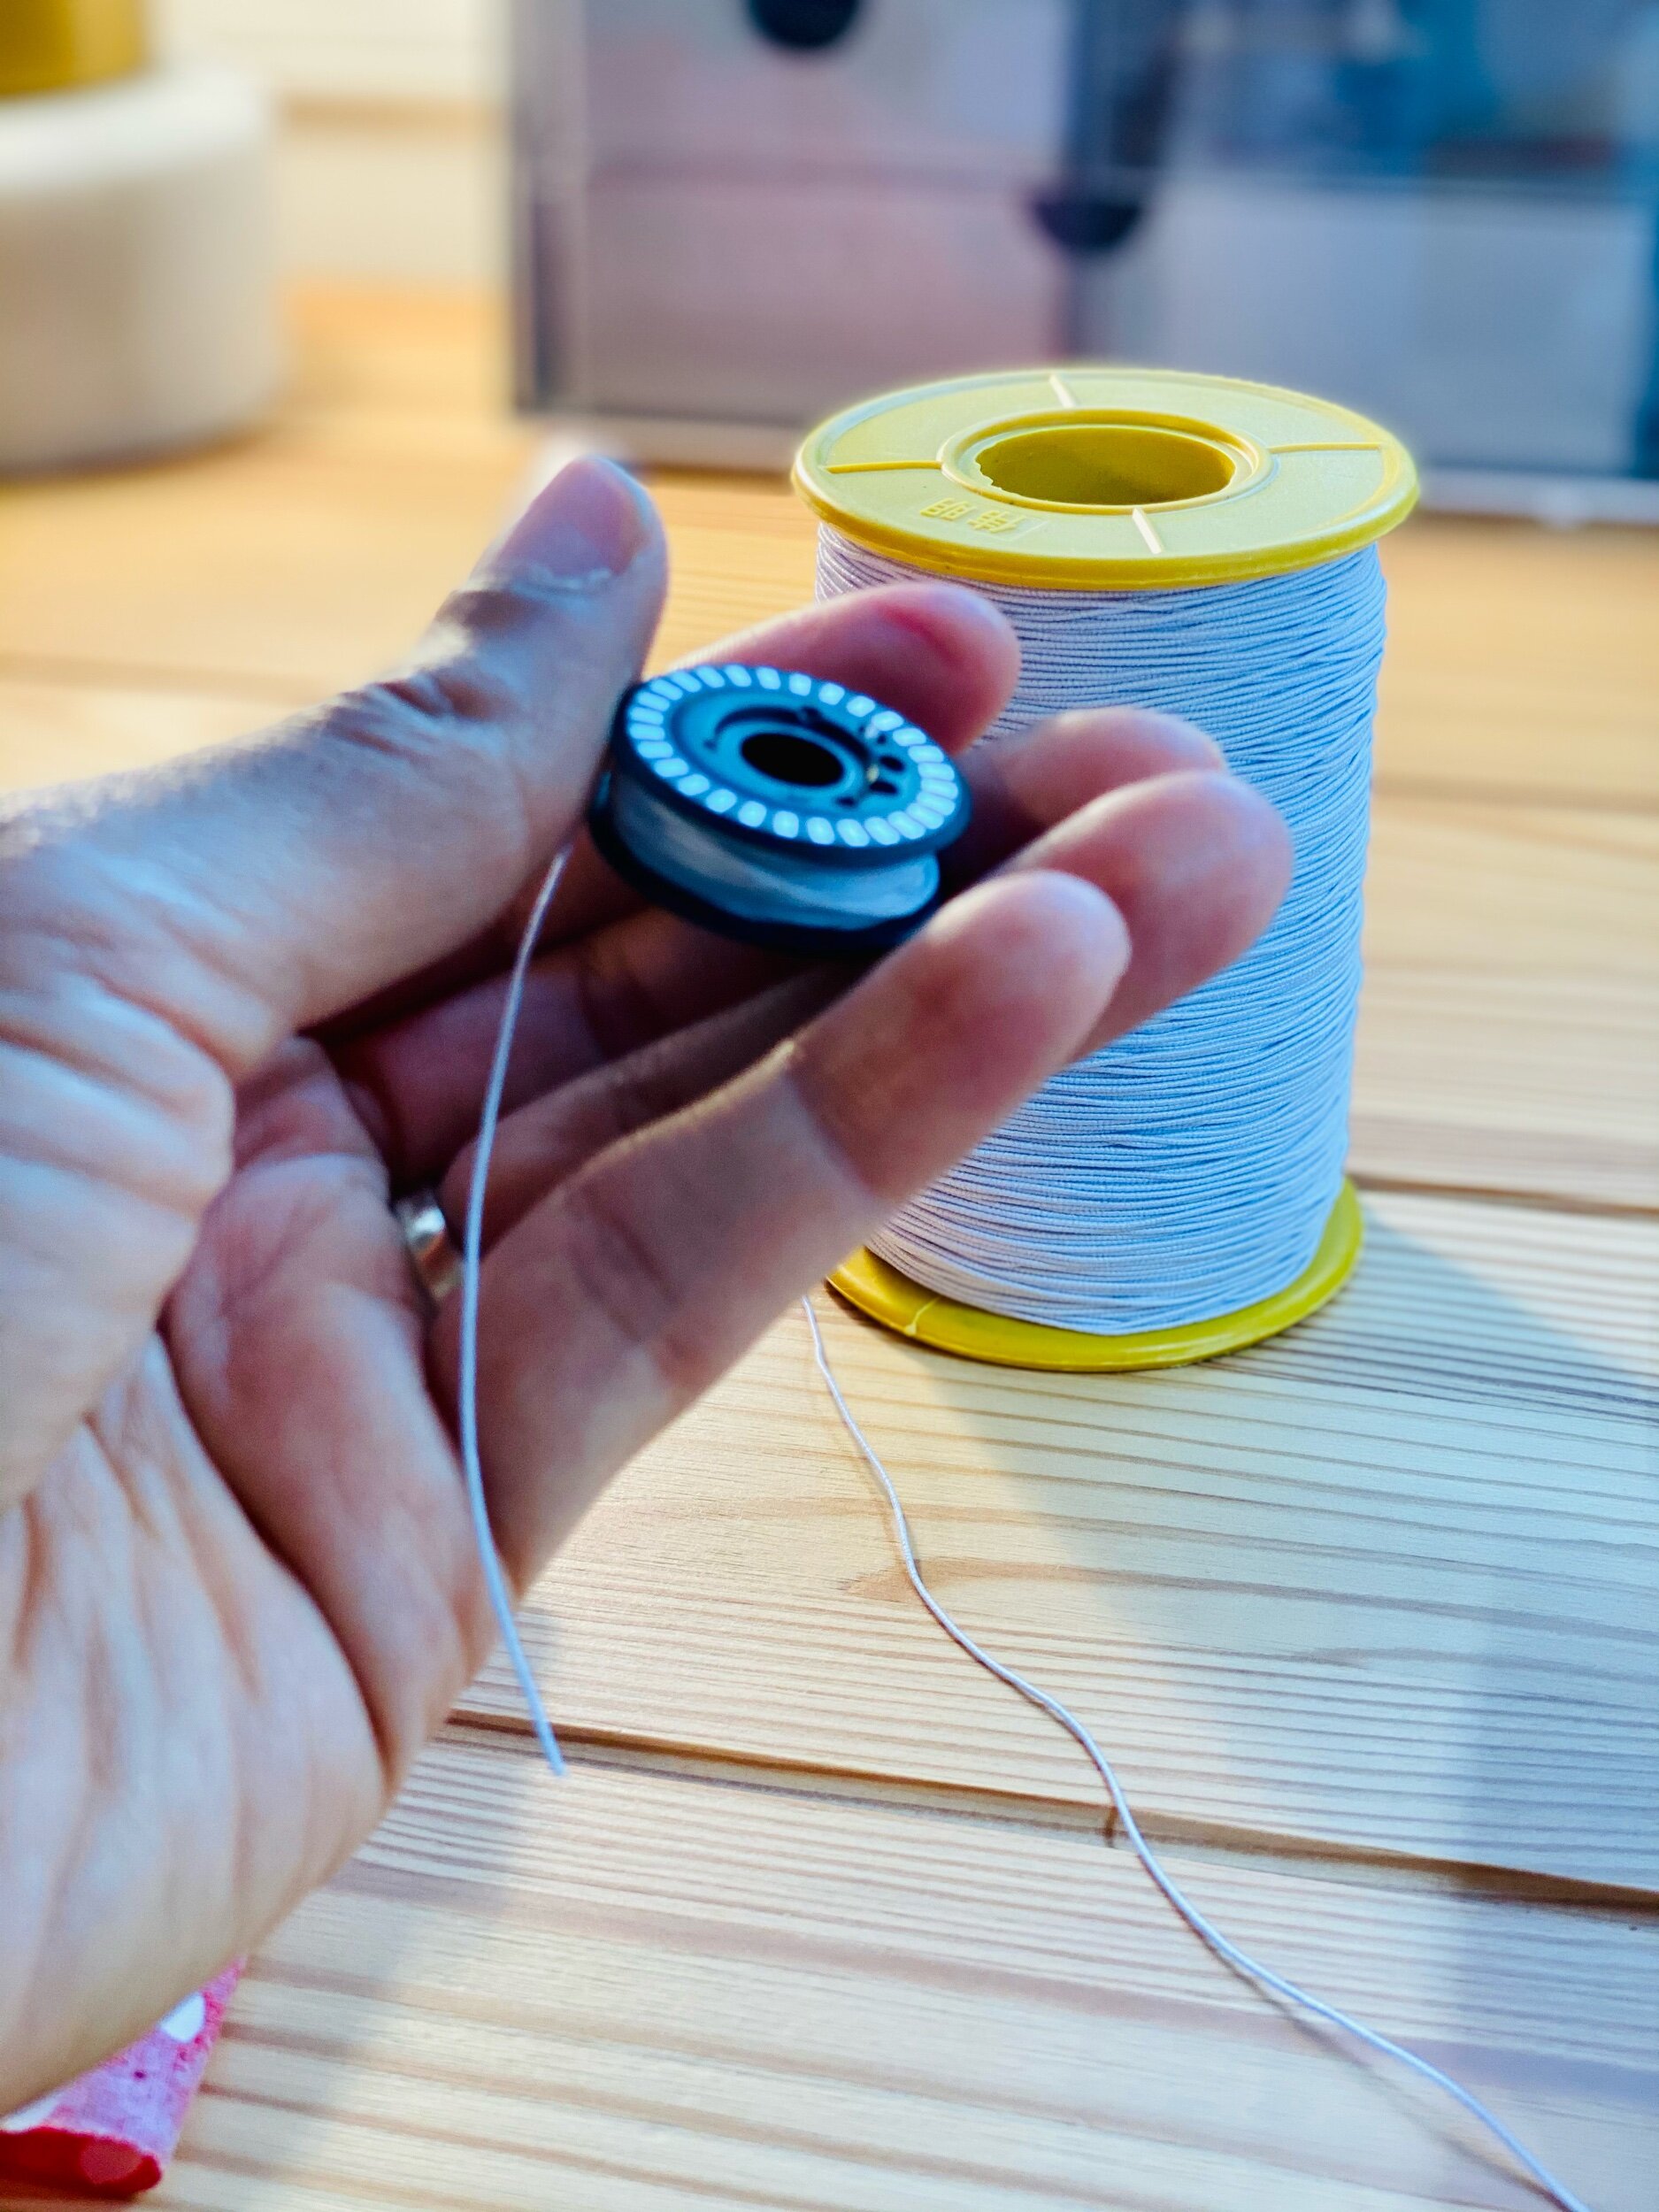
Okay, so many people told me they’re afraid of shirring. I too was skurrd lol. But I finally put my fears aside after my friend Raven assured me that it wasn’t that bad. One of the most tedious things about shirring is hand winding your bobbins. I sew on my Bernina 880 plus and the elastic thread is too thick to feed through my automatic bobbin threader. If your machine can, then by all means do you. The great thing about my 880 is that the bobbins are jumbo size so I only used about 3 and a half bobbins for my elastic thread.
Please keep in mind the amount of shirring you choose and spacing will determine how much elastic thread you will need. I will say you will about 3-5 bobbins for shirring spaced 1cm apart and on an average of 20-30 rows of shirring should be enough. You want to be sure not to wind your bobbin too loose or too tight!
For this project you will need:
Sewing machine
elastic thread (check out my Amazon shop here)
all purpose thread
Binding or bias tape (for sleeves)
Lingerie Elastic 3/8” or 5/8” (for sleeves)
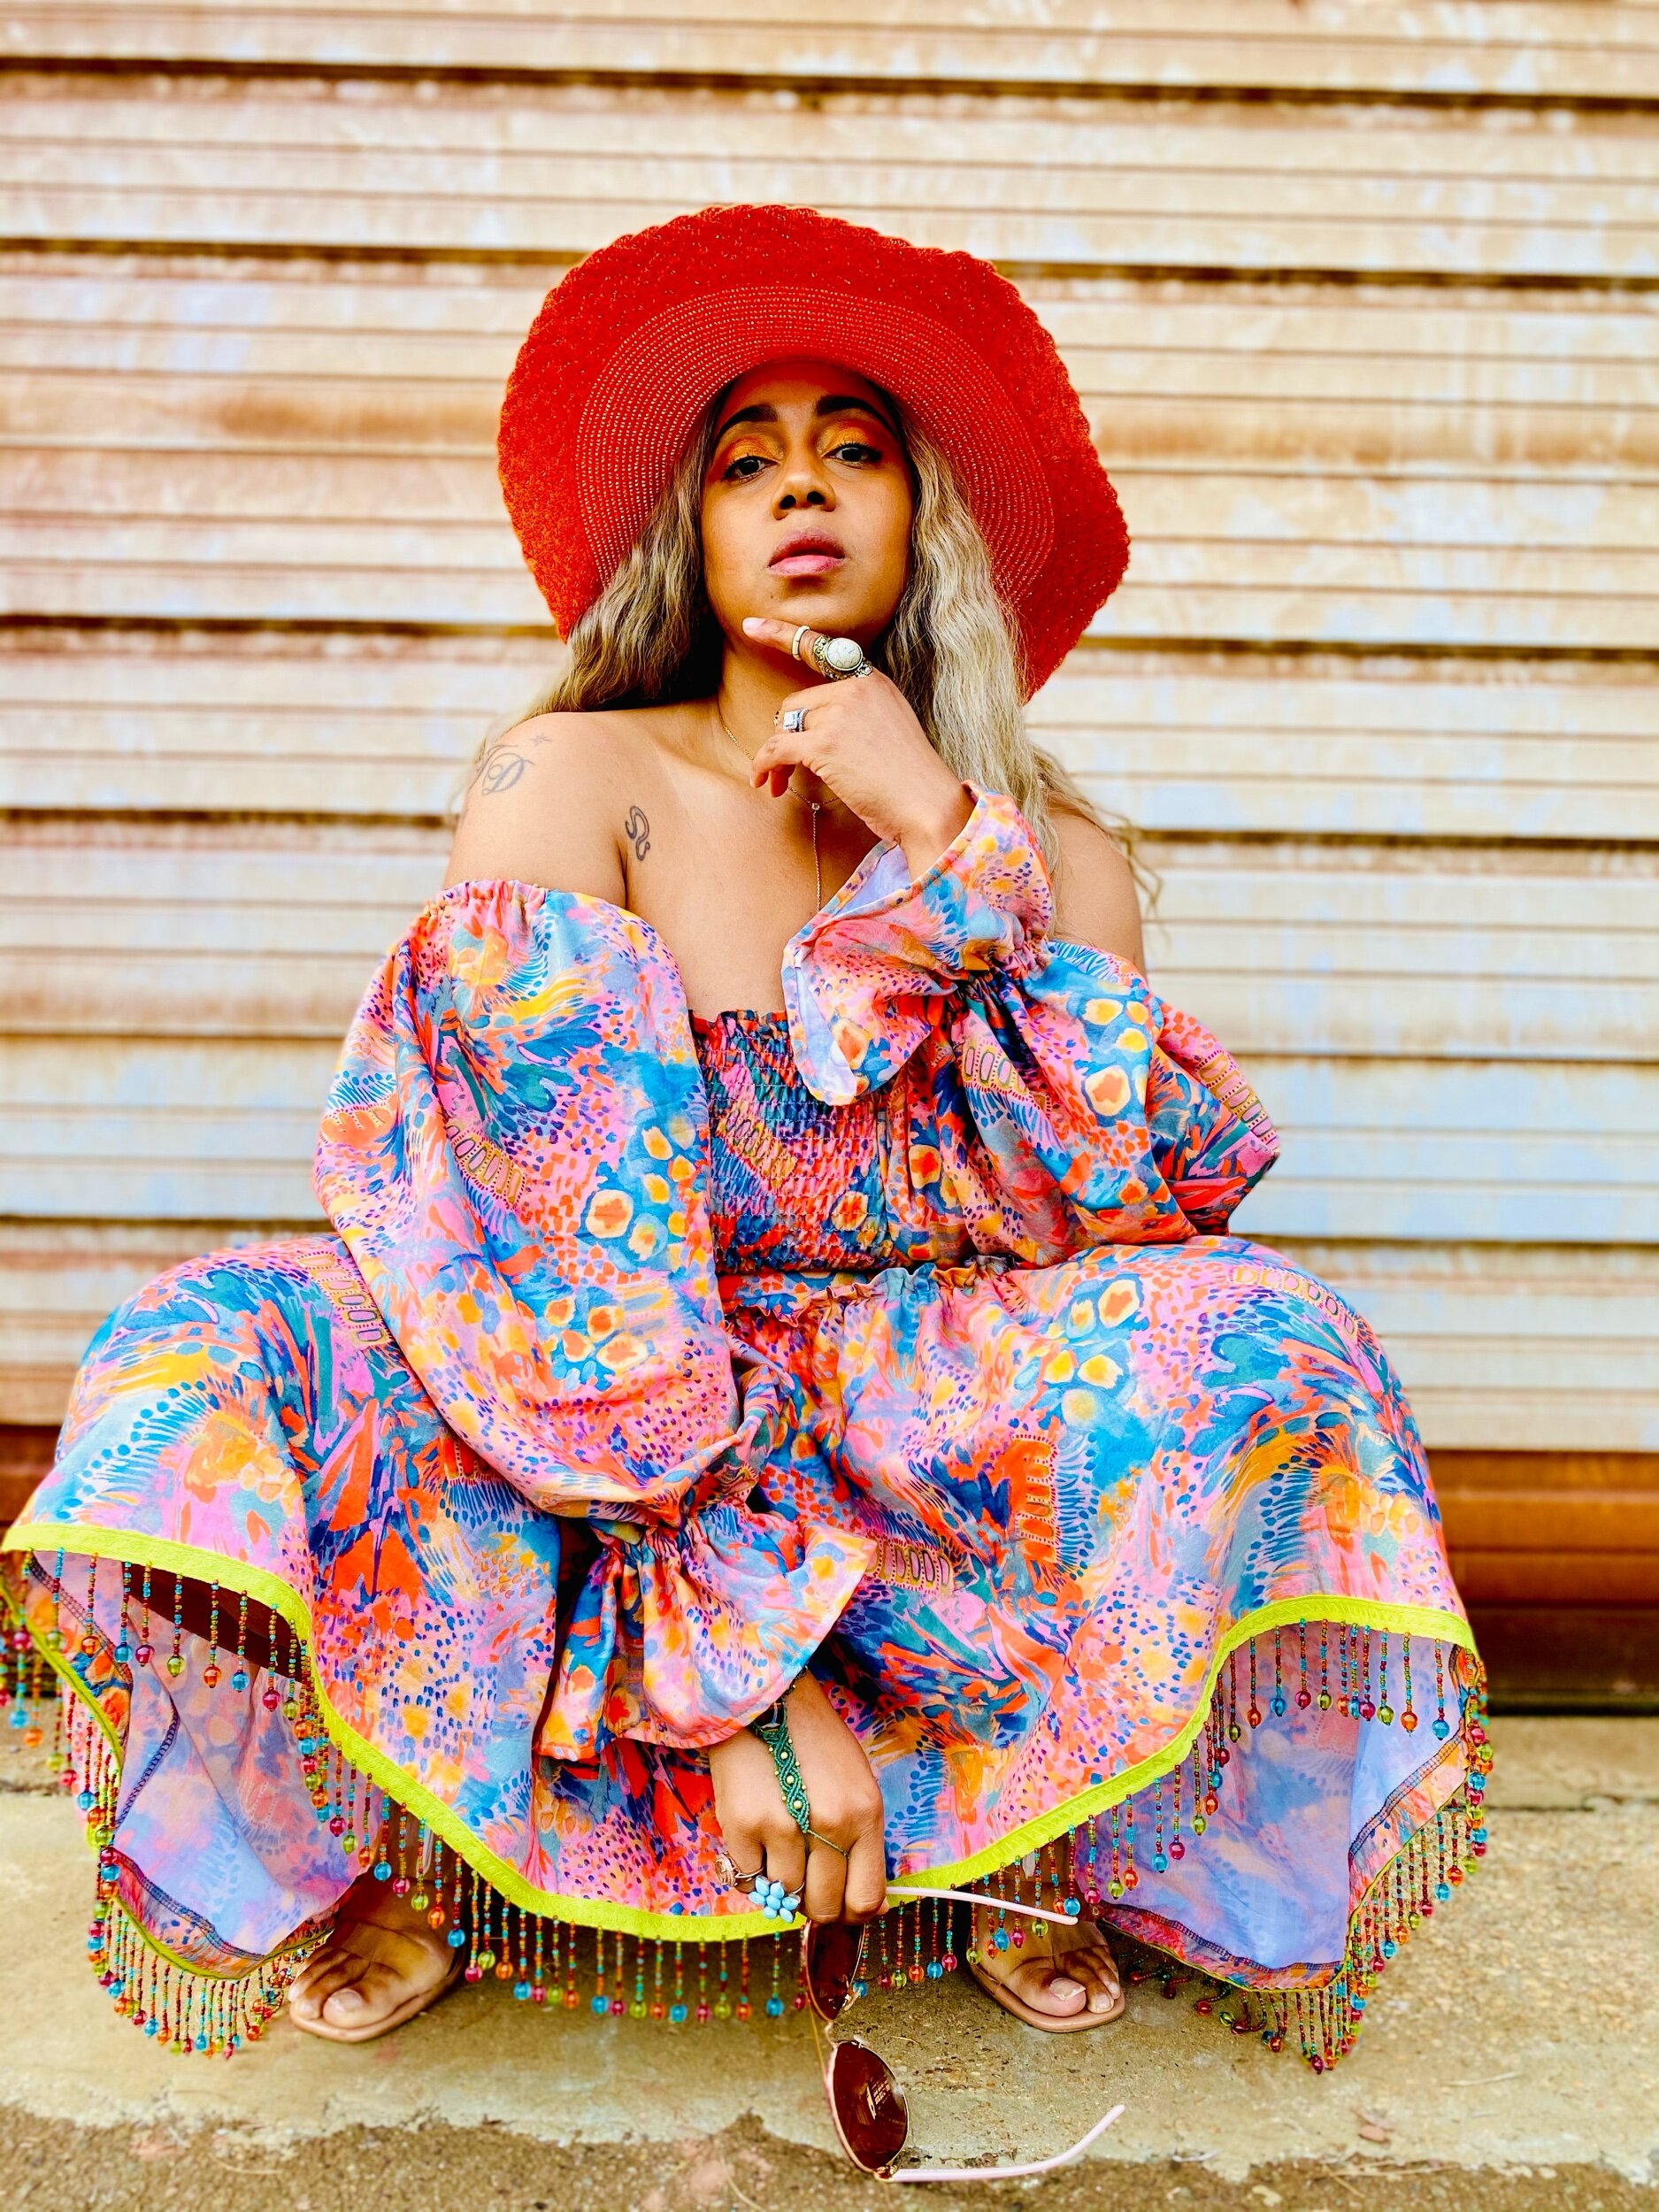
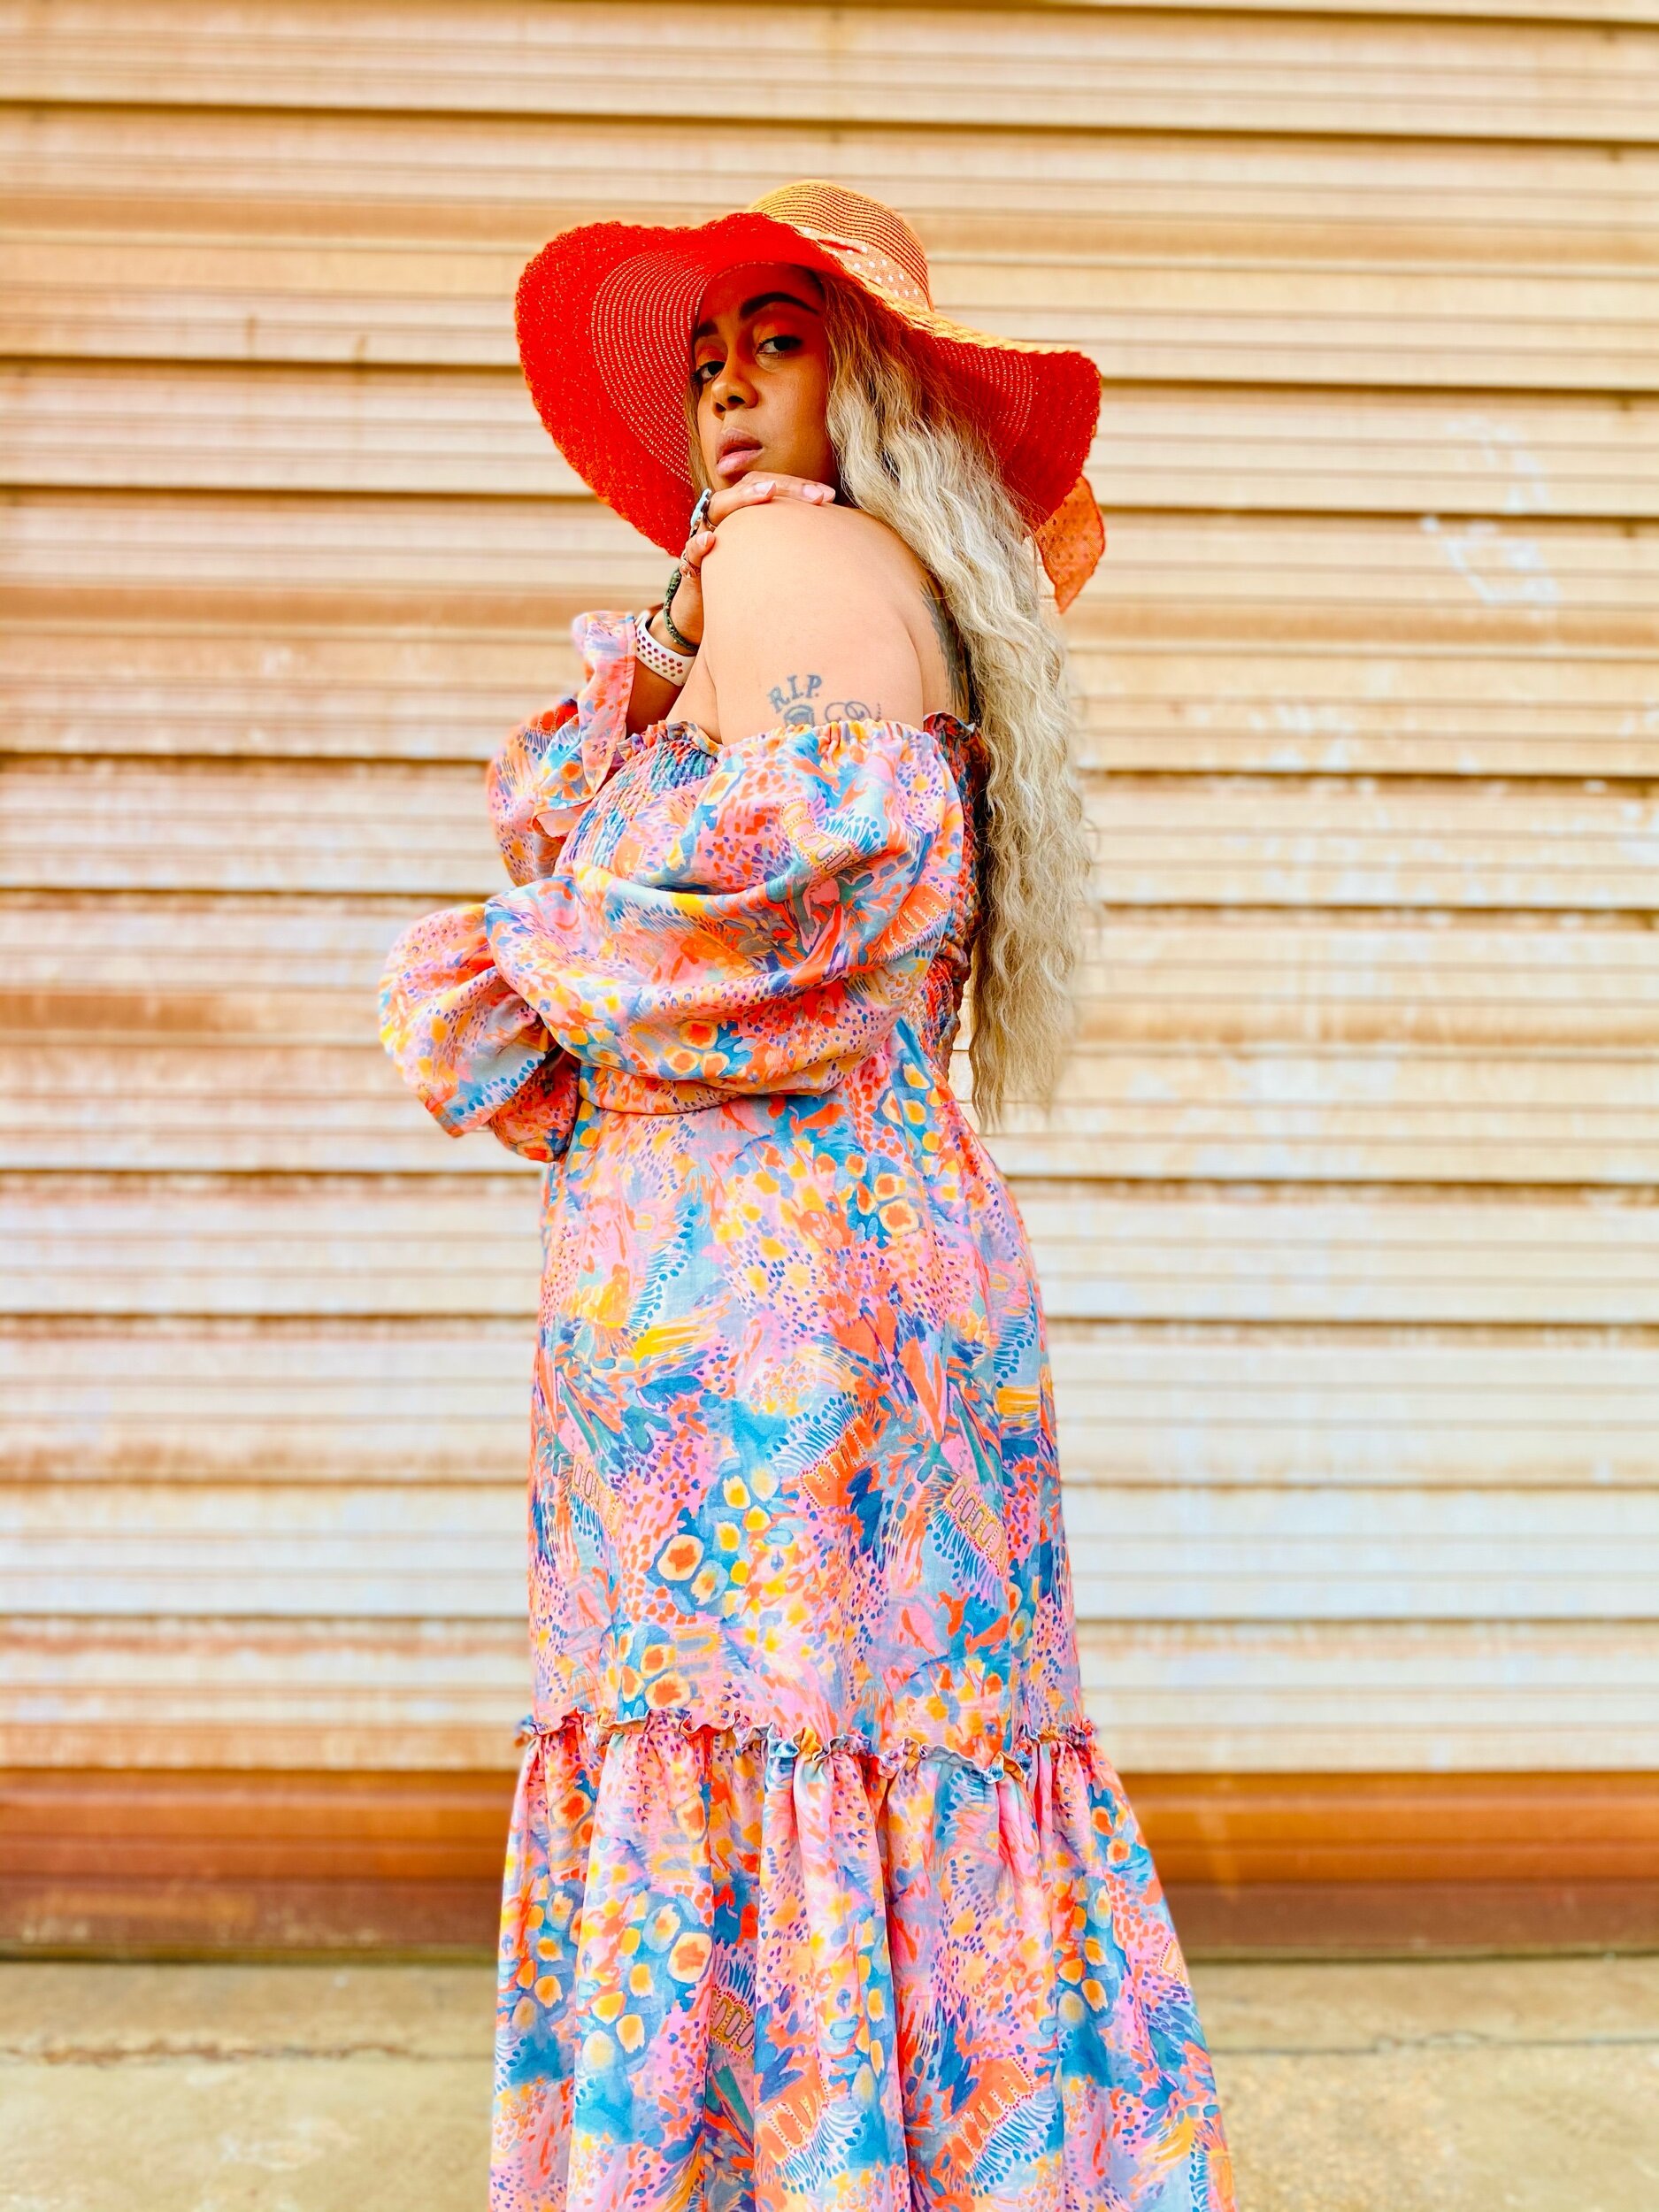
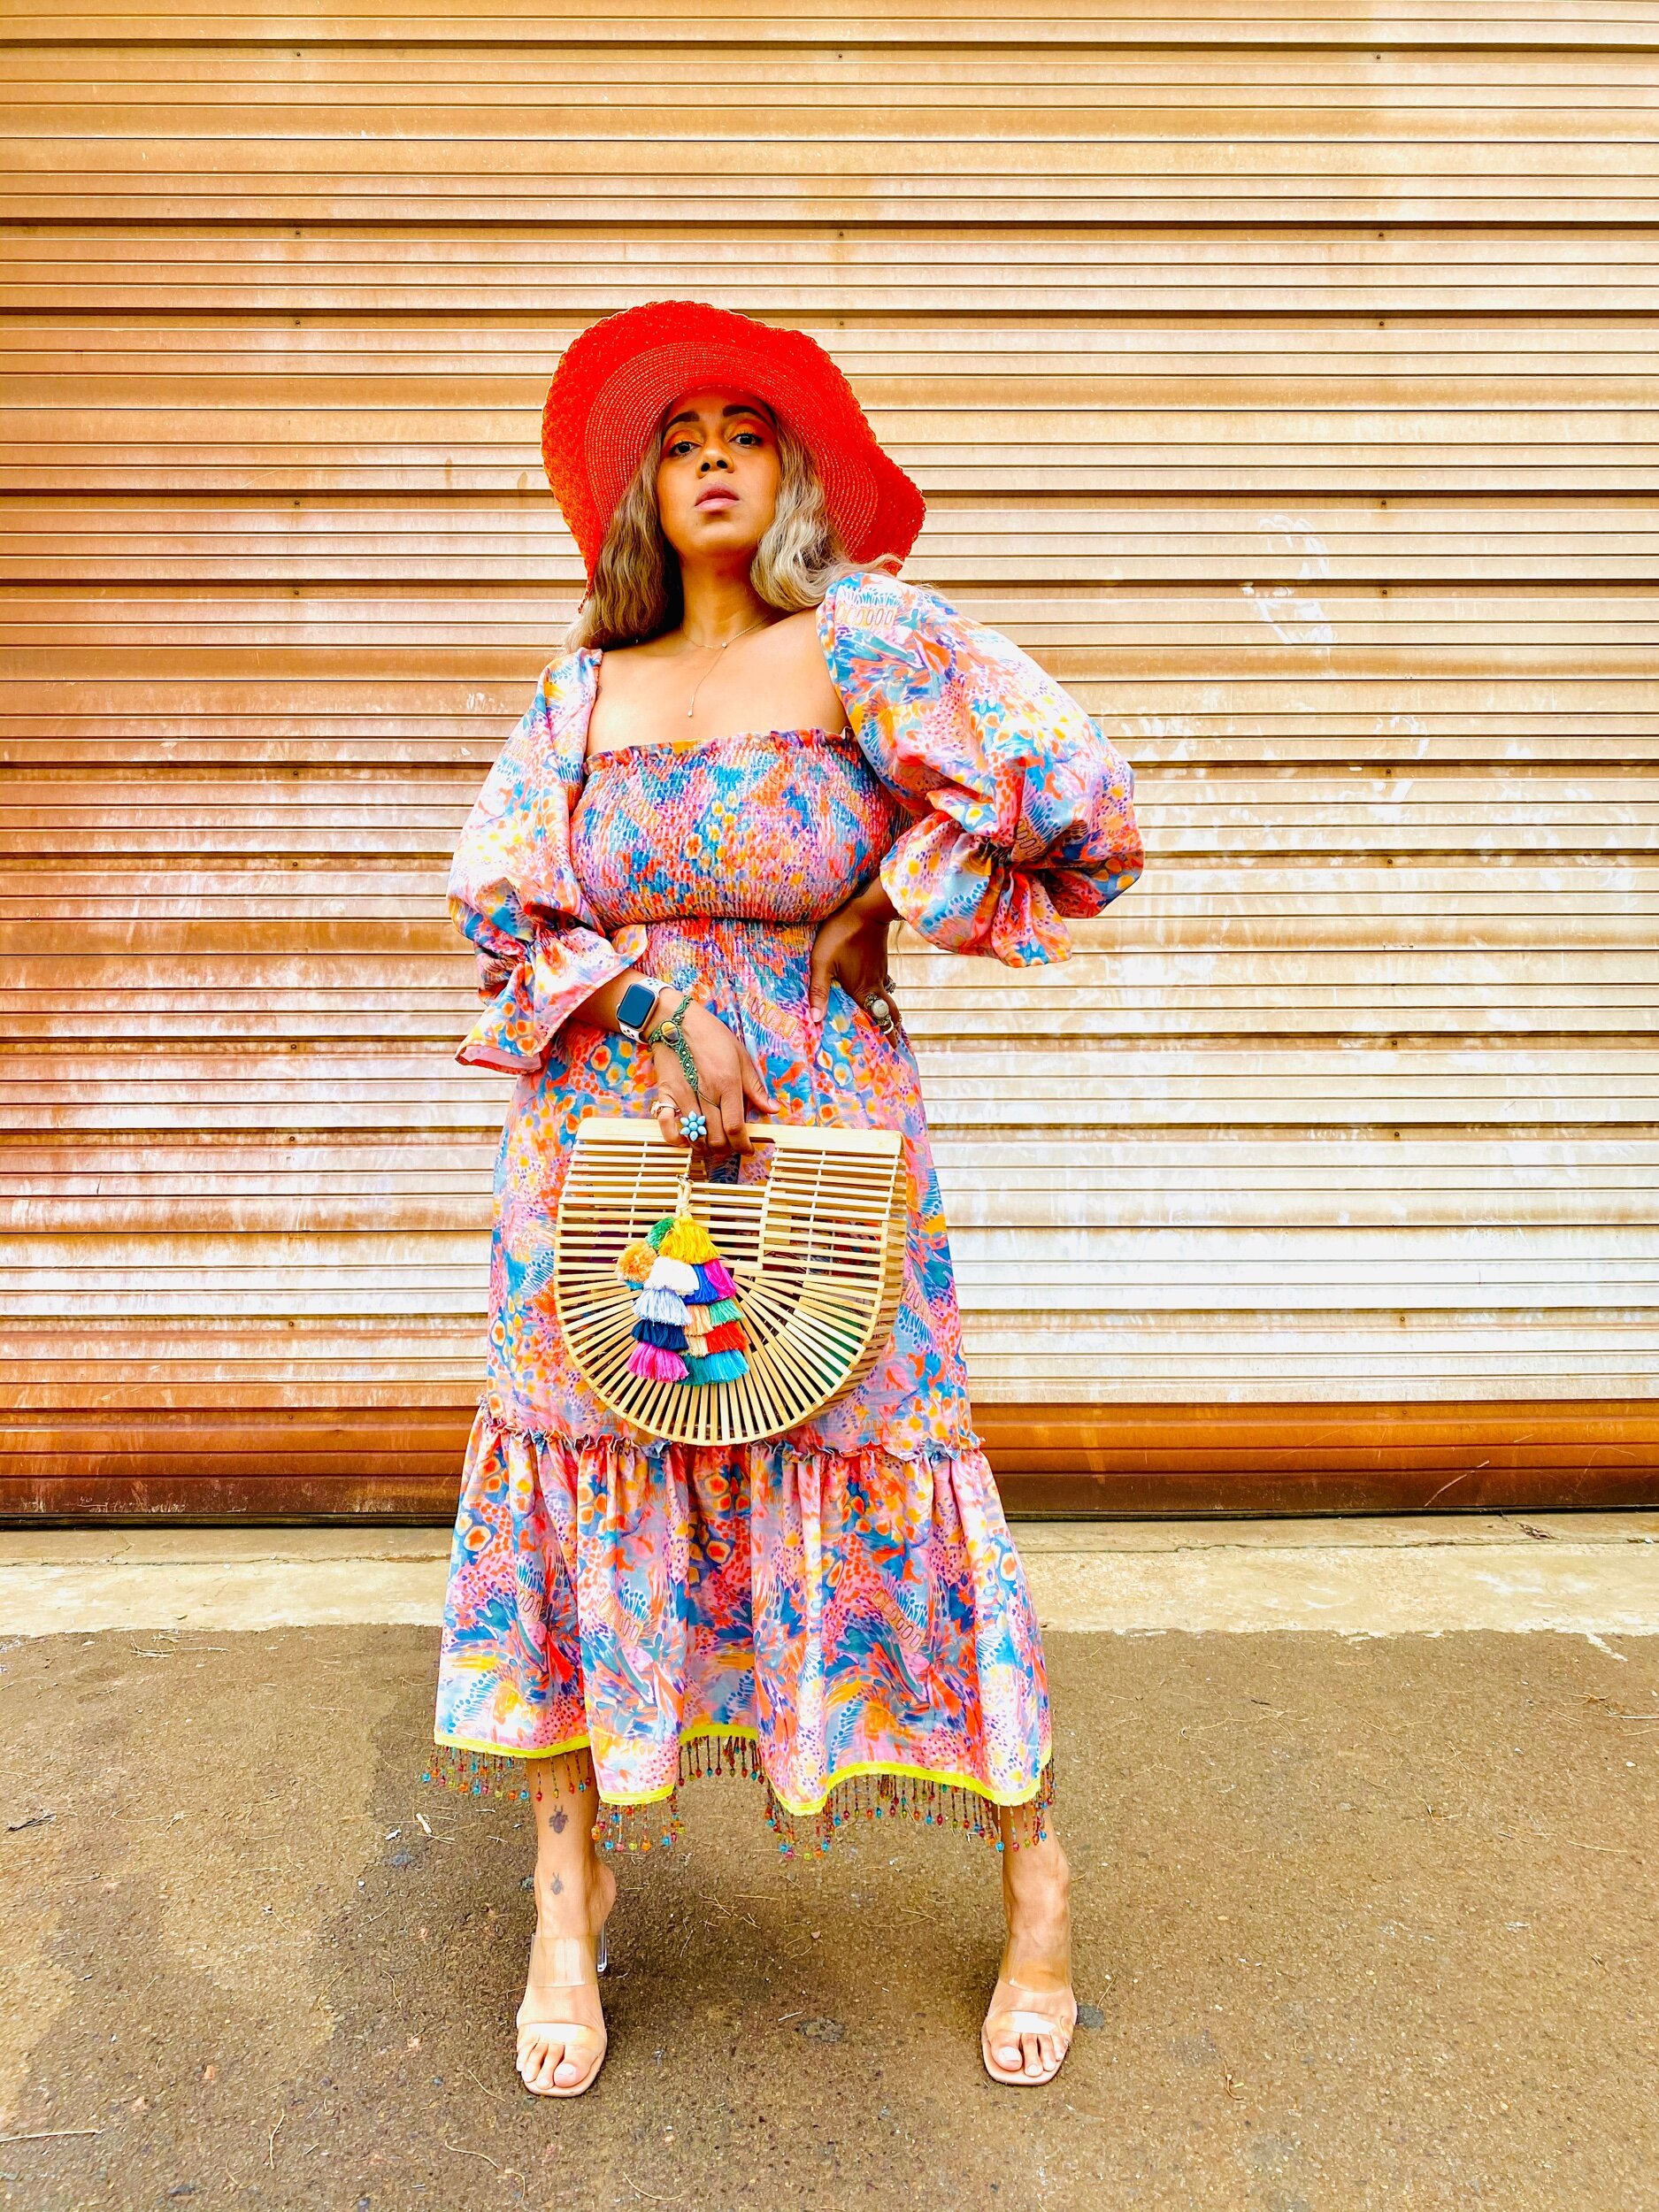
This dress is the By Hand London Shirred dress. It’s literally 4 rectangles. What you will need is your bust measurement x 1.5 and whatever length you want for your dress. For the bottom tier, multiply your dress measurement by 2 and the length about 20 inches (you can make this shorter or longer). For the sleeves cut two rectangles 24” long and 30” wide. You can find more in-depth details in the highlights of @Byhandlondon for this shirred dress.

I sewed 29 rows of shirring for my dress. My bust measurement is 42” so I needed more than the suggested 20 rows of shirring.
For the bottom tier I wanted an exposed gathered look so I did a rolled hem on the top and gathered by using my Bernina Ruffler foot.
I wanted a little razzle dazzle so I added this beaded trim I had on hand to the bottom hem of the dress.


I do hope you enjoyed this look and that you go check out the new Lush & Wild Collection by Katie Kortman! Thanks for stopping by and as always
Peace & Blessings!

Drippin’ Rainbows
A LATE BUT COLORFUL START TO THE NEW YEAR
I finally managed to blog for the start of 2021 and oh how great it feels to share this creation with you all. If you have been following me on IG then you are aware that I am one of the new Spoonflower Ambassador’s for 2021! I couldn’t be more excited and thankful. 2021 is my year of rainbows! Each year I focus on expanding my wardrobe with one particular color that I’m craving or lacking. So it was only fitting that after all the rain in 2020, we deserve Rainbows in 2021, right?

Construction
Does this boiler suit look familiar? Well it is the same pattern used for my Fall Florals. You can check out deets and tips there.
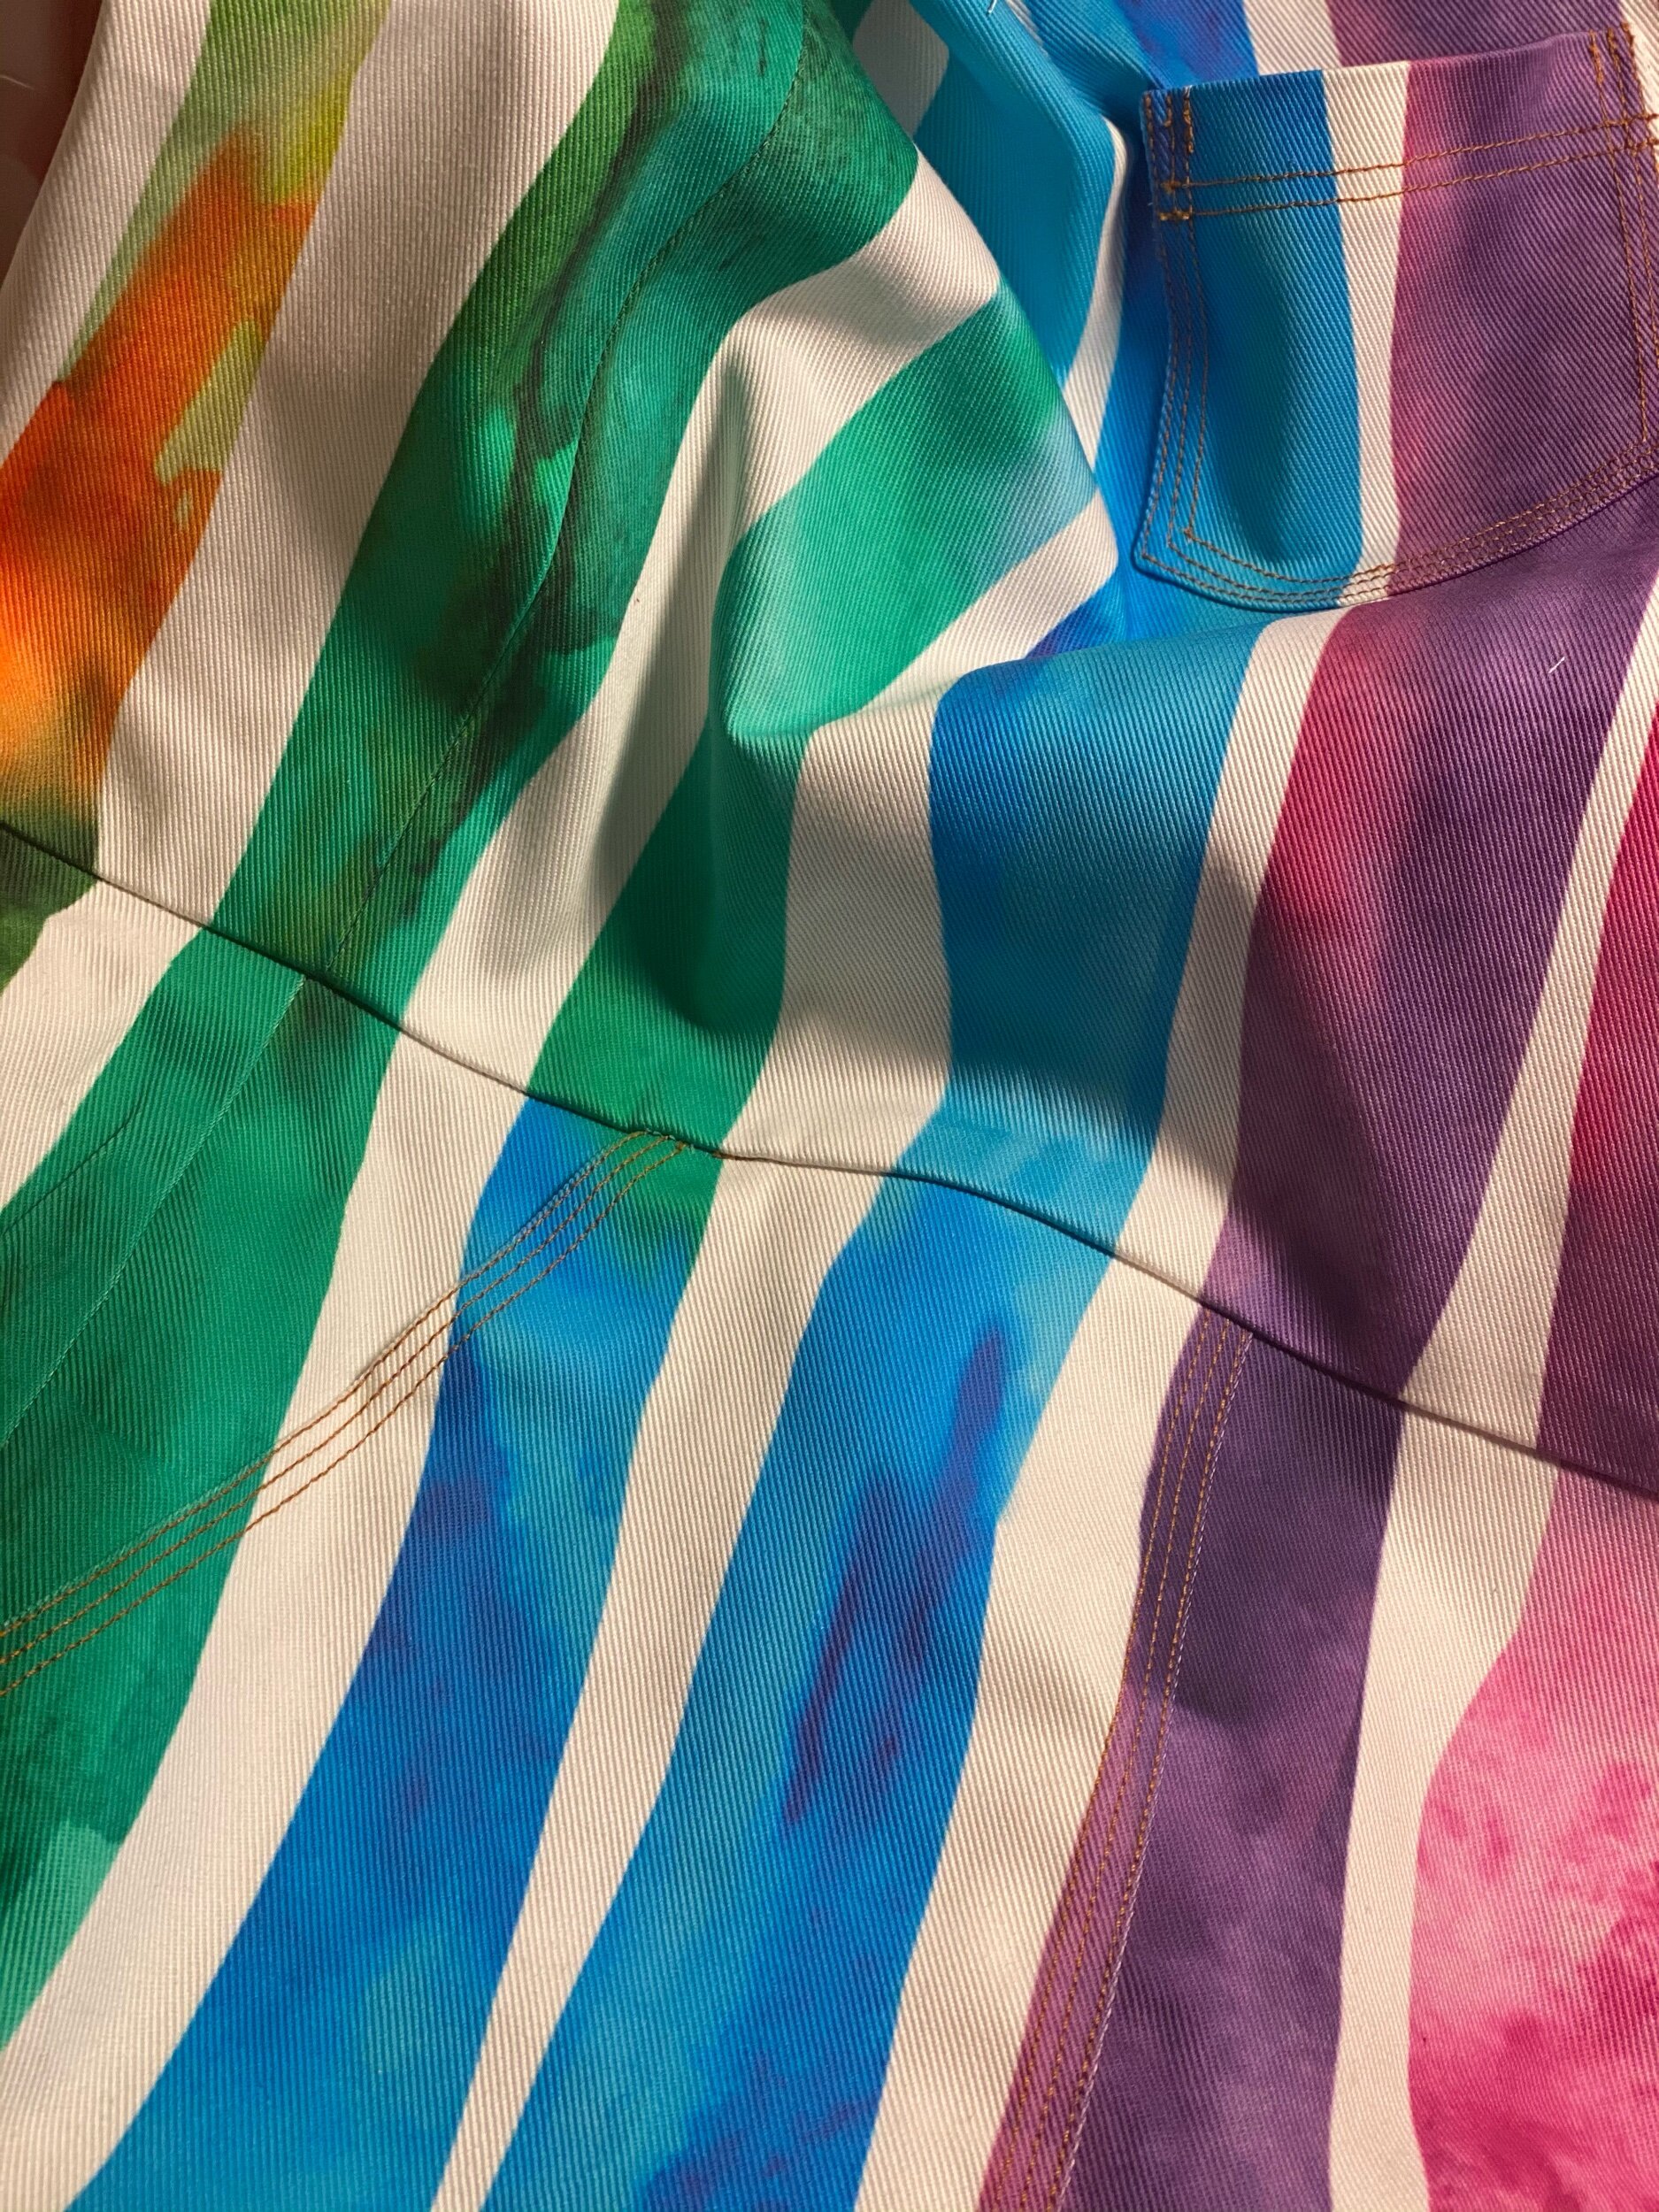
In today’s blog I want to highlight this yummy Spoonflower Dogwood Denim™️ from the Katie Kortman Rainbow collection. I’ve made this boiler suit 3 times so far and this time I needed denim. I had a huge fabric haul from Spoonflower just before the year came to an end and I decided to try out the Dogwood Denim this go round. You can find this exact fabric here. I’m not disappointed at all and it softens once you wash. But let’s talk about color! The colors in this watercolor design are bold and vibrant. I had the most fun matching the prints. Luckily, I had plenty of fabric…well just enough fabric.
The pink shades in this print reminded me that I had an old pair of jeans that I could no longer squeeze into and I decided to use them for the under collar and back yoke. I added a third row of topstitching to give the suit a little more detail. It’s not my best topstitching but I survived!
So what did I do differently on this boiler? I did not add an inside zipper facing and I made the sleeves quarter length instead of full length. There’s also the obvious print matching which turned out lovely and very rewarding. If you can’t find the pockets right away then my job is complete.
The Dogwood Denim does not have any stretch by the way but I’m sure it will make a great pair of classic jeans.
Alright alright, I’ll let you finally get into the Rainbow!


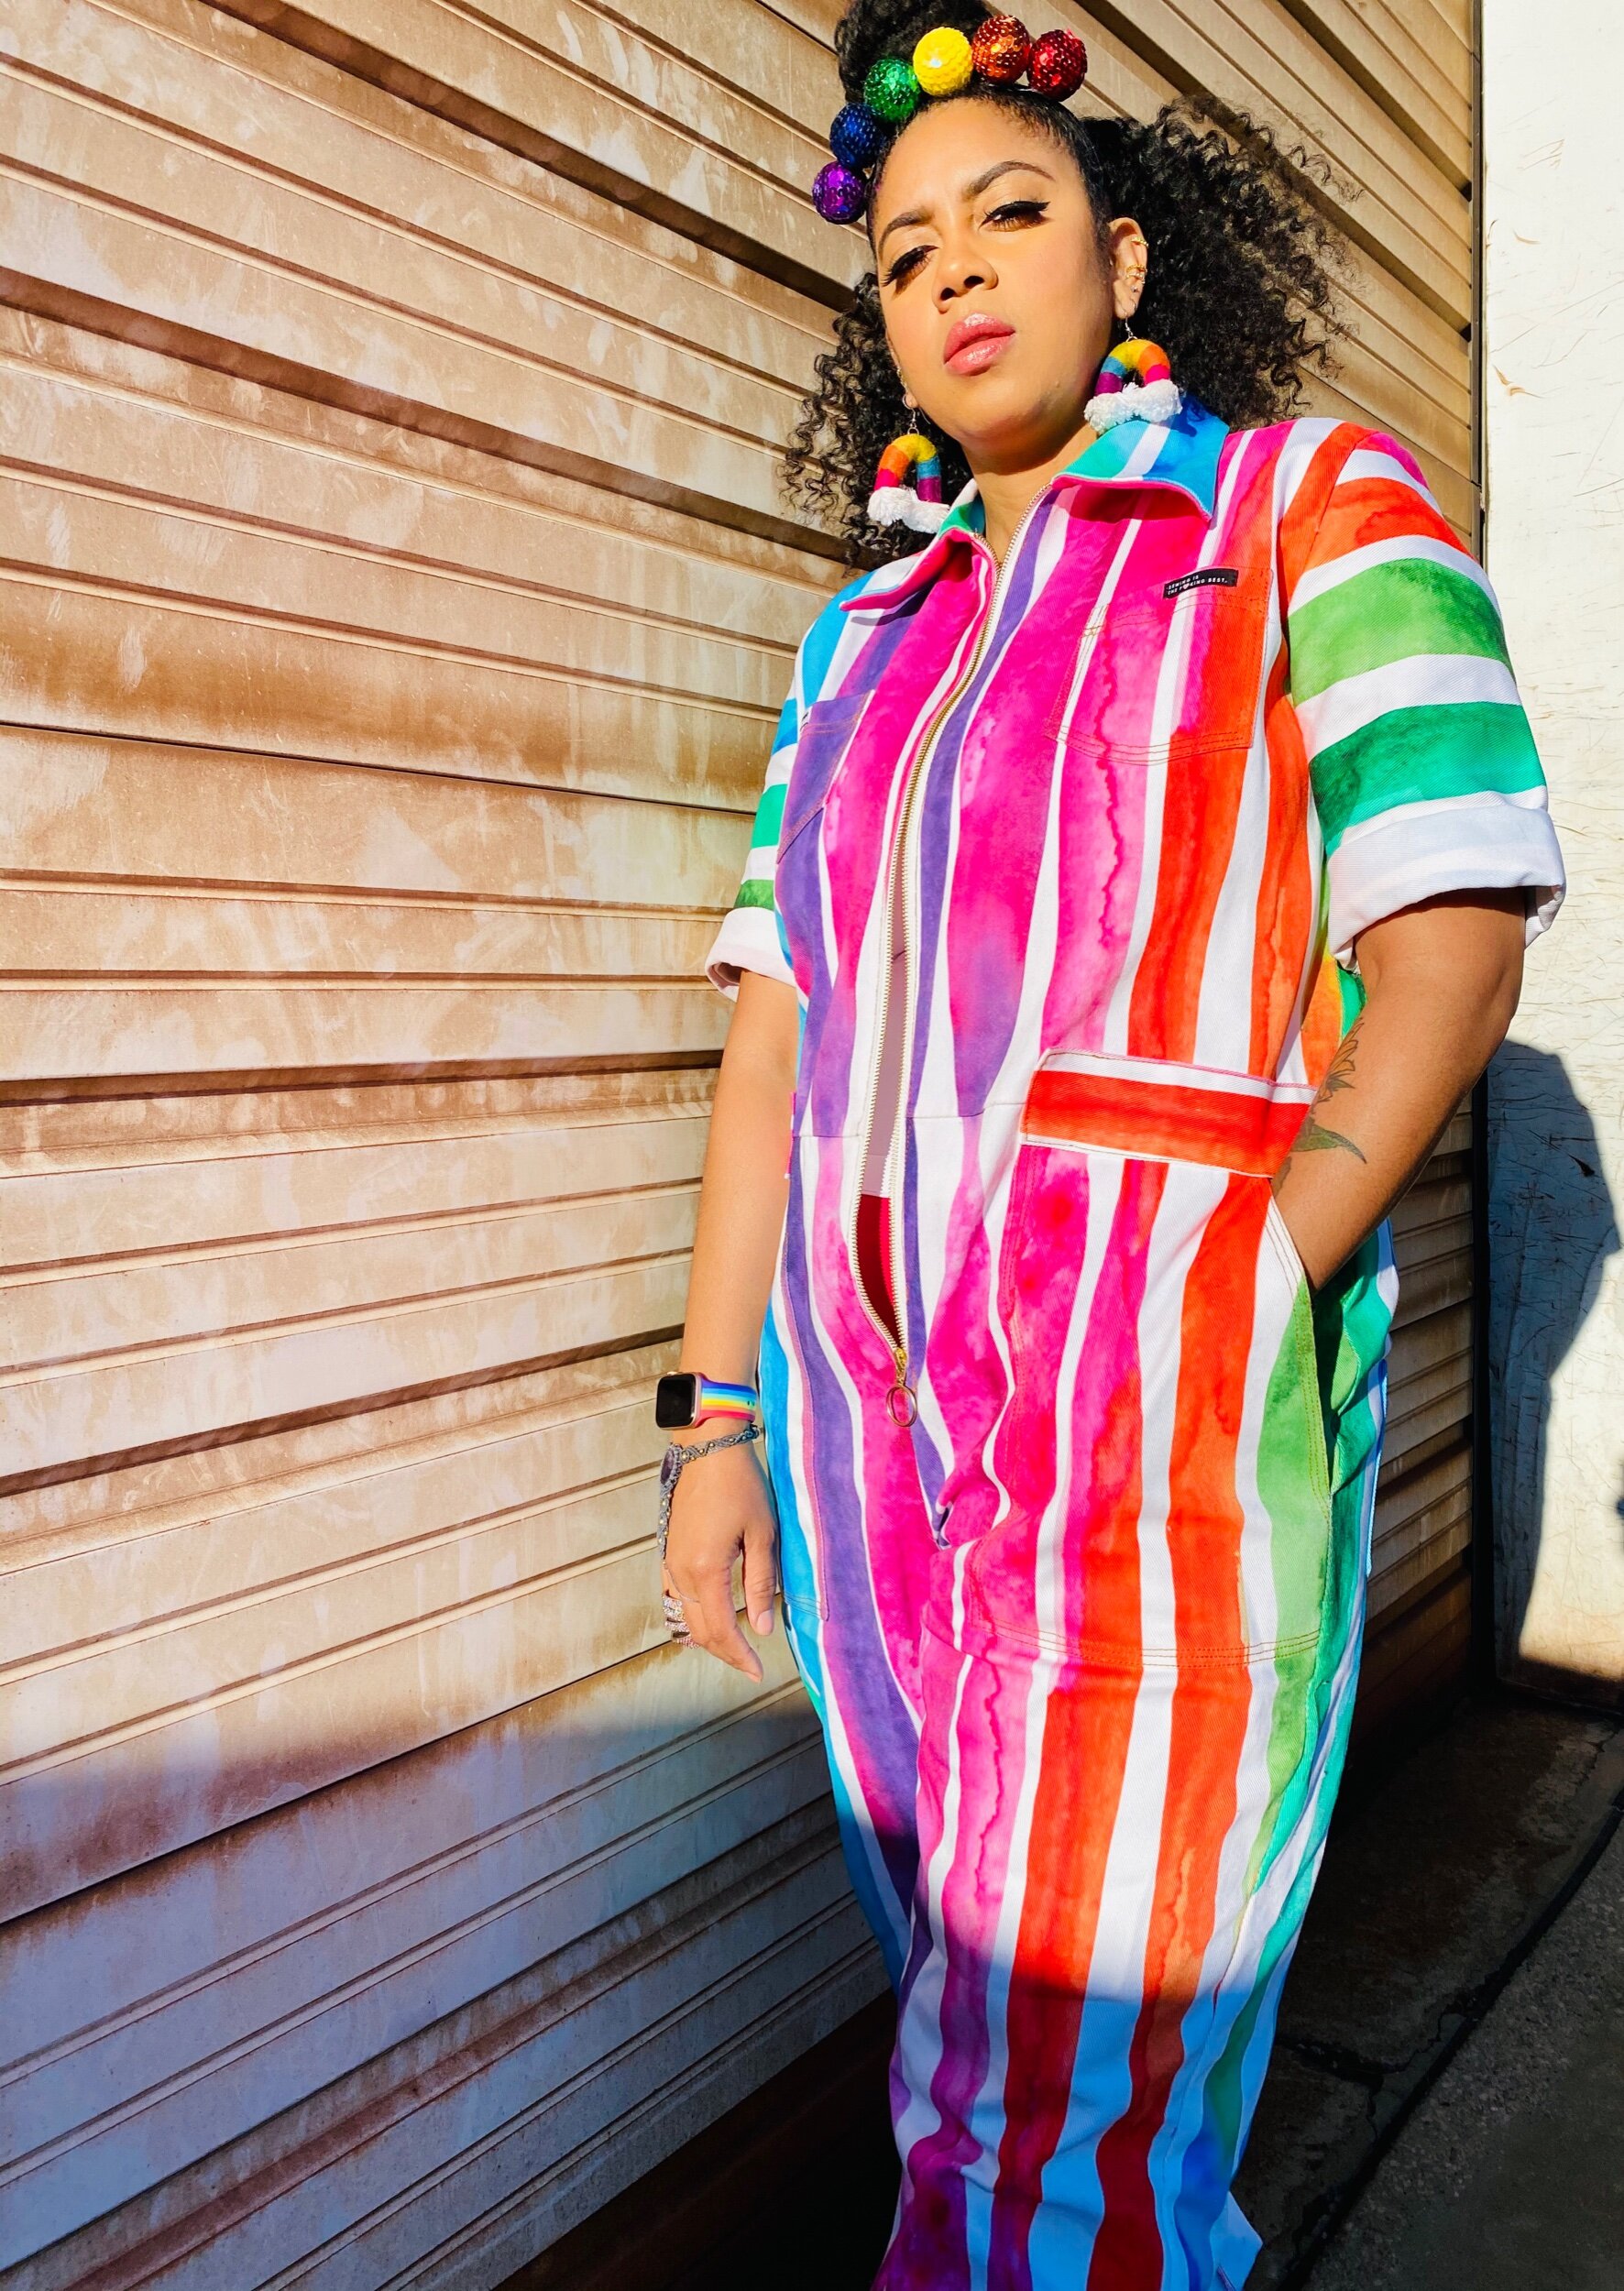

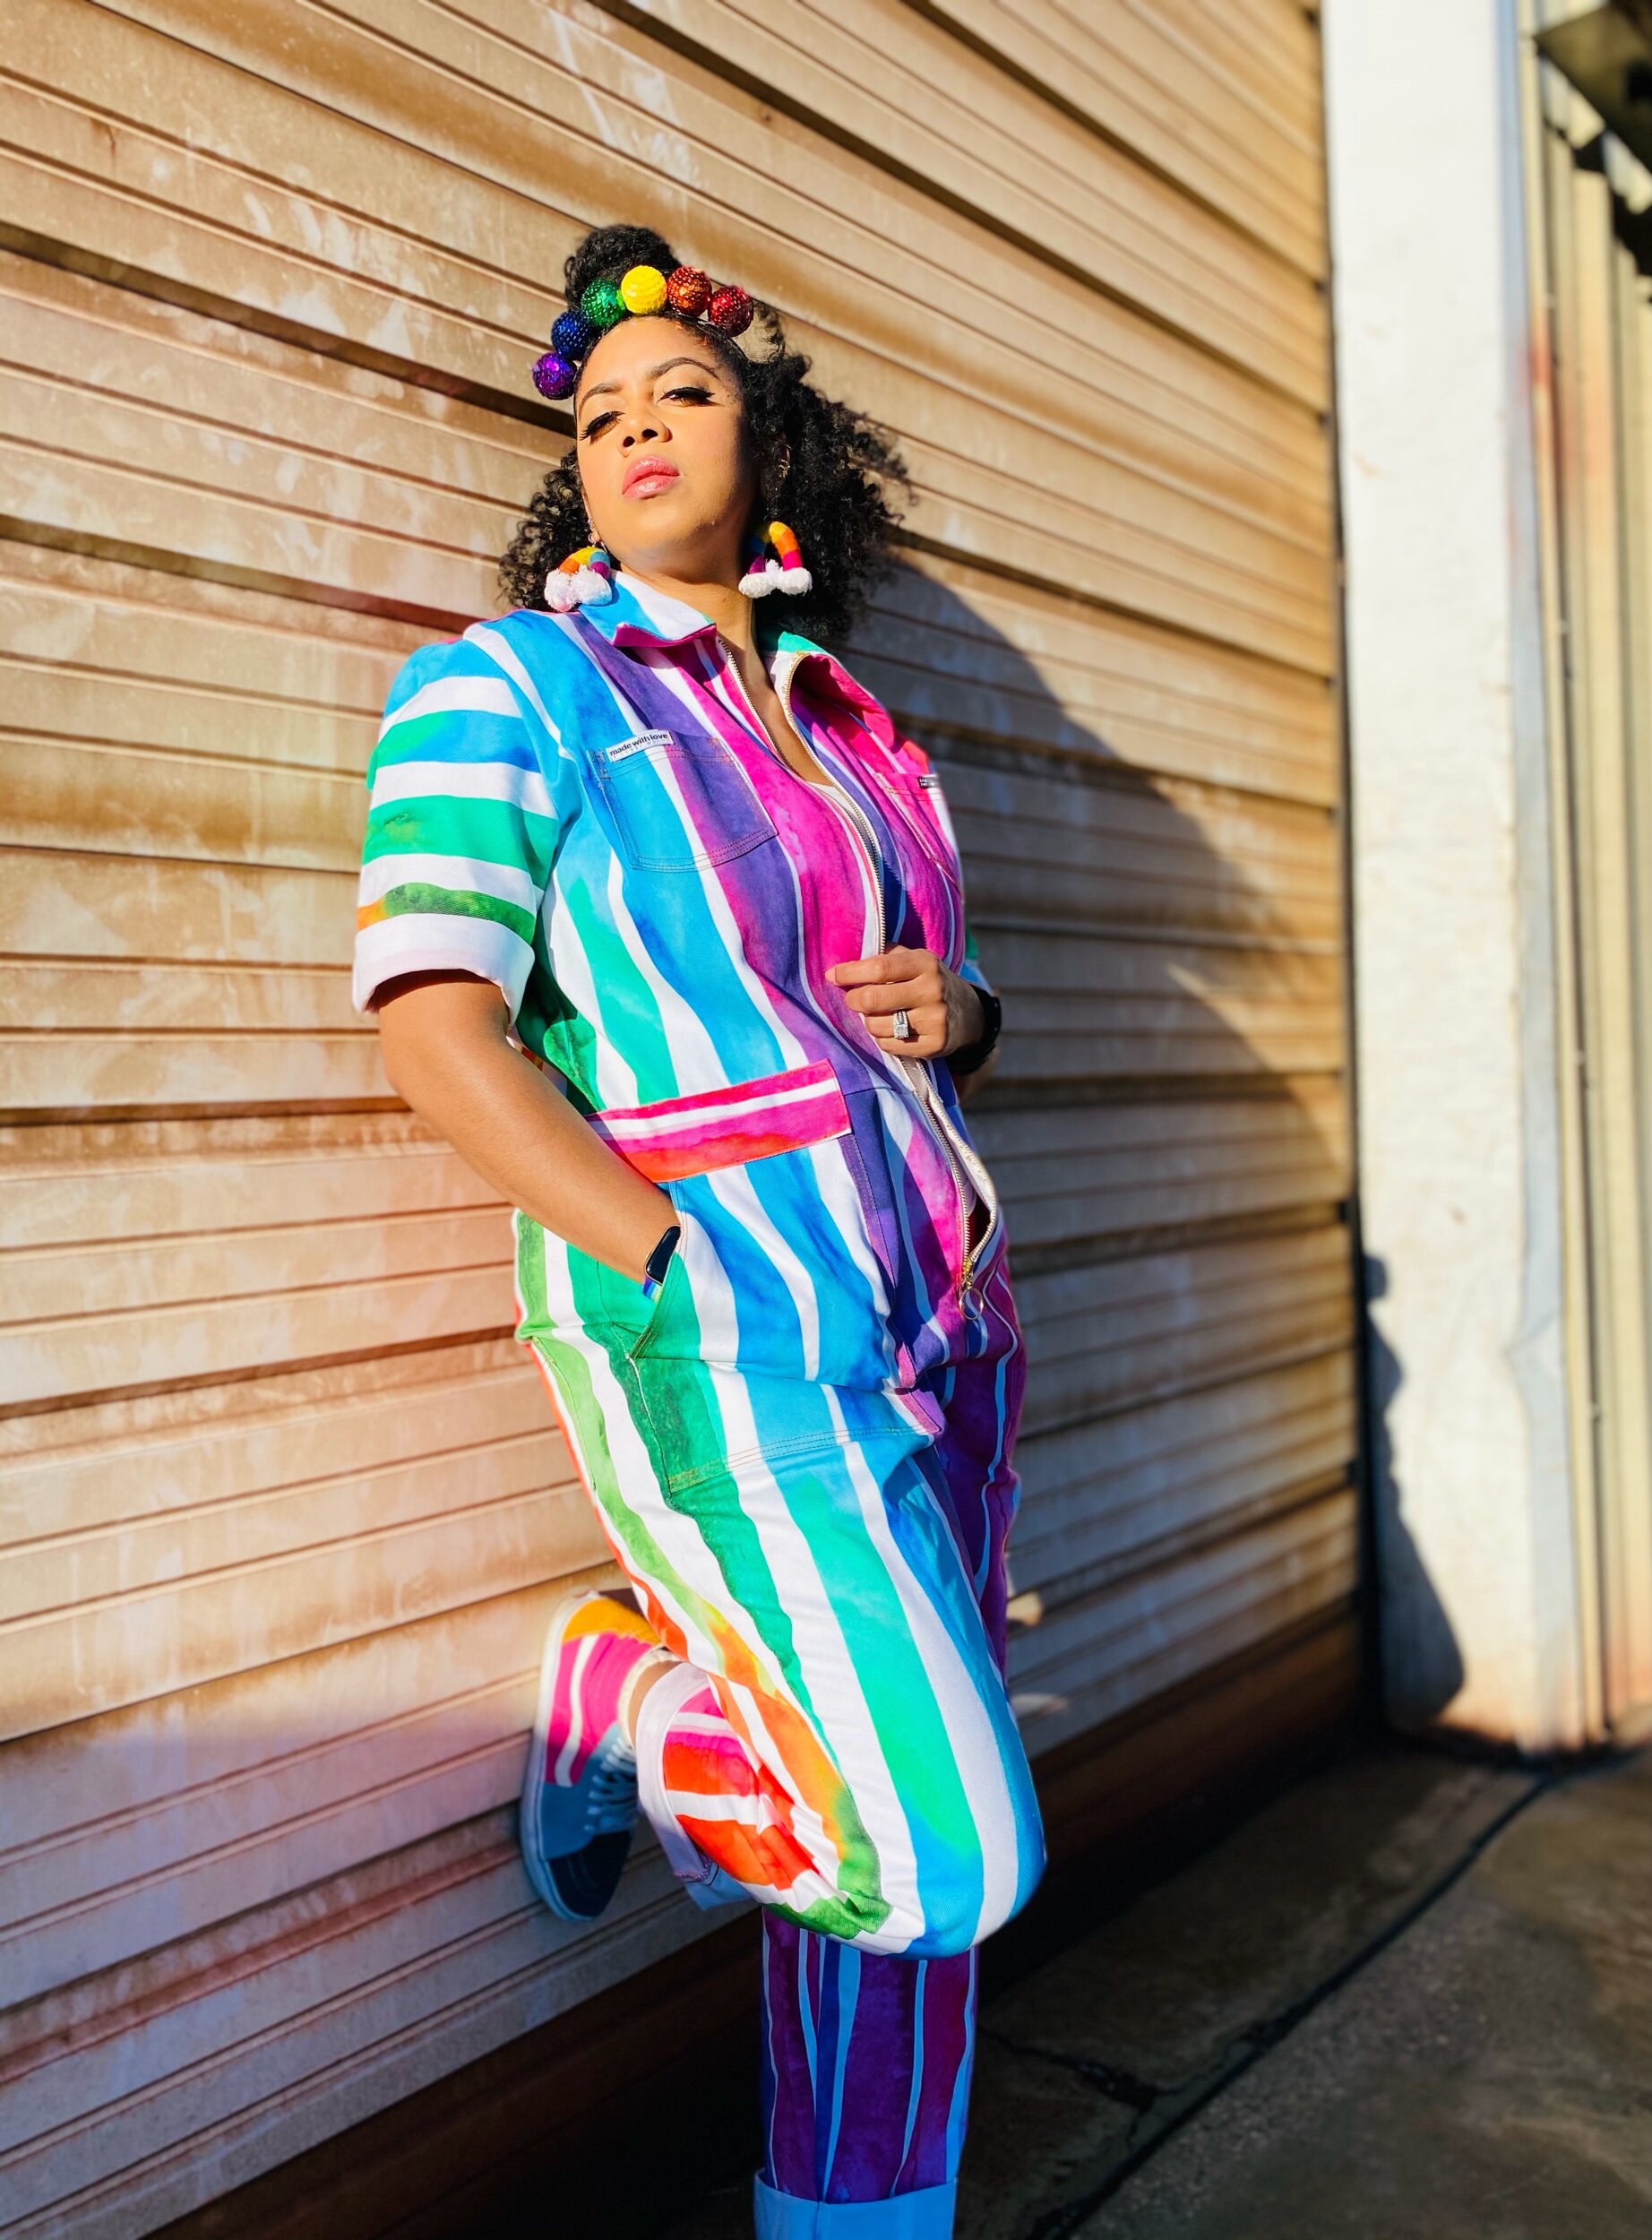


I hope that you enjoyed my drippin rainbow and I’d love to hear from you below. Until next time,
peace & blessings