Peri-ish
A break can do you good
I have been back and forth to Georgia for family and to say goodbye for now to a friend and I just have not felt like sewing. I was also under the weather my first visit home so there’s that. Well, I needed a project that was going to challenge me enough to finish in a day or two and this Mimi G Simplicity pattern 9463 was IT!

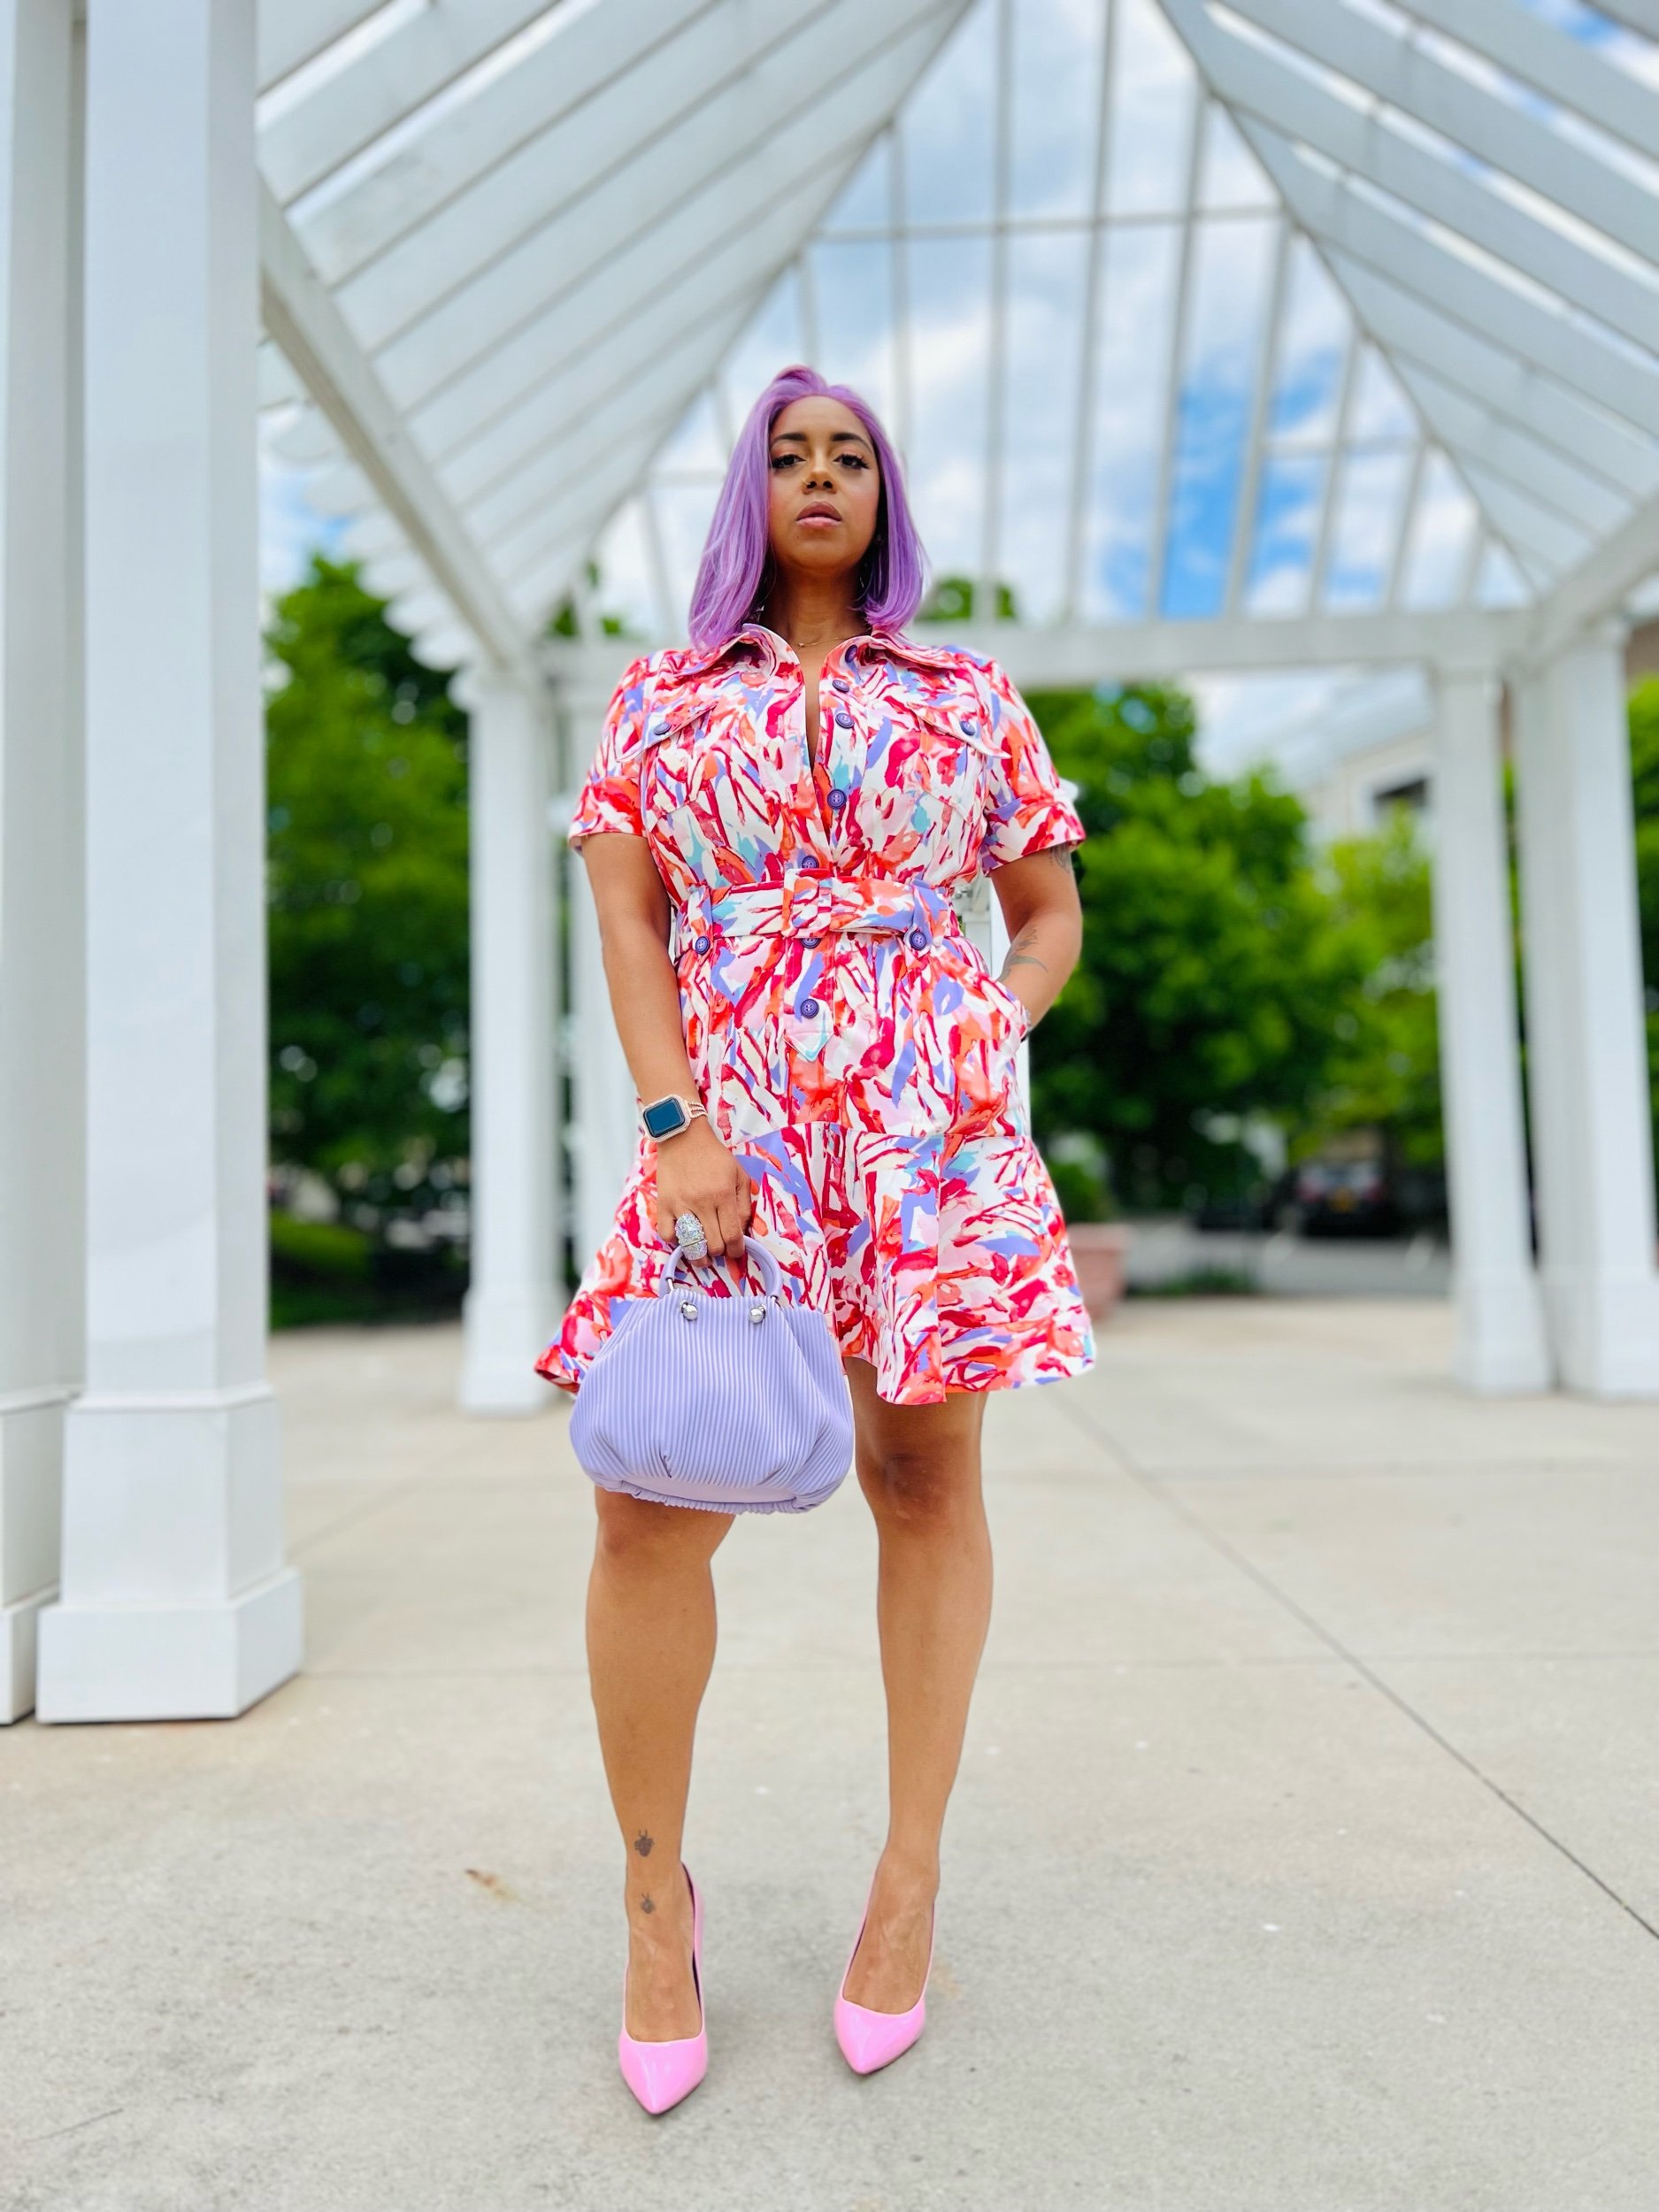
I purchased this fabric from Melanated Fabrics and I initially wanted to make a spring suit jacket with but I wasn’t in the mood to sew a jacket. With Very Peri being Pantones color of the year this print is perfect for spring.
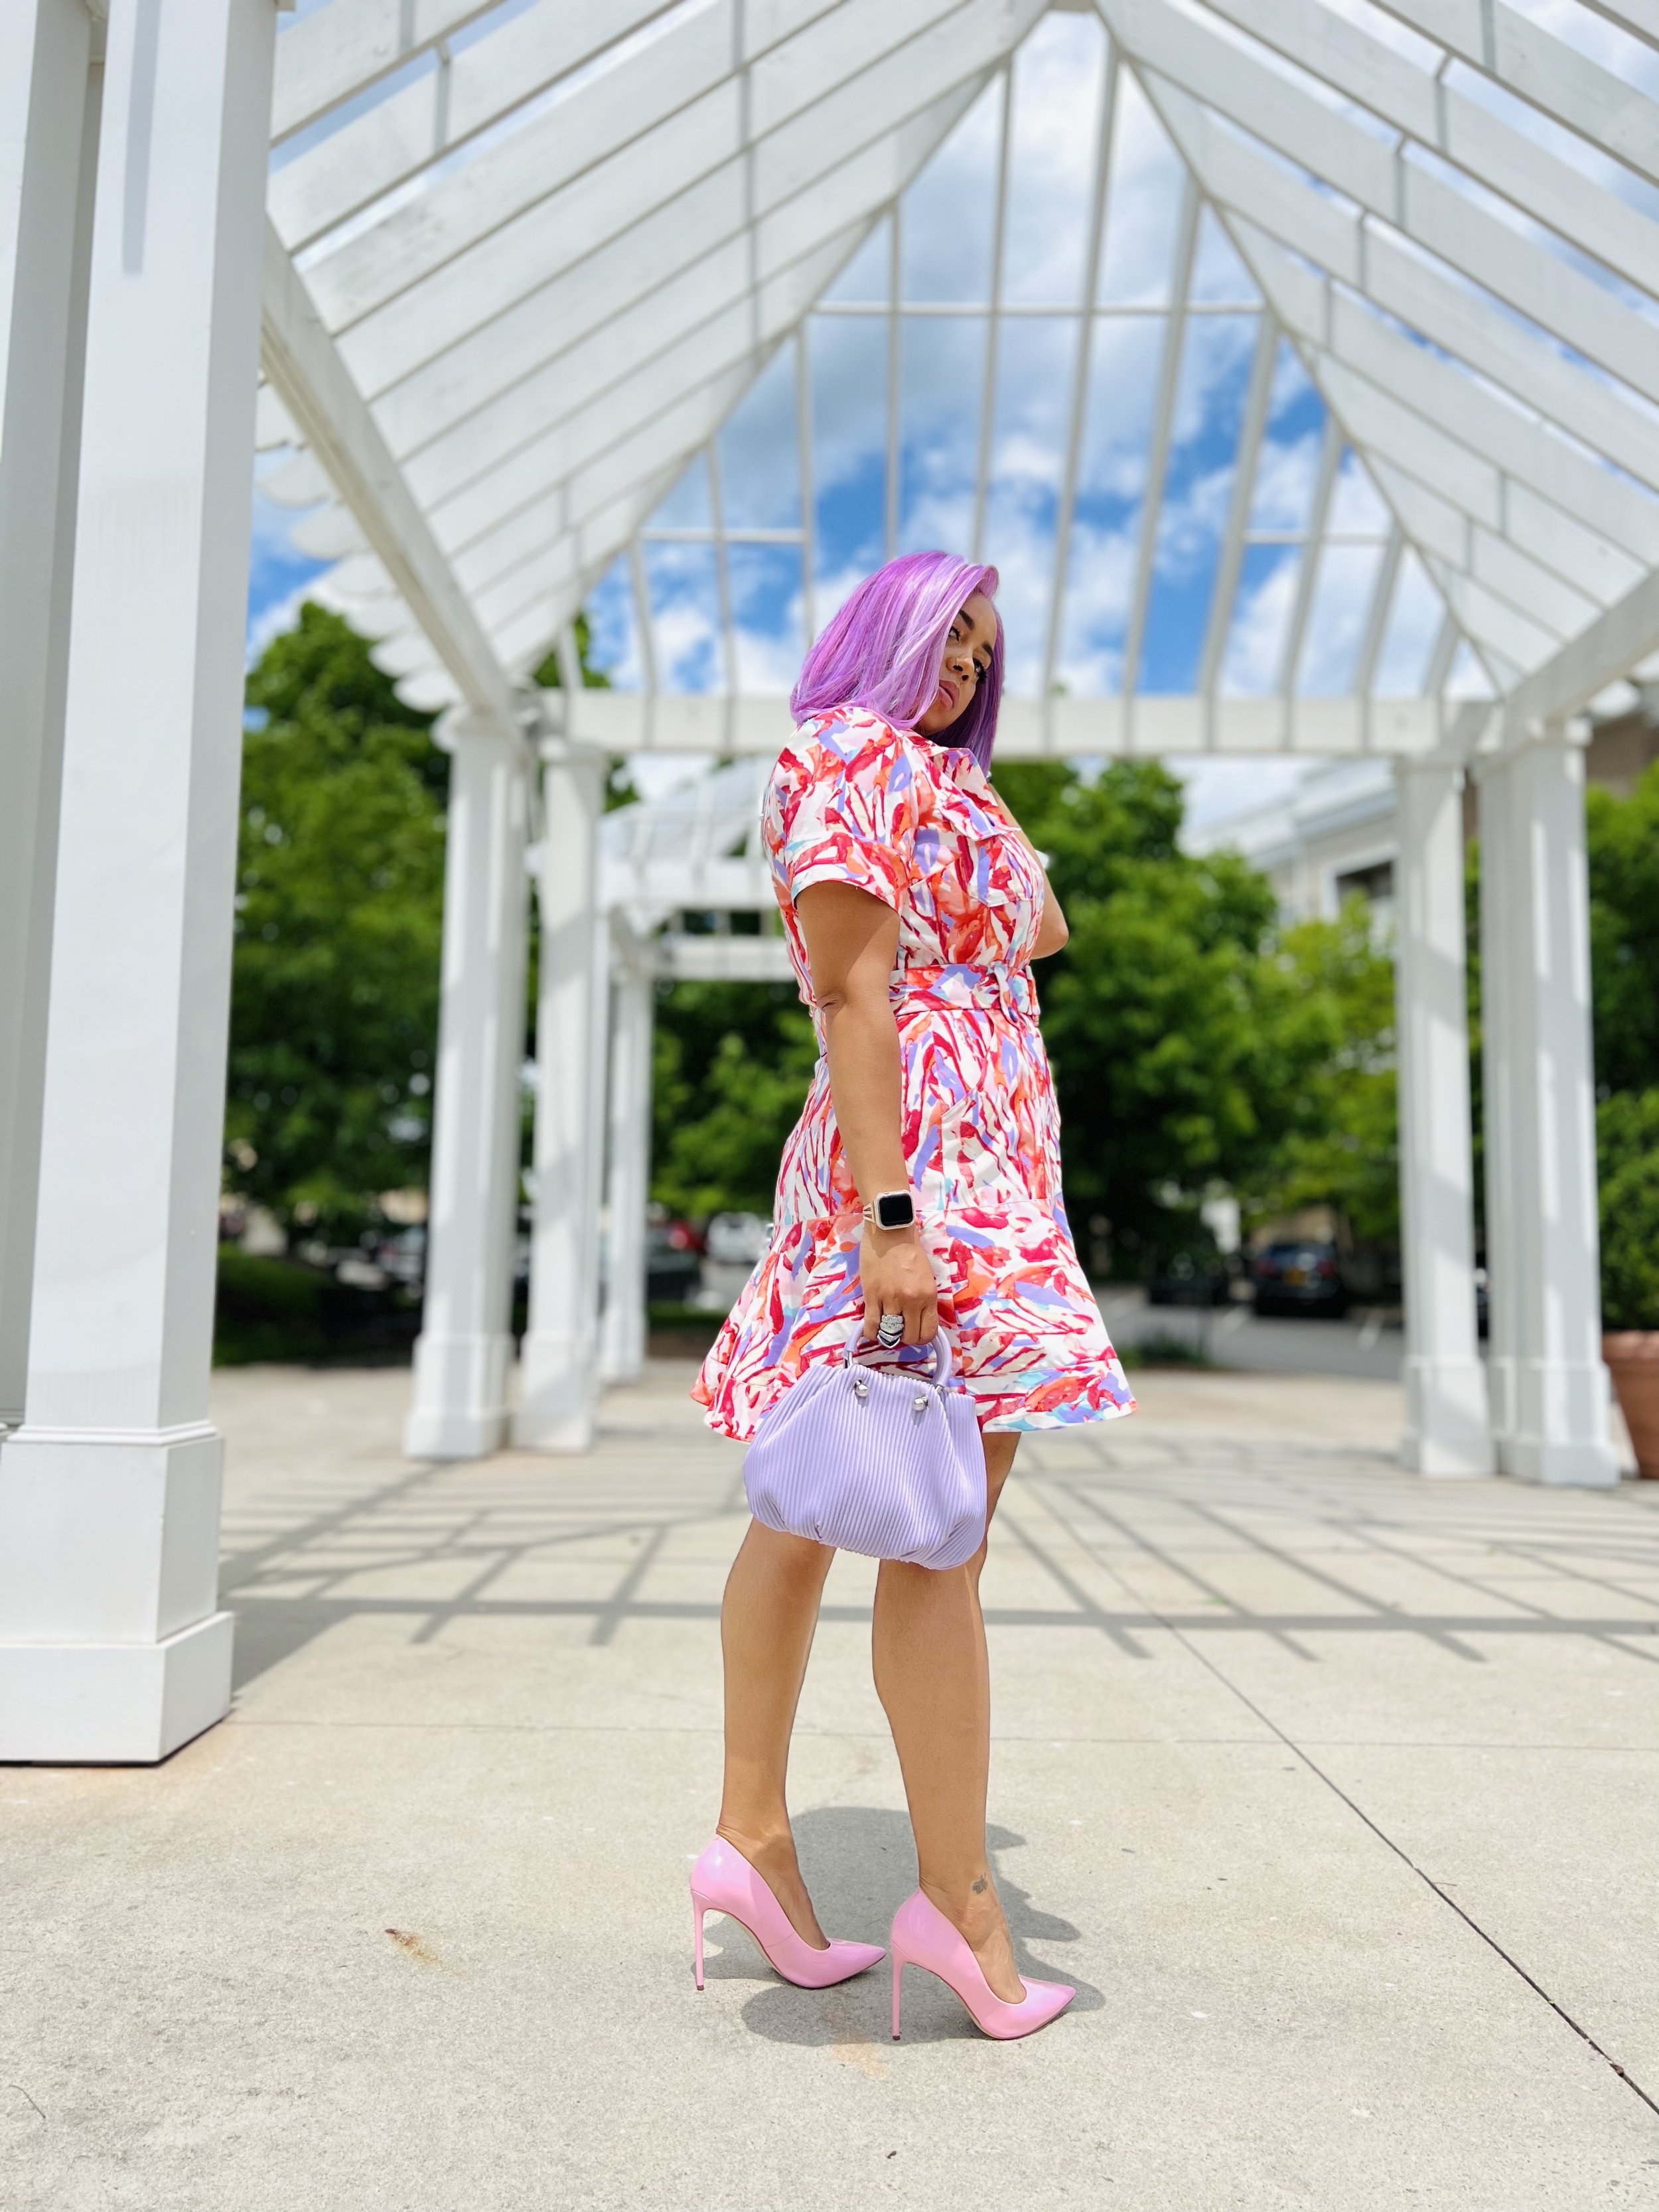
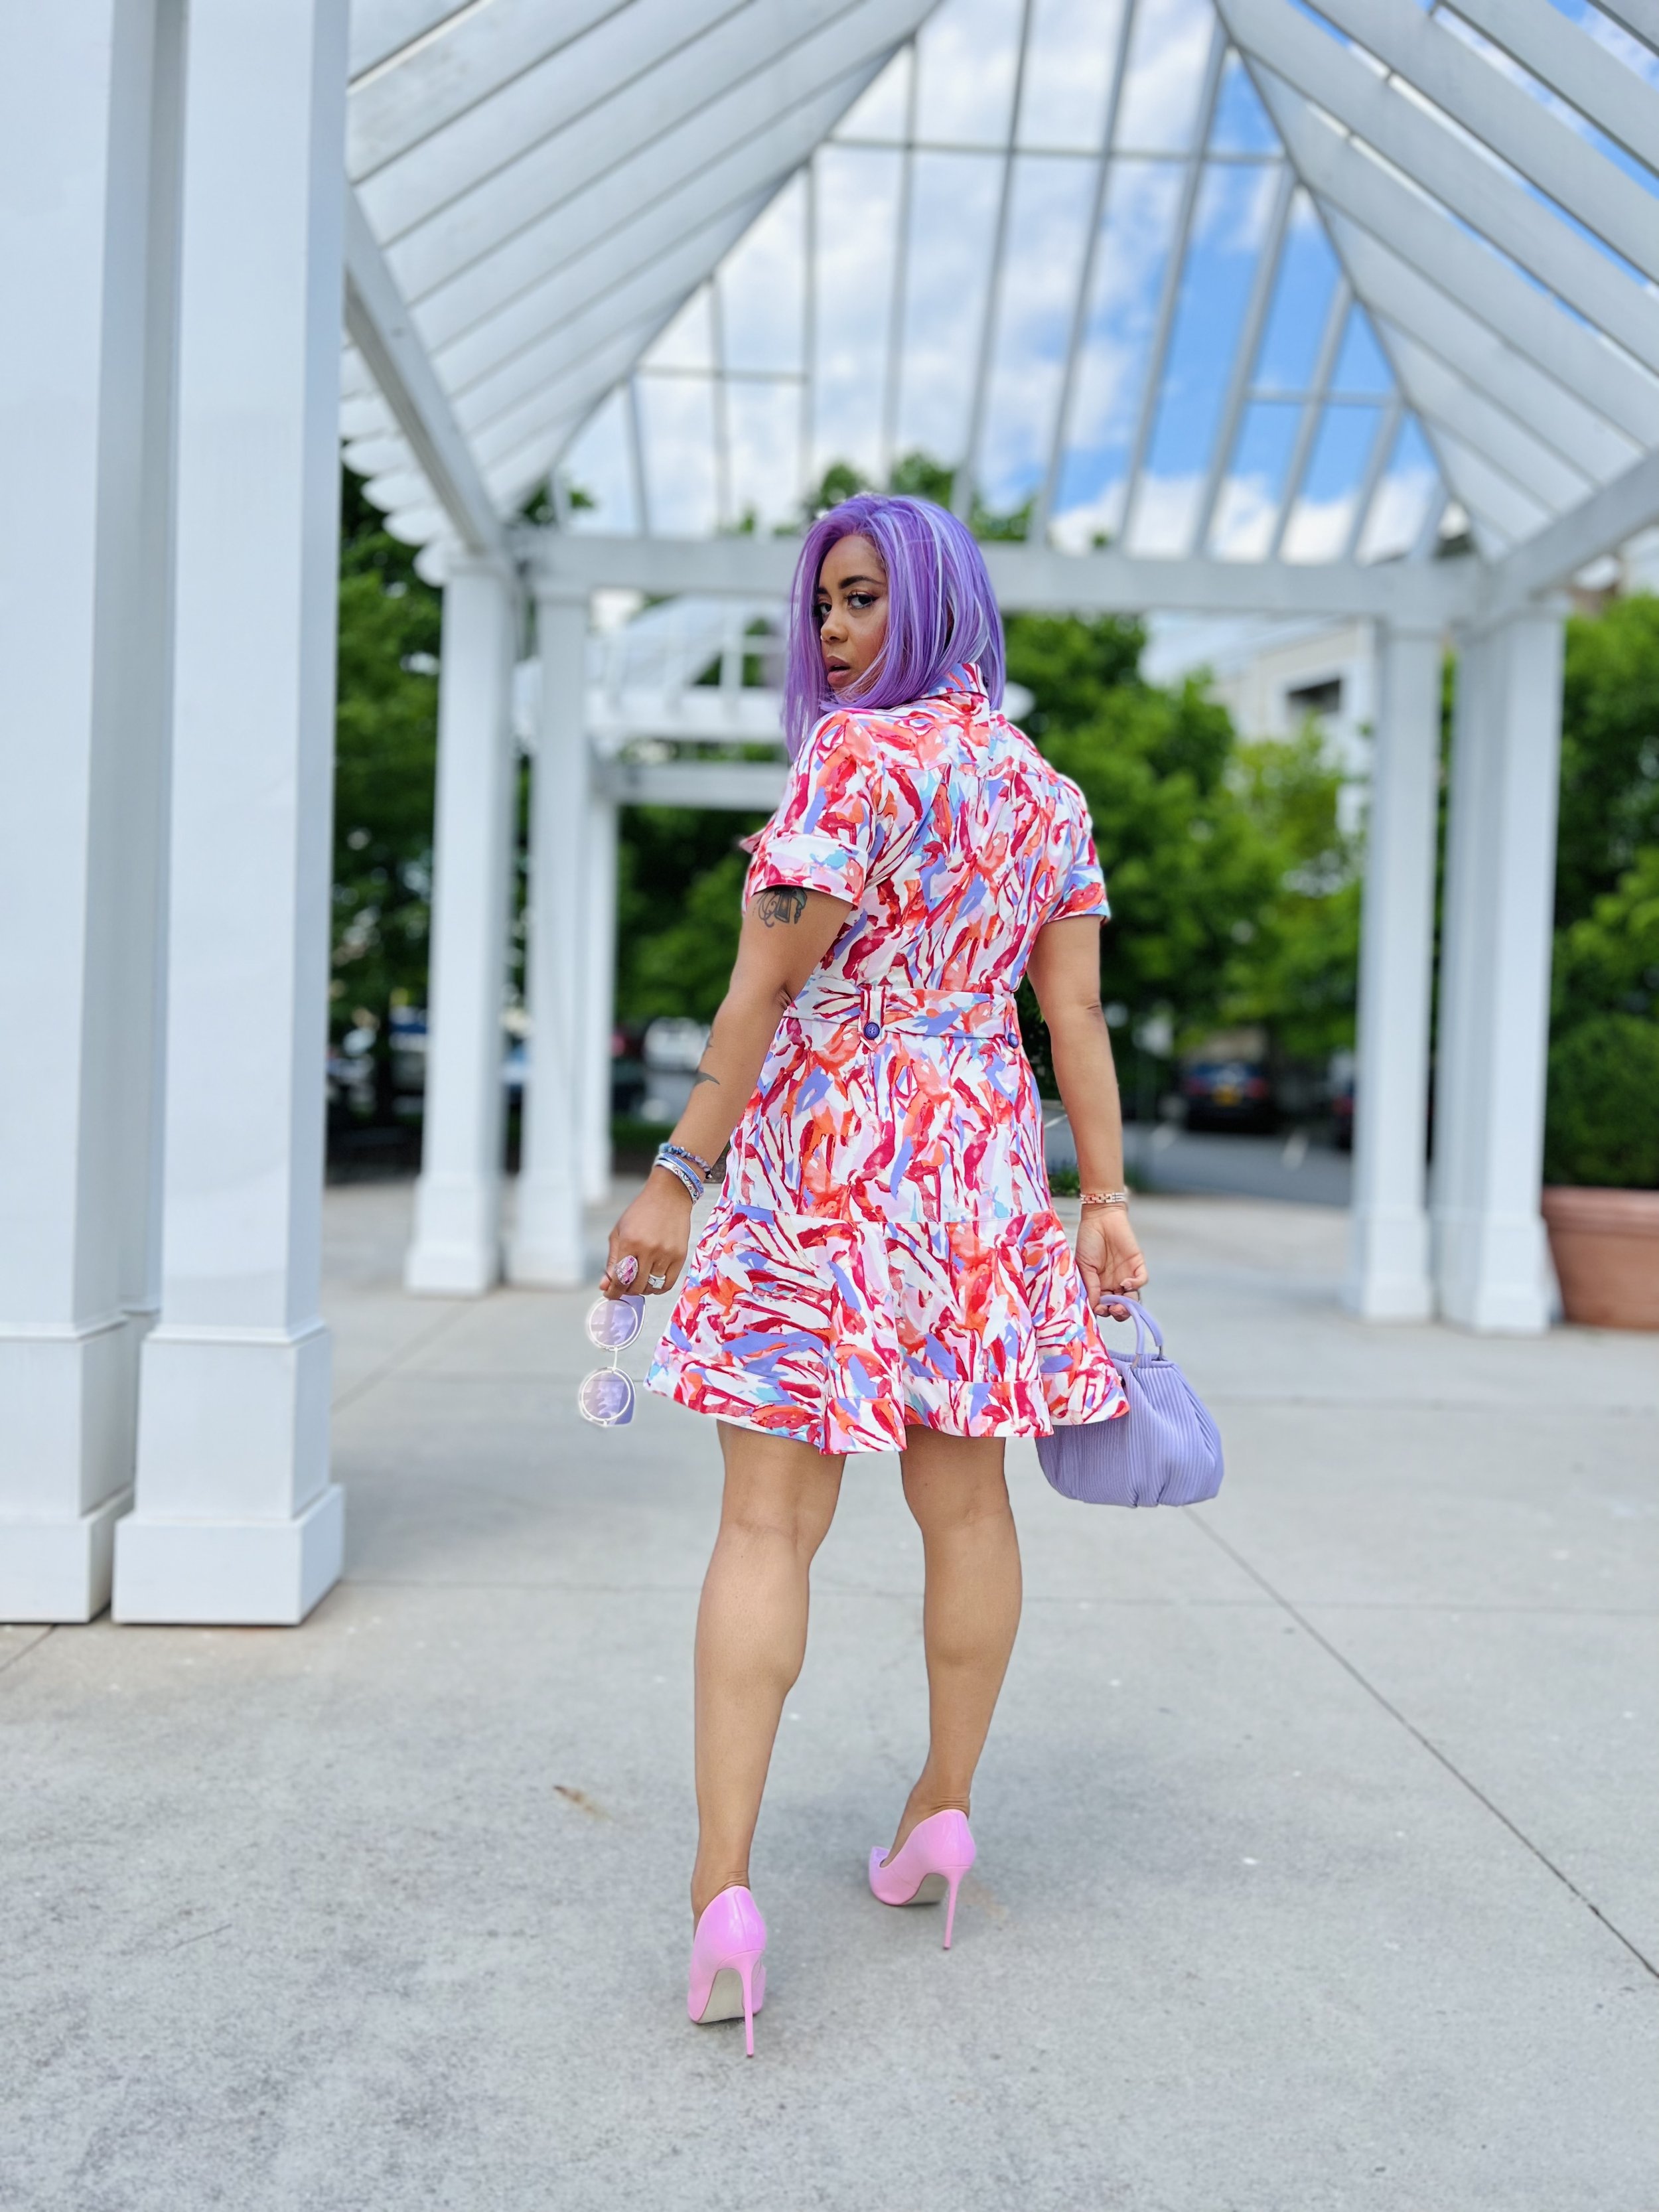
The pattern is very straight forward and I didn’t have any issues. I will say the sew-a-long by Norris Ford was very helpful. Check out the YouTube video here I even made the belt!! I did two rows of topstitching and I edgestitched the flounce and the sleeves bands. I opted out of the topstitching on the skirt flounce and on sleeves because I didn’t feel it would pop with this print. If I were using a solid color then I probably would add that option.
If you’ve been with me you know I am not shame of my breast size. I didn’t have to make any adjustments to the sizing but I did change the placement of the belt loops. Normally I will add about an inch to the bodice to hit my waist just right. I’ll be sure to do it on the next make. I did notice that if you’re blessed in the butt you might want to make adjustments to the skirt as well. I will be adding about an inch and a half to the length of the skirt (flounce version).
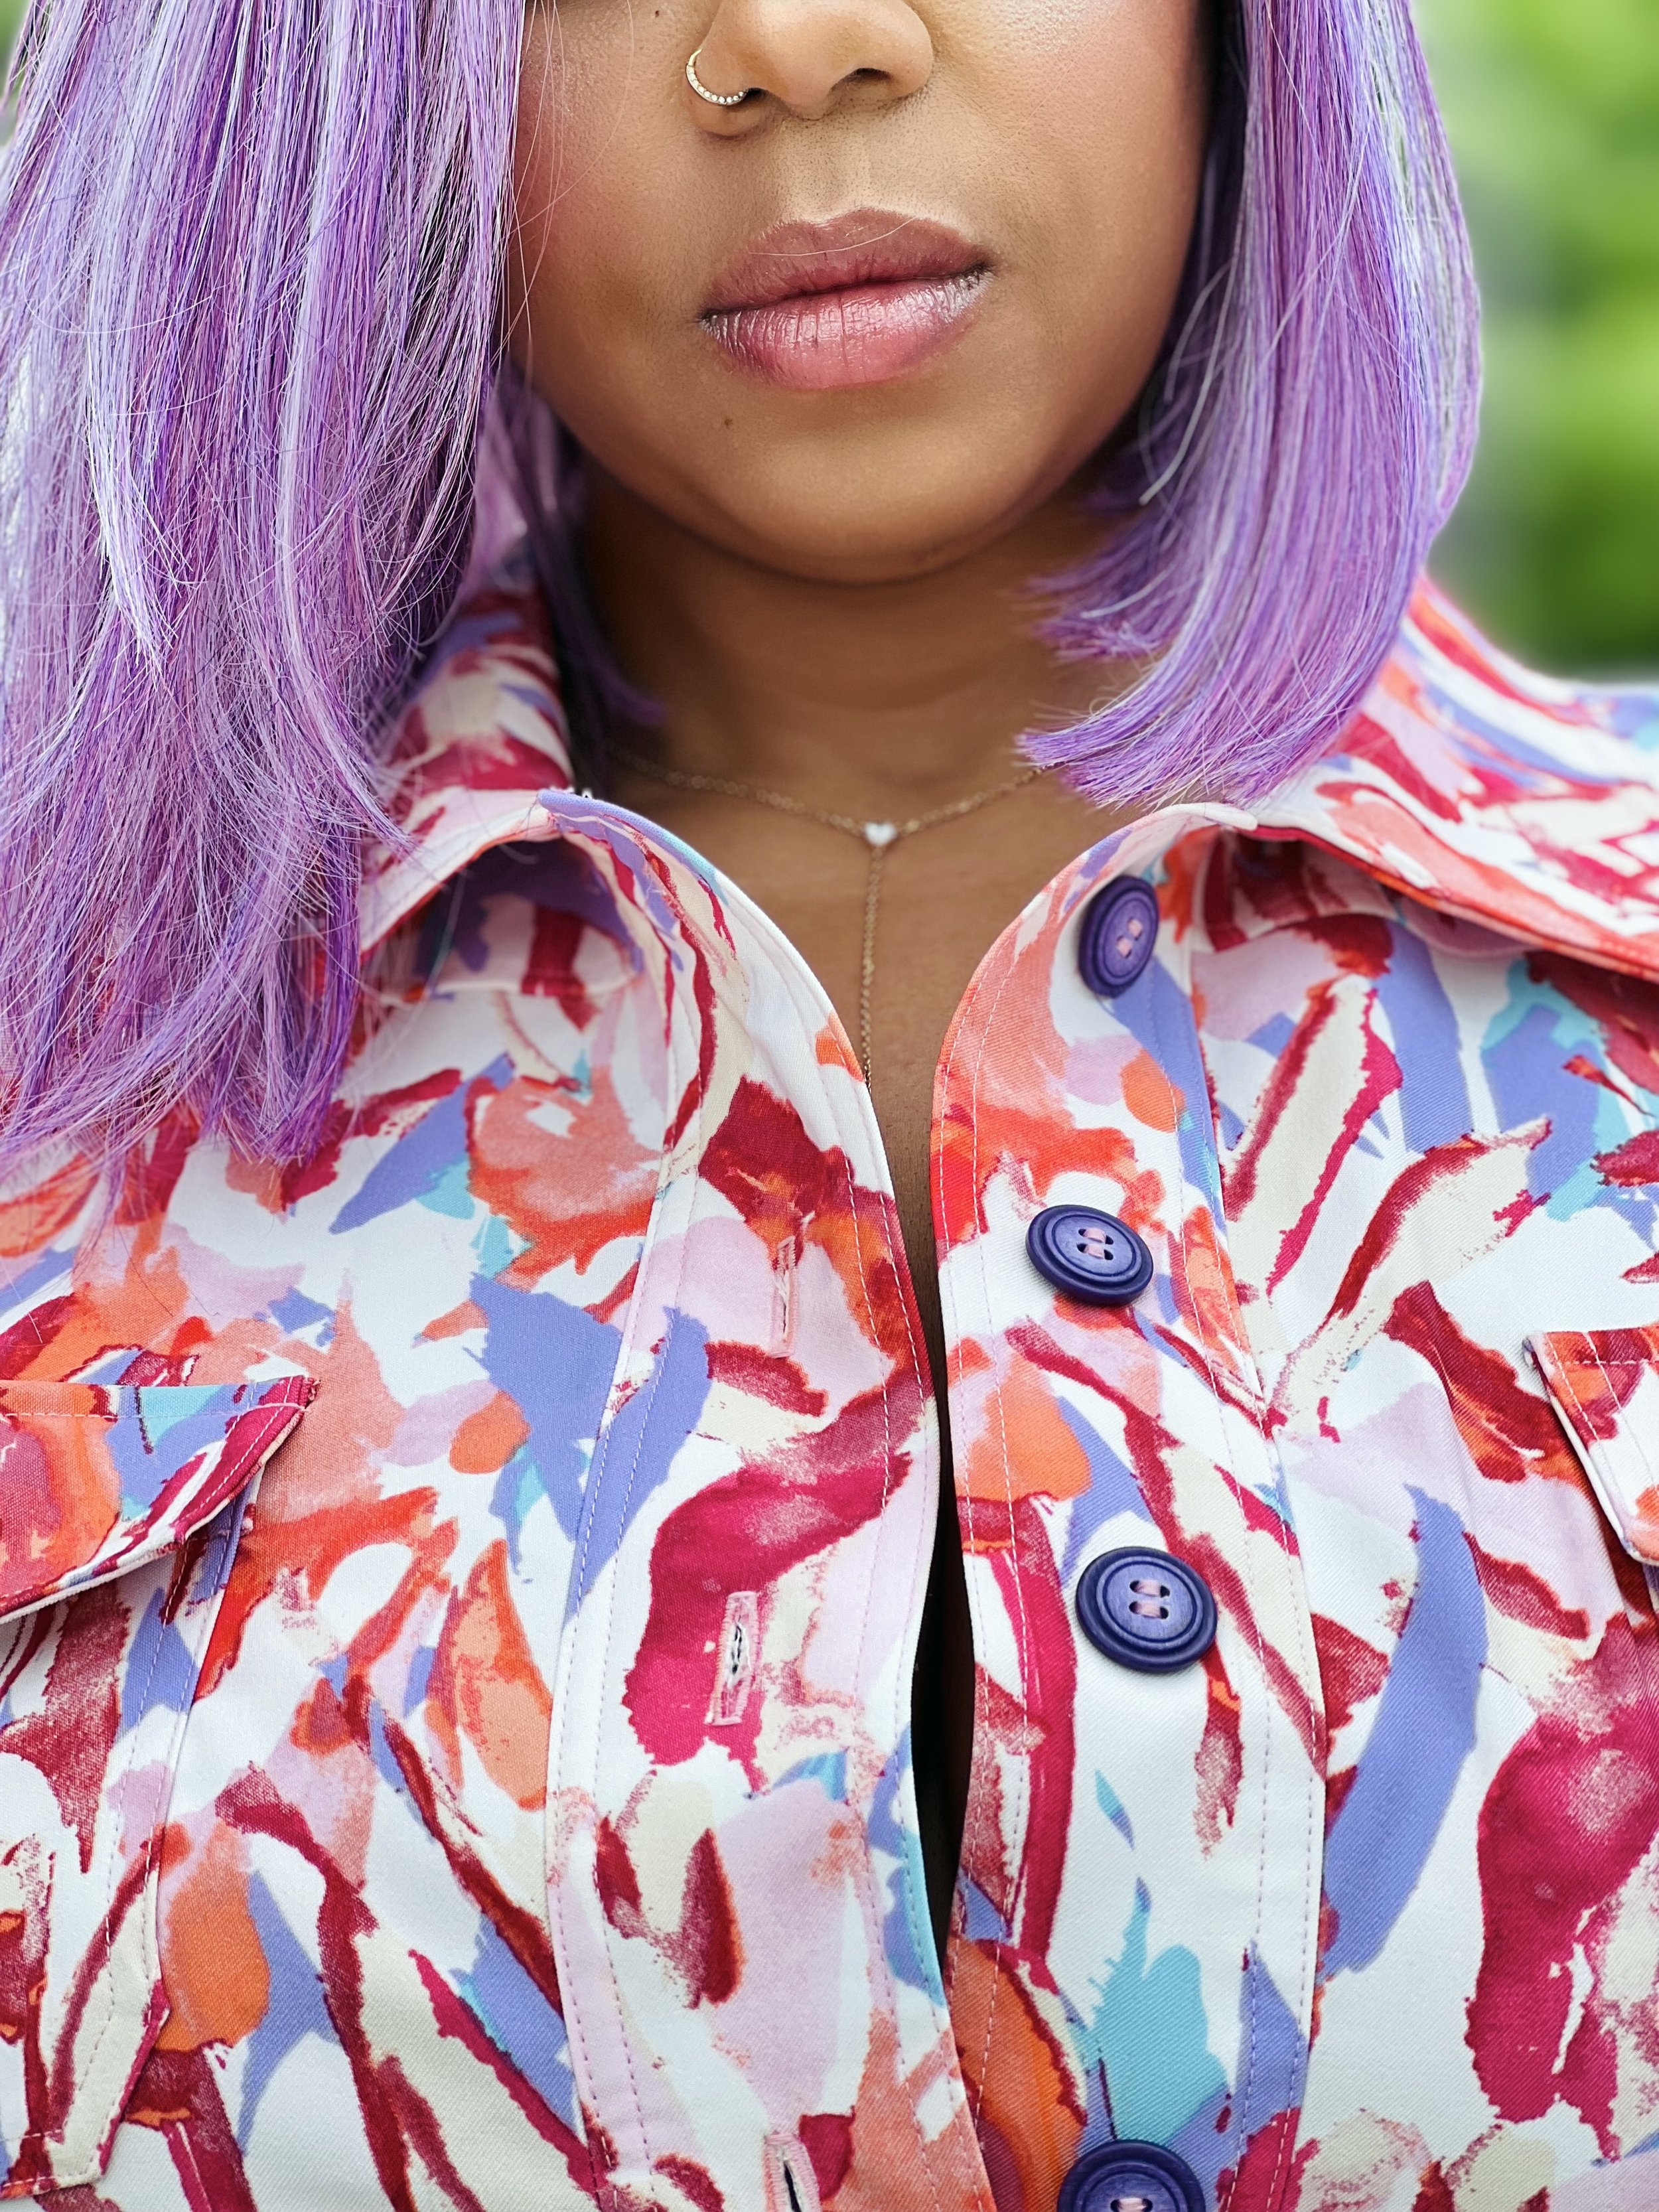
I had these purple buttons on hand and I thought they would be a nice pop to the Very Peri in the color of the fabric.
My recommendation for fabrics are wovens with slight stretch. This fabric is a Moda Crepe and honestly my favorite for Spring and Summer (I want it in every color). The pattern recommends denim, linen, rayon (I don’t recommend), sateen, shirtings, and twill. I would love to make more of this pattern in linen or denim…soon!


Do you have this pattern on your list of next makes? Or have you sewn this pattern? Share with me and let me know what you think about this make in the comments. As always thanks for stopping by!
Peace & blessings
Lush & Wild
Lush & Wild
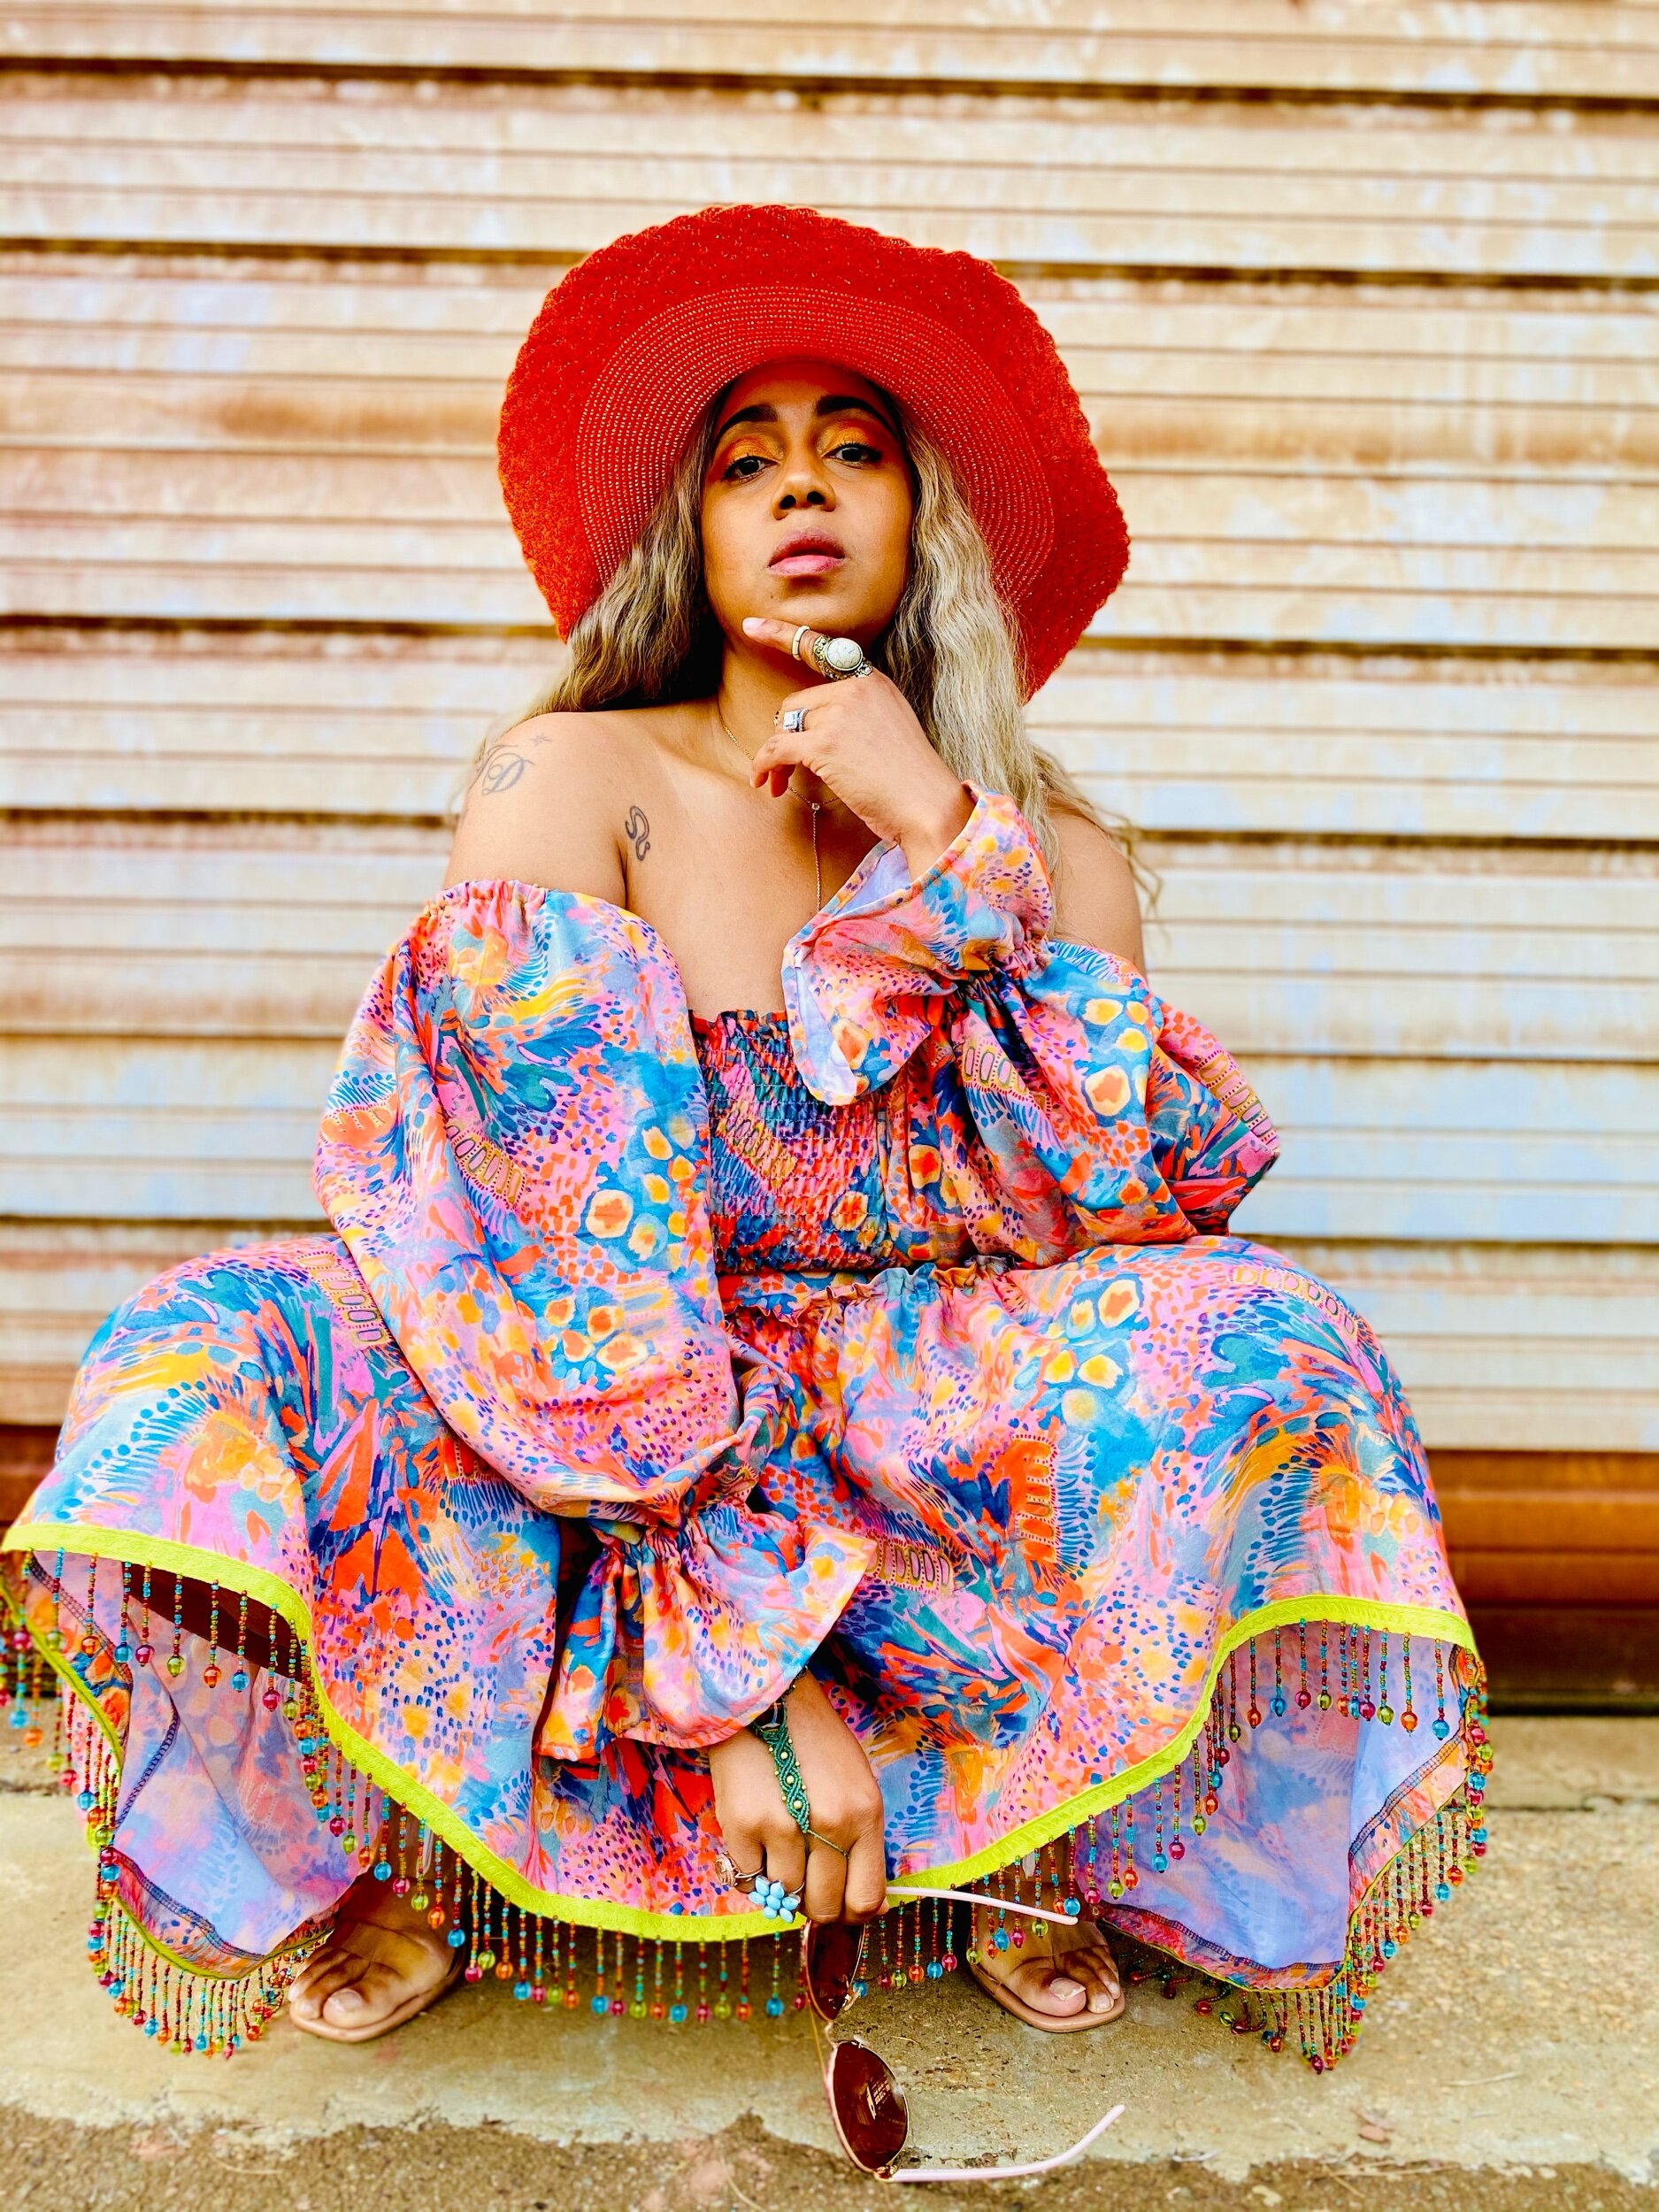
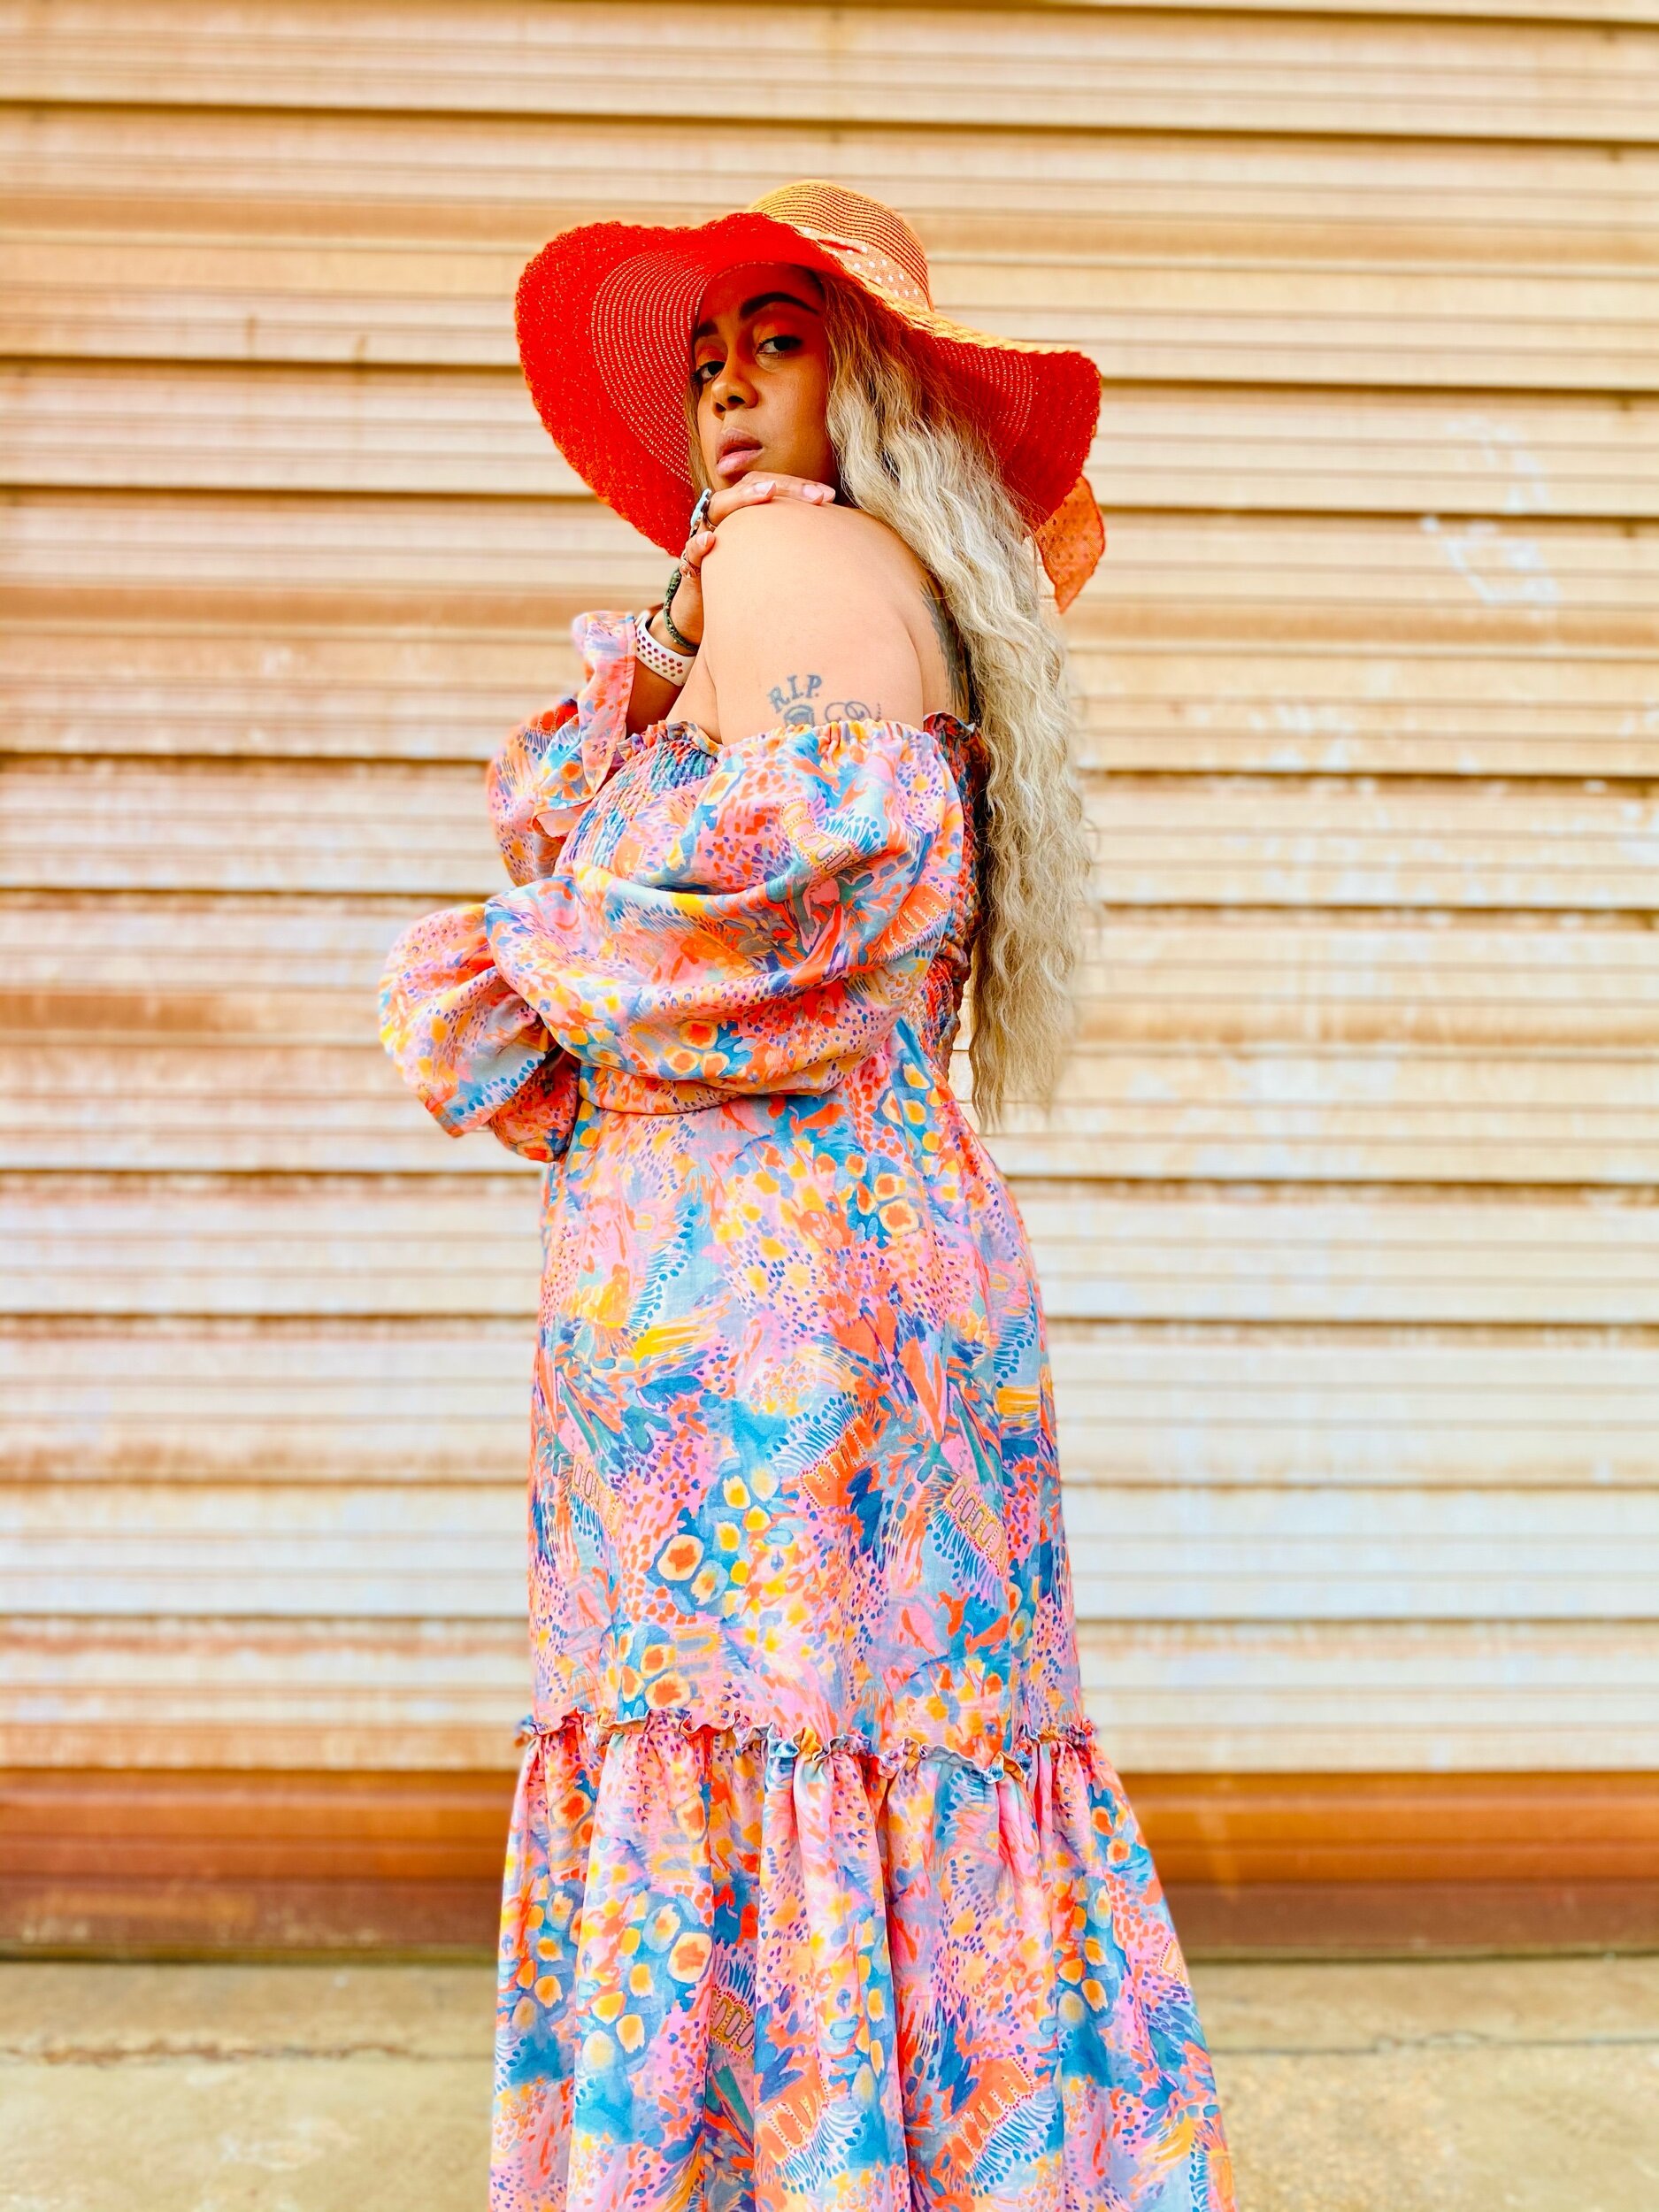
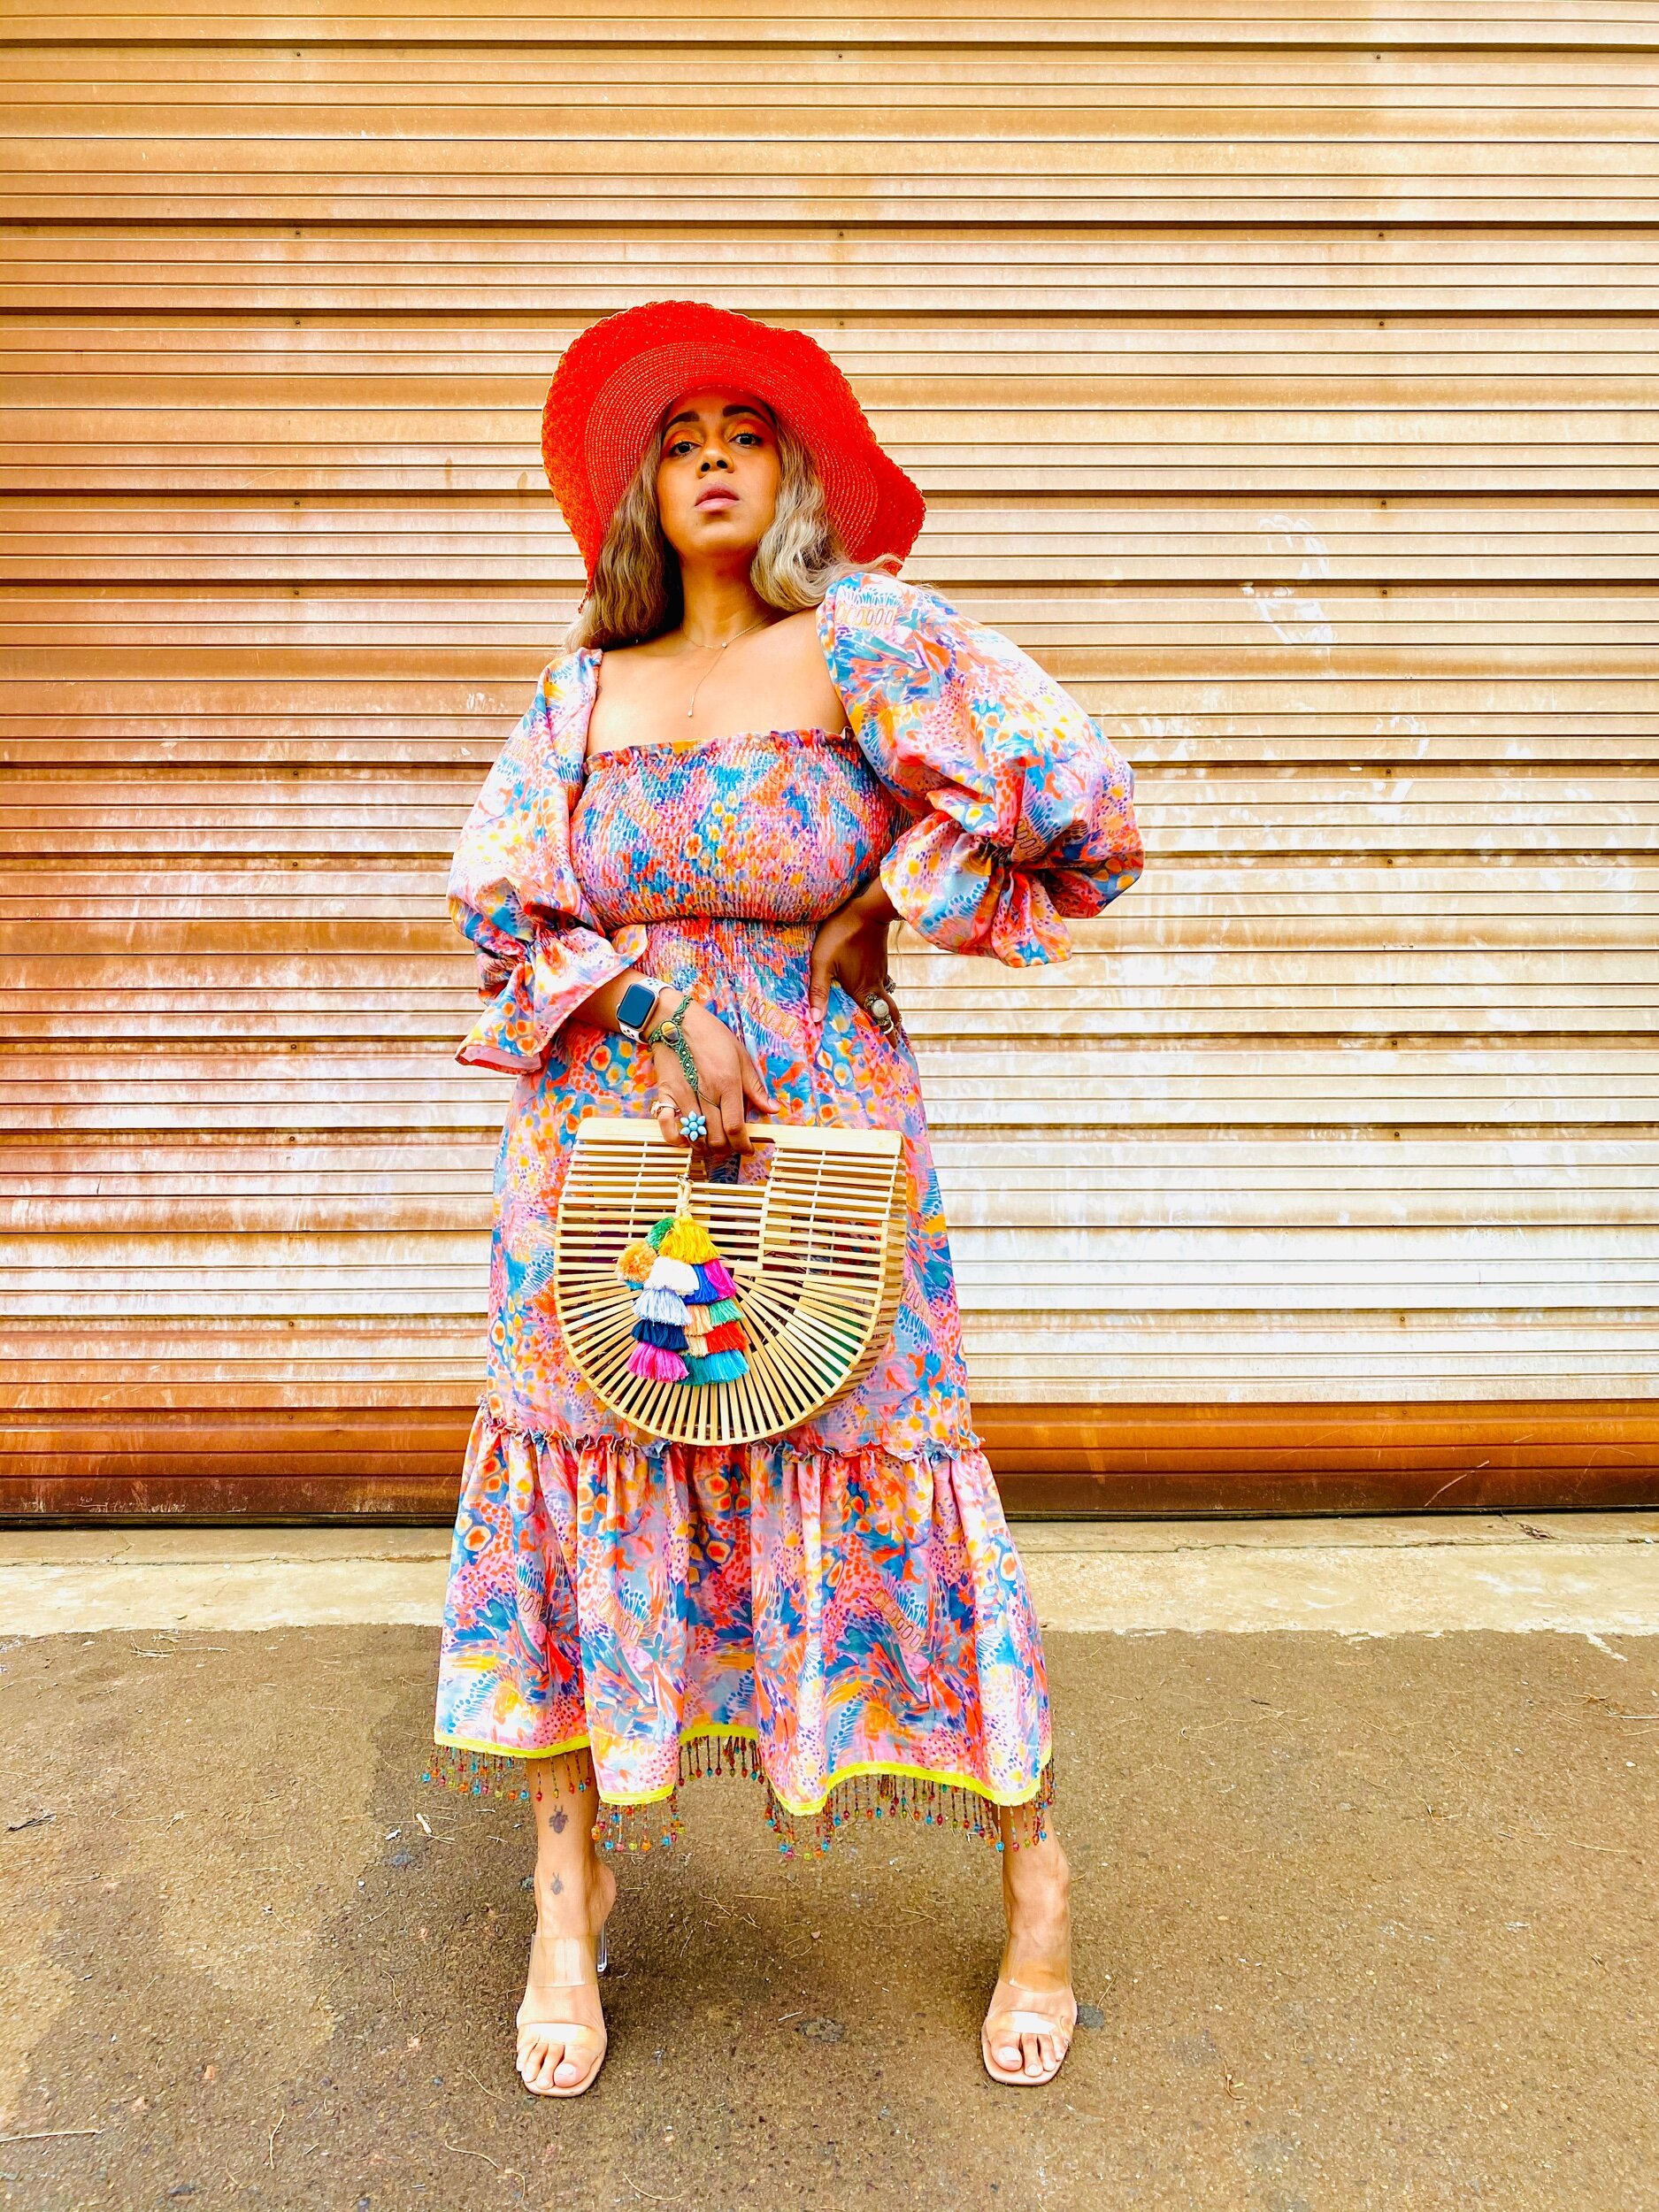
I had the pleasure of receiving Katie Kortman’s Lush & Wild double gauze fabric in this beautiful print before it was released April 19th on Fabricdotcom. Click the link here to view the entire collection. Let’s just say I absolutely love these prints
The fabric choices include double gauze, sateen, canvas, and quilting cotton. The hand on the double gauze is a nice soft drape and perfect for Spring and Summer. After sharing a sneak peak of this look on my IG, this print sold out on the 1st day lol. But don’t worry they will print more and it will be available again soon.

Shirring
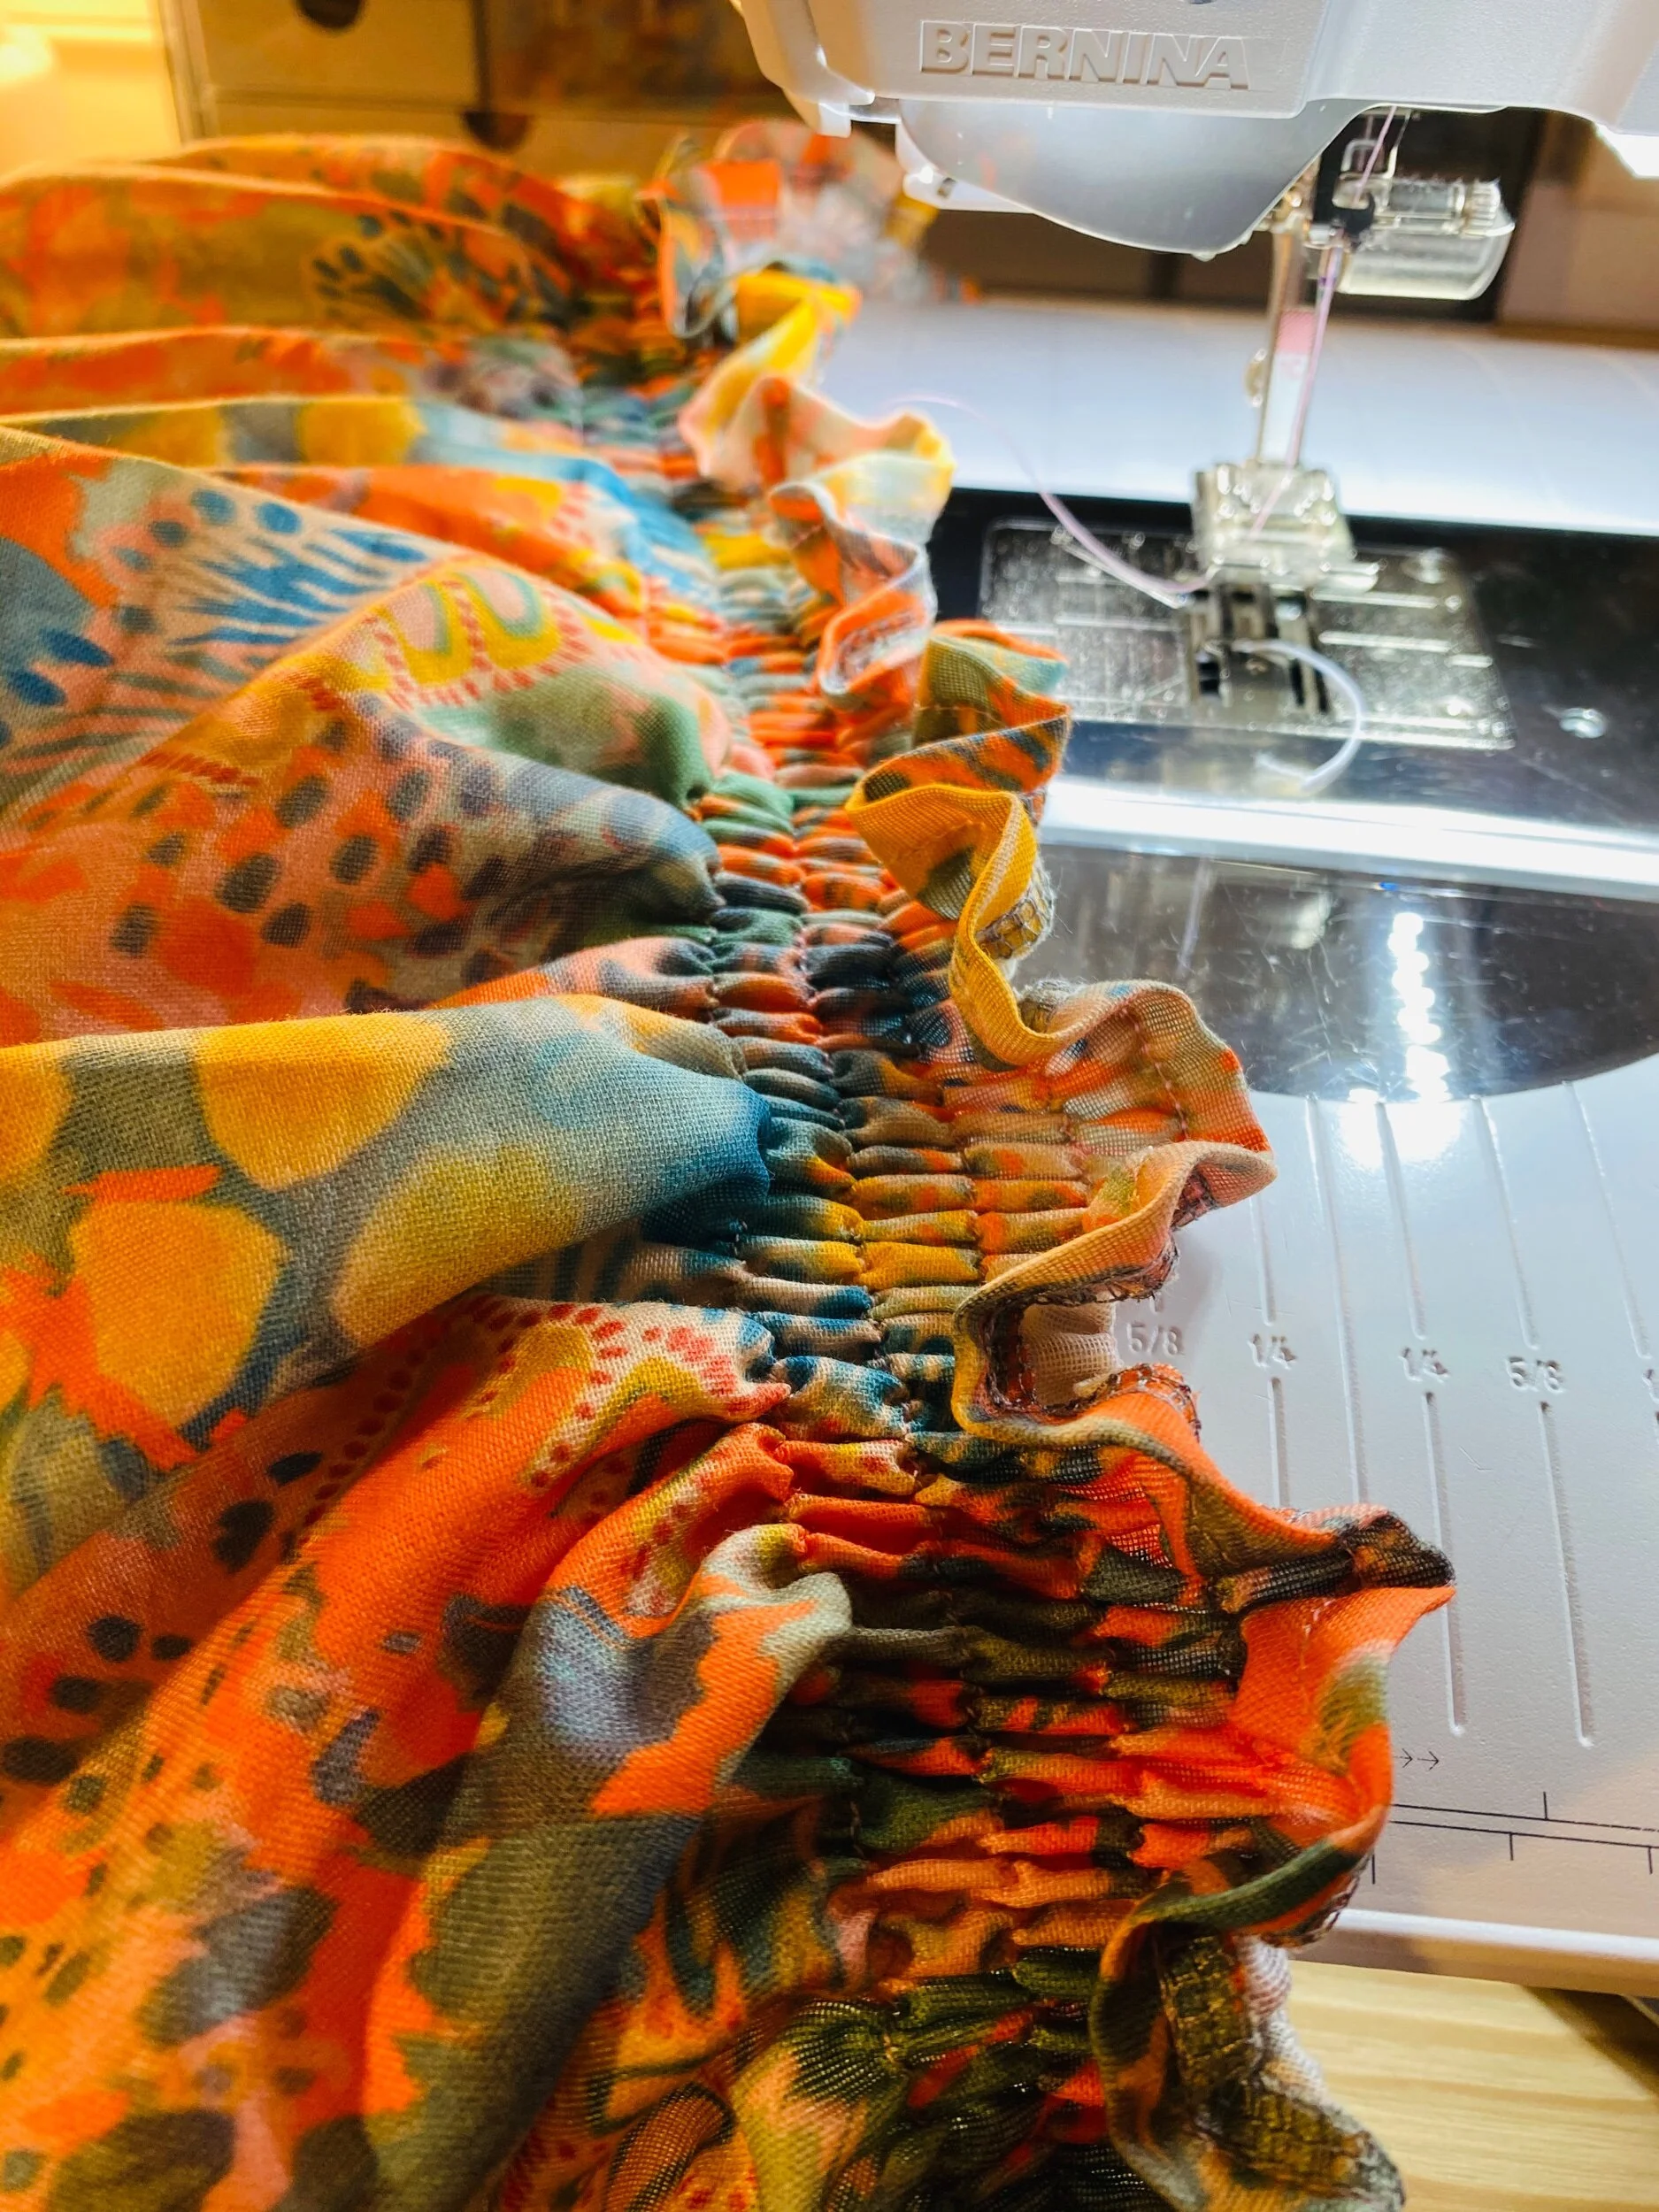
I had never tried shirring and with the 4 yards of fabric I had, I figured I could squeeze out shirring, big sleeves, and a gathered skirt. Luckily I was able to finish this dress with about 1/4 of a yard to spare.
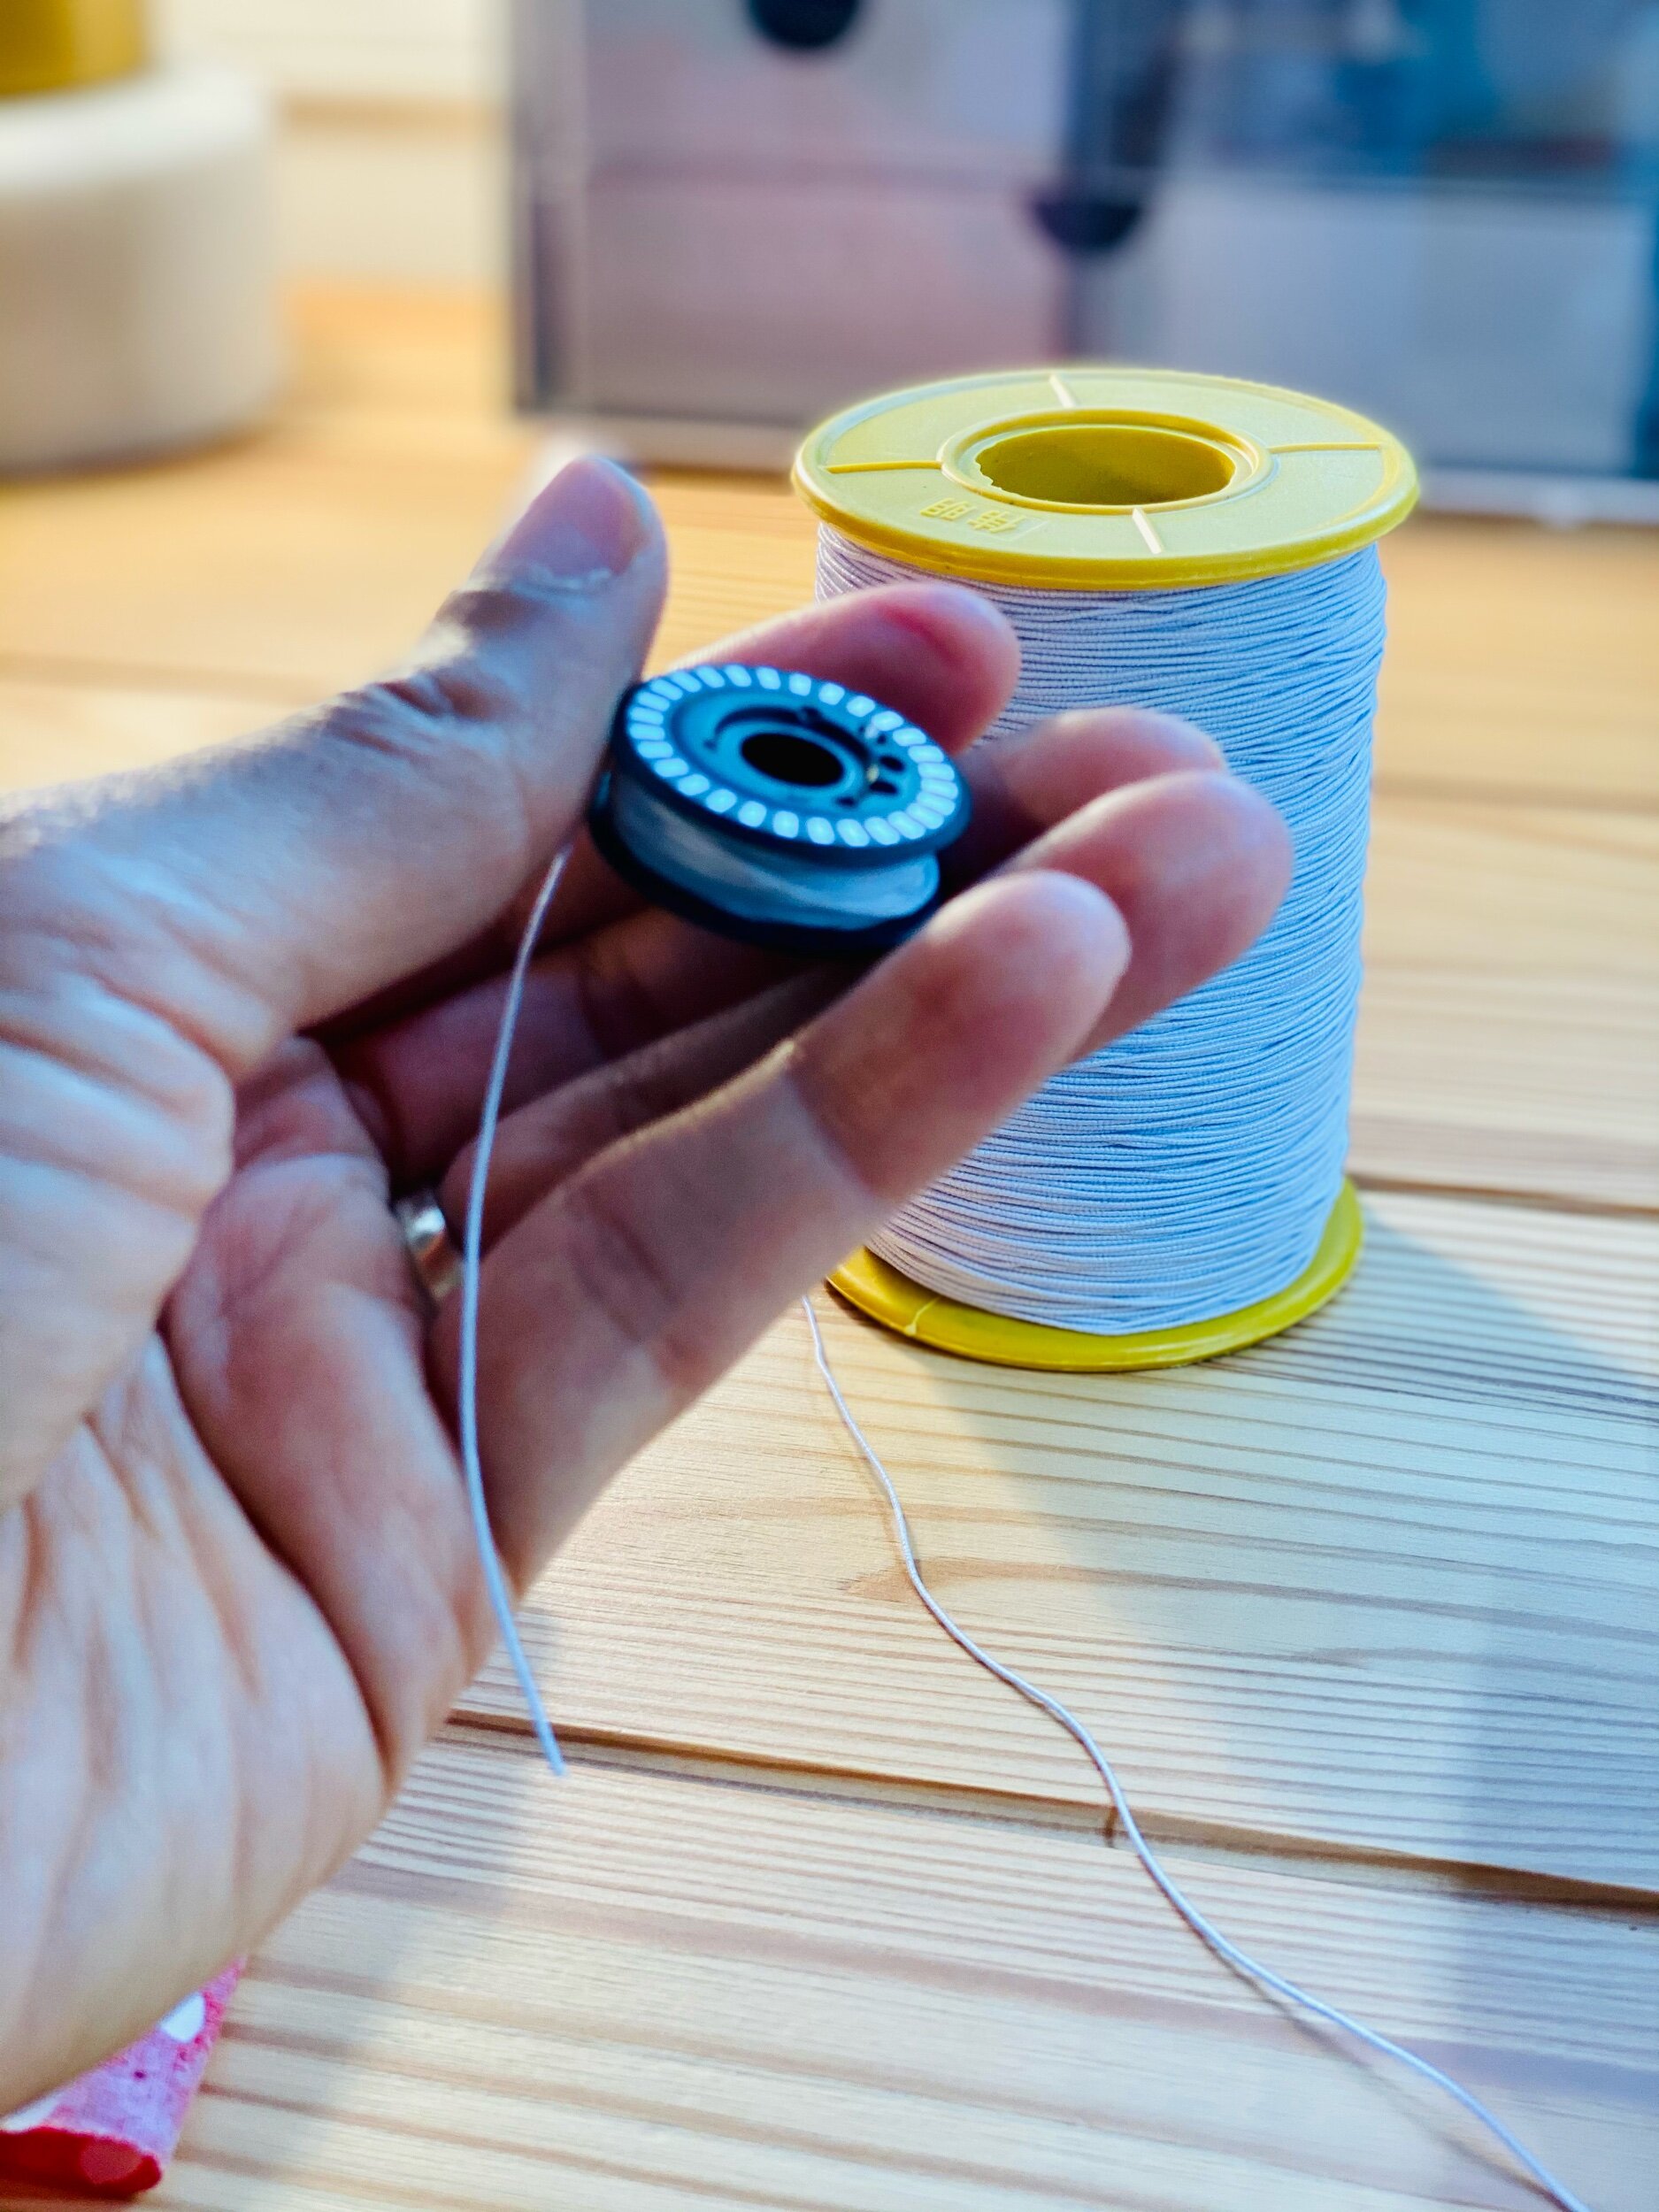
Okay, so many people told me they’re afraid of shirring. I too was skurrd lol. But I finally put my fears aside after my friend Raven assured me that it wasn’t that bad. One of the most tedious things about shirring is hand winding your bobbins. I sew on my Bernina 880 plus and the elastic thread is too thick to feed through my automatic bobbin threader. If your machine can, then by all means do you. The great thing about my 880 is that the bobbins are jumbo size so I only used about 3 and a half bobbins for my elastic thread.
Please keep in mind the amount of shirring you choose and spacing will determine how much elastic thread you will need. I will say you will about 3-5 bobbins for shirring spaced 1cm apart and on an average of 20-30 rows of shirring should be enough. You want to be sure not to wind your bobbin too loose or too tight!
For this project you will need:
Sewing machine
elastic thread (check out my Amazon shop here)
all purpose thread
Binding or bias tape (for sleeves)
Lingerie Elastic 3/8” or 5/8” (for sleeves)
This dress is the By Hand London Shirred dress. It’s literally 4 rectangles. What you will need is your bust measurement x 1.5 and whatever length you want for your dress. For the bottom tier, multiply your dress measurement by 2 and the length about 20 inches (you can make this shorter or longer). For the sleeves cut two rectangles 24” long and 30” wide. You can find more in-depth details in the highlights of @Byhandlondon for this shirred dress.

I sewed 29 rows of shirring for my dress. My bust measurement is 42” so I needed more than the suggested 20 rows of shirring.
For the bottom tier I wanted an exposed gathered look so I did a rolled hem on the top and gathered by using my Bernina Ruffler foot.
I wanted a little razzle dazzle so I added this beaded trim I had on hand to the bottom hem of the dress.


I do hope you enjoyed this look and that you go check out the new Lush & Wild Collection by Katie Kortman! Thanks for stopping by and as always
Peace & Blessings!