
National Flannel Day
Are you a flannel addict?
I didn’t realize how much I actually love flannel. So much so, I think it’s only right to make December 25th National Flannel Day!
I mean how many of you, your friends, and family were rockin flannel on Christmas Eve and Christmas? Errrbody, lol.
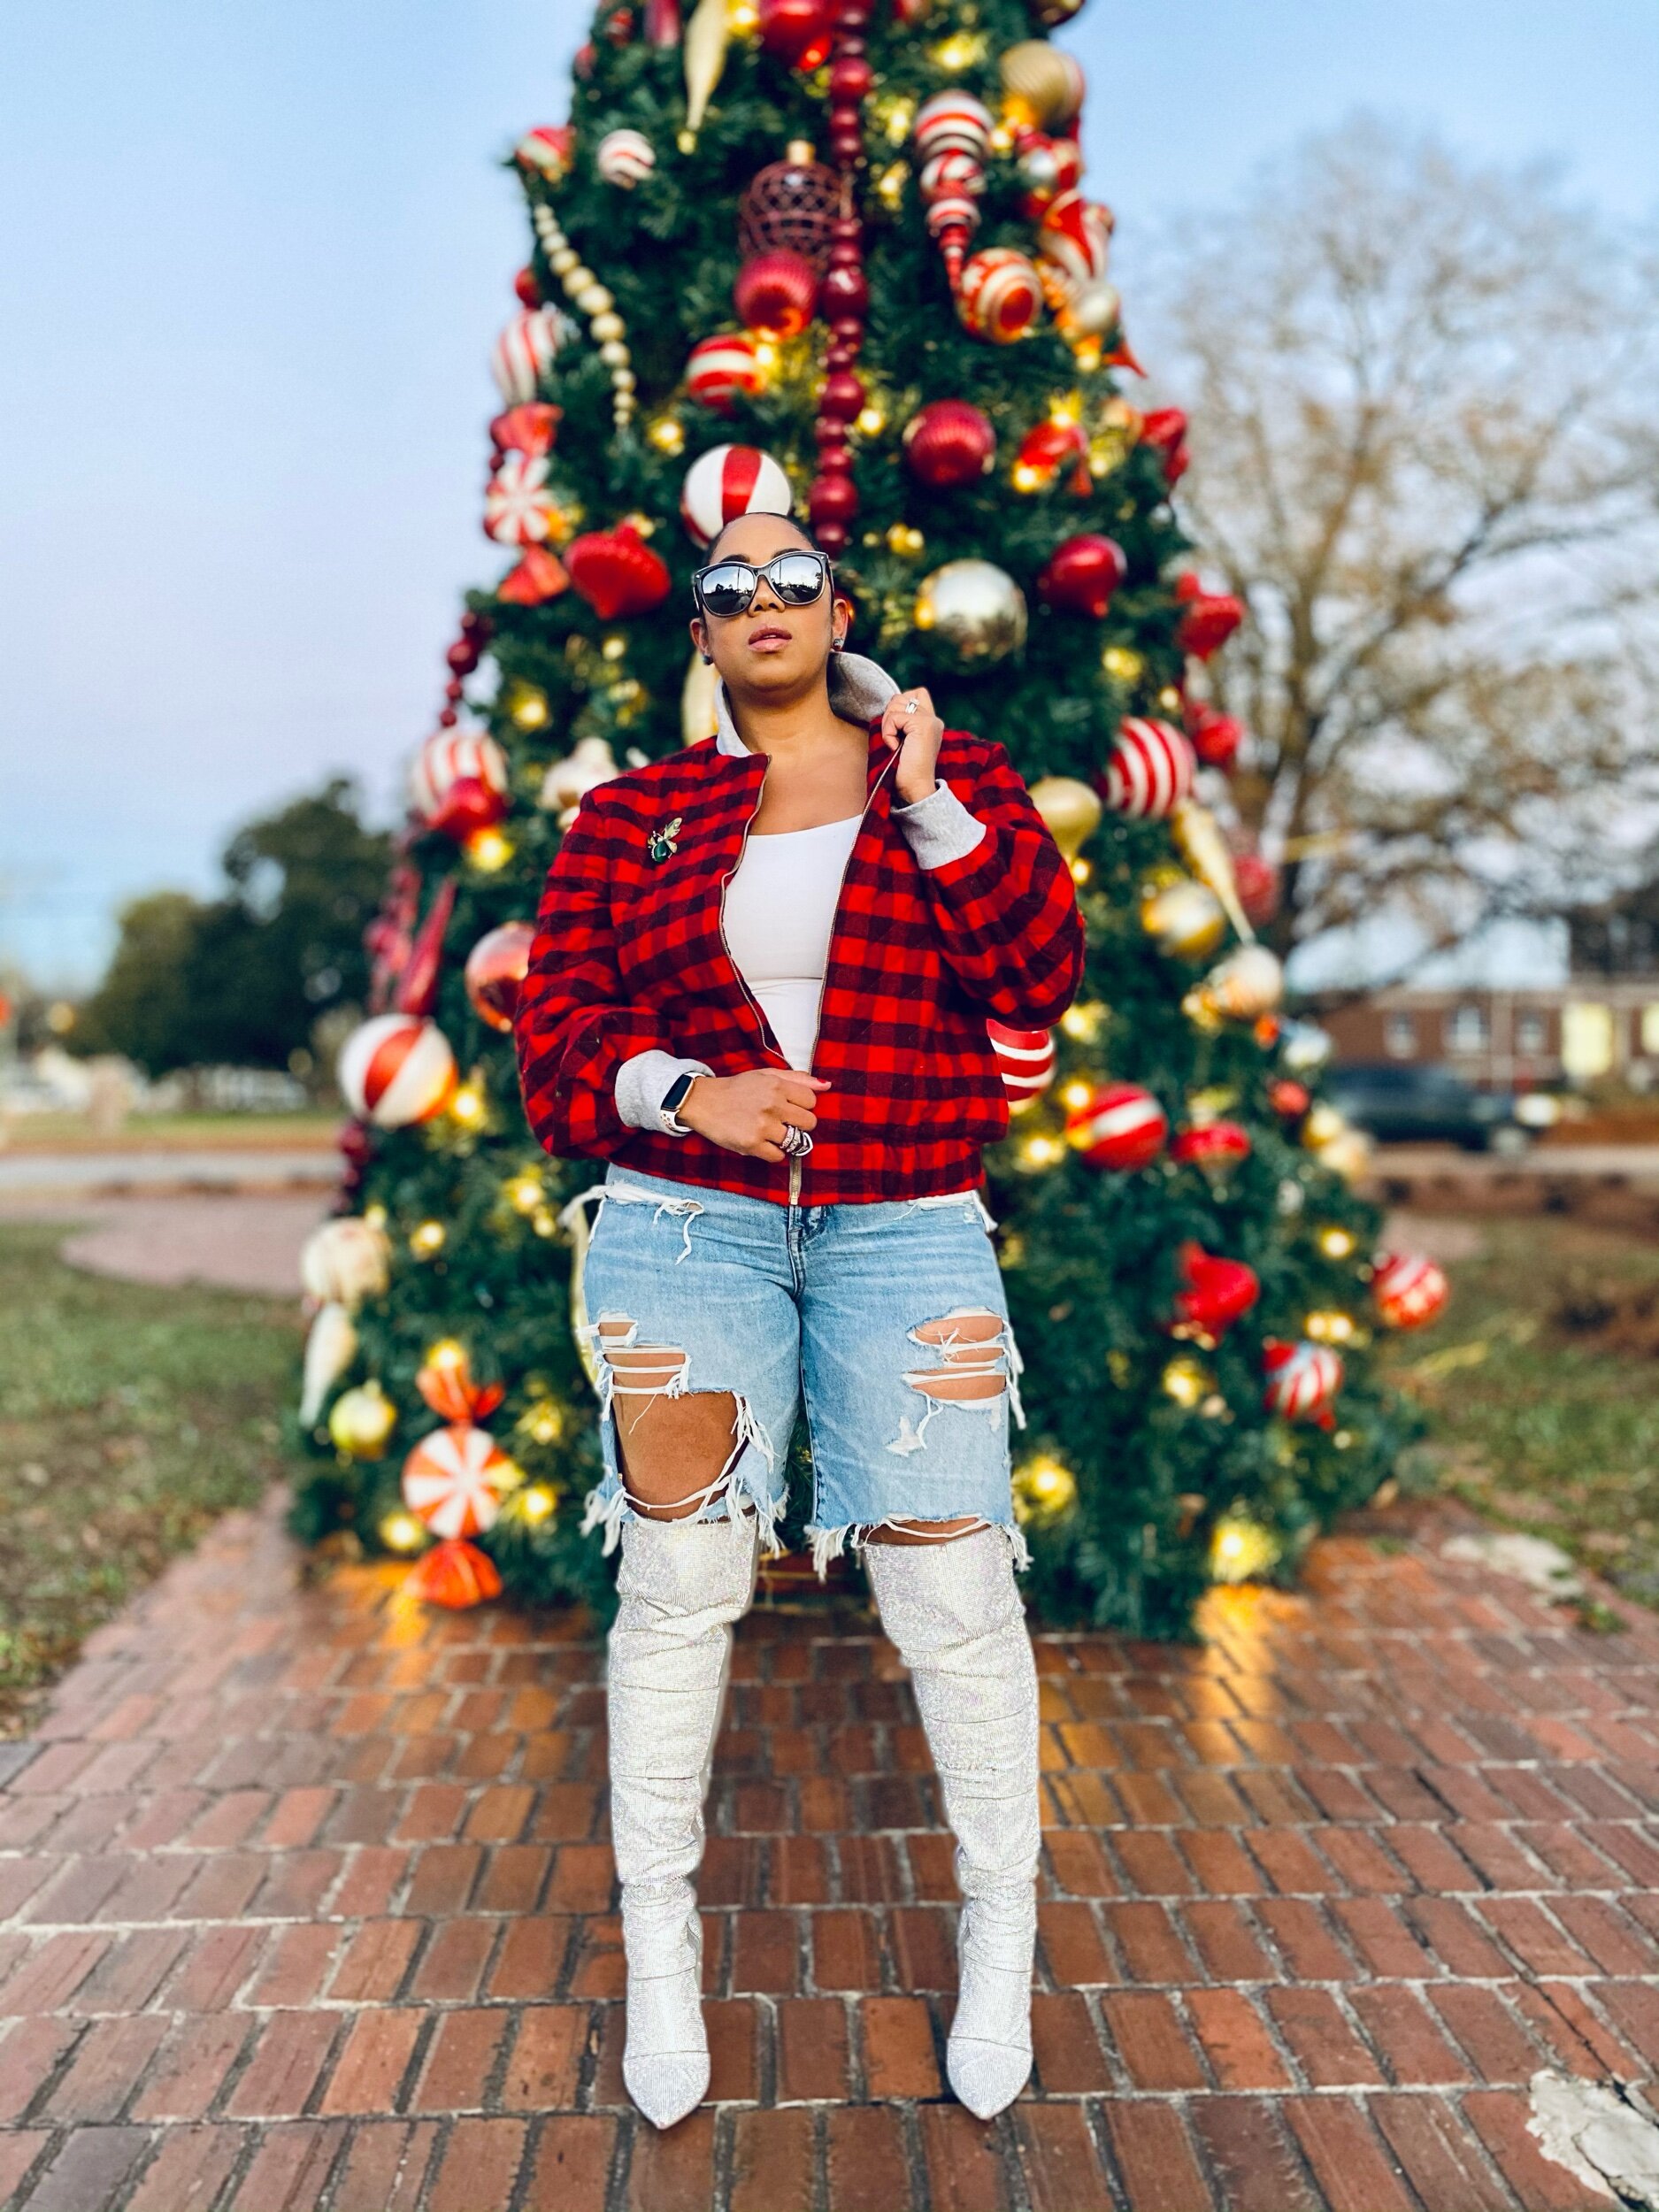
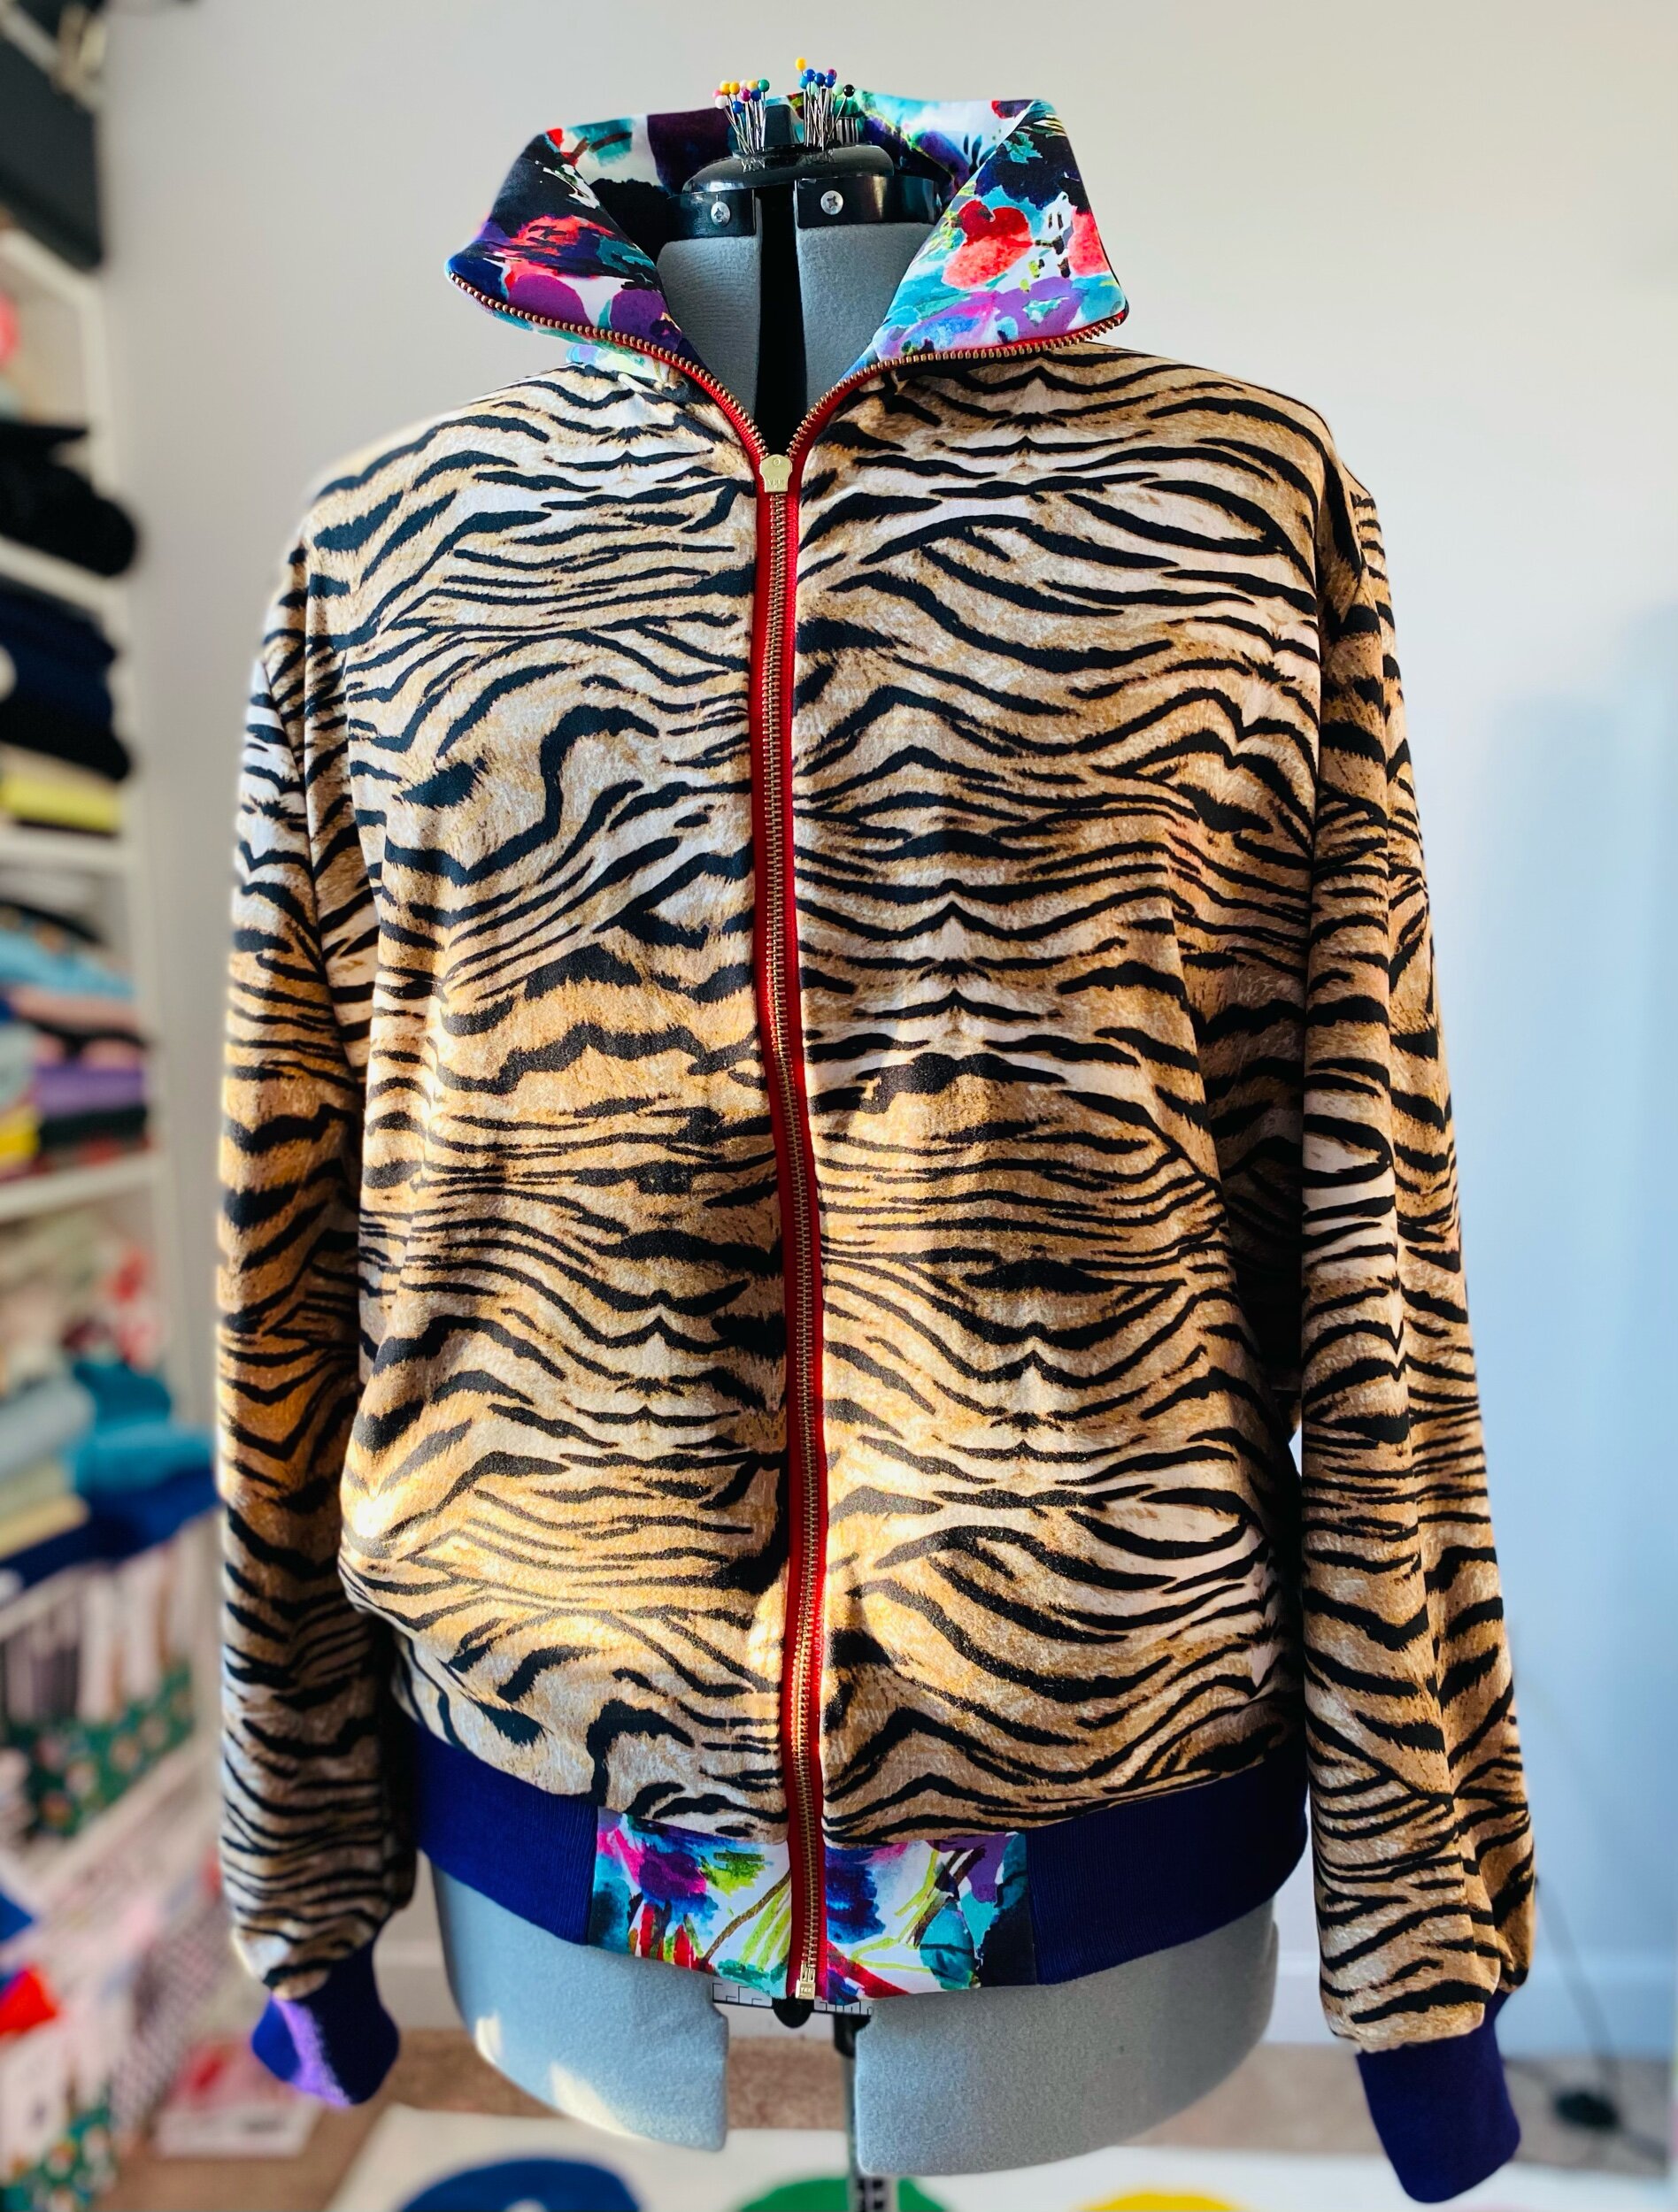
I have had this quilted flannel fabric for over two years now and finally decided I needed to bring it to life. On one of my IG scrolls I saw Mimi G’s throwback of her flannel bomber jacket with casual sneaks and shades and I remembered why I bought the fabric in the first place.

Let’s Talk construCtion
So I have flannel fabric but didn’t have gray for the cuffs and the collar…or did I? Okay, here’s a tip if you want to recreate this look and don’t want to buy the gray fabric like me. Hubs was literally throwing out old gray sweatshirts that were actually not very old at all and I looked at them (being the fabric hoarder I am) and said ummm I can repurpose these. So…I did!
There were vinyl lettering on some parts of the sweatshirts but I manage to find enough space to cut (in the appropriate stretch direction) the two pattern pieces needed for the collar and cuffs. This quilted flannel is nice and fluffy and it is definitely keeping me warm even in below 30 degree weather.
If you caught my previous blog then you will notice I also used the same animal print fabric as my Jogger Season bomber for lining (no fabric left behind).

To match or not to match? that’S the question
Here’s where some sewers may say flannel matching, HELL NO! I’m usually HELL YES!! The sizing of the flannel in this fabric is not too small where I feel I can’t pattern match but if it were smaller, I might rethink that idea. But guess what? If you don’t want to pattern match flannel that’s okay and that’s yo business! I managed and purposely patterned matched this jacket with the exception of the shoulder and sleeves seams. I tried but my eyes eventually said that’s enough honey!
Below you can see for my zipper install I stitched down one side of the separating zipper and then marked the remaining unsewn zipper piece on the wrong side of the zipper where patterns match. This helps me to eliminate pulling out my seam ripper because my prints aren’t lining up once zipped together.
I live for an exposed zipper and I had a nice gray zipper handy so I stitched a little closer to the edge than the pattern called for.
If you made it this far I bet you’re also wondering if I used a pattern? Yes I did use a pattern but I didn’t follow it to a tee. This pattern by Nikki Brooks of Beaute’ J’adore M7636 is one of my faves. I opted out of the cording and made the sleeves one pattern piece instead of two. I do want to add that if you have a basic shirt sloper you can achieve this look without this pattern. You would need to make sure the fit is to your liking (baggy or fitted) and cut down the middle of the front piece to add a zipper. You would also need to factor in length to fold up to create the waistband of the jacket and pockets if you choose. I like welt pockets for bombers but I didn’t want to make time to insert them this go round.


The jacket has a few seams and in my opinion can be sewn within a few hours (not including cutting). I managed to cut and sew both jacket and lining, with zipper install in under 3 hours but I was rolling lol.
I think this pattern is easy to moderate depending on confidence with zippers, pleating (sleeves), and cording (if using). I would definitely recommend it and once you try it, you will probably use it again and again.


I hope you all enjoyed this creation. Tell me what you think below. I’d love to hear from you.
Until next YEAR!! Bye 2020
Peace & Blessings

Jogger Season
Jogger Season
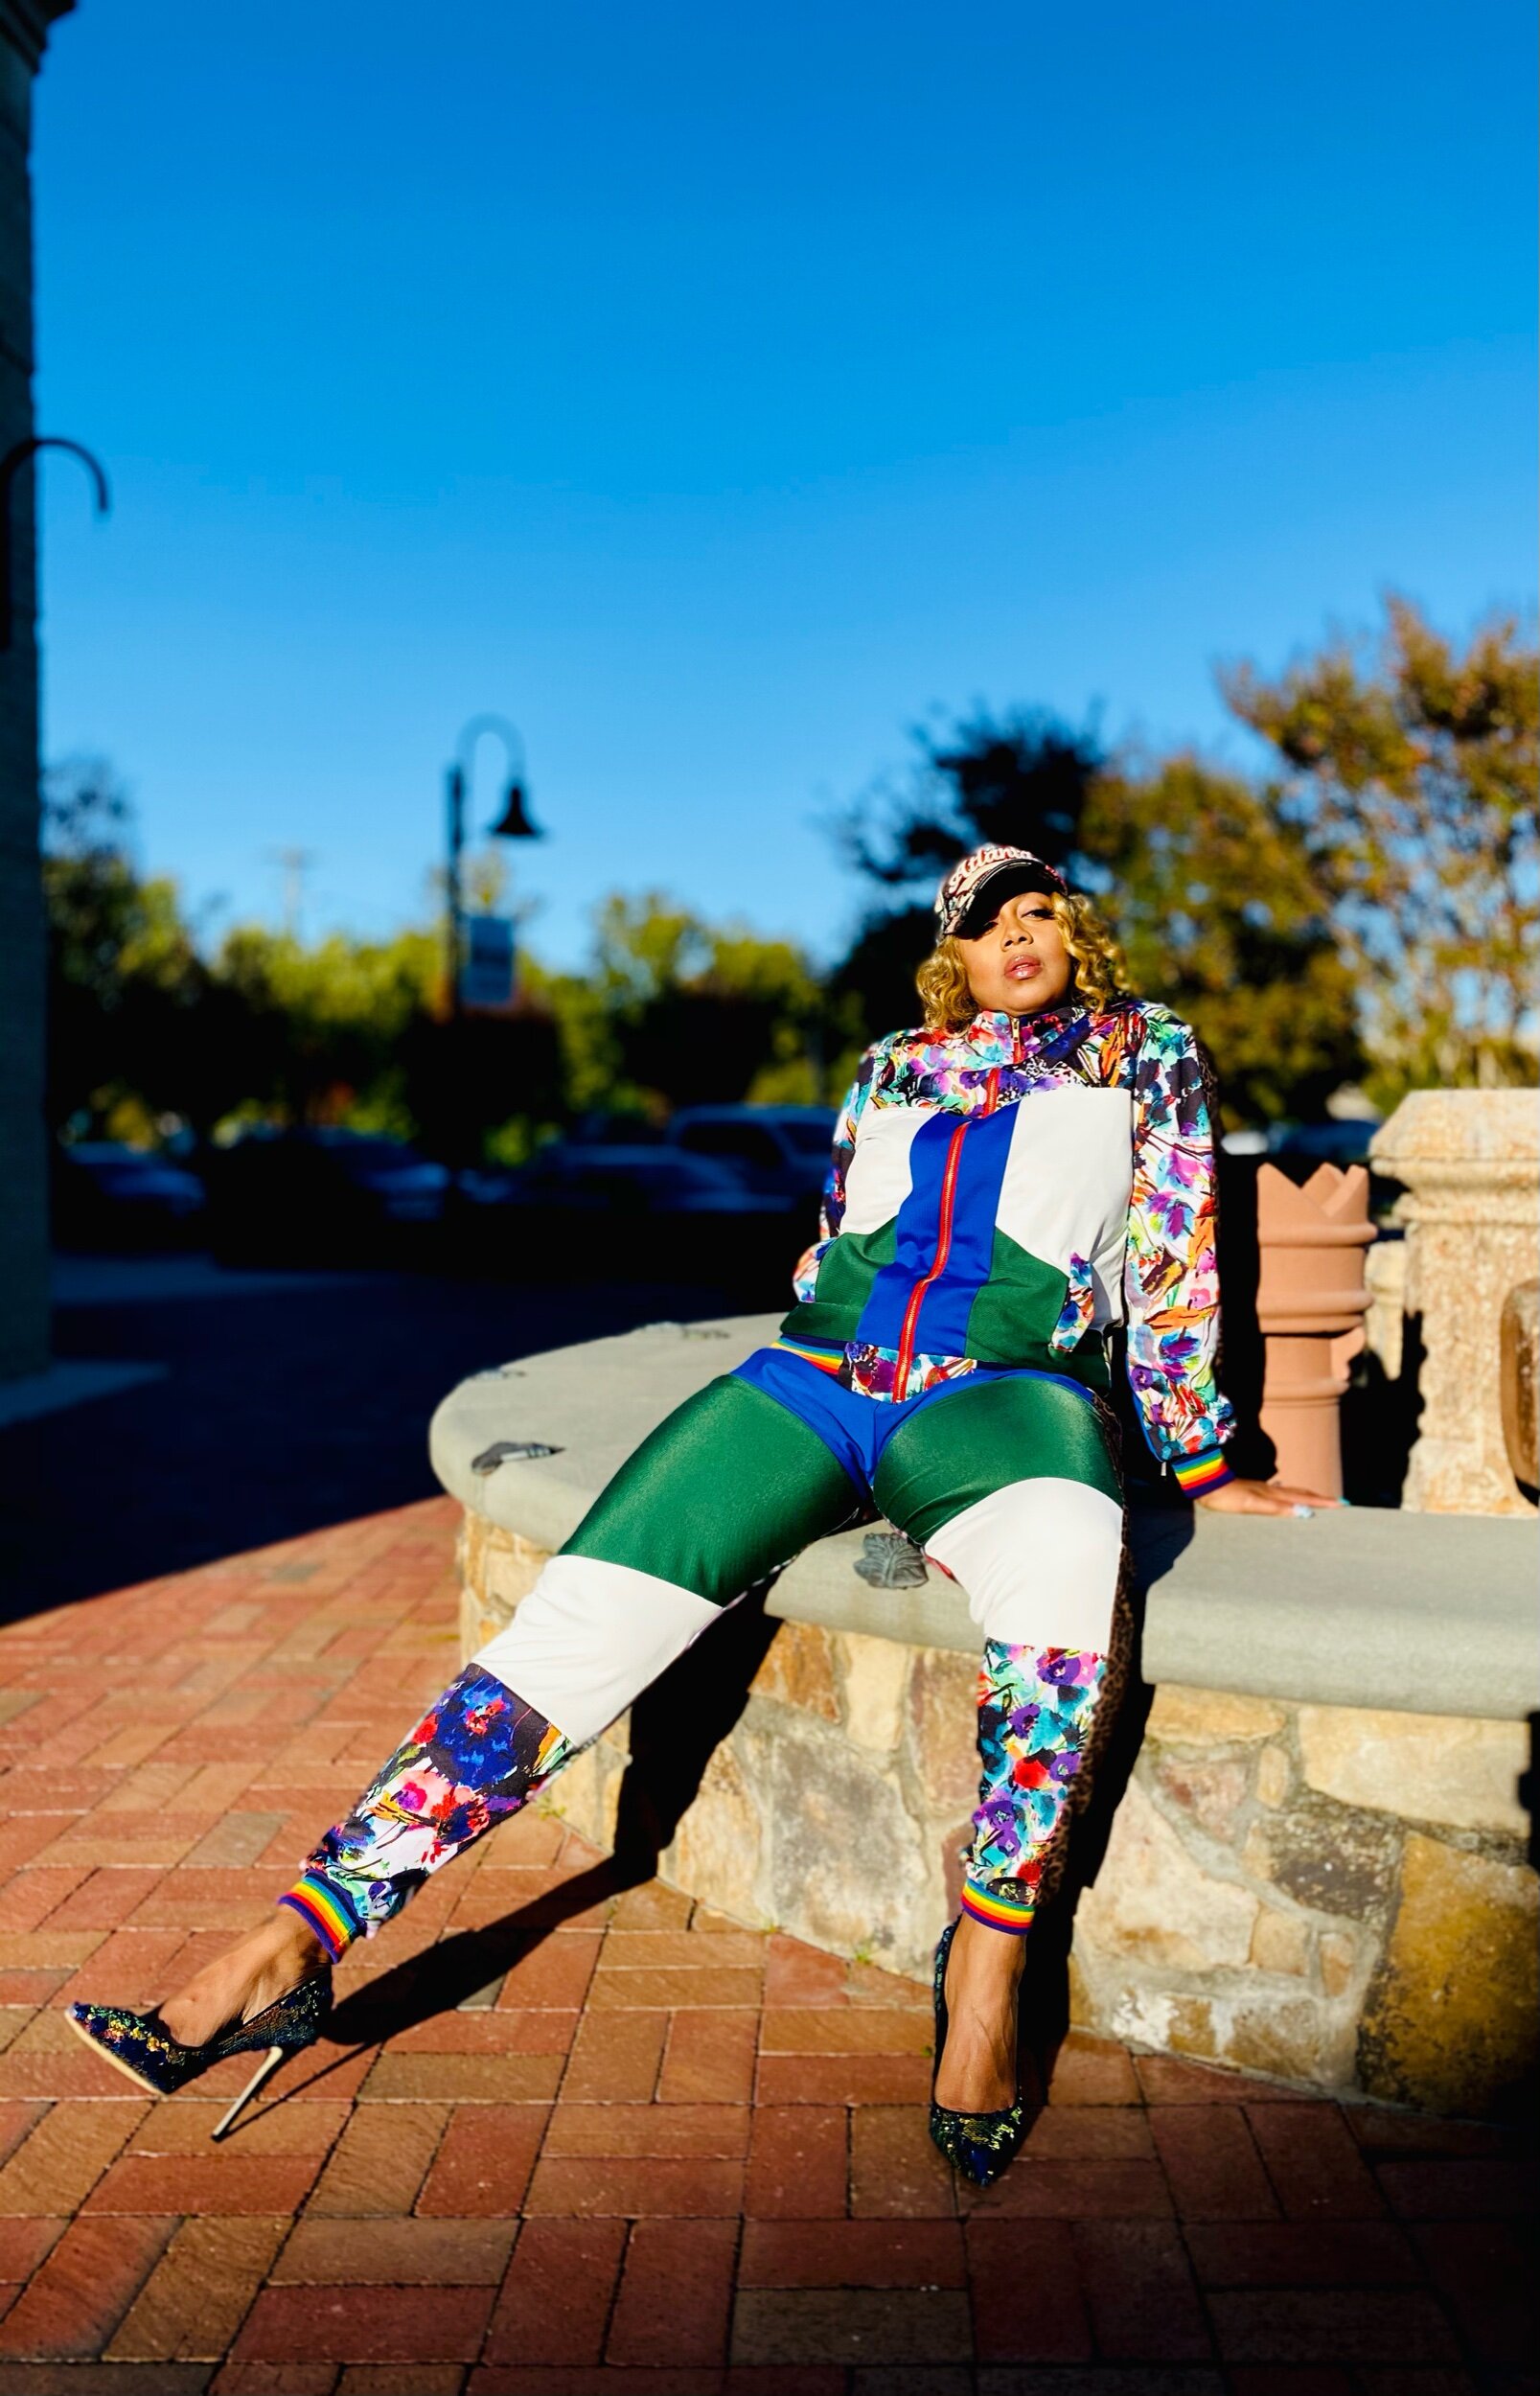
I can’t help but want to wear sweats and jogging suits right now but I also need my pumps. That’s the beauty of a jogger set! You can be comfy and sexy all at once or you can dress it down with sneakers. However you choose, these babies are staples in my wardrobe.
When ideas come to life
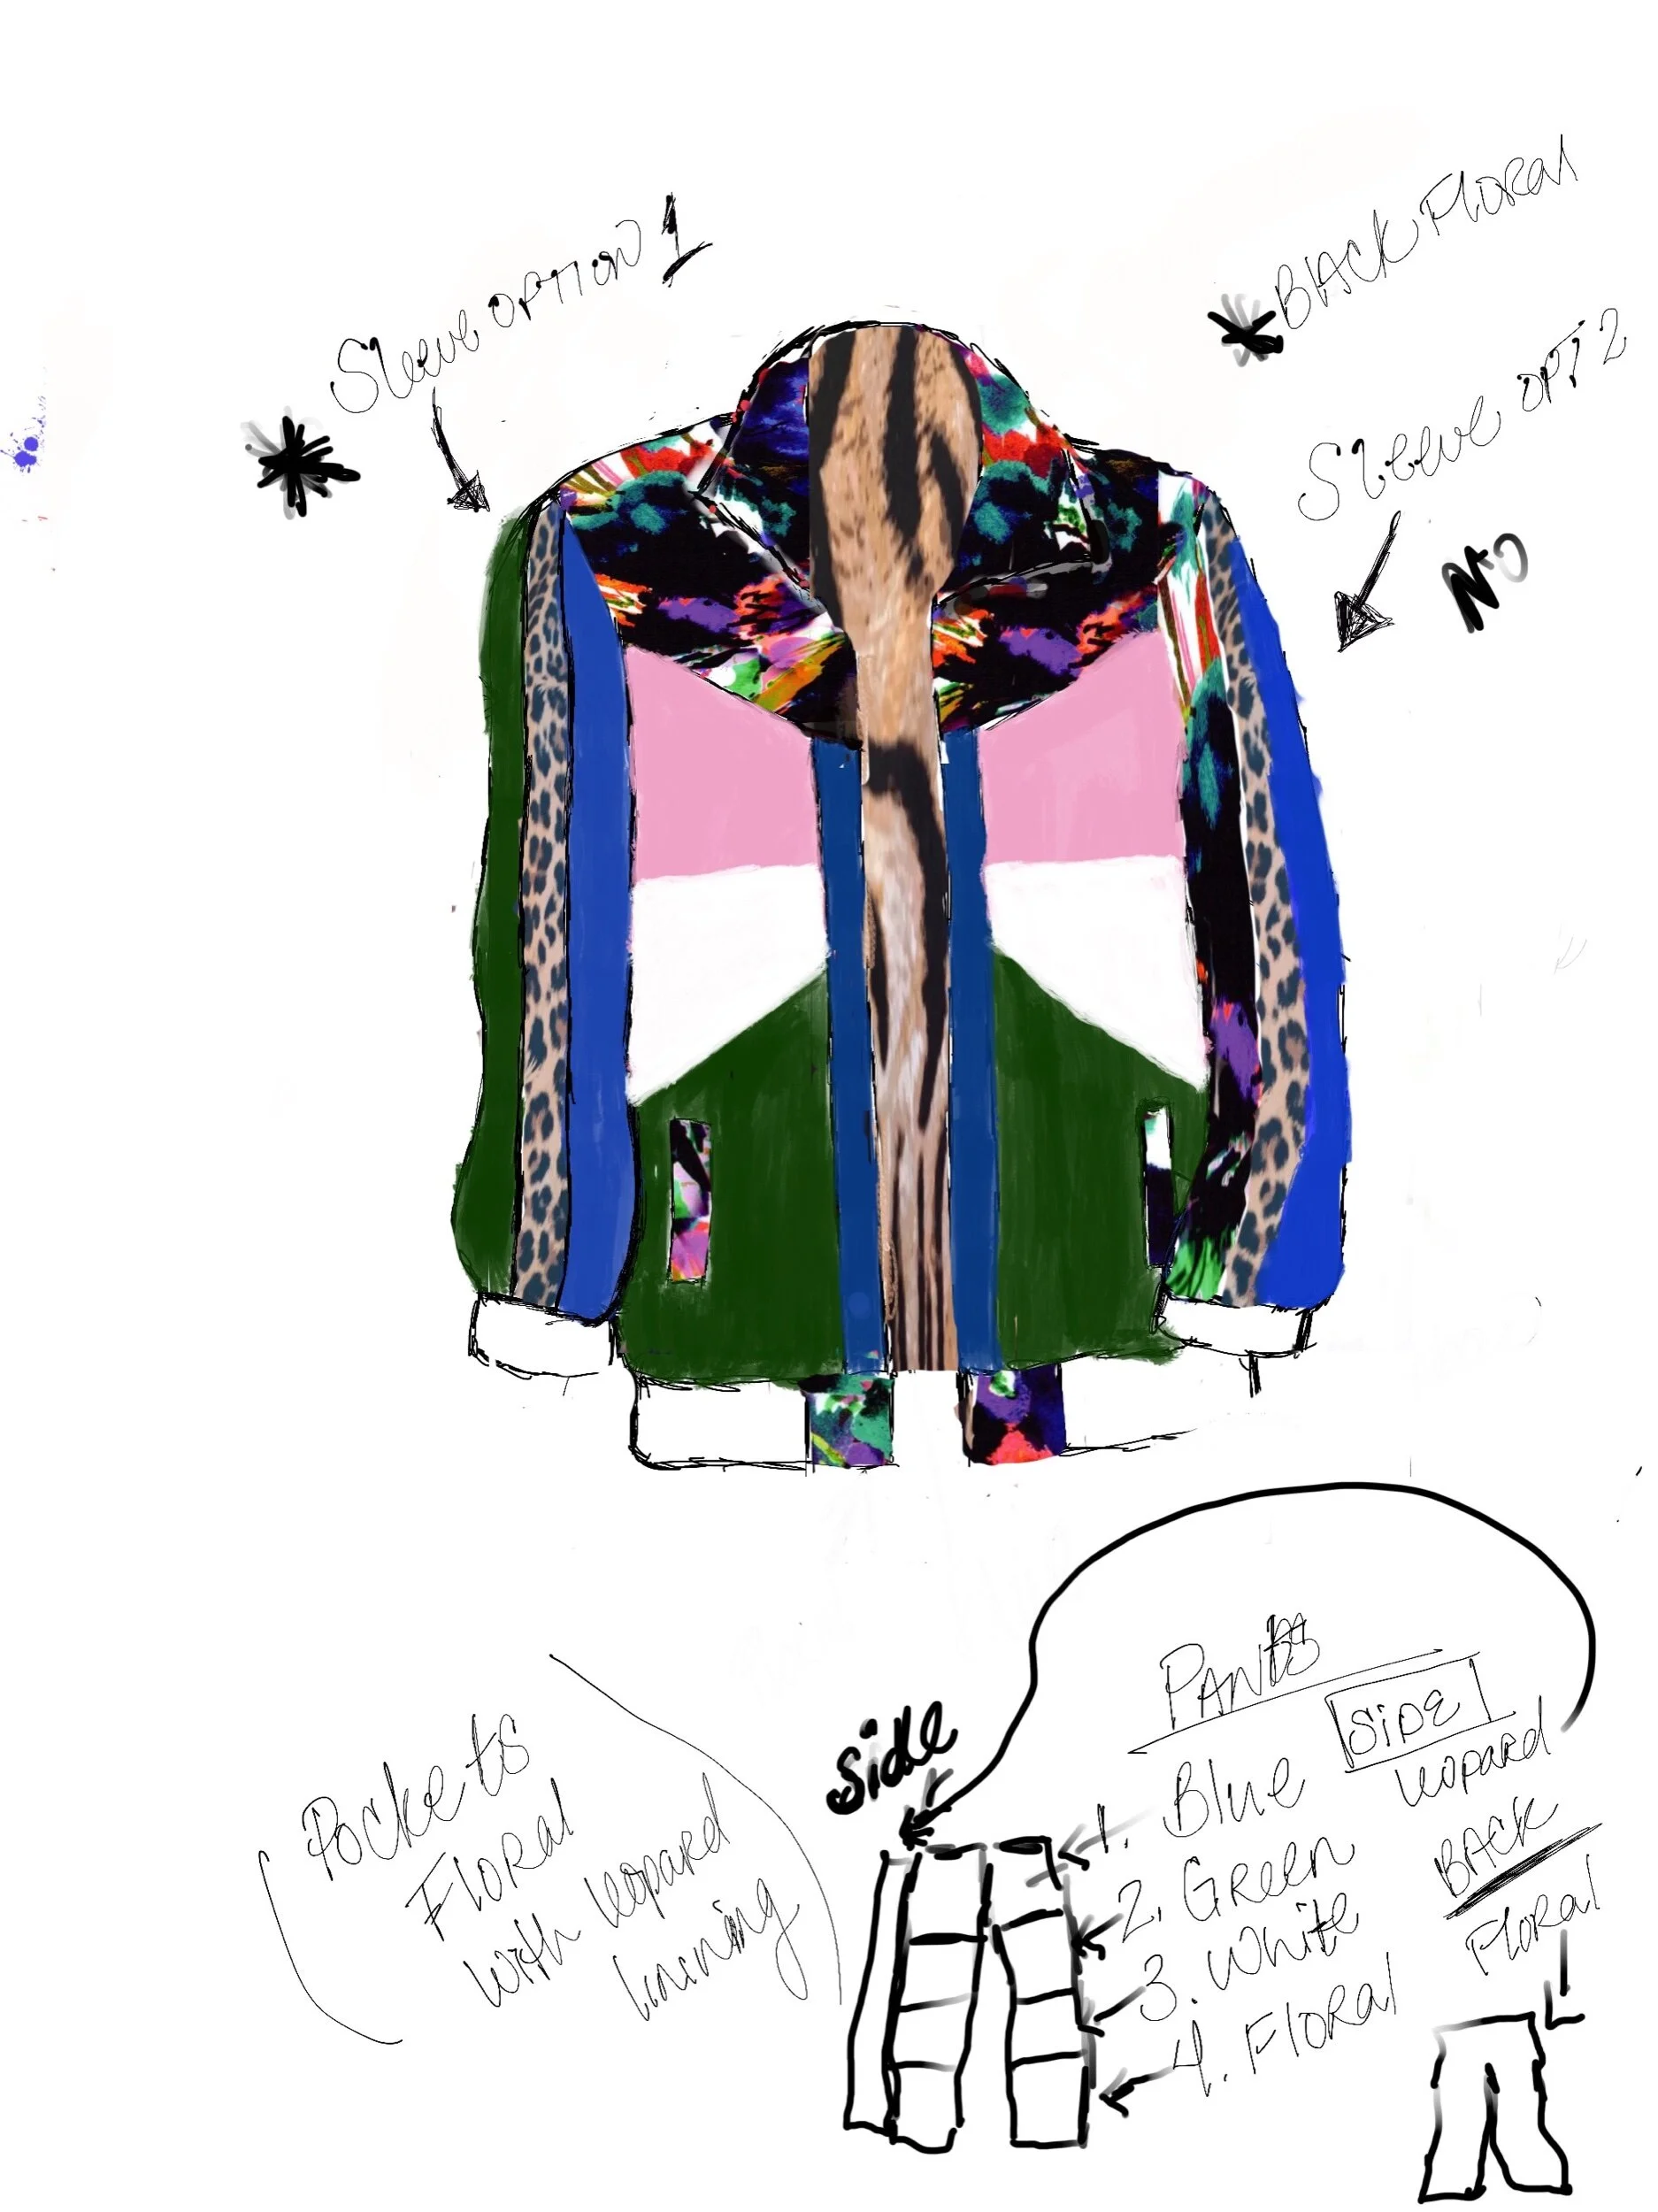
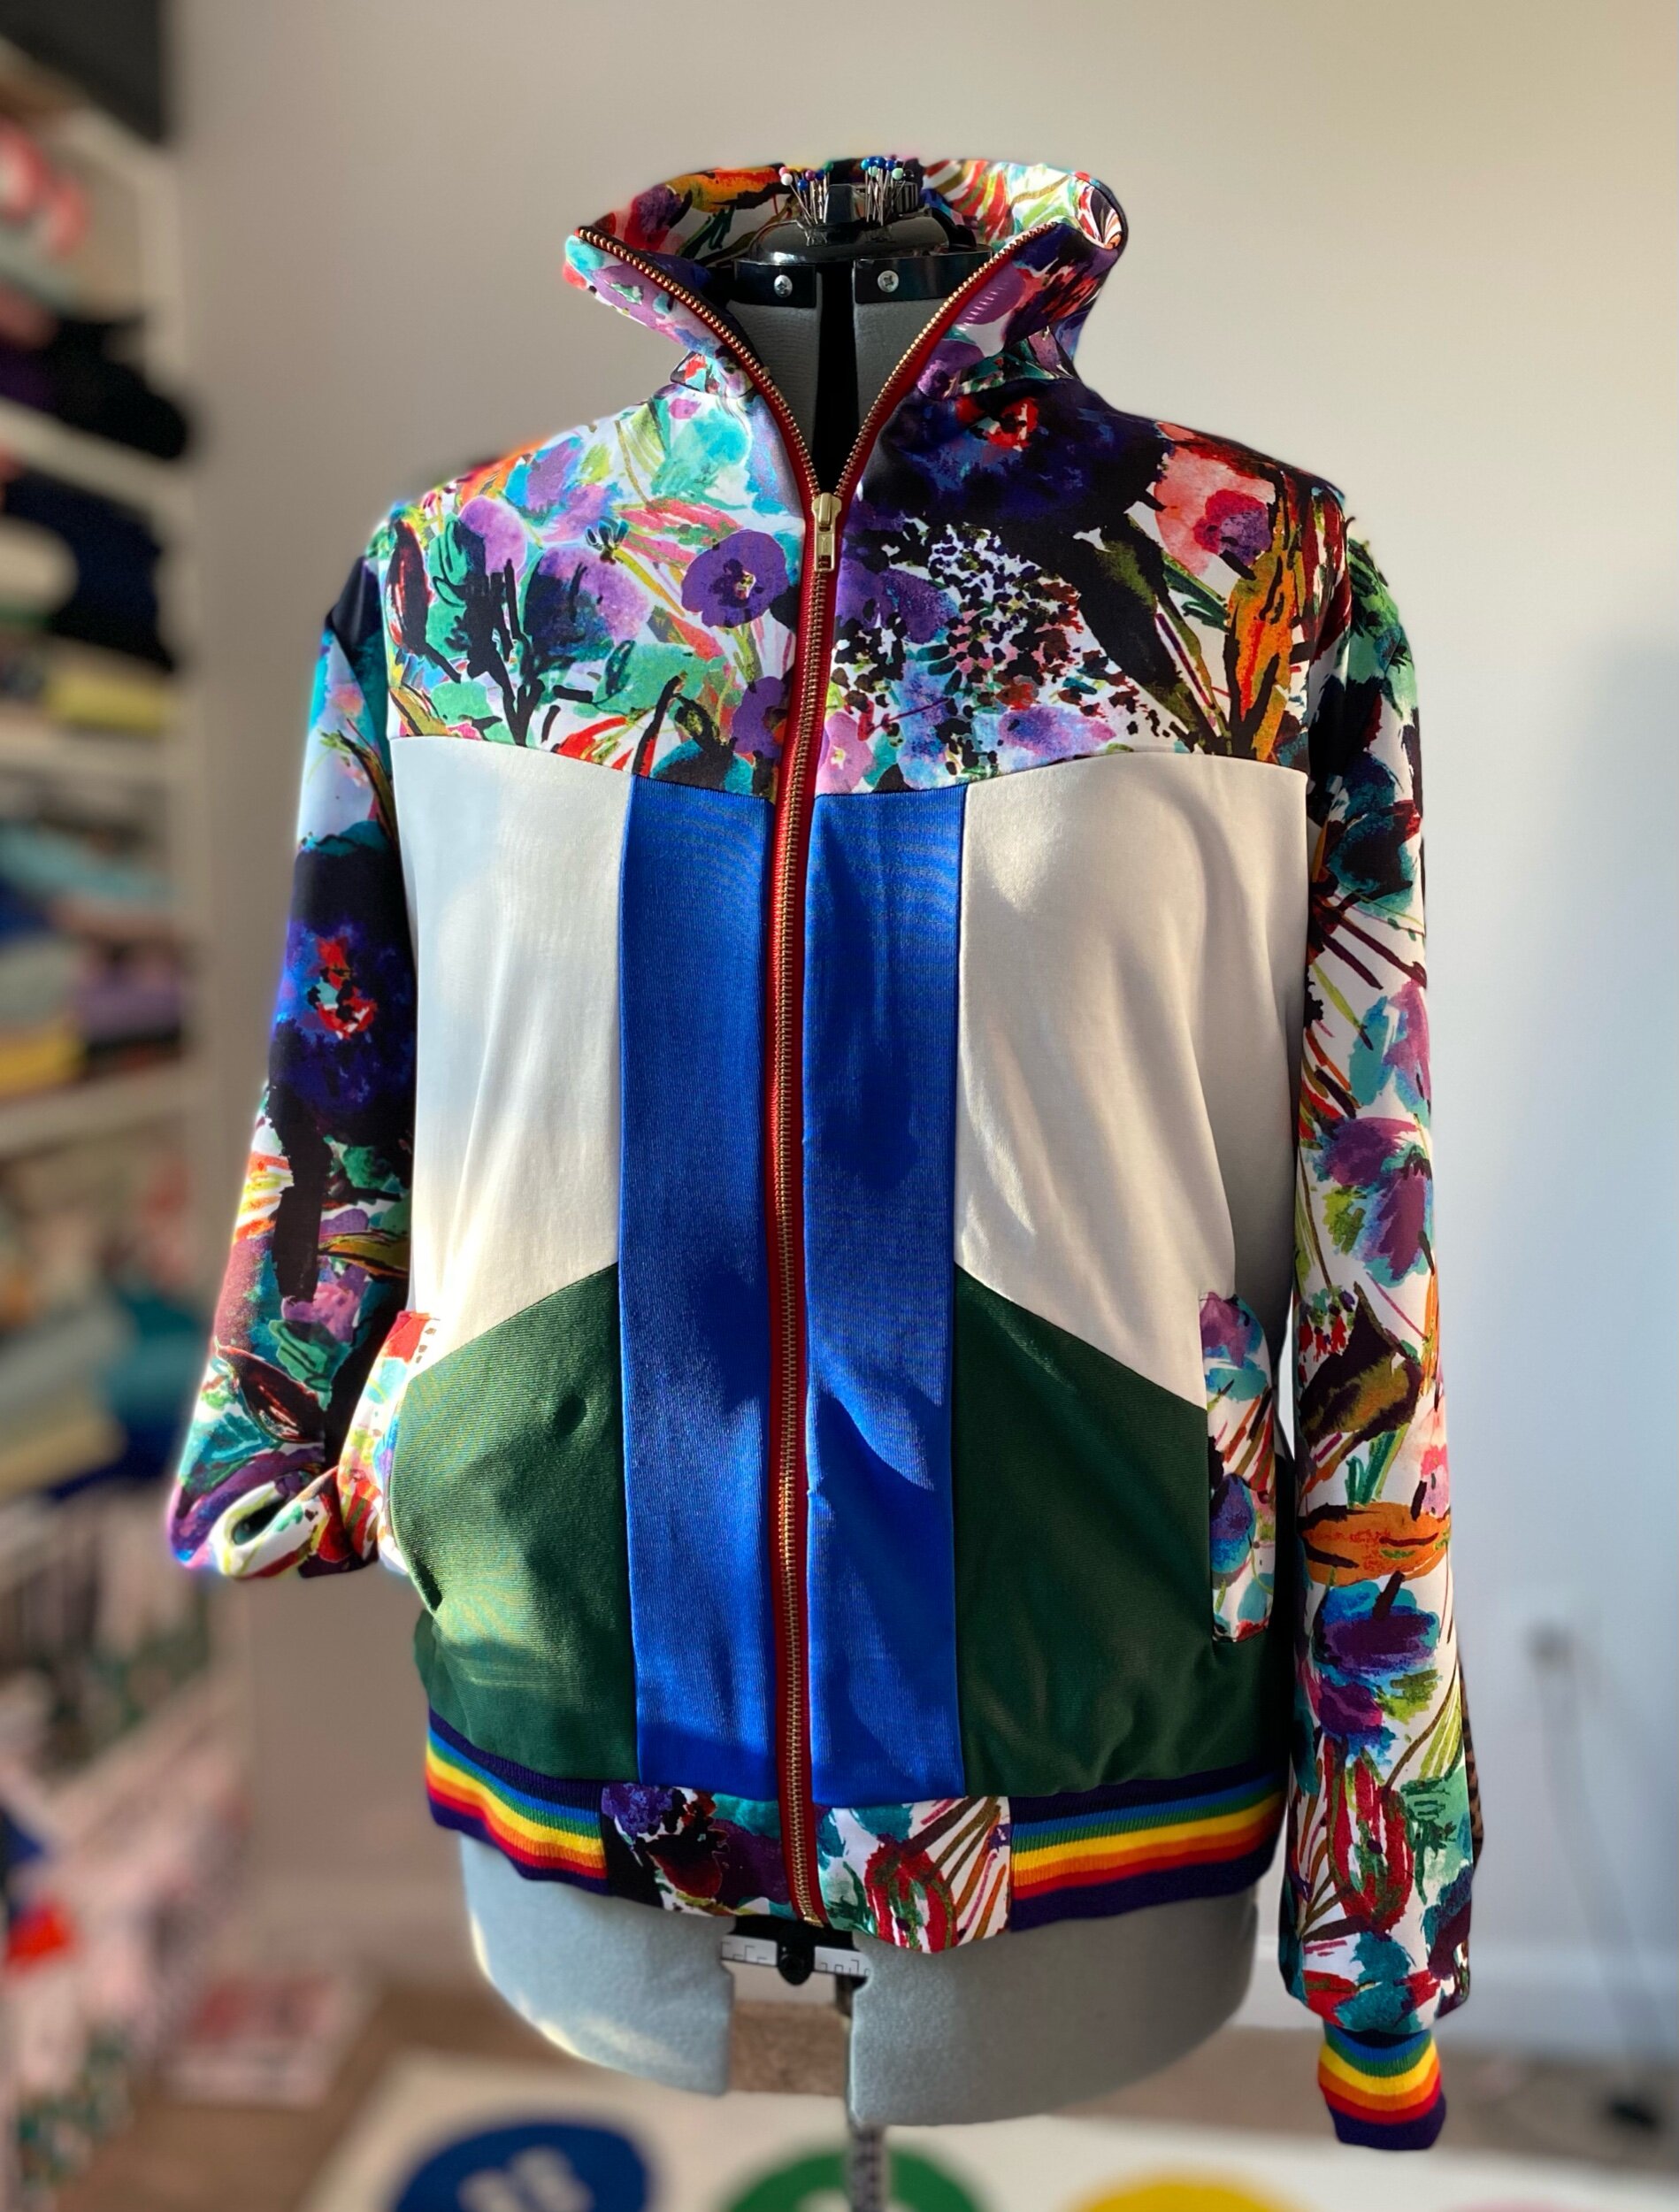
This project started with a sketch but before the sketch I saw an amazing designer named Prep Curry rockin his custom floral jogger set and I knew I had to make one for myself. So I shopped my stash and found floral, green, blue, and white fabric. I have had all these fabrics for a few years now and finally found something to create with them. I sketched out the jacket late last year and just never got around to sewing it up. Most of my ideas for contrasting fabrics arise because I simply don’t have enough fabric to make an entire garment so I think of ways to spice it up. This was the case with the floral print. When I purchased it, I had no idea what I was going to make and when it came time to create I couldn’t find the fabric anywhere (I looked for about 1 day total lol). So I had about 2 yards of the floral fabric and based my sketch off of that. Initially, I didn’t think I had enough floral to add to the sleeves but I’m so happy I was able to squeeze it in. As for my solid color fabrics, I had plenty for this project so I wasn’t playing Tetris. My initial design I added a pink contrast but when I went shopping for this shade I didn’t find the perfect fabric at local stores so I just scratched pink off my design. I also didn’t want to spend much on this project.
I’m often asked how do I come up with contrasting looks, mixing colors, and prints? Well sometimes it’s really me just making what I already have work. Other times I actually plan out color palettes and design and source from there. I really just like to have fun with colors and prints and don’t like following rules.
Let’s Sew
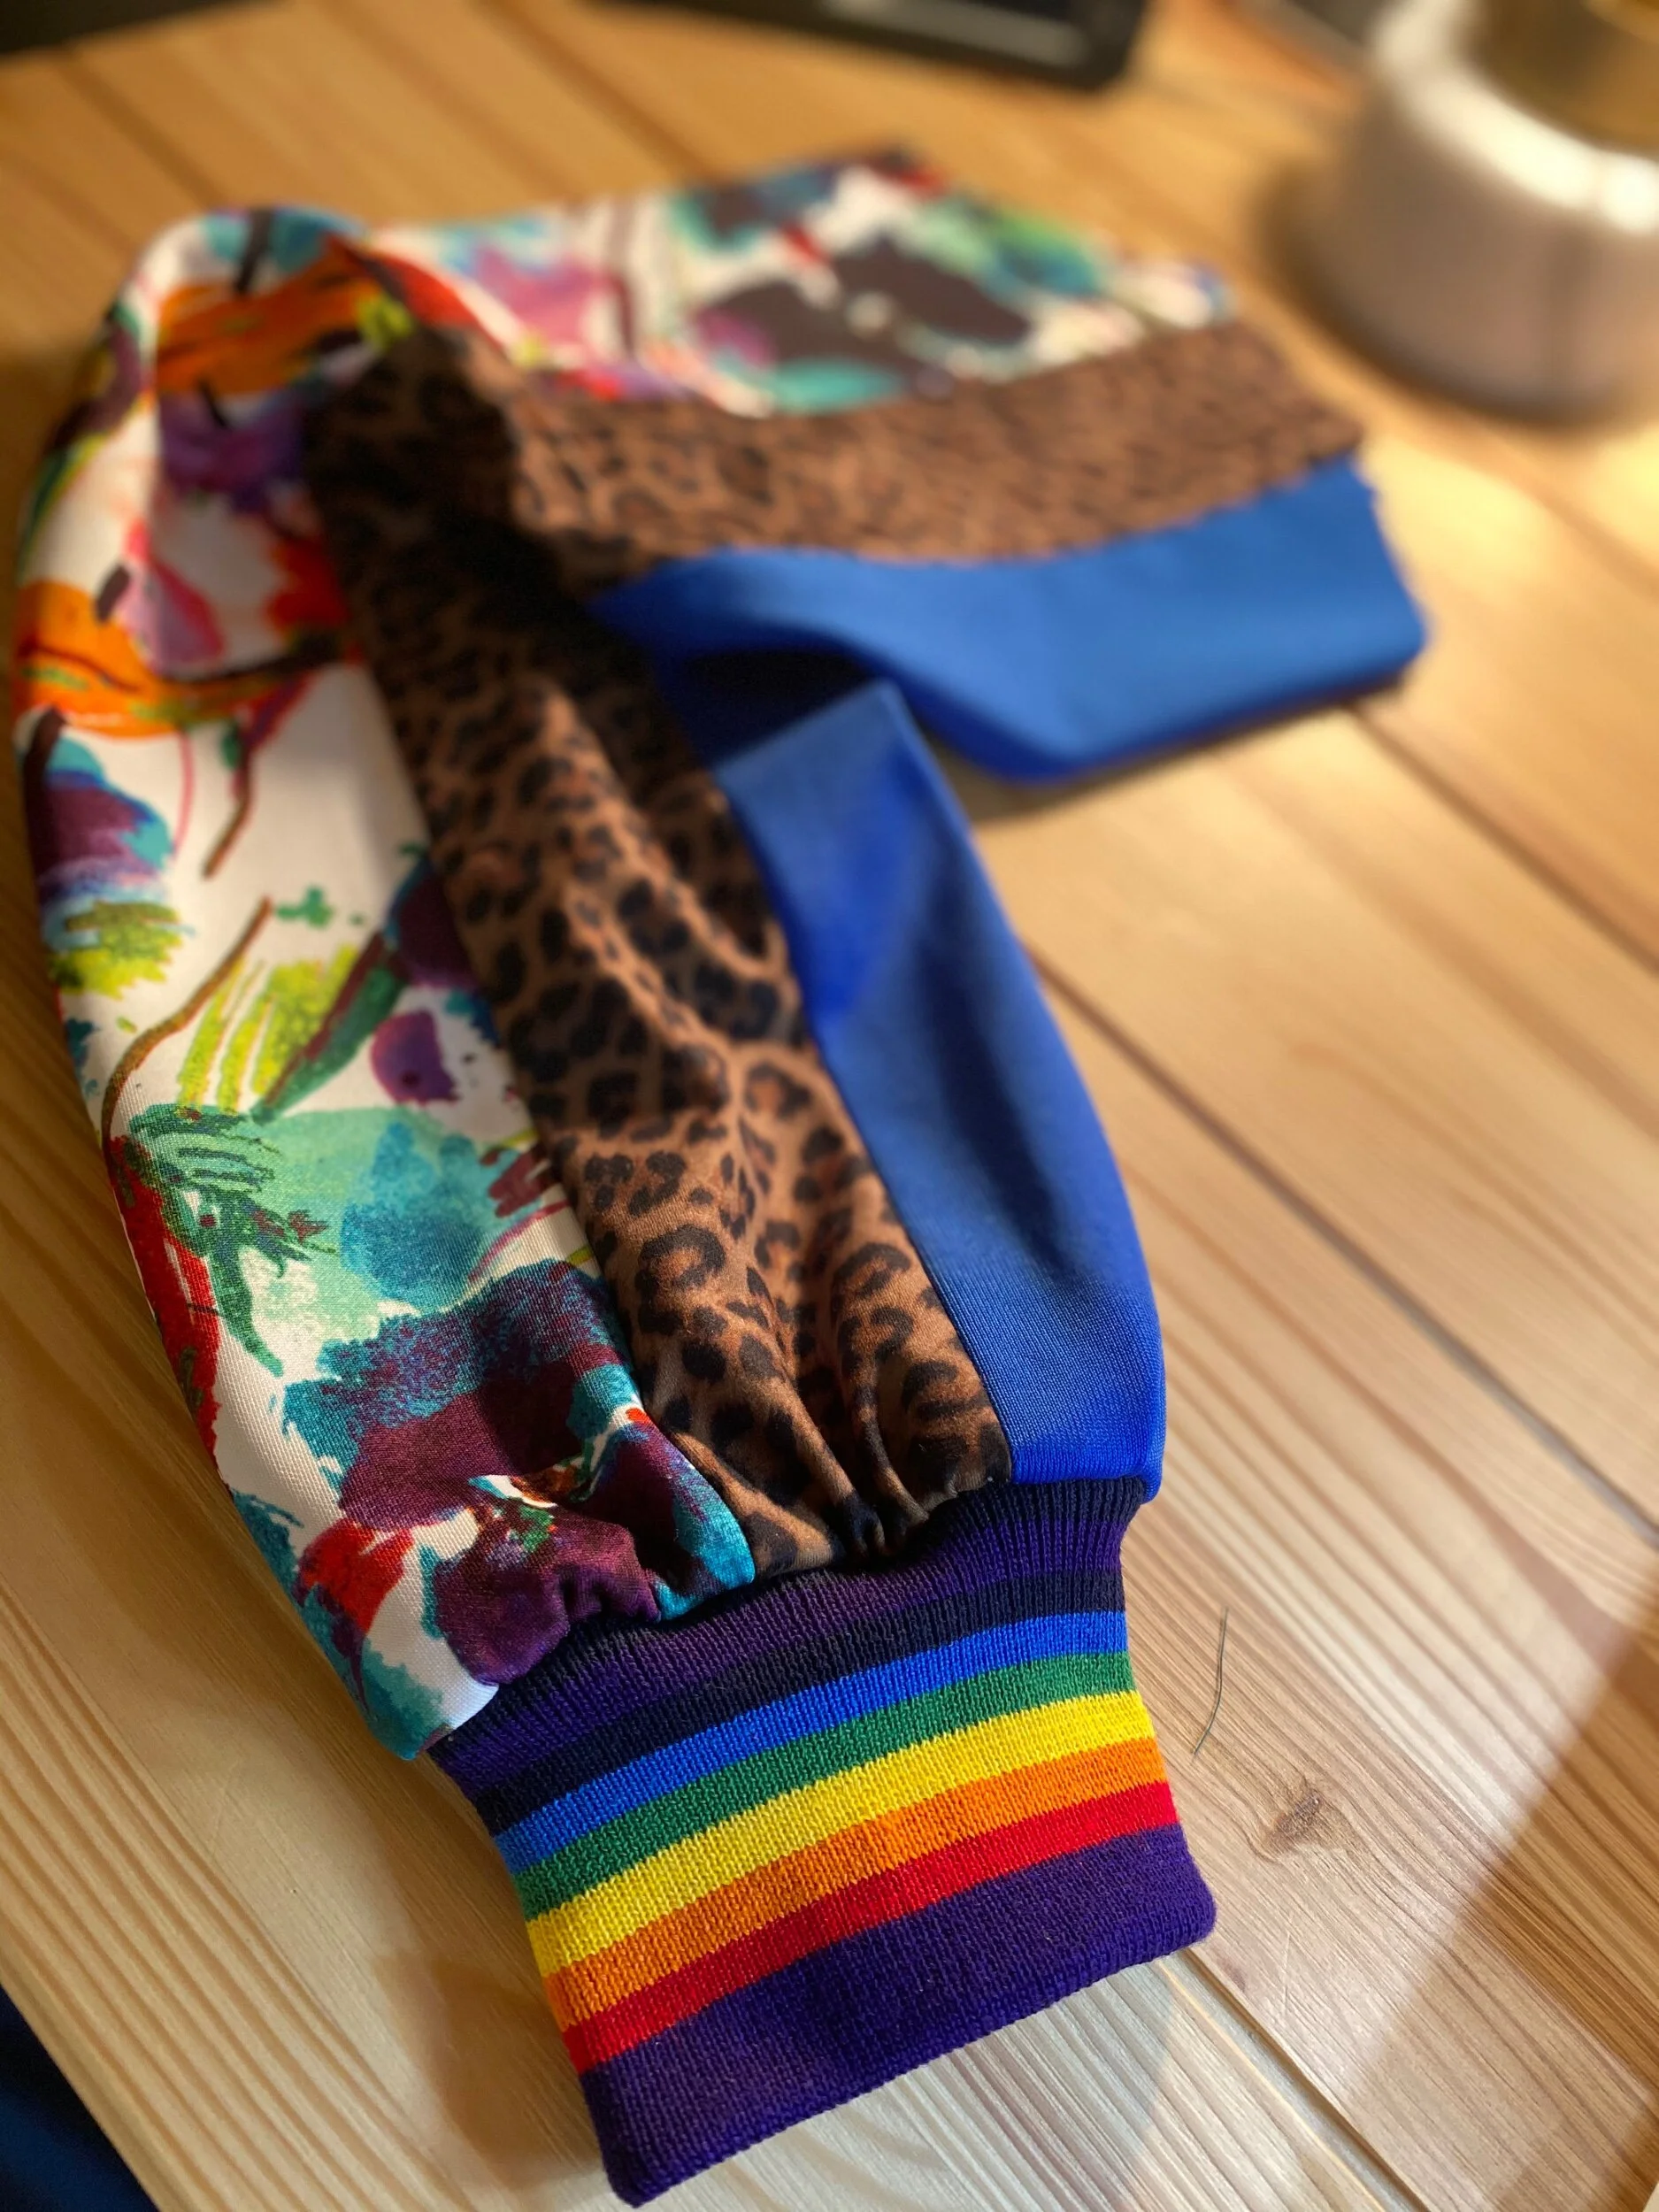
I used Mimi G’s Simplicity pattern 8702 for both the pants and the bomber jacket. I switched up the design in the front for the jacket a bit by cutting and taping pattern pieces in the direction I wanted for each contrast. When doing this type of hack, be sure to add or subtract seem allowance where necessary. It takes a little more time but the outcome is worth it. I shared some of this process for the pants contrast on my Instagram IGTV video here! I serged the side seems on the pants but I used a straight stitch for the contrast to help everything lay flat. The pants for this pattern are meant to be fitted and also have a zipper at the ankle. I went up a size because I wanted a slight loose fit and instead of the zipper on the ankle I added rainbow ribbed knit (purchased on Amazon).
Like majority of Mimi G’s simplicity patterns, there was a video tutorial for the entire set on YouTube. I have made this jogger set once before so I was confident sewing it for the second time.
The pattern doesn’t have pockets and ya girl needs pockets! So I added welt pockets to the bomber jacket. You could even add pockets to the pants. I personally found it easier to just add pockets to the jacket. I would’ve had to get a little more creative with pockets on the pants since the middle side section (animal print) is not perfectly centered for pocket placement on a seem. Whatever your preference, I say do you!

Welt pocket Install


POCKETS PLEASE!
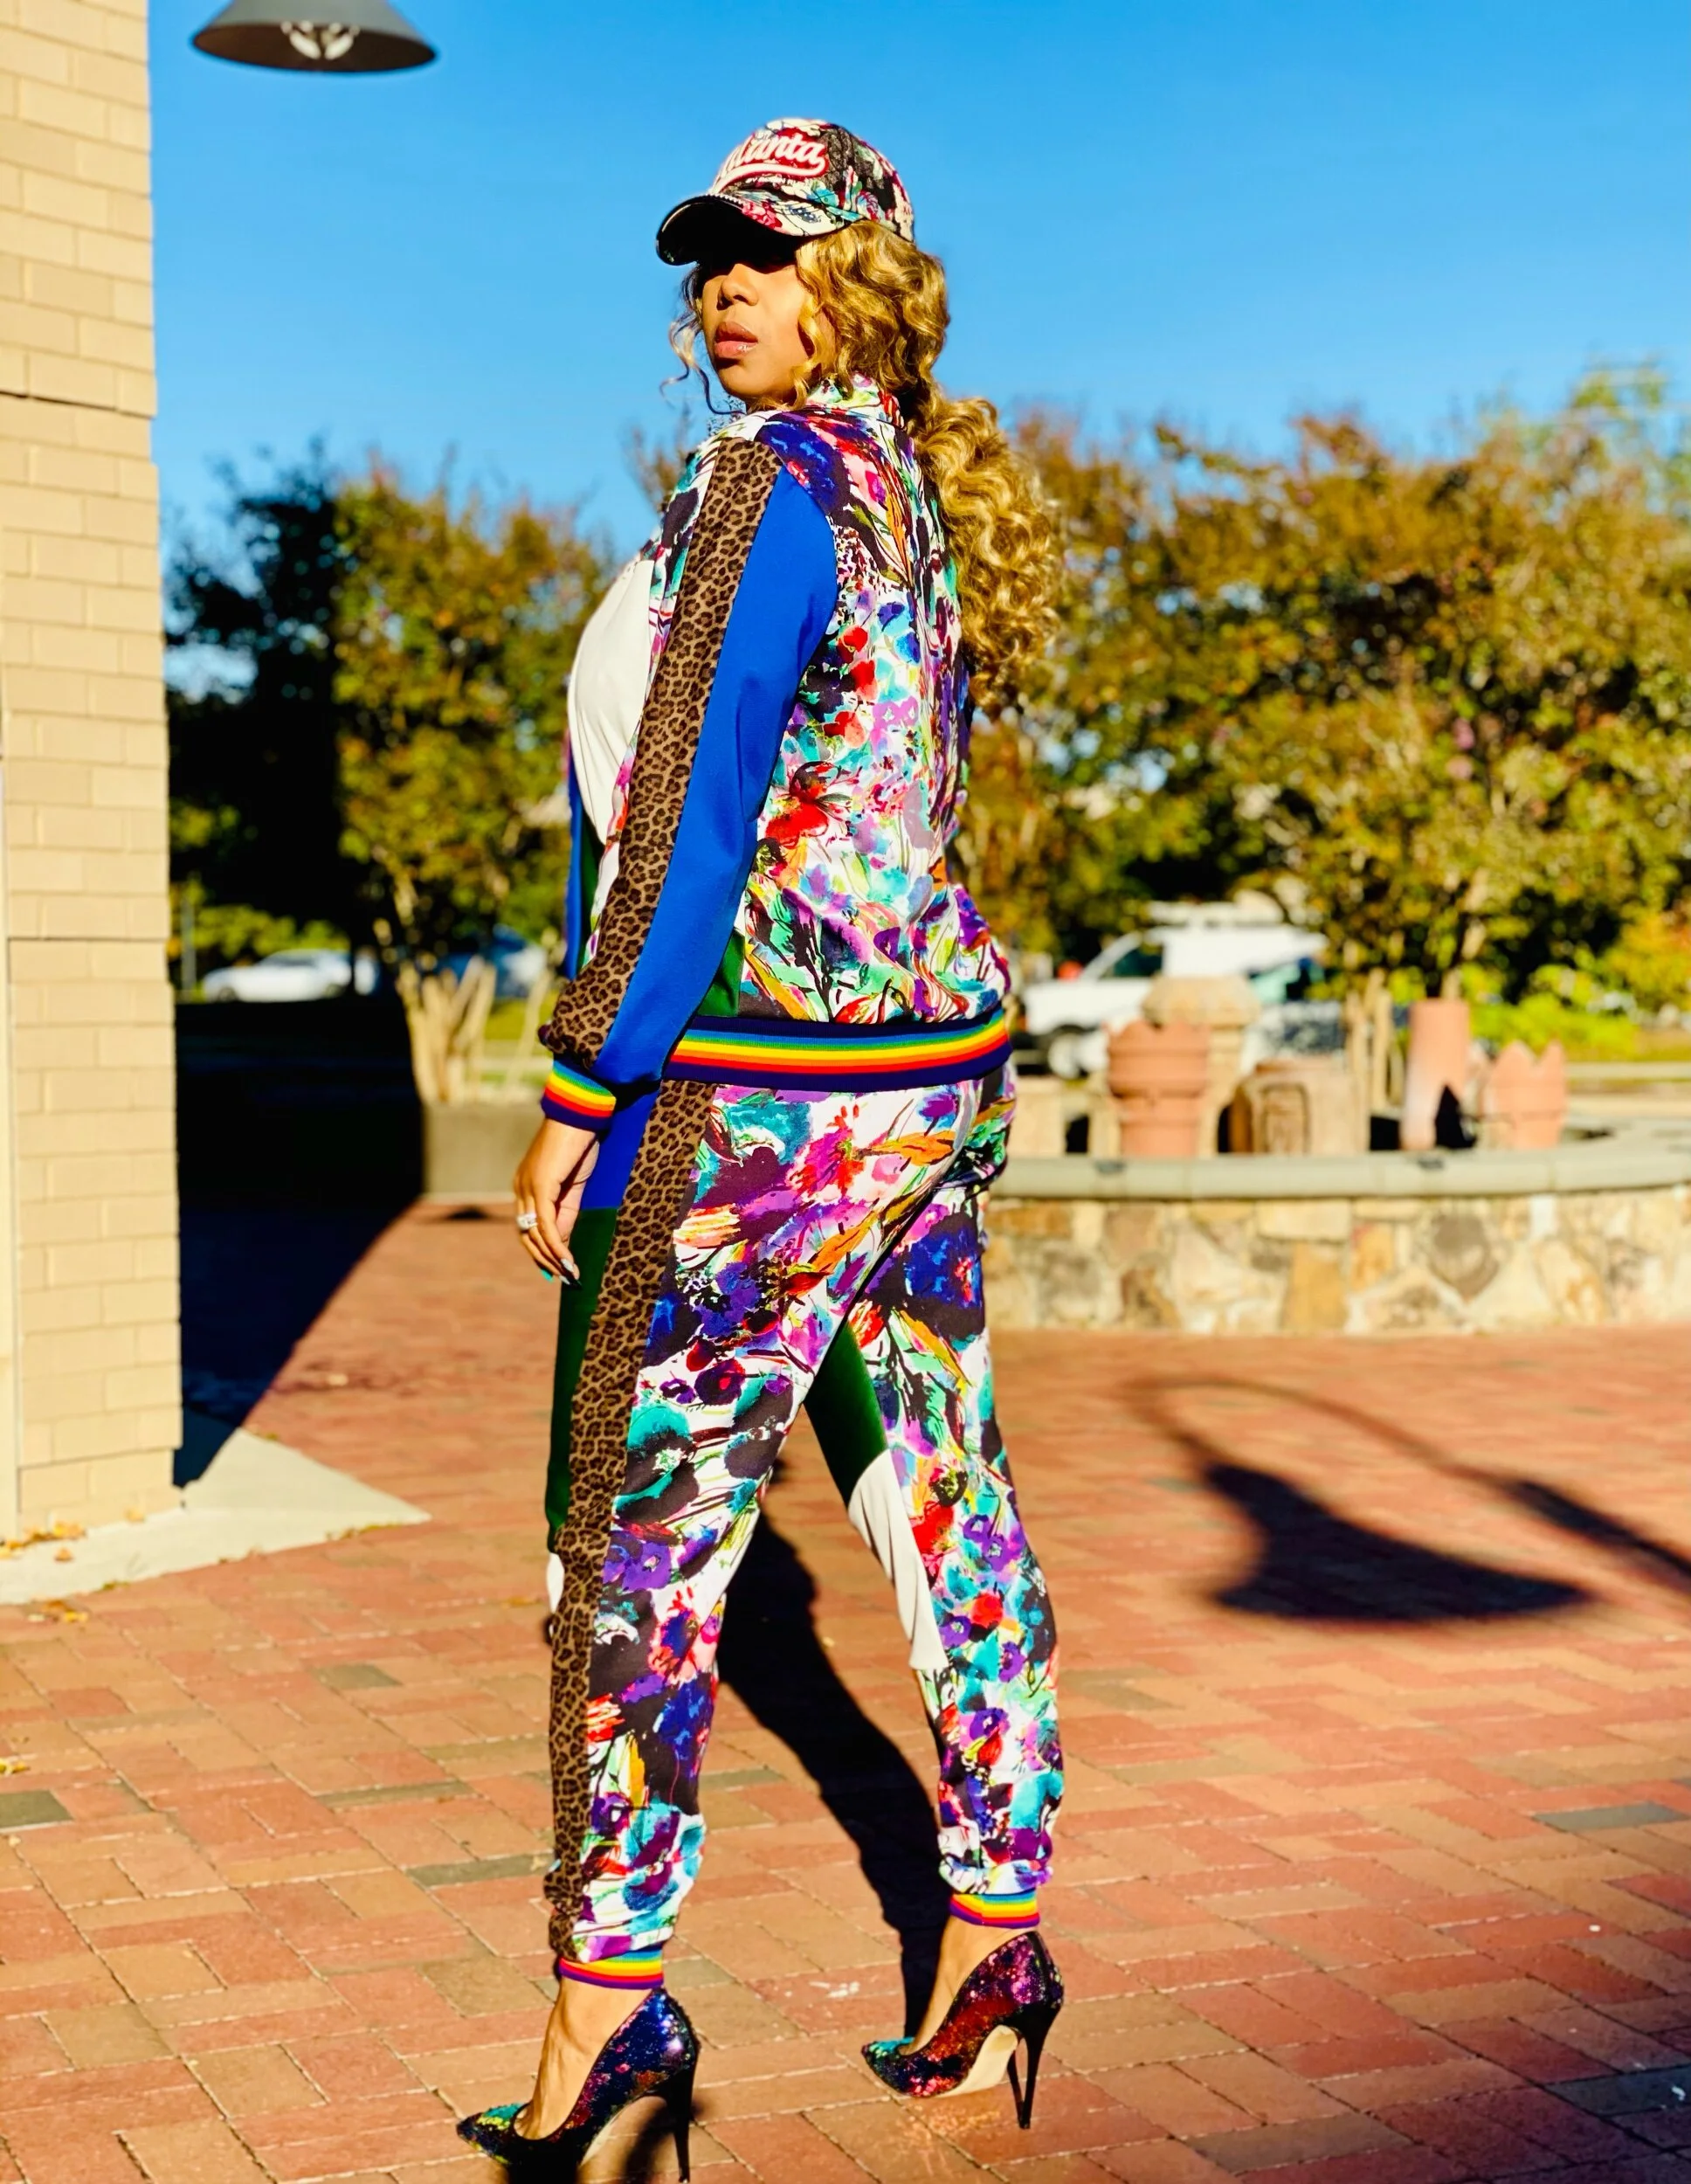


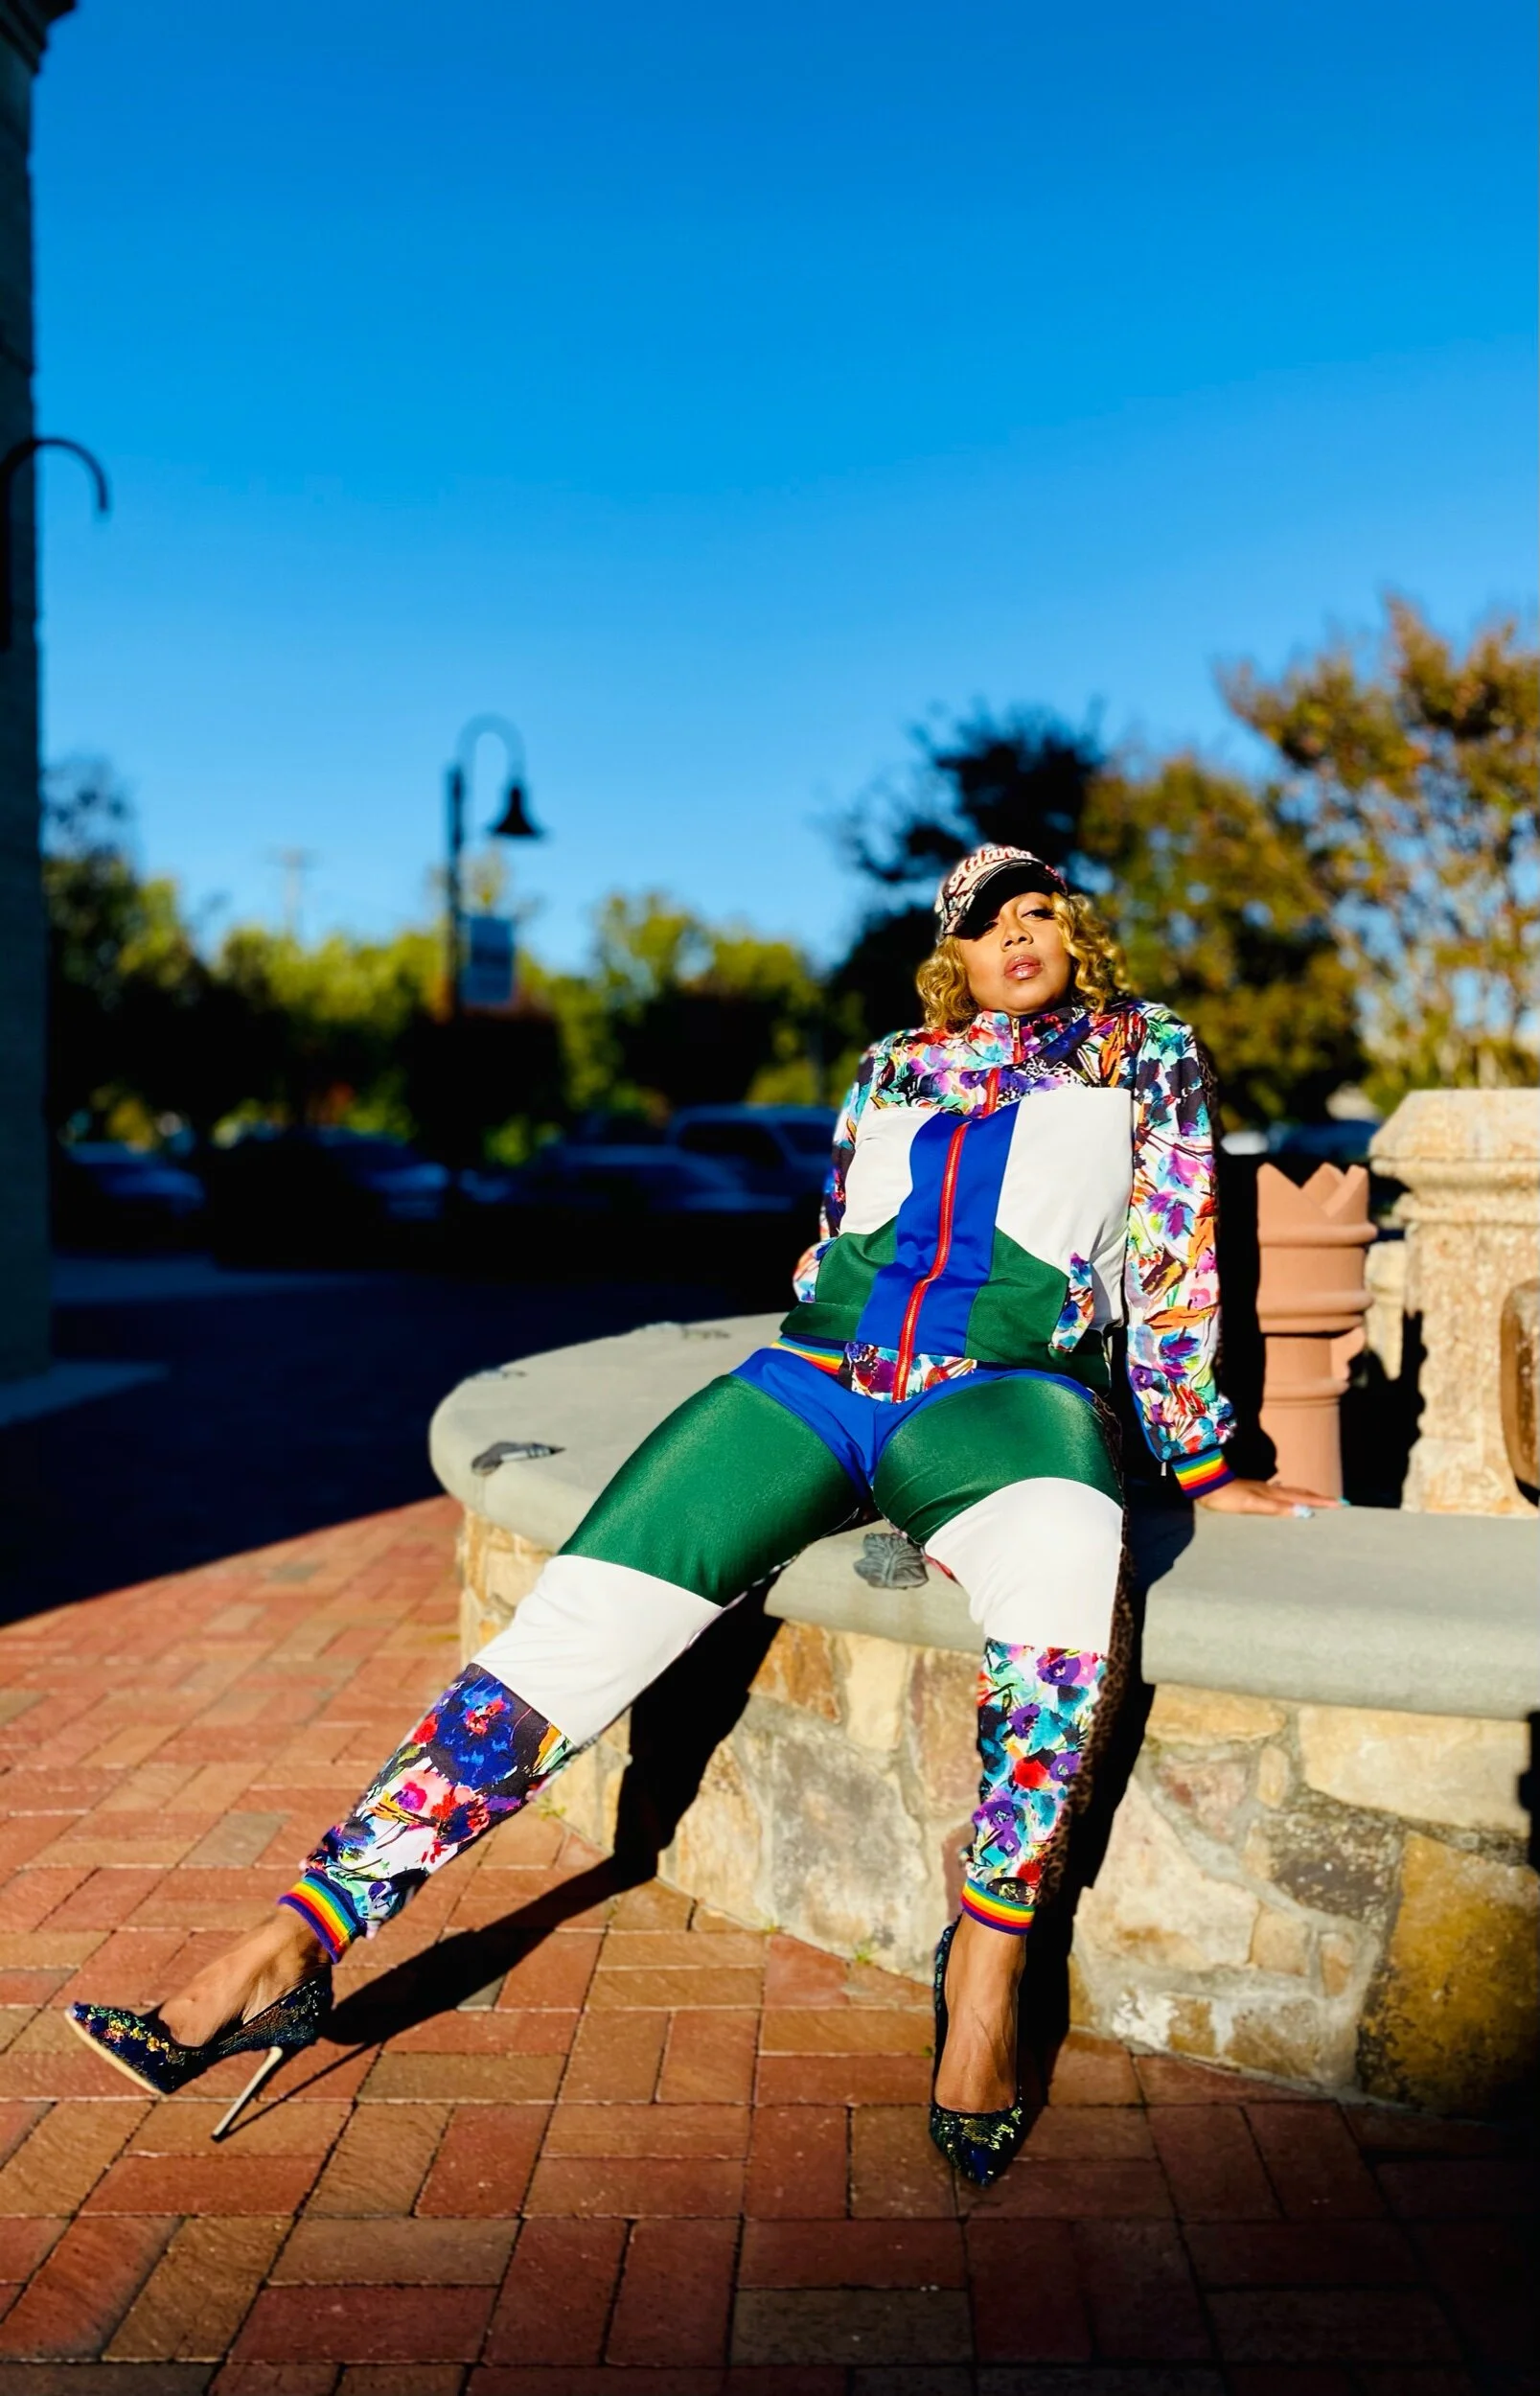
Overall I had so much fun creating this look! The lining gave me the pop I wanted on the inside and I will definitely keep warm wearing this through the winter.
Will I make it for a 3rd time? Absolutely! I feel this pattern can be beginner friendly as long as you don’t get too intimidated by the zippers and follow along with Mimi. I hope you all enjoyed this creation. Tell me what you think below. I’d love to hear from you.
Until next time
Peace & Blessings

Pink palm Wilder
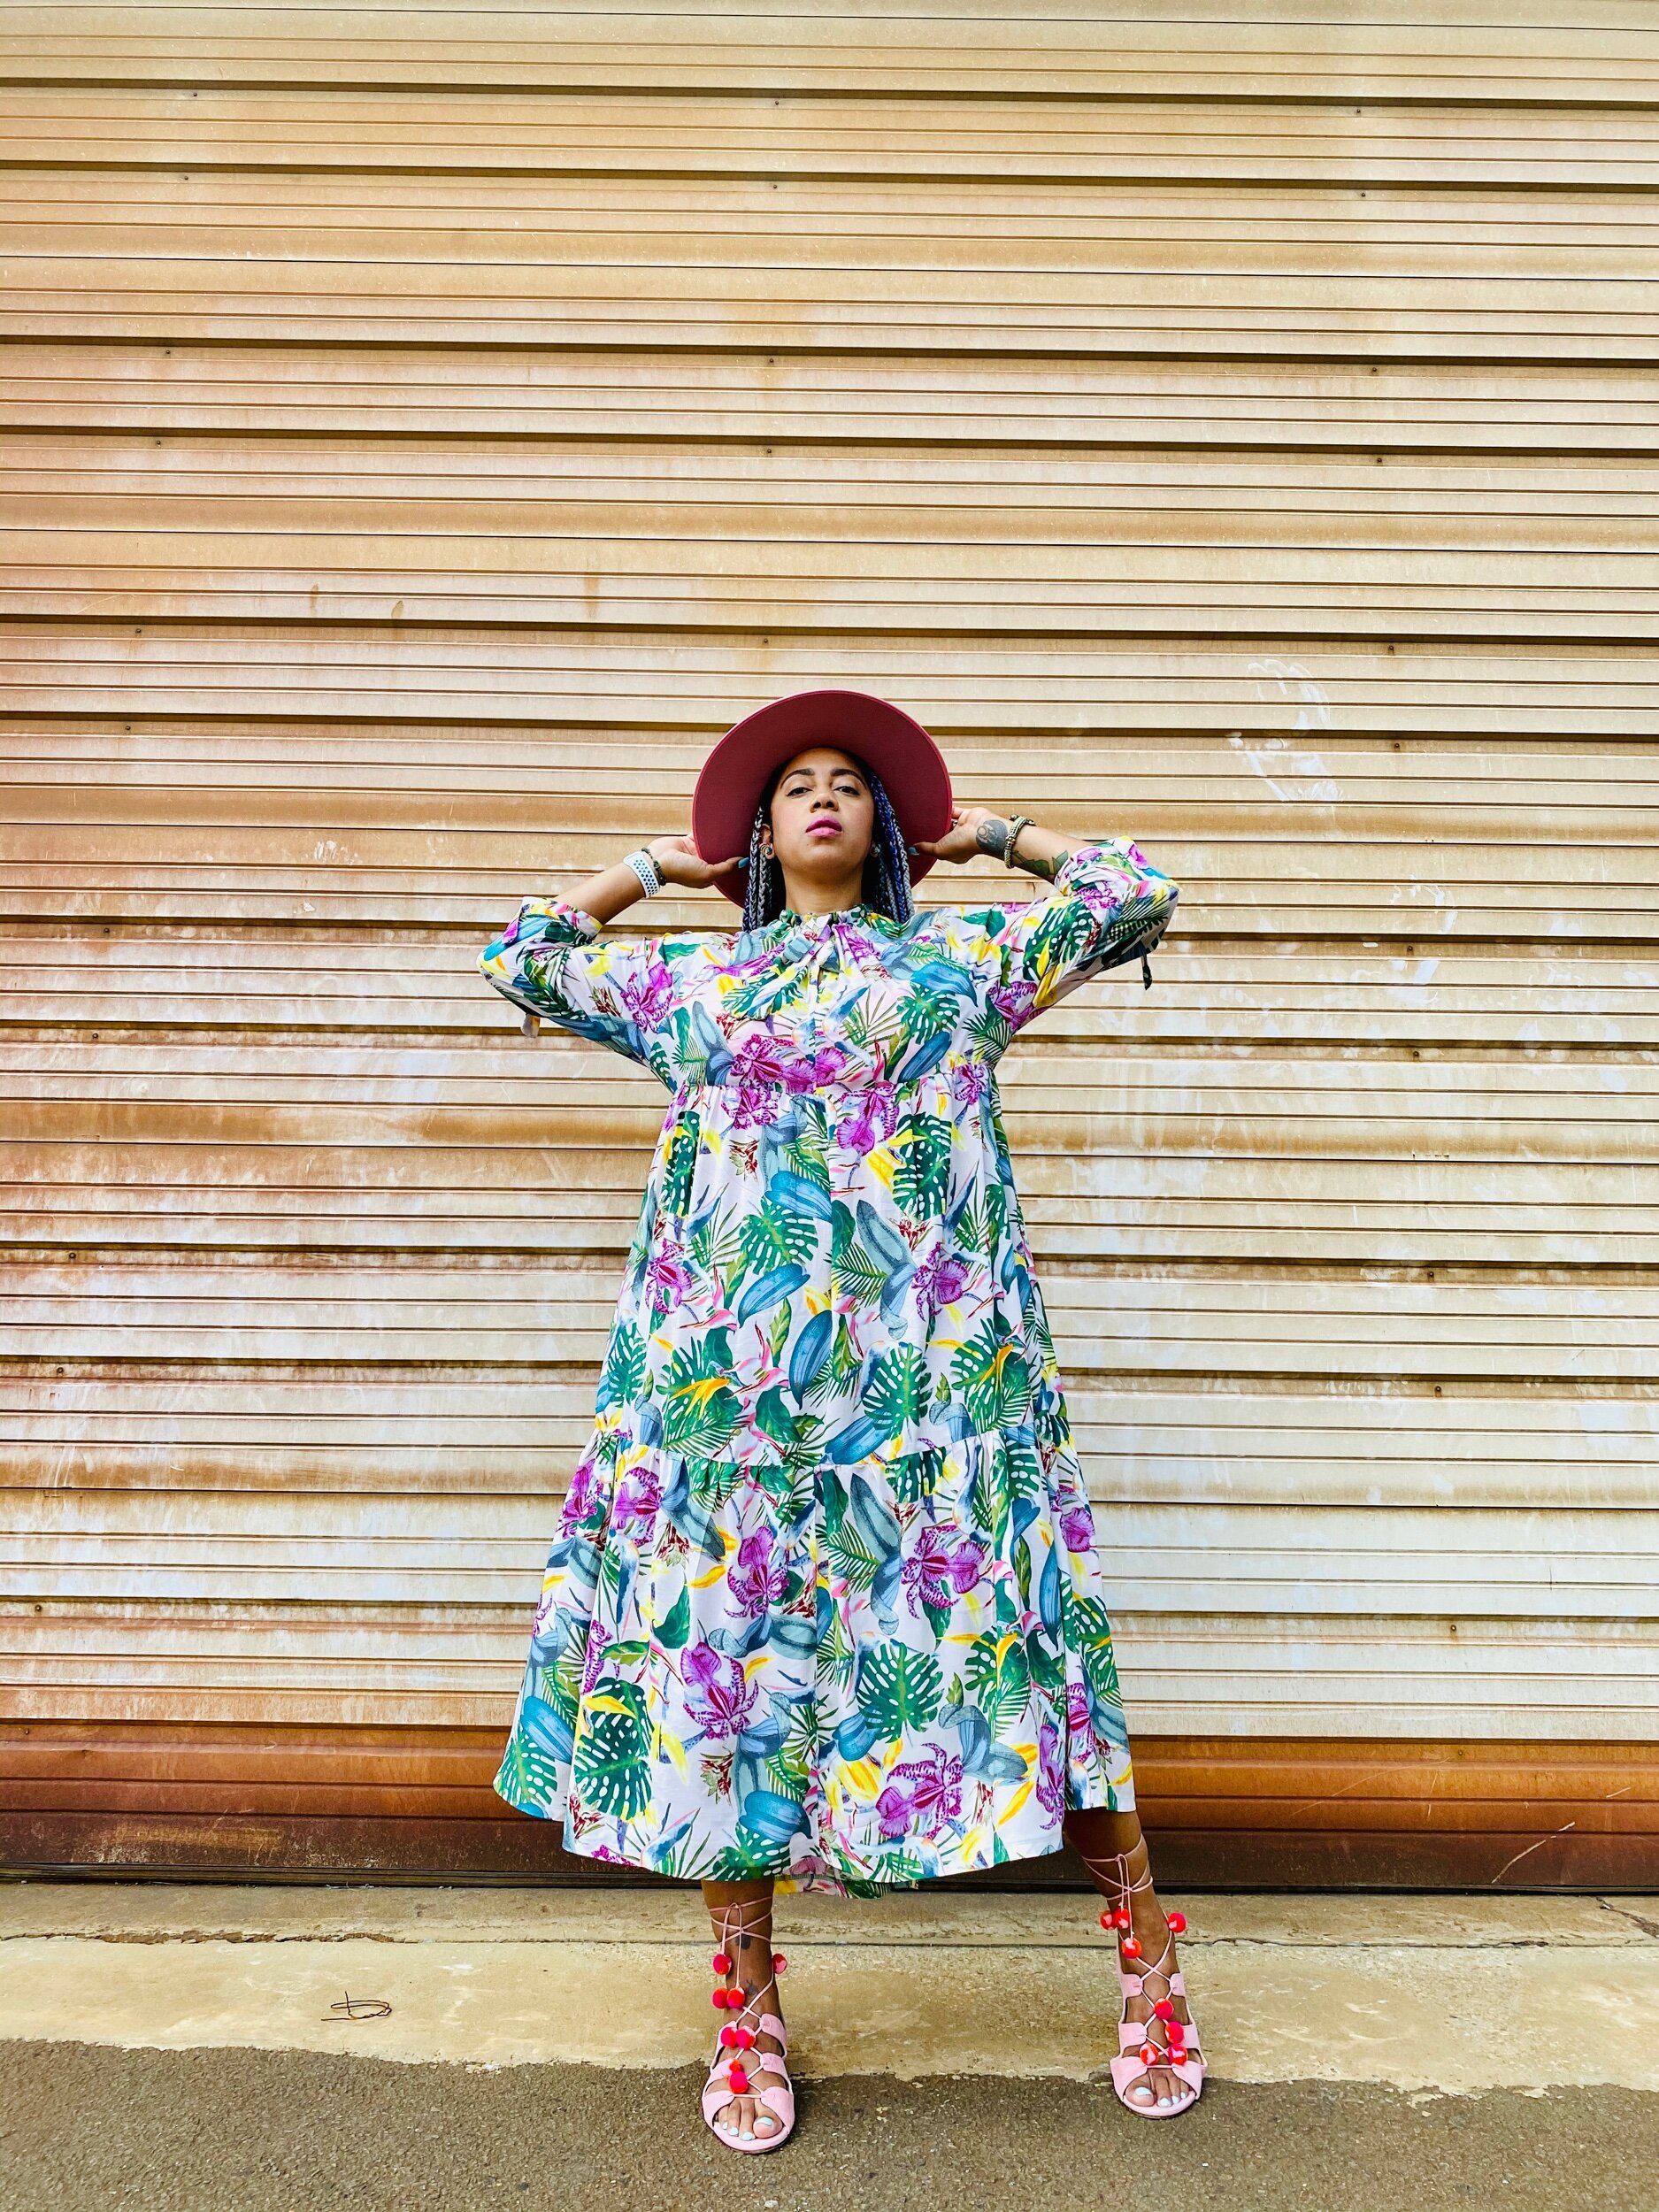
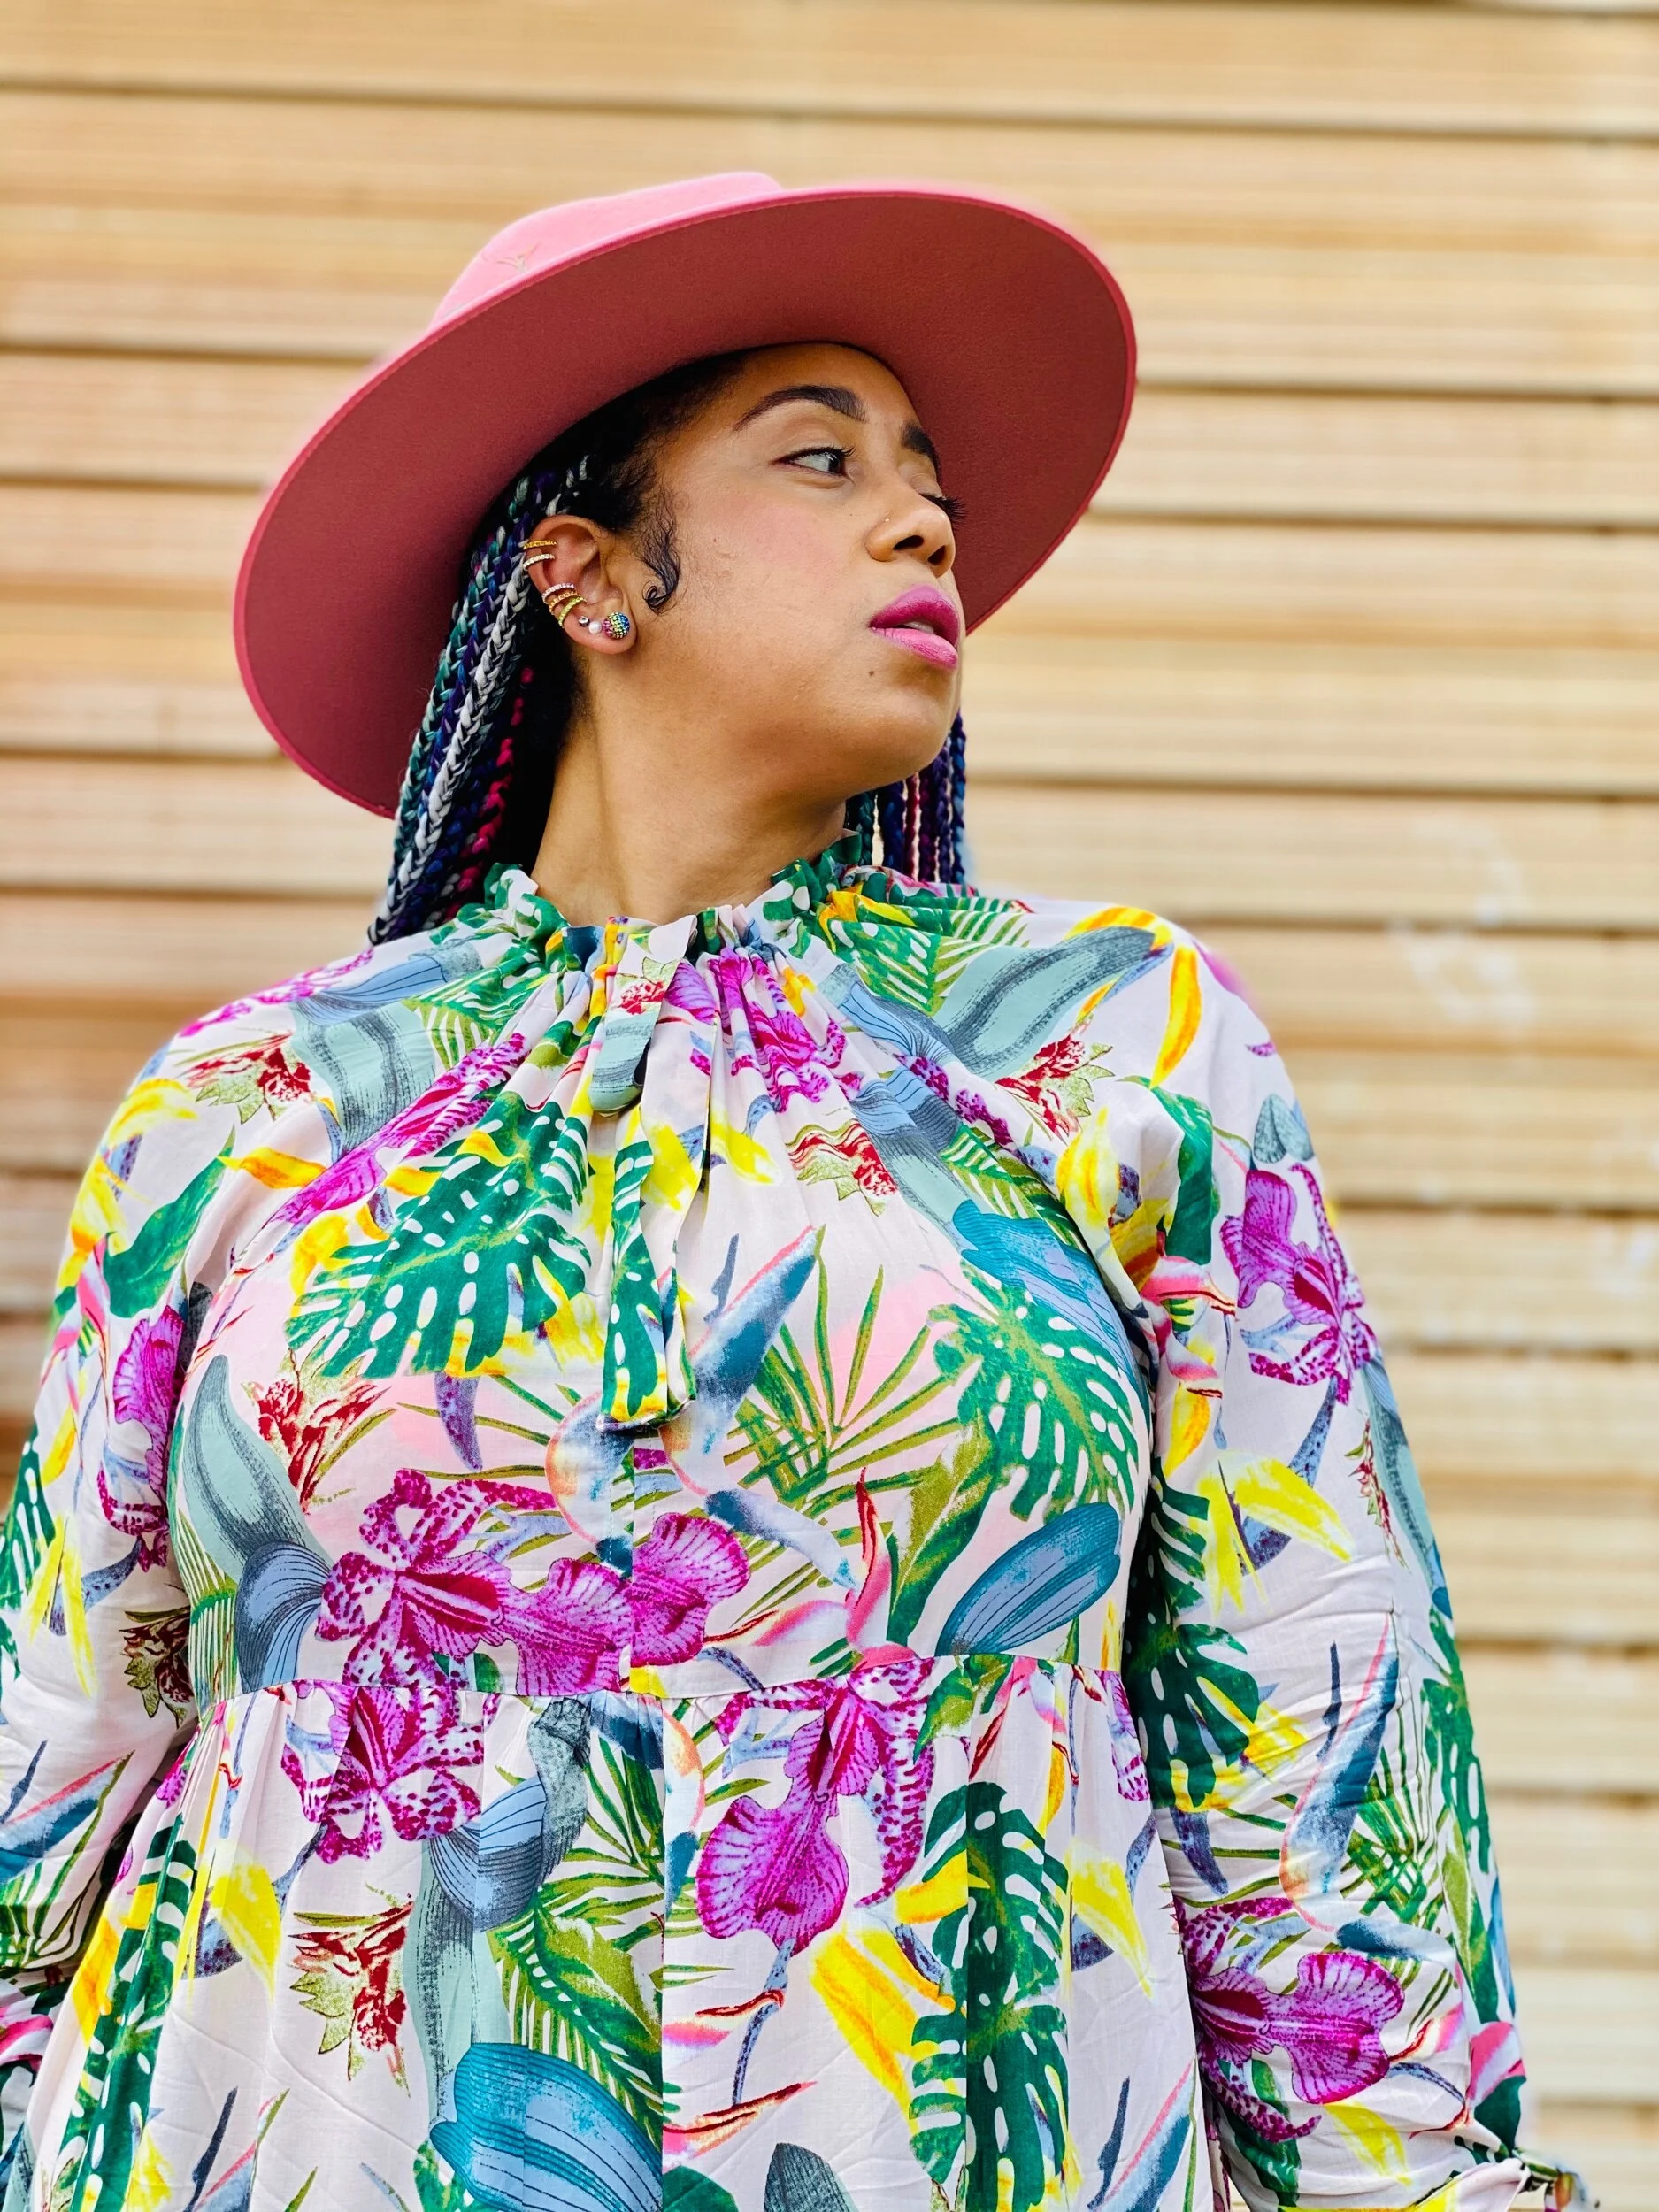
Pink Palm Wilder

Summer is always on my mind and this summer has definitely brought the heat! I fell into a rabbit hole of florals while searching for a very special Telio fabric print. That’s when I learned that Fabricdotcom offers Telio fabrics.
I just celebrated my 37th BEarthday and I went on a bit of a fabric shopping spree to treat myself. So I purchased 2 Telio prints and 4 solid linen fabrics from Fabricdotcom. You can check out this haul on my IGTV here.
The Friday Pattern company released the Wilder Gown last year and I knew I needed to add it to my wardrobe. I purchased the pdf version of the pattern and decided to use my lightweight pink palm Telio fabric for the Wilder. This rayon fabric is so soft and the colors are so vibrant.
Construction
For this project I had to pull out my straight stitch plate. I love using my straight stitch plate for very delicate fabrics to prevent fabric from going into the feed dog. I also make sure to change me needle. I love Schmetz Microtex needles as they are super sharp and don’t snag my fabric. Change your needles people!
This pattern was fairly quick and easy to make but I must add that the pdf version does not have the skirt portion attached to the print out but it does come with the download. So you can find it in your download purchase or measure out the skirt portion yourself. I choose to use their measurements and make my own. It’s really just a square rectangle cut out 5 times.
Because I am not about that muslin life, I went ahead and cut and stitched my dress. Here’s what I noticed; the bodice portion was fine for the girls and I loved where the seam hit under my bust until I tied the neck. Was it bad enough to do a bust adjustment? No, but for the next wilder I will add about an inch to the bodice length. This is something I normally do to some patterns in the bust because I’m a true DD. I must also mention that I love how the pattern already has the lines in place to make a full bust adjustment if needed. Okay okay!
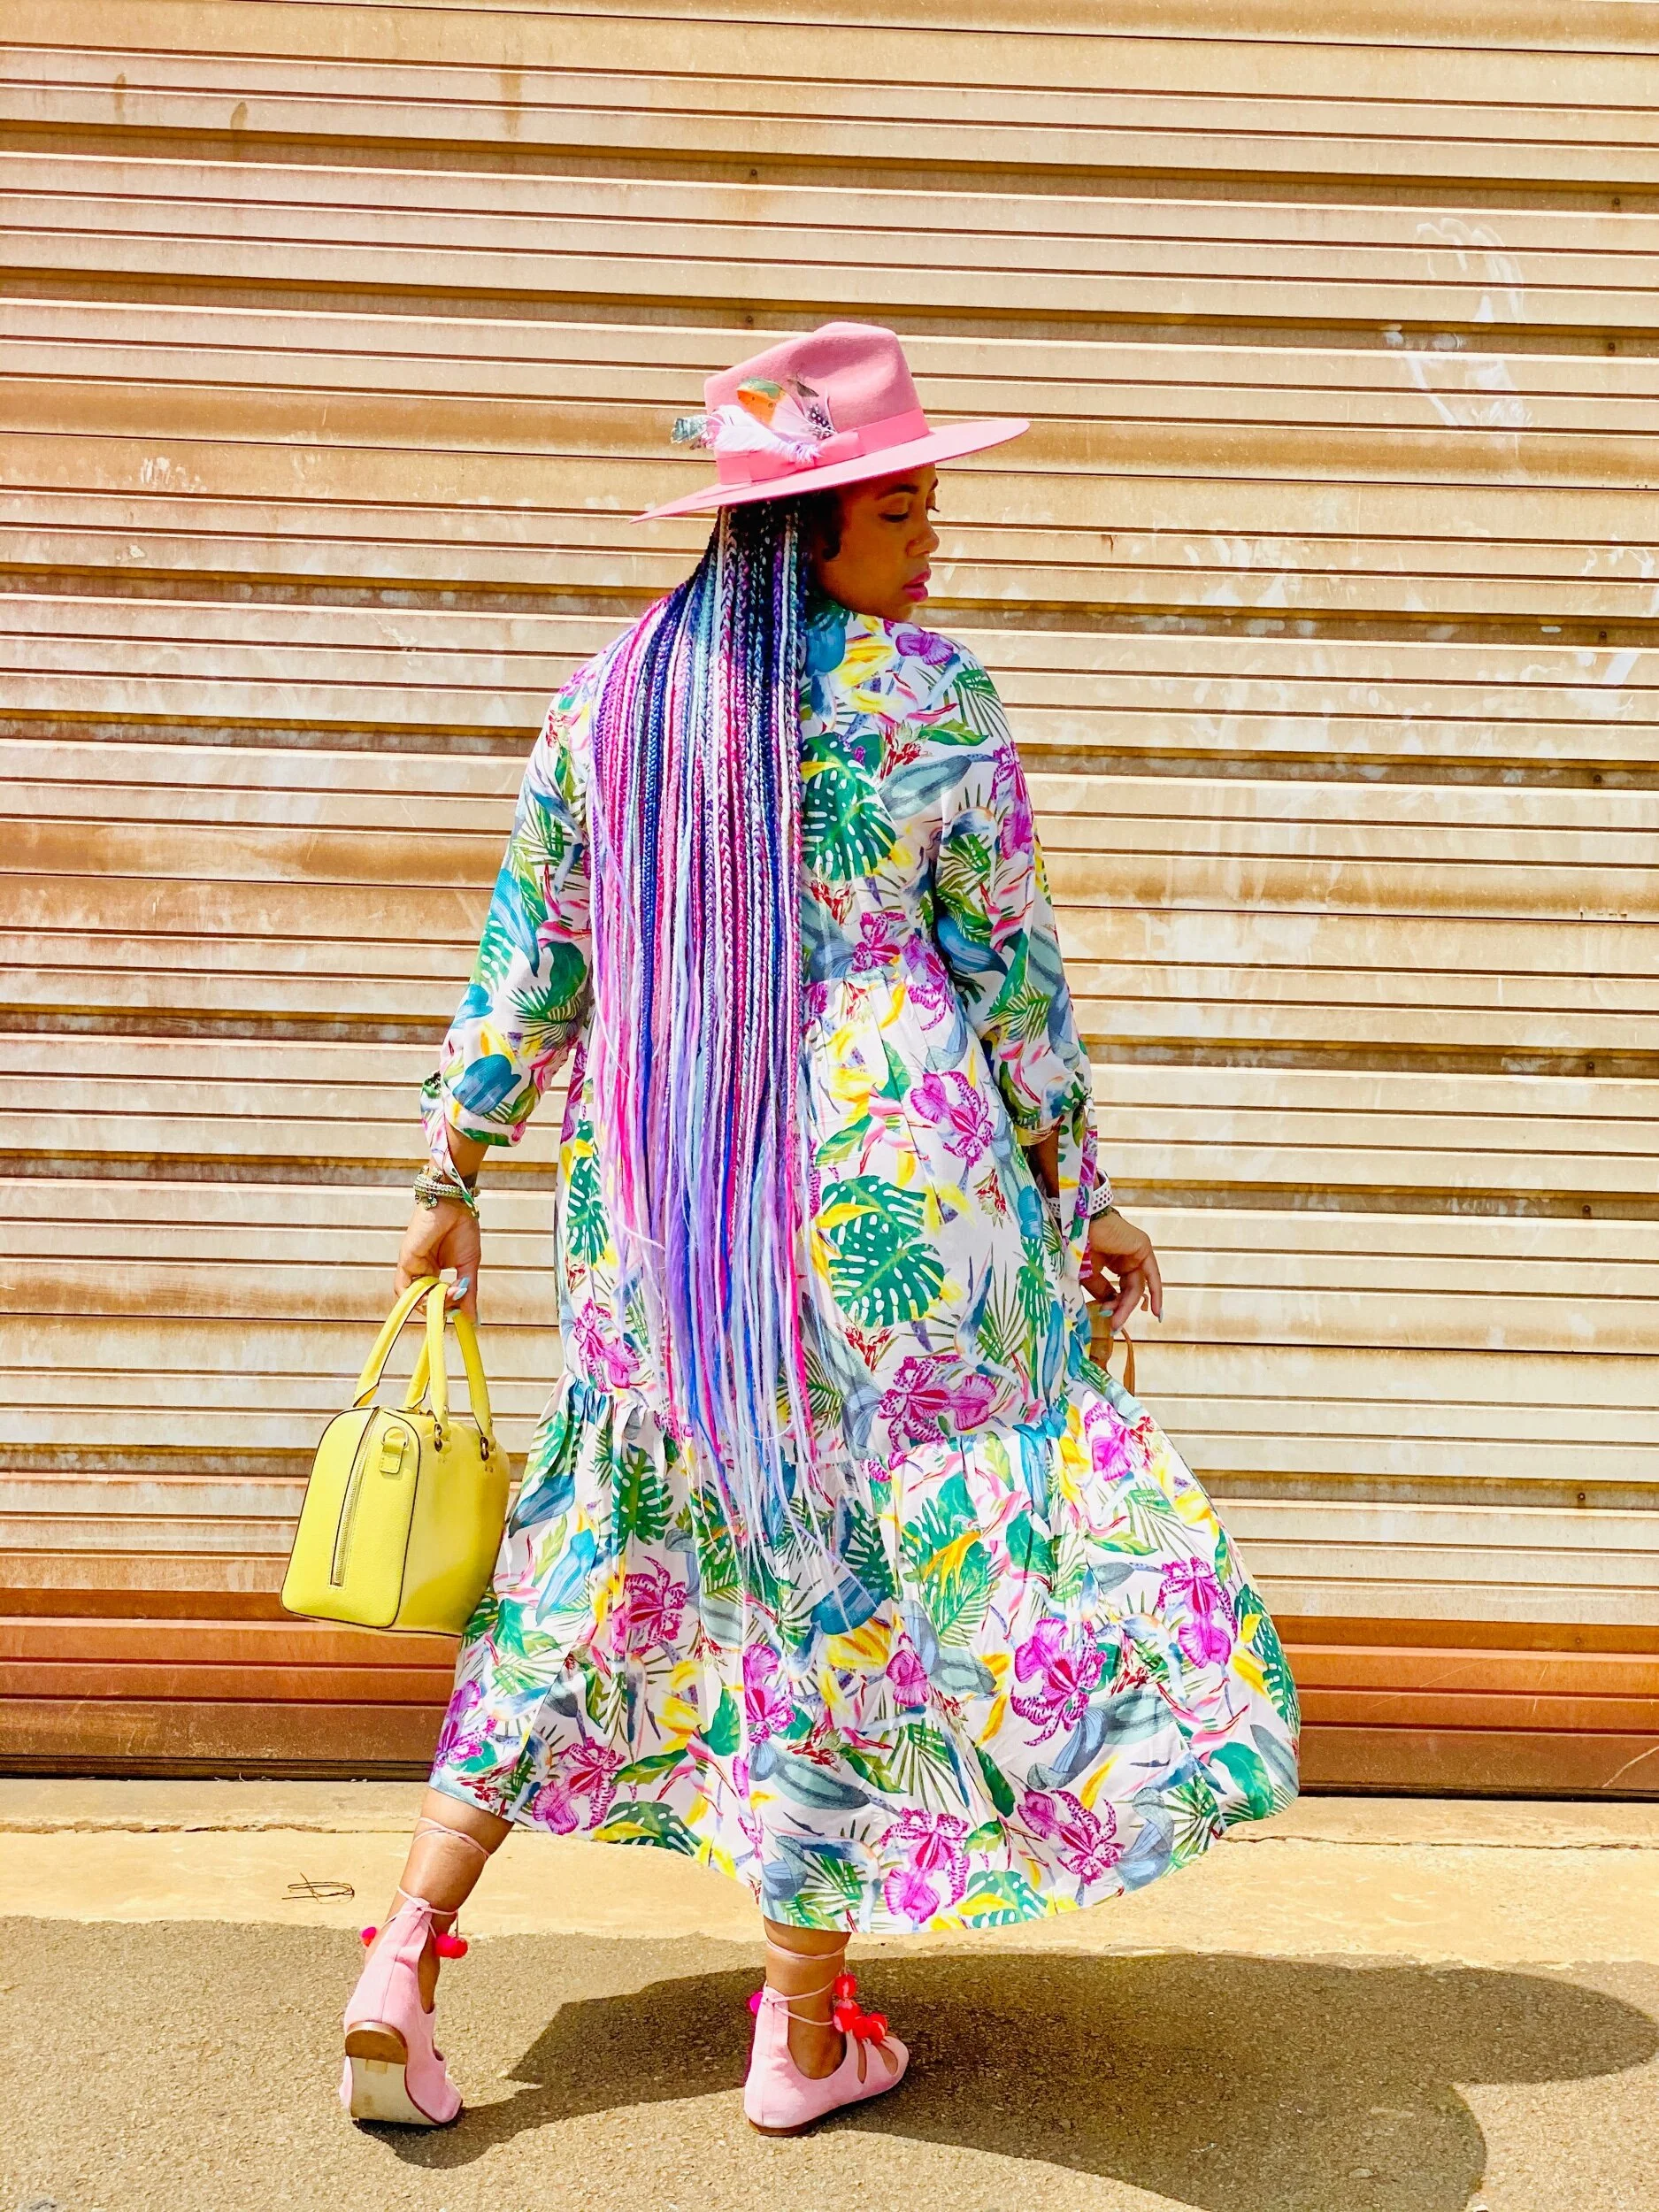
The Wilder gowns I’ve seen circulating have all kinds of hacks and I love to see them. I’m 5’10 so the length was definitely not being adjusted and 2 tiers were perfect for me. But I did want to jazz up the sleeves a little. I thought about adding a couple layers of gathered ruffles but I didn’t want to overdo it…this time! I decided to add ties to the hem of the sleeves to bring together with the neck tie. I simply cut out two extra ties of the neck tie pattern piece and use one for each edge of the sleeves. When I finished I realized if I would’ve made the sleeves on the bottom wider (to allow for gathering) I could’ve used the same casing method used on the neck. I will definitely do that for the next Wilder because I’m seriously making more!
Now for gathering the skirt! There are several different methods for gathering and I normally used the yarn method but with such fine fabric it just wasn’t the best option. So I went old school and used a basting stitch for my gathering. If your machine has a gathering foot, this would also be a great time to pull that foot out okurrrrr! I also decided for my next Wilder that I want more gathering in the skirt so instead of 2 for top tier I may do 3 and for the bottom tier I will use 4 (cutting out 7 instead of 5).


As always, thanks for stopping by! Tell me what you think about my first Wilder gown. Have you created this baby? If not, what are you waiting for? It’s so fun!
Peace & Blessings!
Flintstone Feet
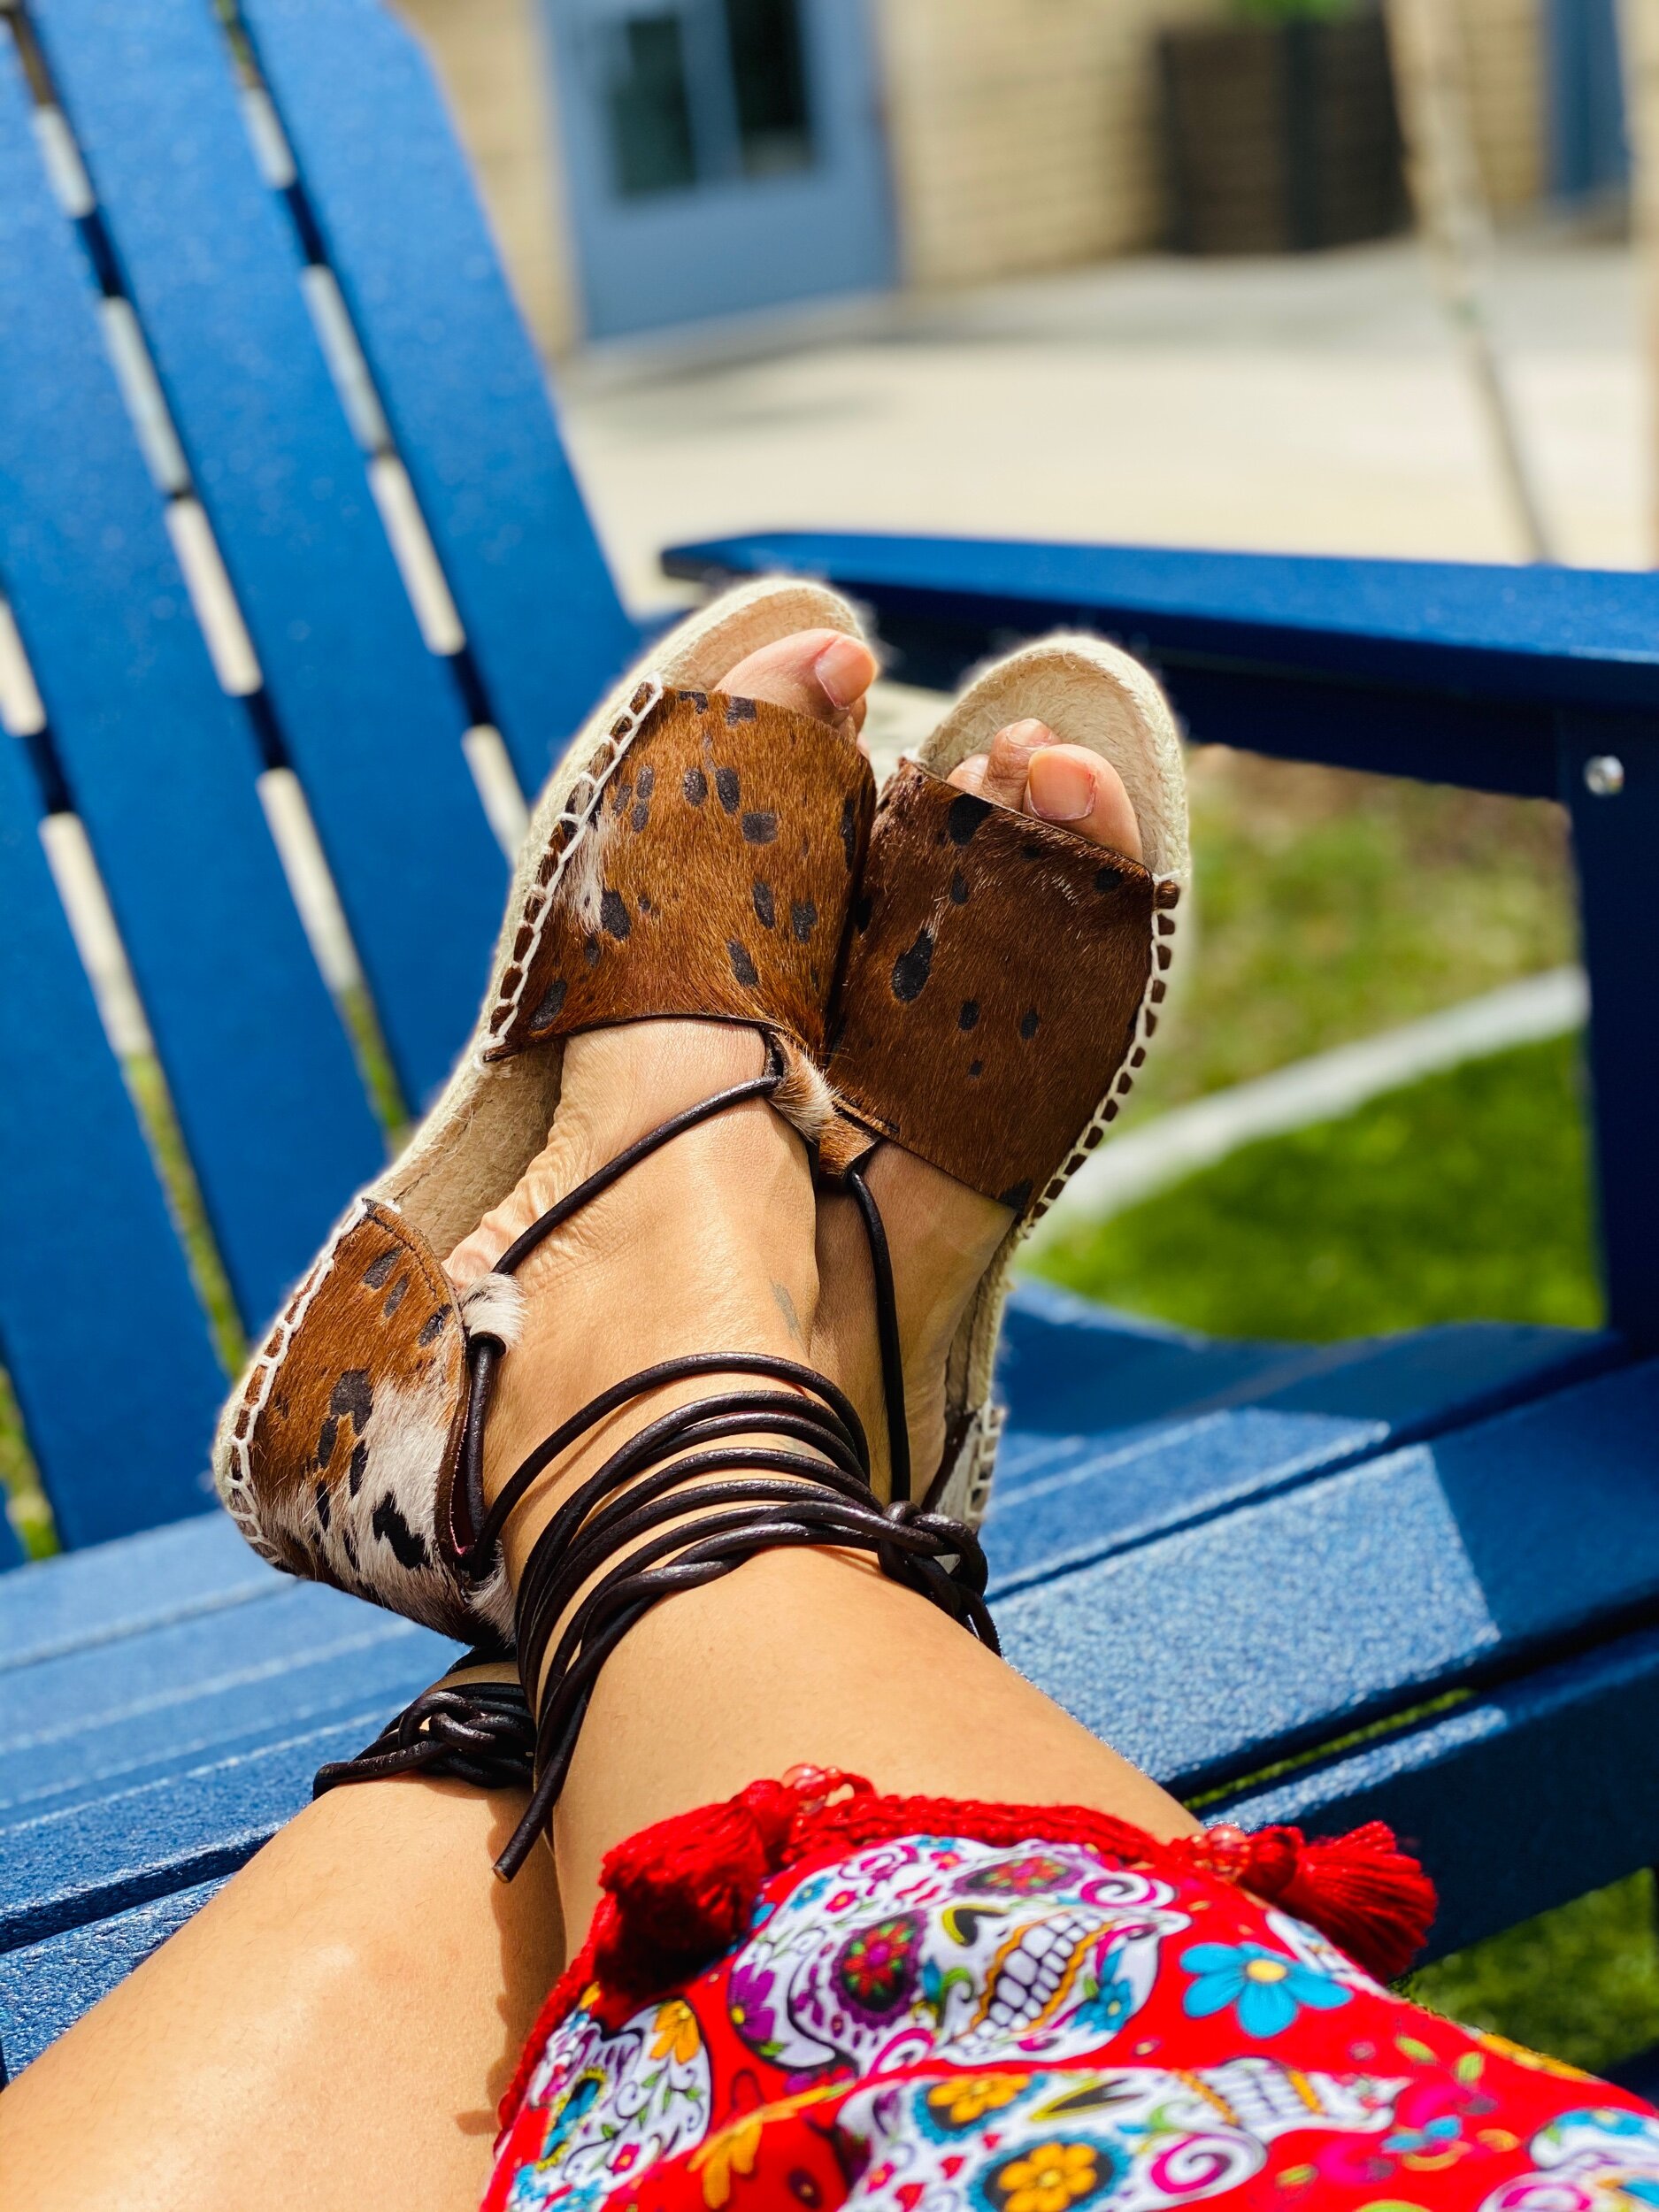
I made my first pair of shoes!
I stumbled across an Espadrille Kit by A Happy Stitch a few years back and I had shoe making on my list of creative things to do. Fast forward to 2020 when leather bag maker extraordinaire, Treasure of Nikki & Mallory collabed with A Happy Stitch to create a hair-on leather sandal espadrille tutorial. Unfortunately, this tutorial was only available for a limited time in A Happy Stitch Etsy shop. If I didn’t have the push a few years back, I definitely got the push now!

Supplies
Off to purchase leather scraps! There are a few items you will need outside of an espadrille kit and the Nikki & Mallory sandal tutorial. I decided to stick with hair on leather and I found several options on Etsy. Here’s what you will need:
leather scraps (if using hair-on leather beware it is messy and you will have hair everywhere)
lightweight leather for fusing
4mm leather cord 10-11 yards
Edge Kote (I used brown)
Leather Cement Glue
Upholstery thread
Leather needle for your sewing machine or you can choose to hand stitch loops in place.


Edge Kote applied on the left piece vs. No Edge Kote applied on the right piece
I used pink leather scraps from my stash for my fusing and then cut out all the required pieces for the sandals (rotary cutter highly recommended). The leather cement glue is used to glue the fusing (lightweight leather) to the inside of the back pattern piece for extra stability. The Edge Kote is applied to the edges of all your leather pieces. Once you have glued, sewn all the loops on, and finished your edges with edge kote, you’re now ready for the fun part…stitching your sandals together!

The espadrille kit provides all the items you will need like needles, yarn, and wax. You’re going to want to pin your fabric pieces onto the shoe sole and fit to your liking. I have pretty long toes so I made those adjustments to position the top sandle pieces so my toes were comfy. Now for the blanket stitch! I had no idea what this stitch was, really. Once I got the hang of this stitch it was on and poppin and then I purchased 2 more espadrille kits lol. Yes they are addictive y’all. After you’ve completely sewn down your pattern pieces to the soles the last thing to do is measure out your straps and you’re all done.


Overall, I absolutely loved creating my Flintstone Feet. I would’ve never thought that I would be making shoes but here I am. Have you tried shoemaking? Or even made a pair of espadrilles? I’d love to know your thoughts and experiences.
As always
Thanks for stopping by!
Peace & Blessings
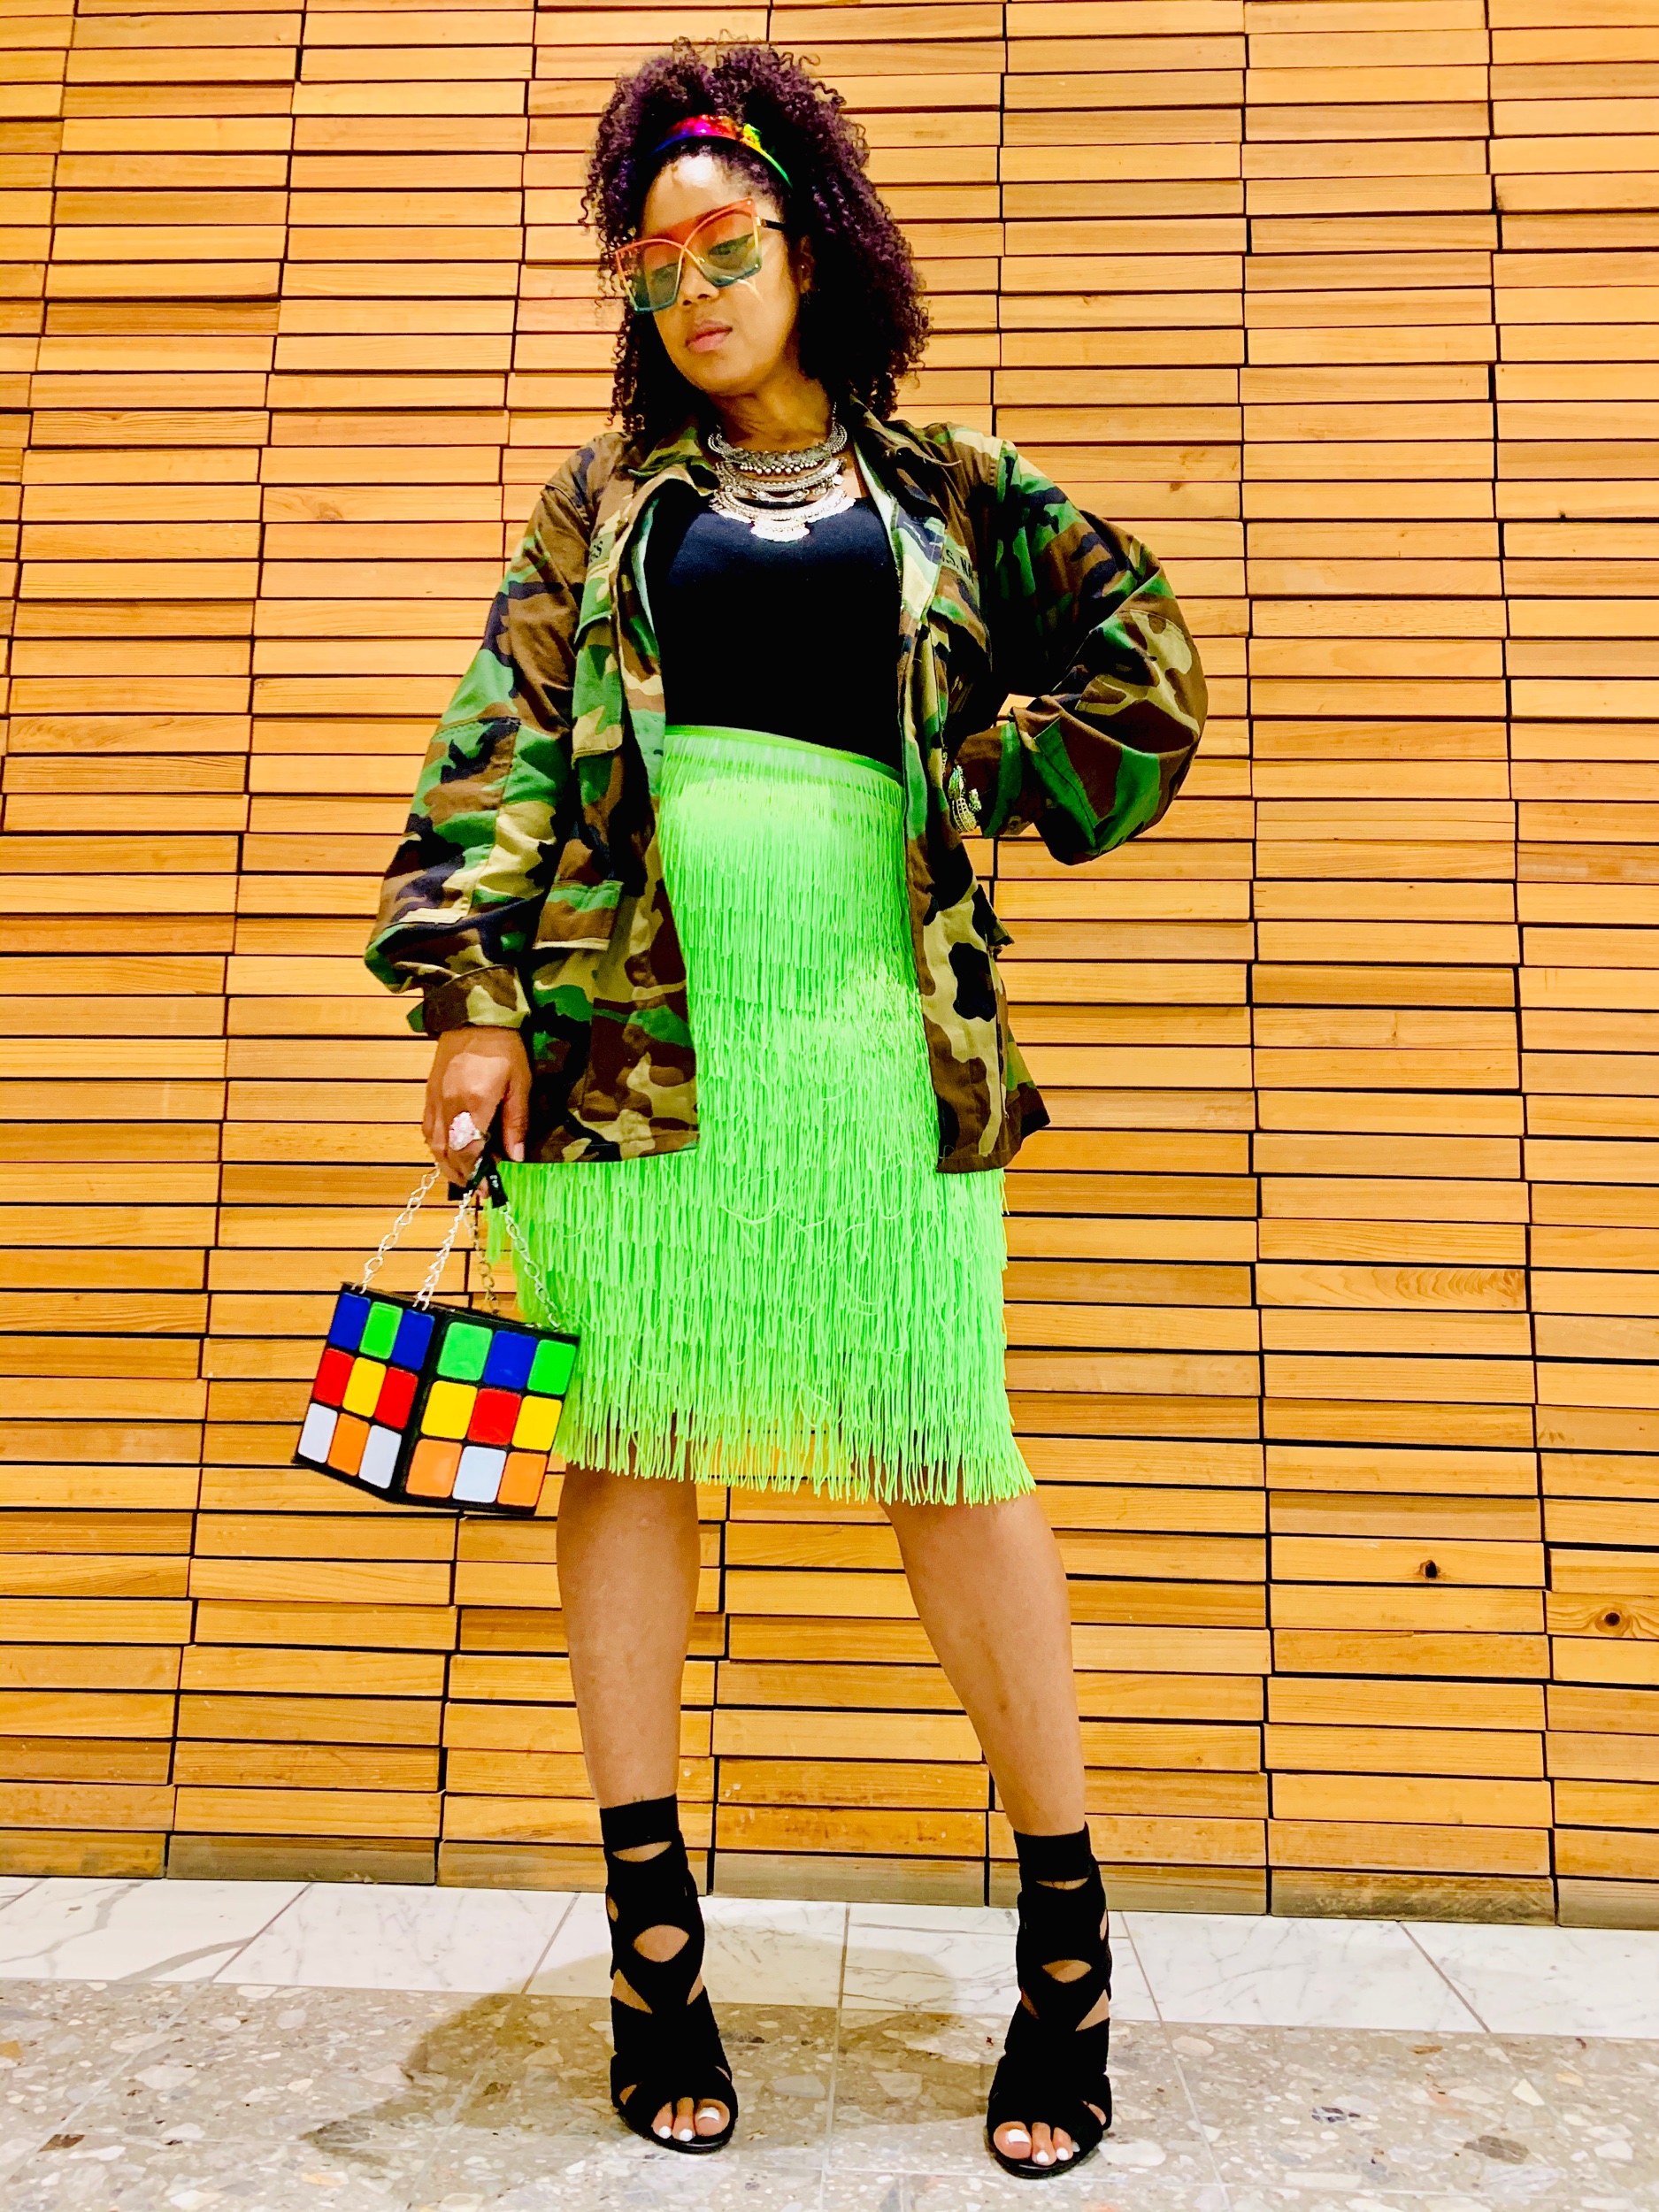
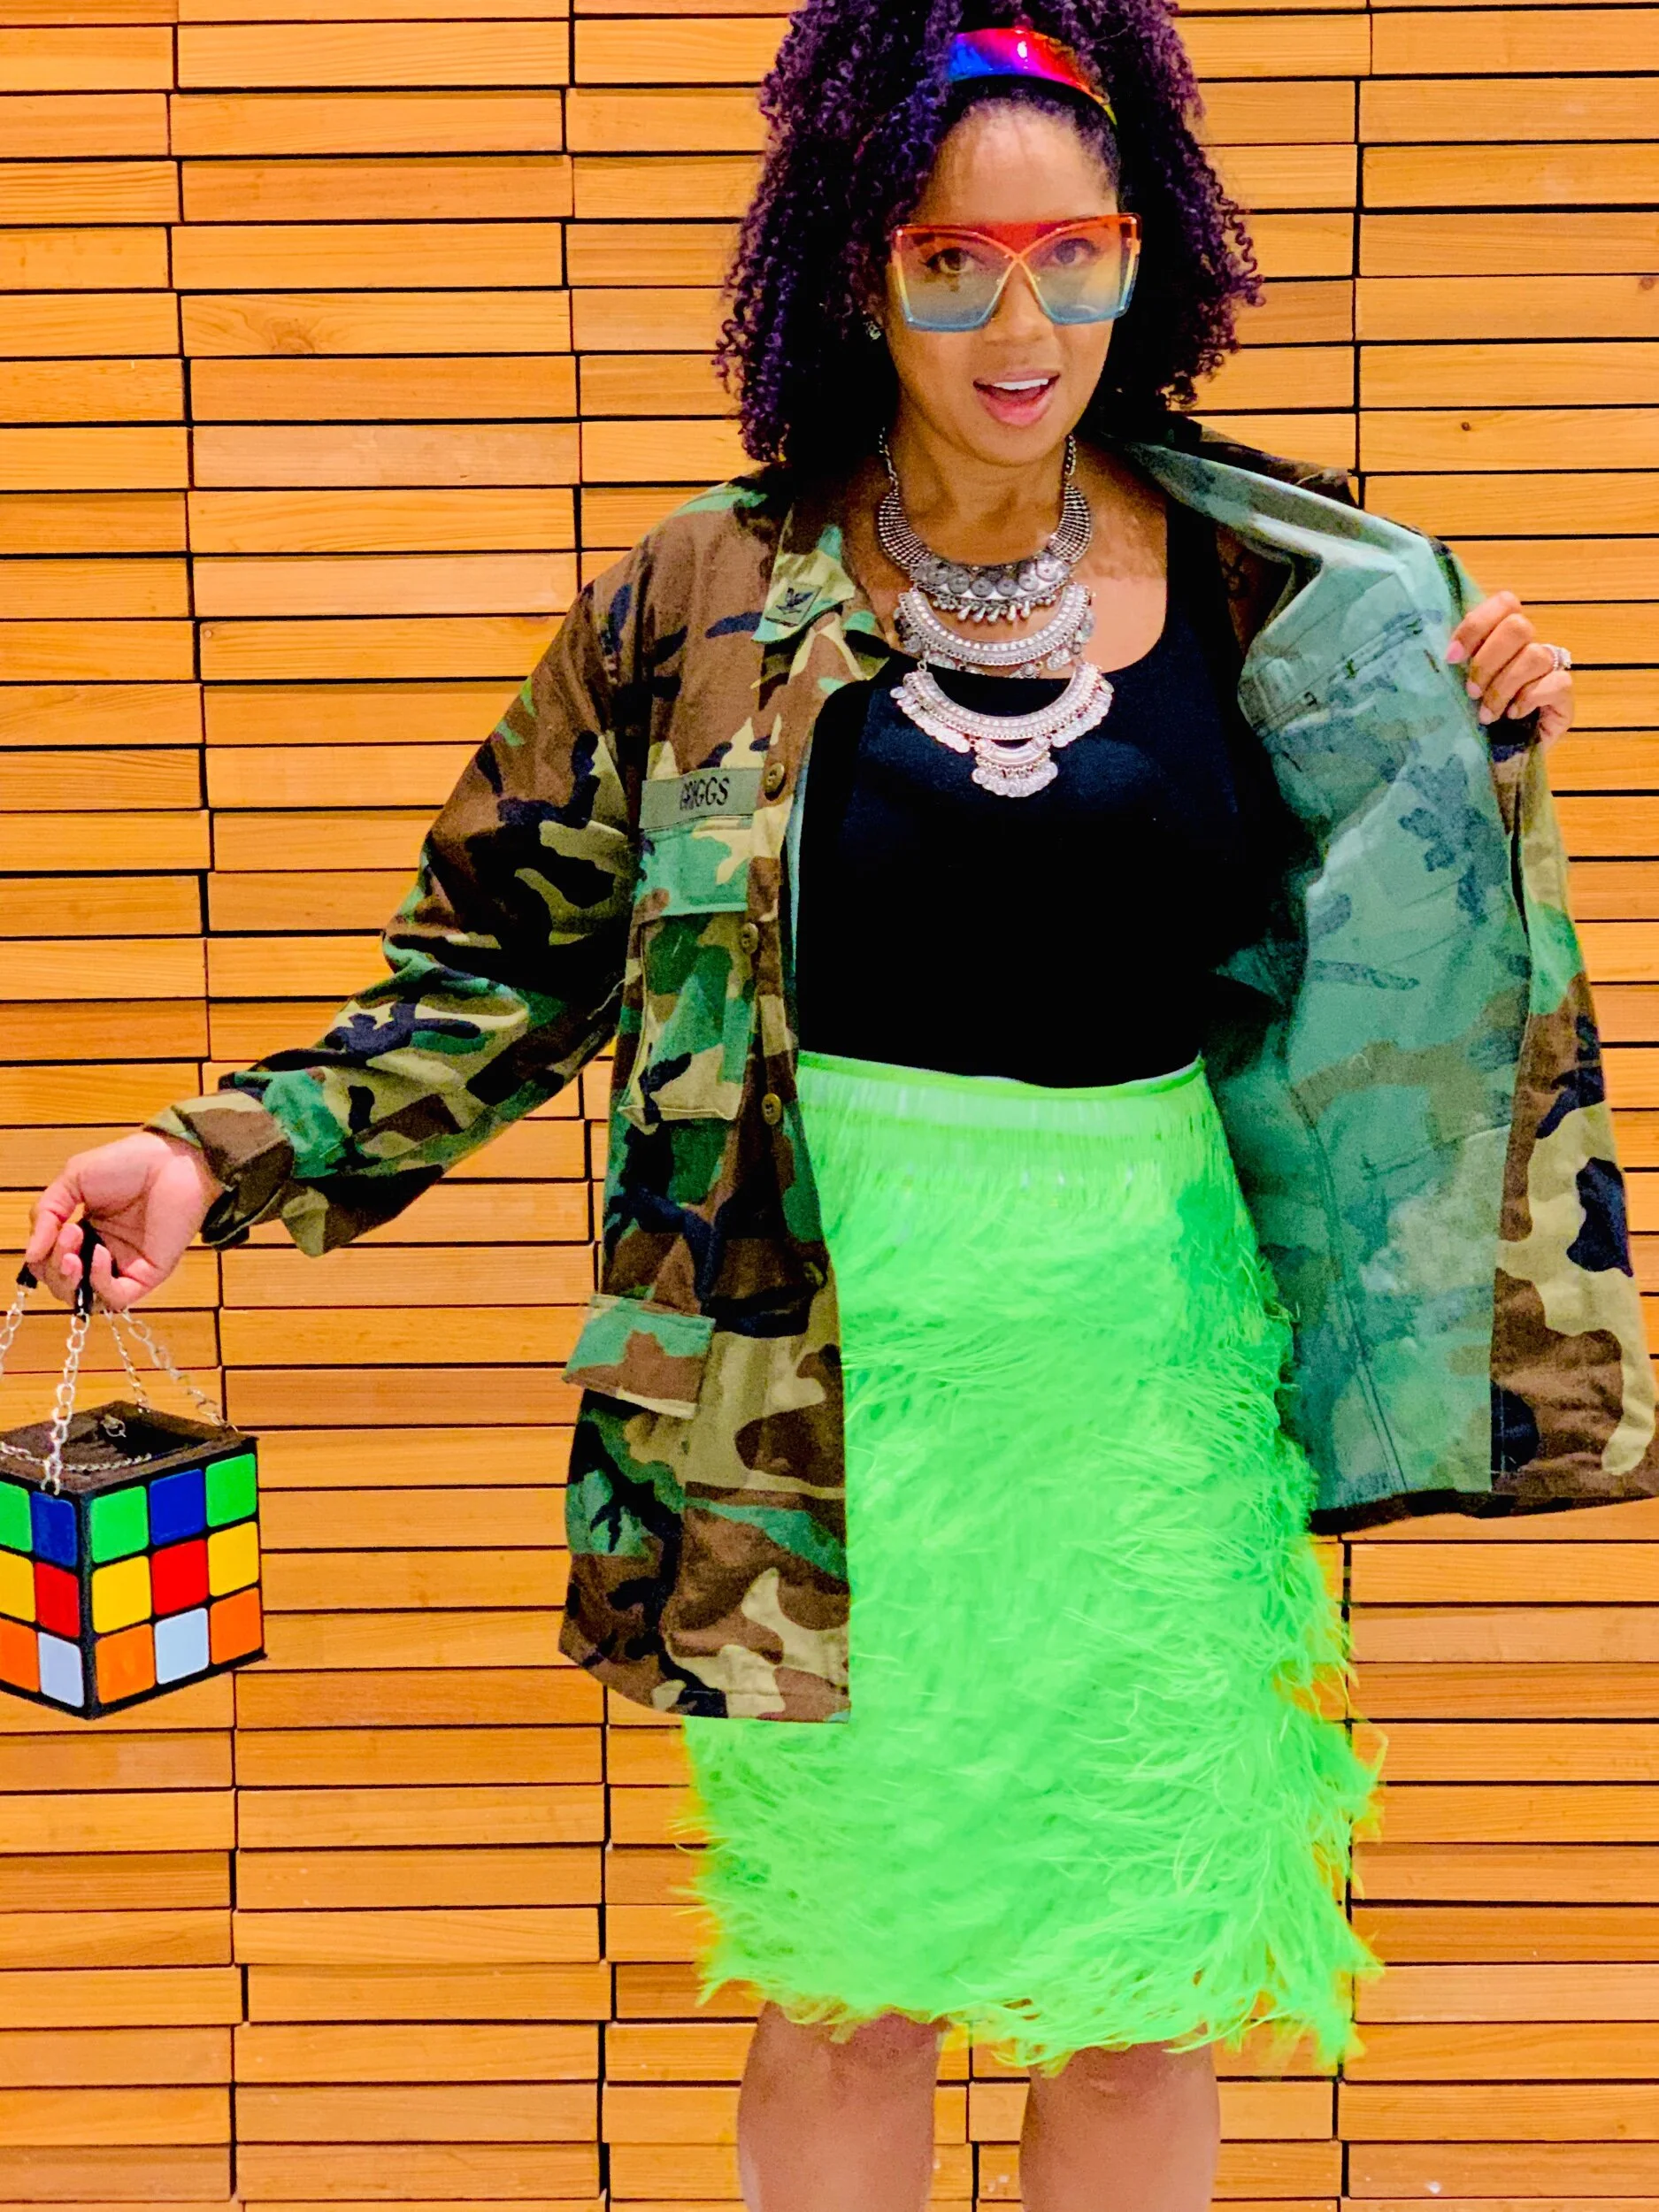
Neon fringe
would you believe me if I told you…IT’S REFASHIONED?
Greetings friends! I’m back today to share this very bright, fun, easy fringe skirt! I’m constantly trying to find and create staple pieces for my closet. This skirt is now extremely high on my wear list. And don’t worry this baby is not restricted to only summer lovin. You can catch me rockin this brightness year round. So let’s talk about it!

I found this skirt at my local thrift store for $2. I was on the hunt for a plain white skirt with no pockets. The closest to all white I could fine was this oversized skirt with embroidery details on the bottom. Initially I was just going to cut off the embroidery and make the skirt short but I had white fabric left over from the inside lining and from the sides after taking the skirt in to add a little more length. I’m glad I made this decision.
Once I had the skirt cut and fitting to my liking, I measured out lines for the spacing of the fringe and began to sew on the fringe with a zigzag stitch. I added fringe to both the front and back of the skirt.
I purchased one 10 yard roll of neon fringe from amazon for $16.99. I thought this would be enough but I could see too much of the white fabric with my spacing so I put the skirt aside and ordered a second roll of fringe.


finish line
Once the second roll of fringe arrived, I began to fill in the empty spaces. Now we’re talking. Time to go shake it! Overall this project can be completed in one day. I feel the most time spent is marking your spacing. Marking is also the most important step if you want your fringe to lay evenly.


Check out my IGTV for a quick look at the entire process.
Tell me what you think. Are you rockin Neon all year? I know I am.
Peace & Blessings

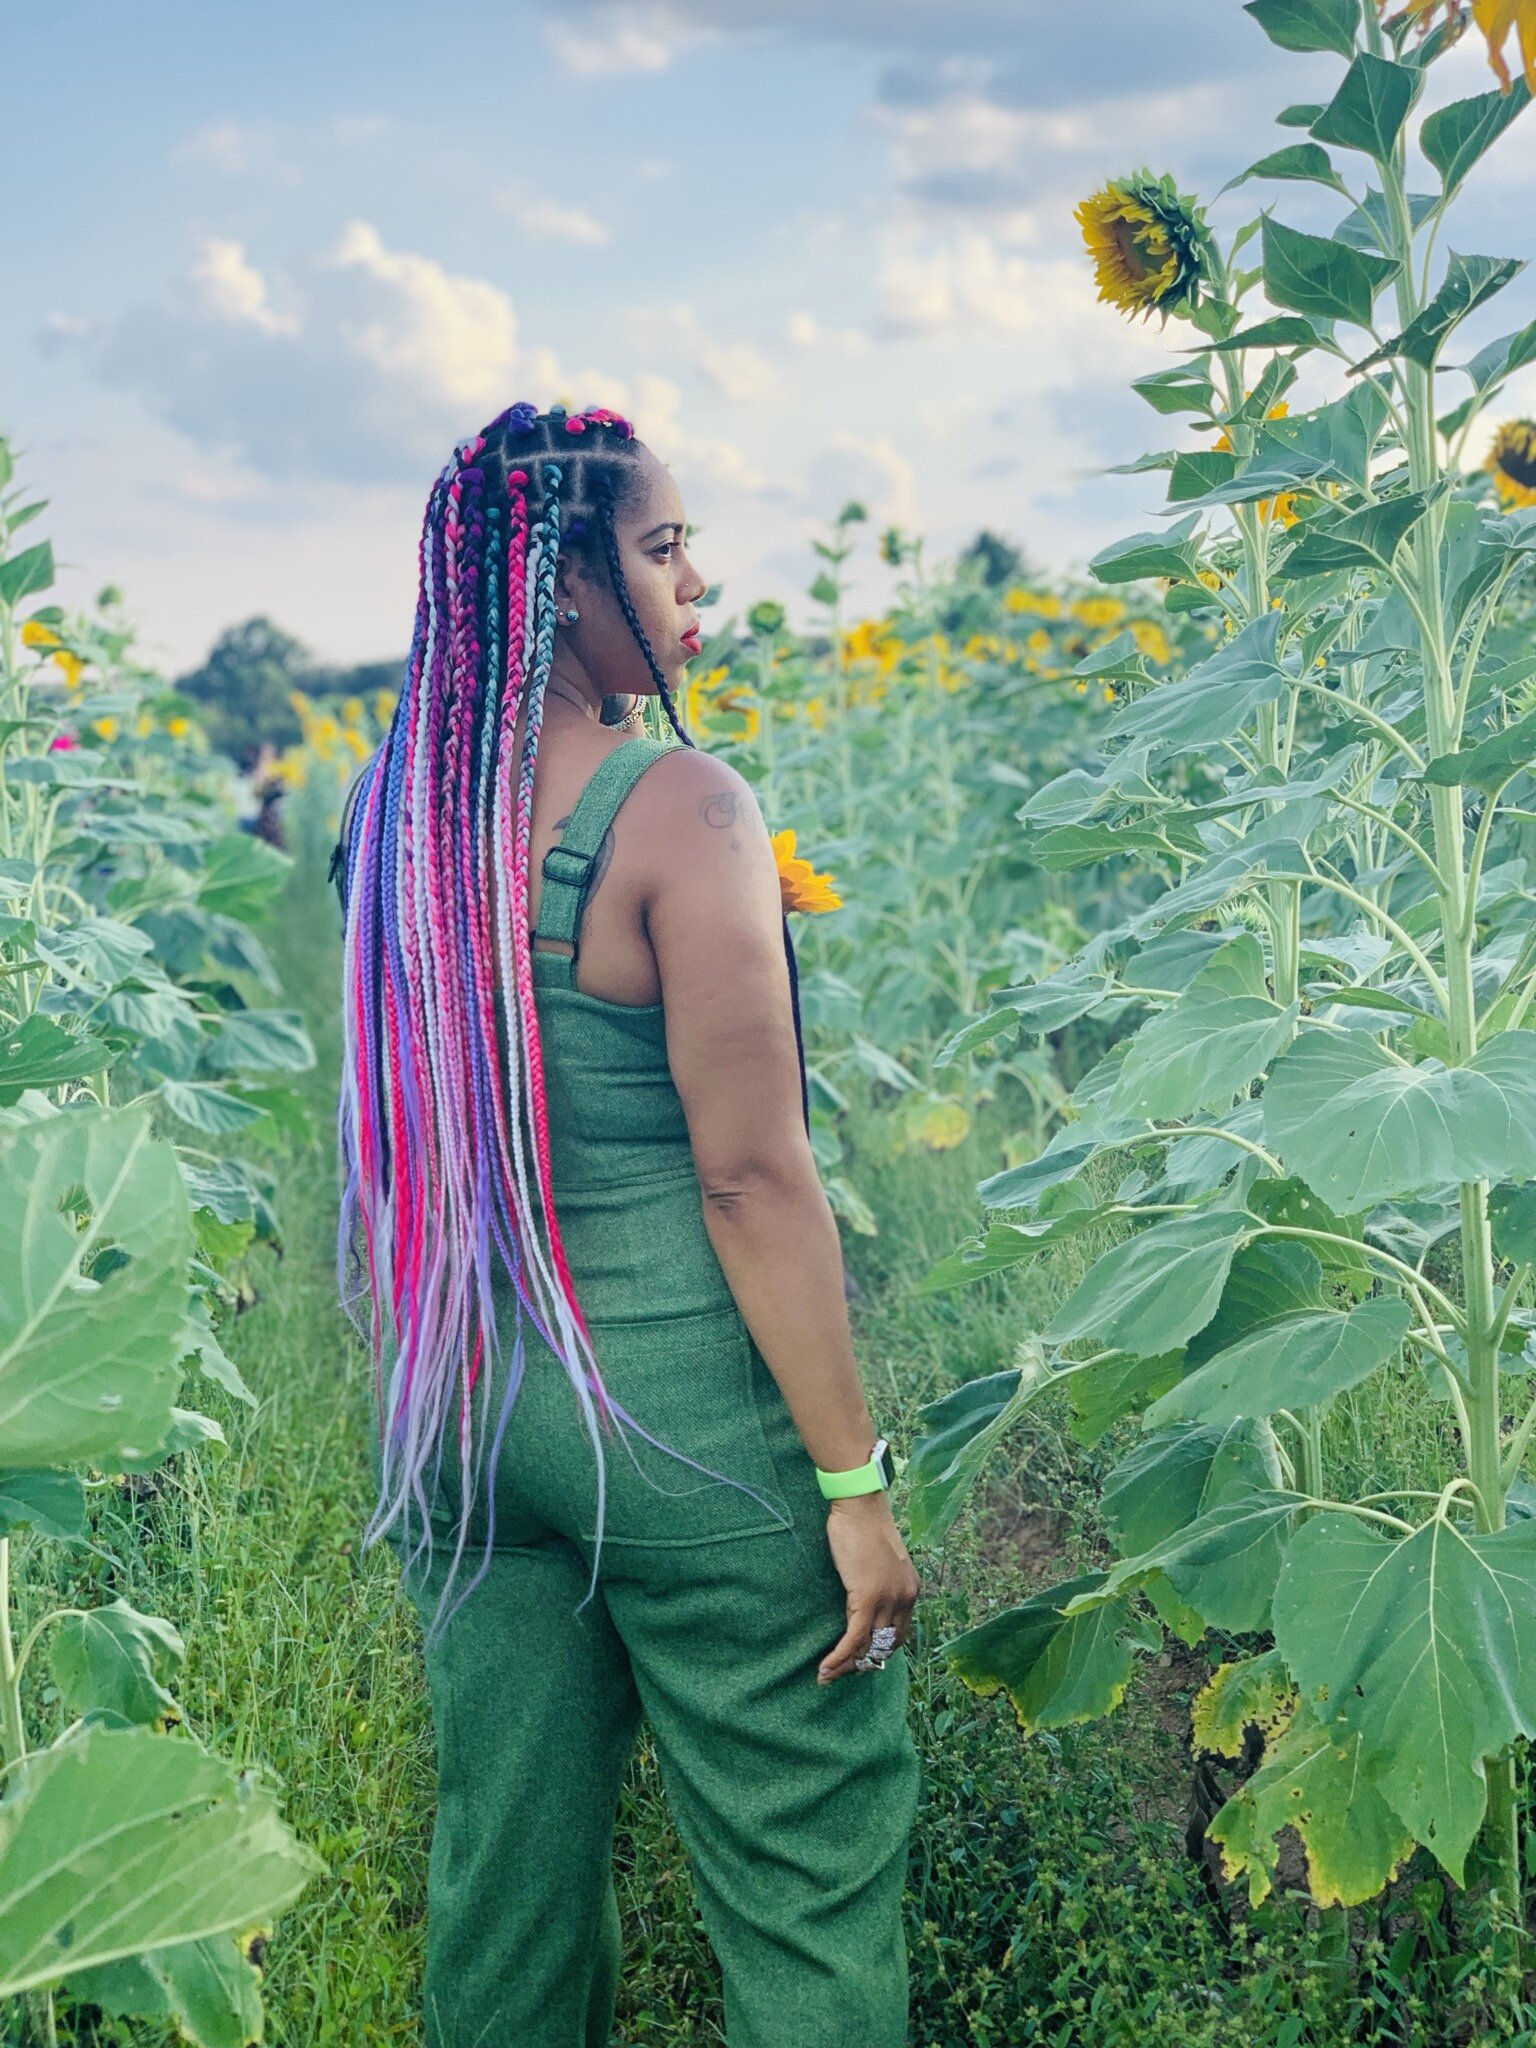
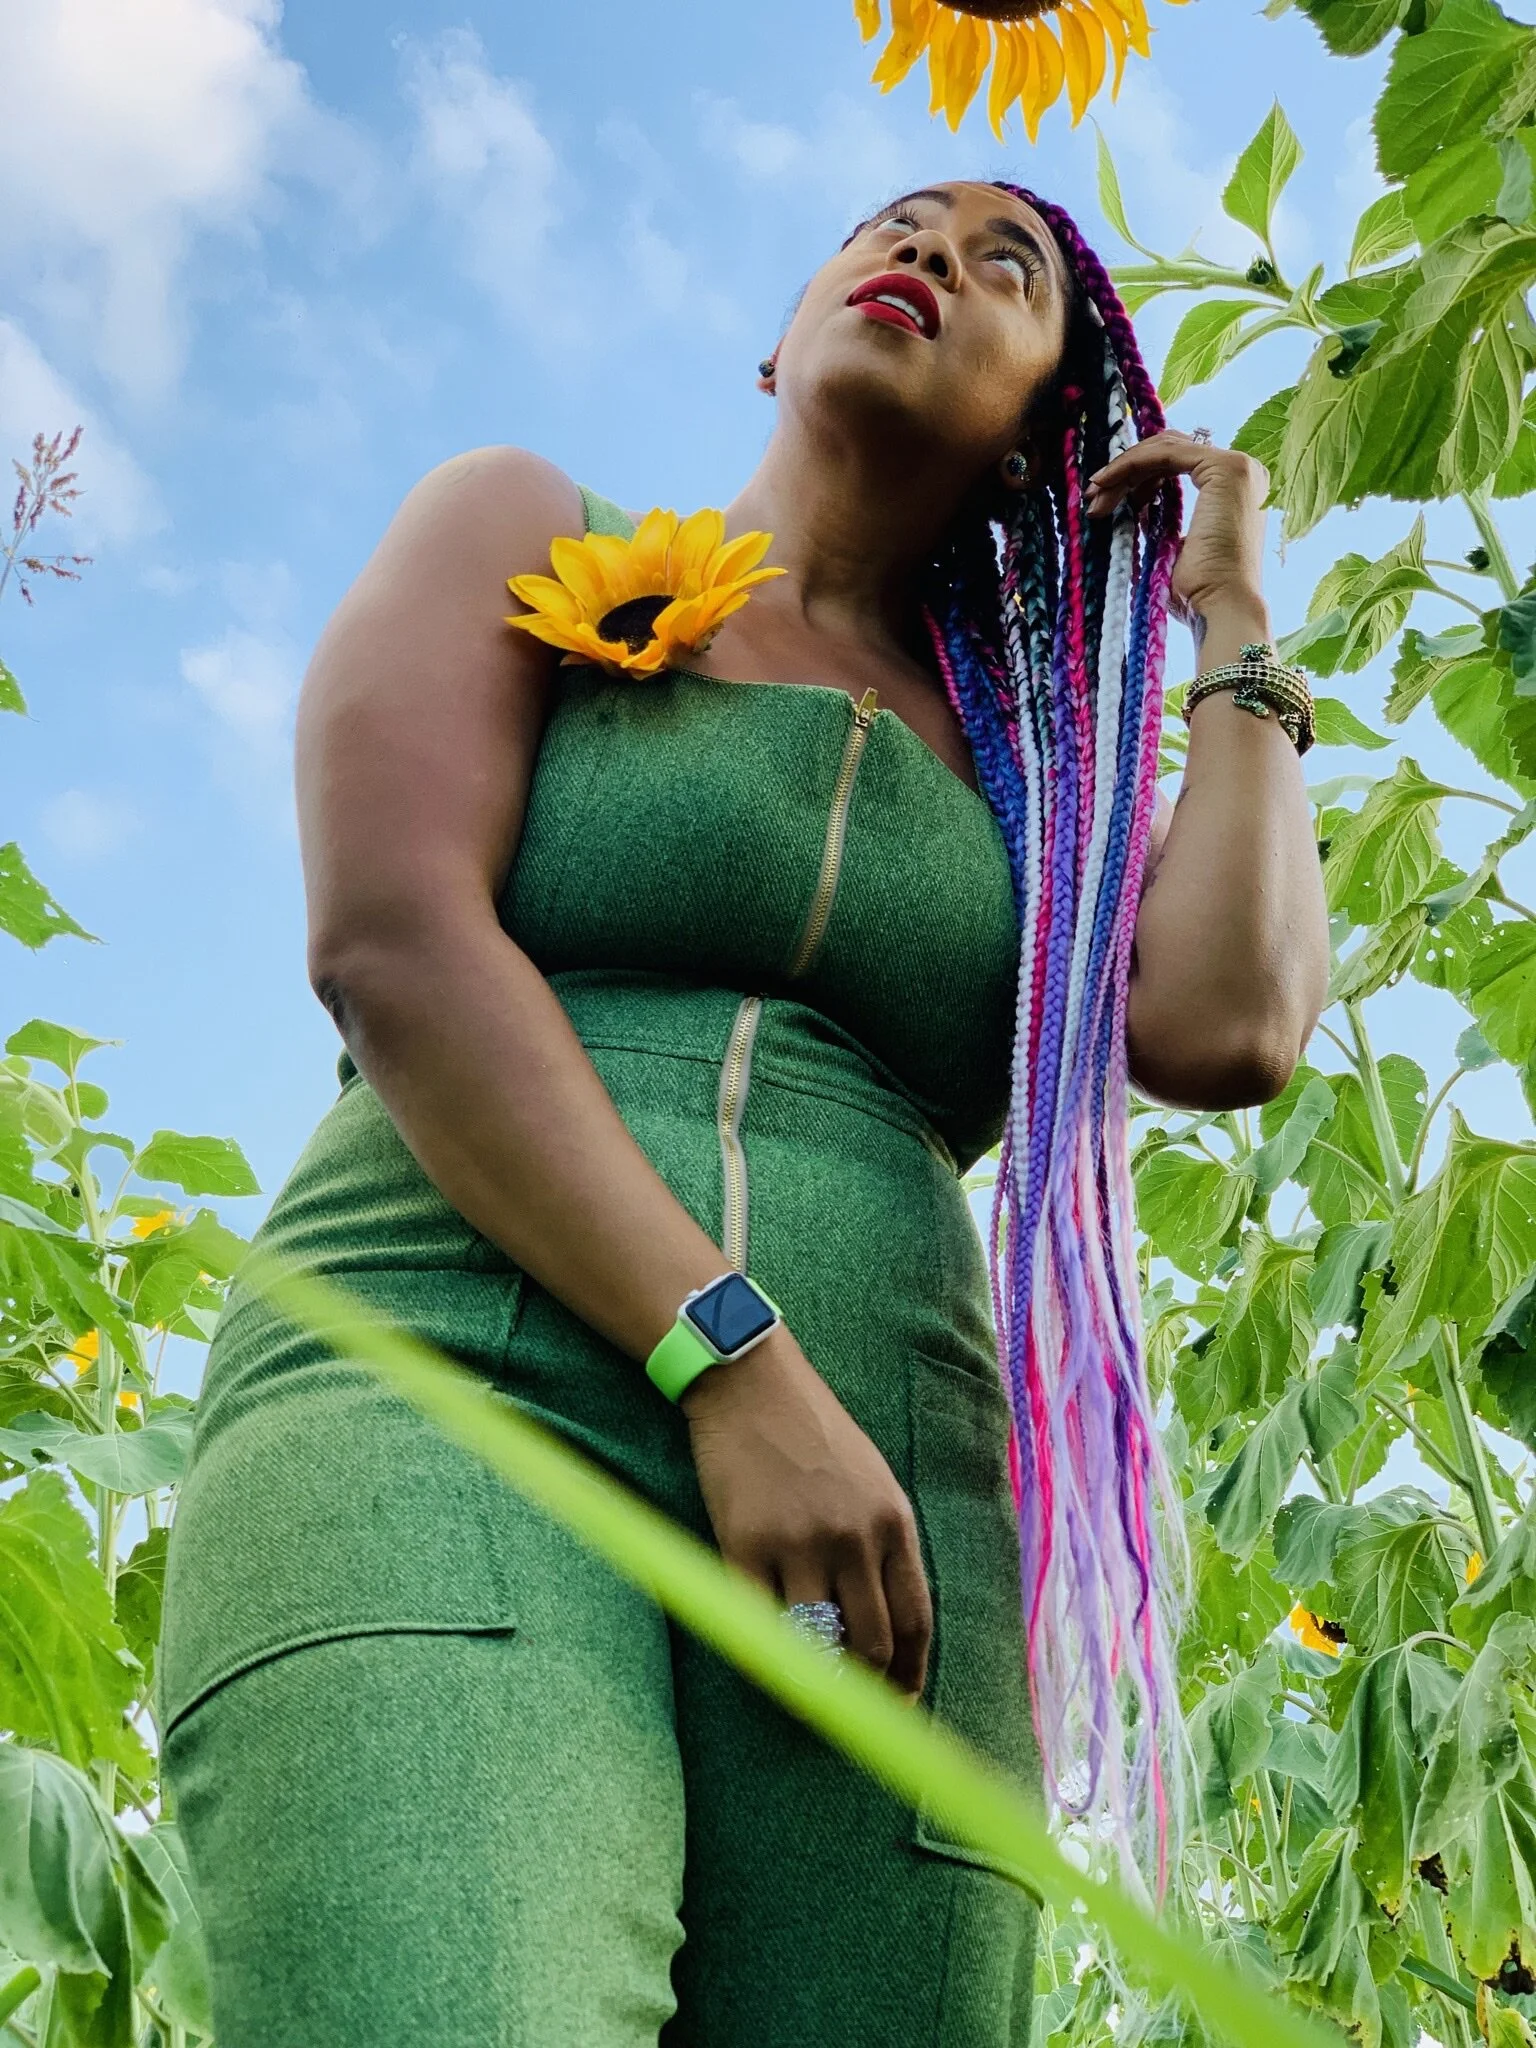
Sunflower Sloanes
Sunflower
Summer is officially over and the leaves are falling. But I can’t help but feel like the Fall breeze is far far away. Counting down to fall, I went to a beautiful sunflower field and managed to even pick a few sunflowers to take home. My plan was to keep them alive and grow my own sunflowers…I failed miserably lol.

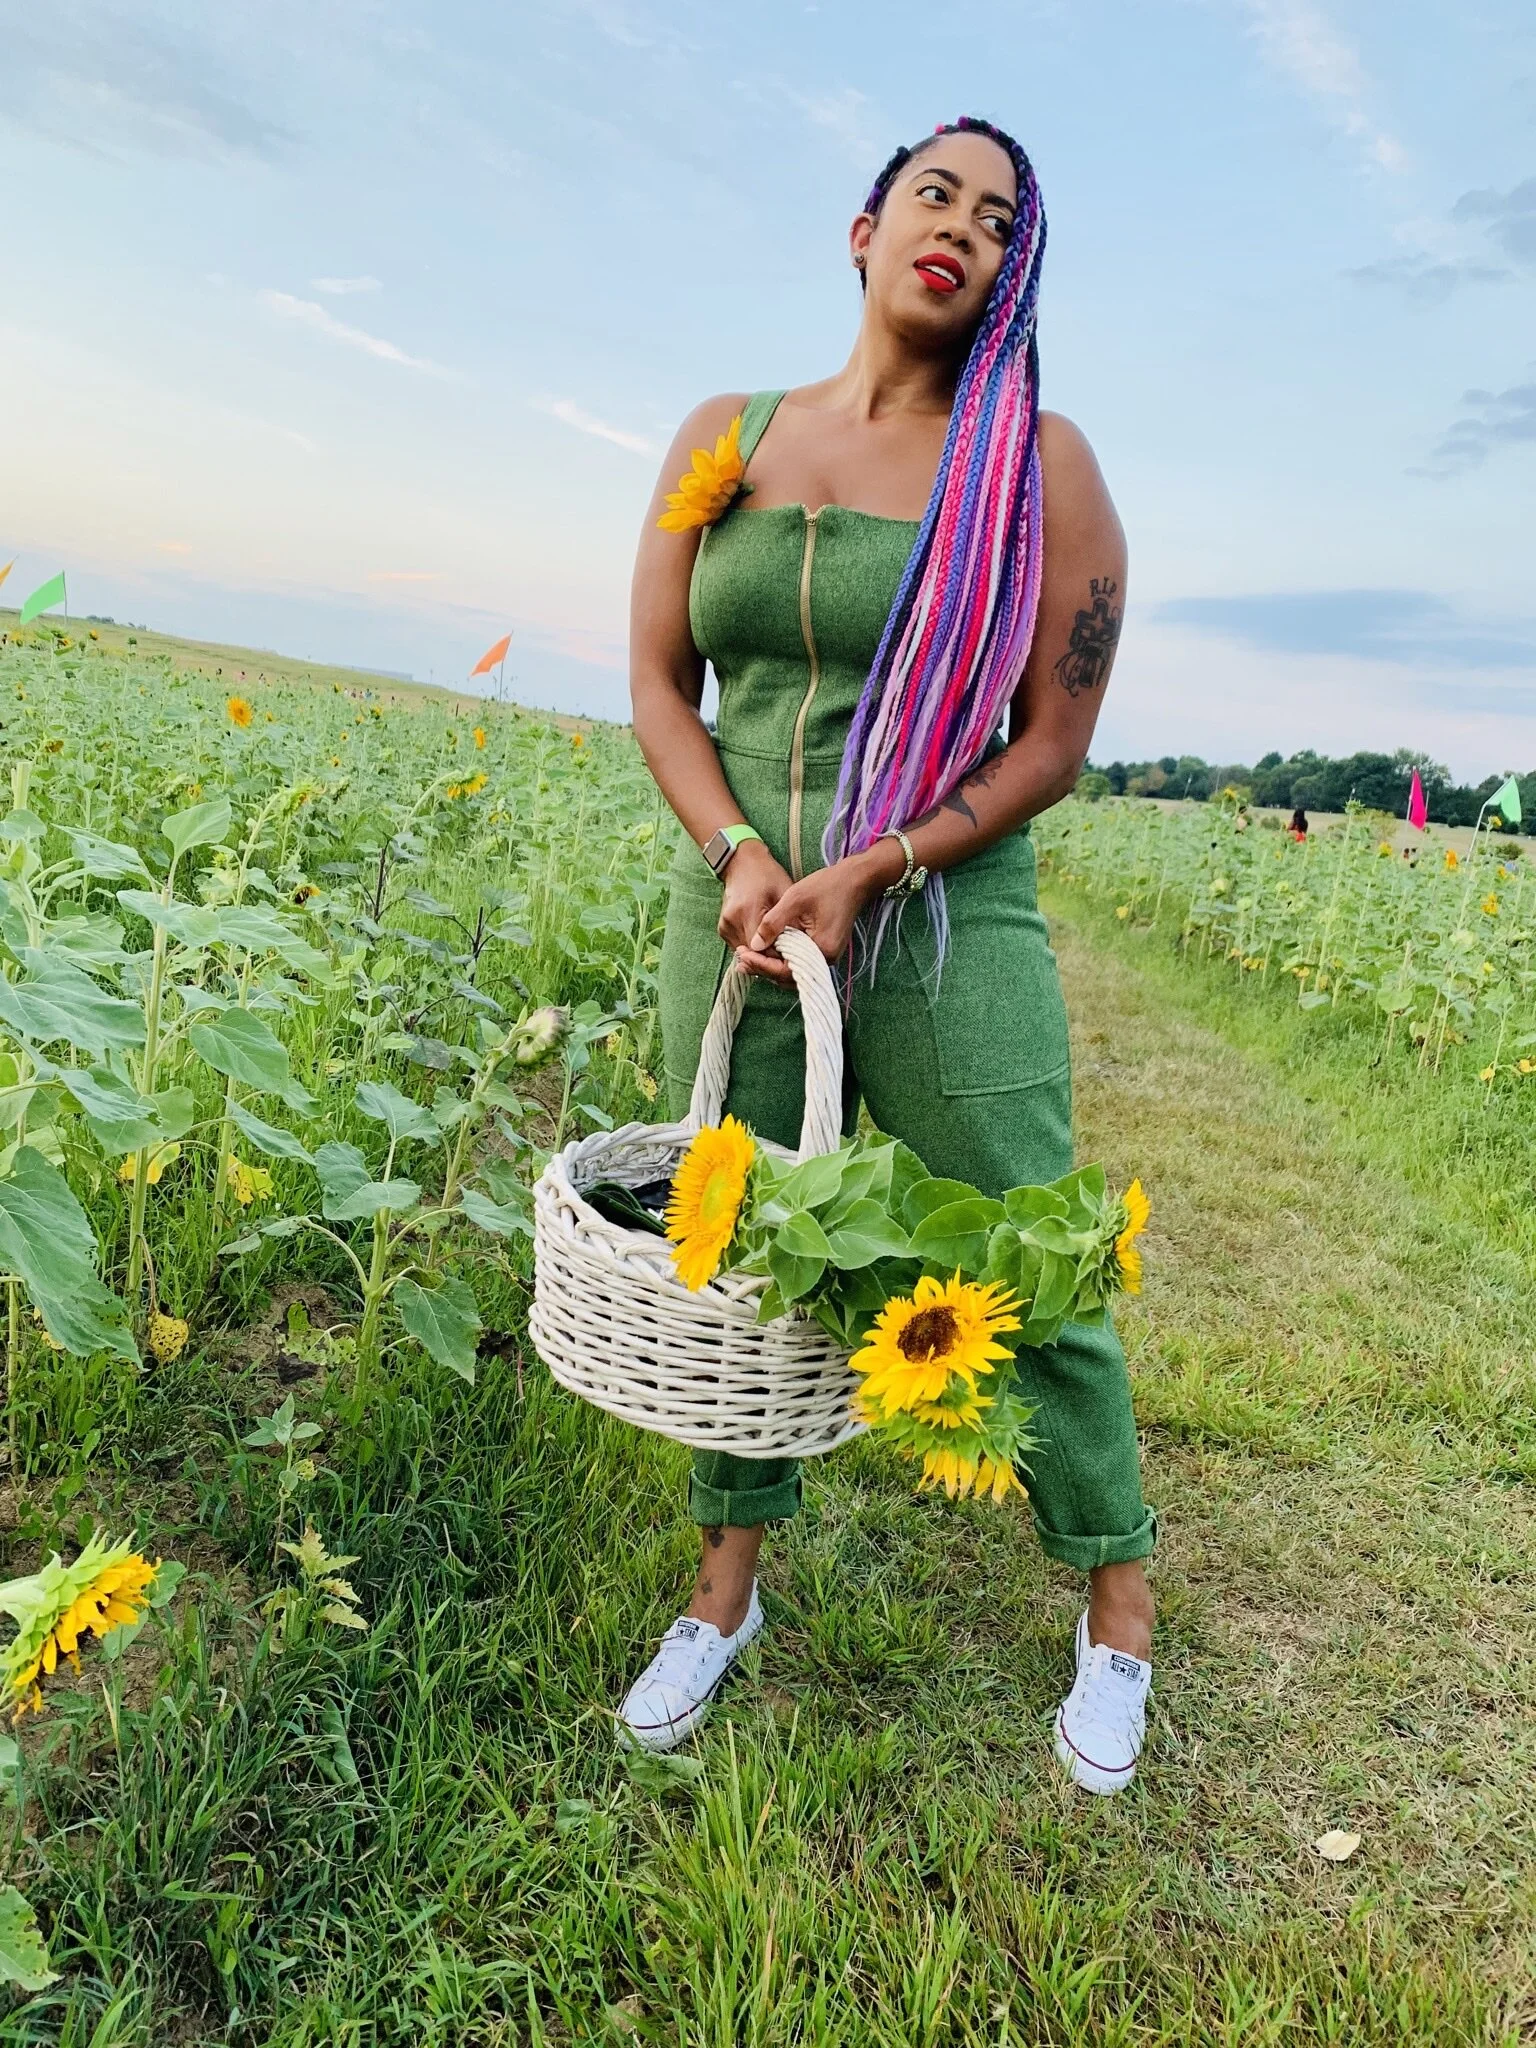
Sloanes
Victory Patterns recently released the Sloane Overalls and Sloane pants and I fell in love. I decided to make the overalls first and I must say they are so good.

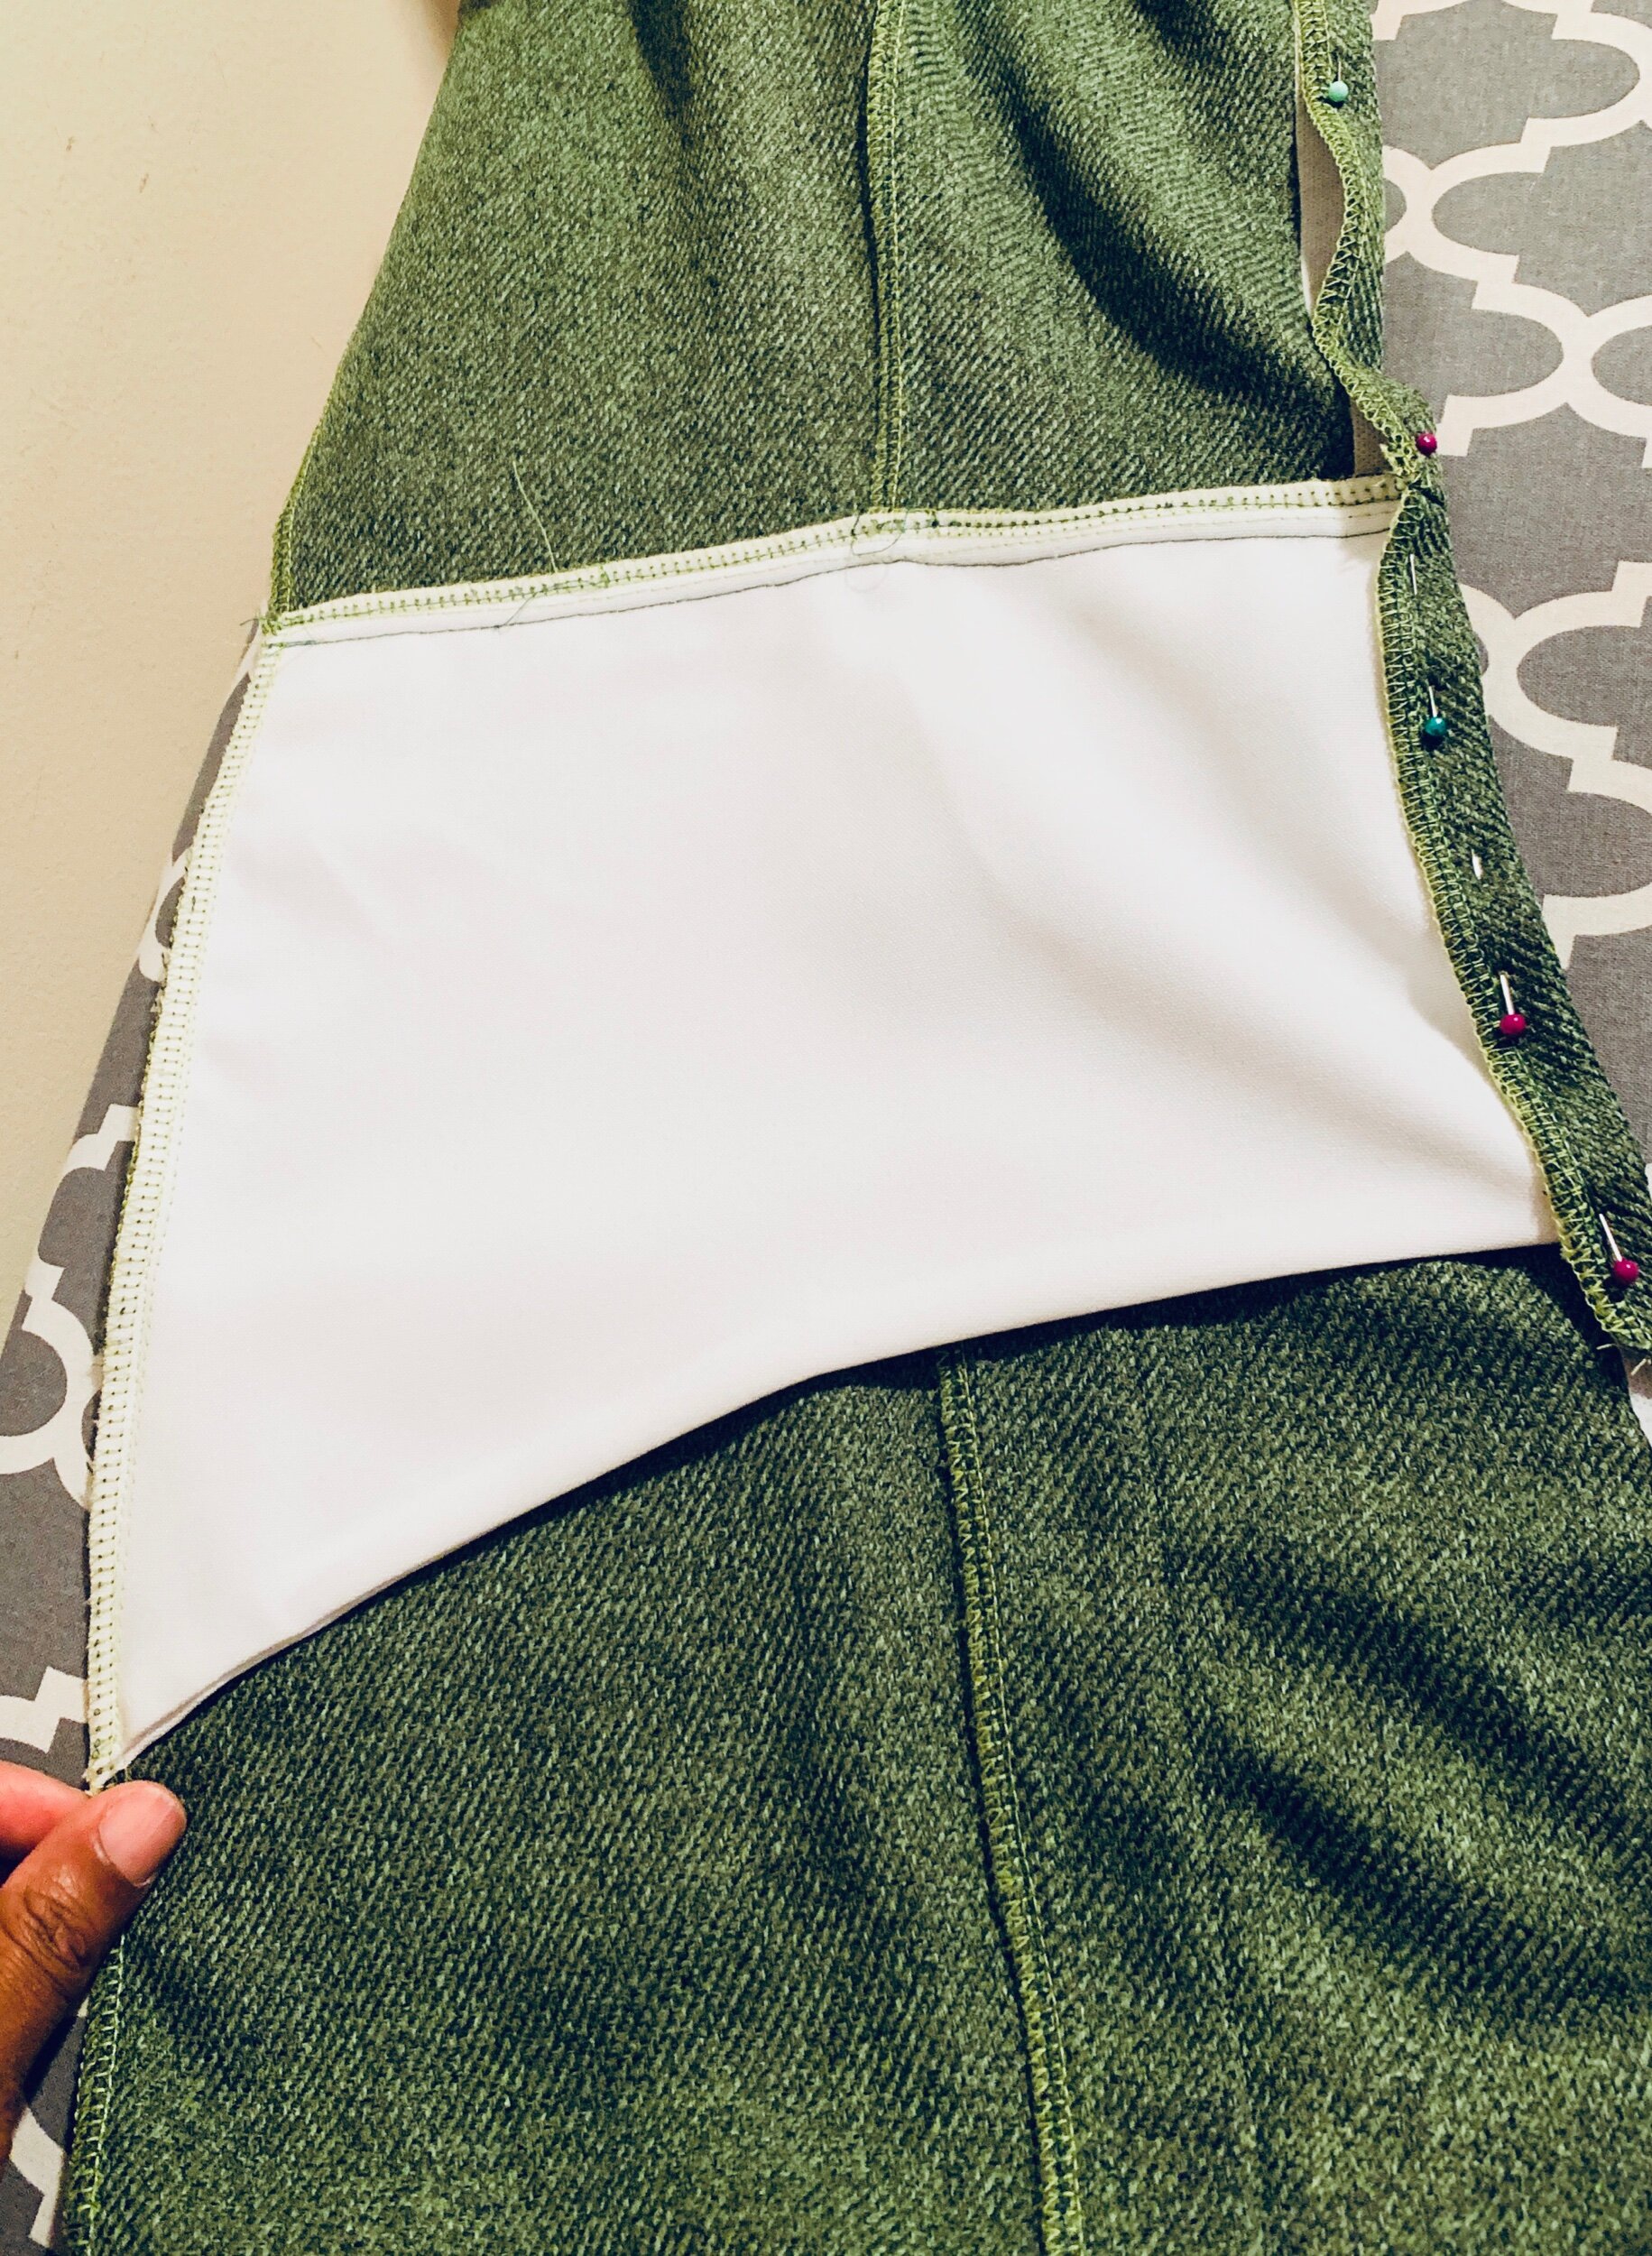
Pattern & Construction
The Sloane overalls are available in PDF print. Luckily, I’ve had a little practice with pdf’s lately so this wasn’t a big problem for me. Both the pants and overalls have the option to add the Tummy Stay (which I am in love with and want to add to all my makes). Then there are optional topstitching (I recommend) that requires a little more construction time but so worth it. I choose a wool blend I had from a previous project and I literally scrap busted to make these overalls work. Would you believe when I was all done I found more of this fabric in my stash and I have enough to complete a pencil skirt? This is what happens when you don’t organize your fabric.
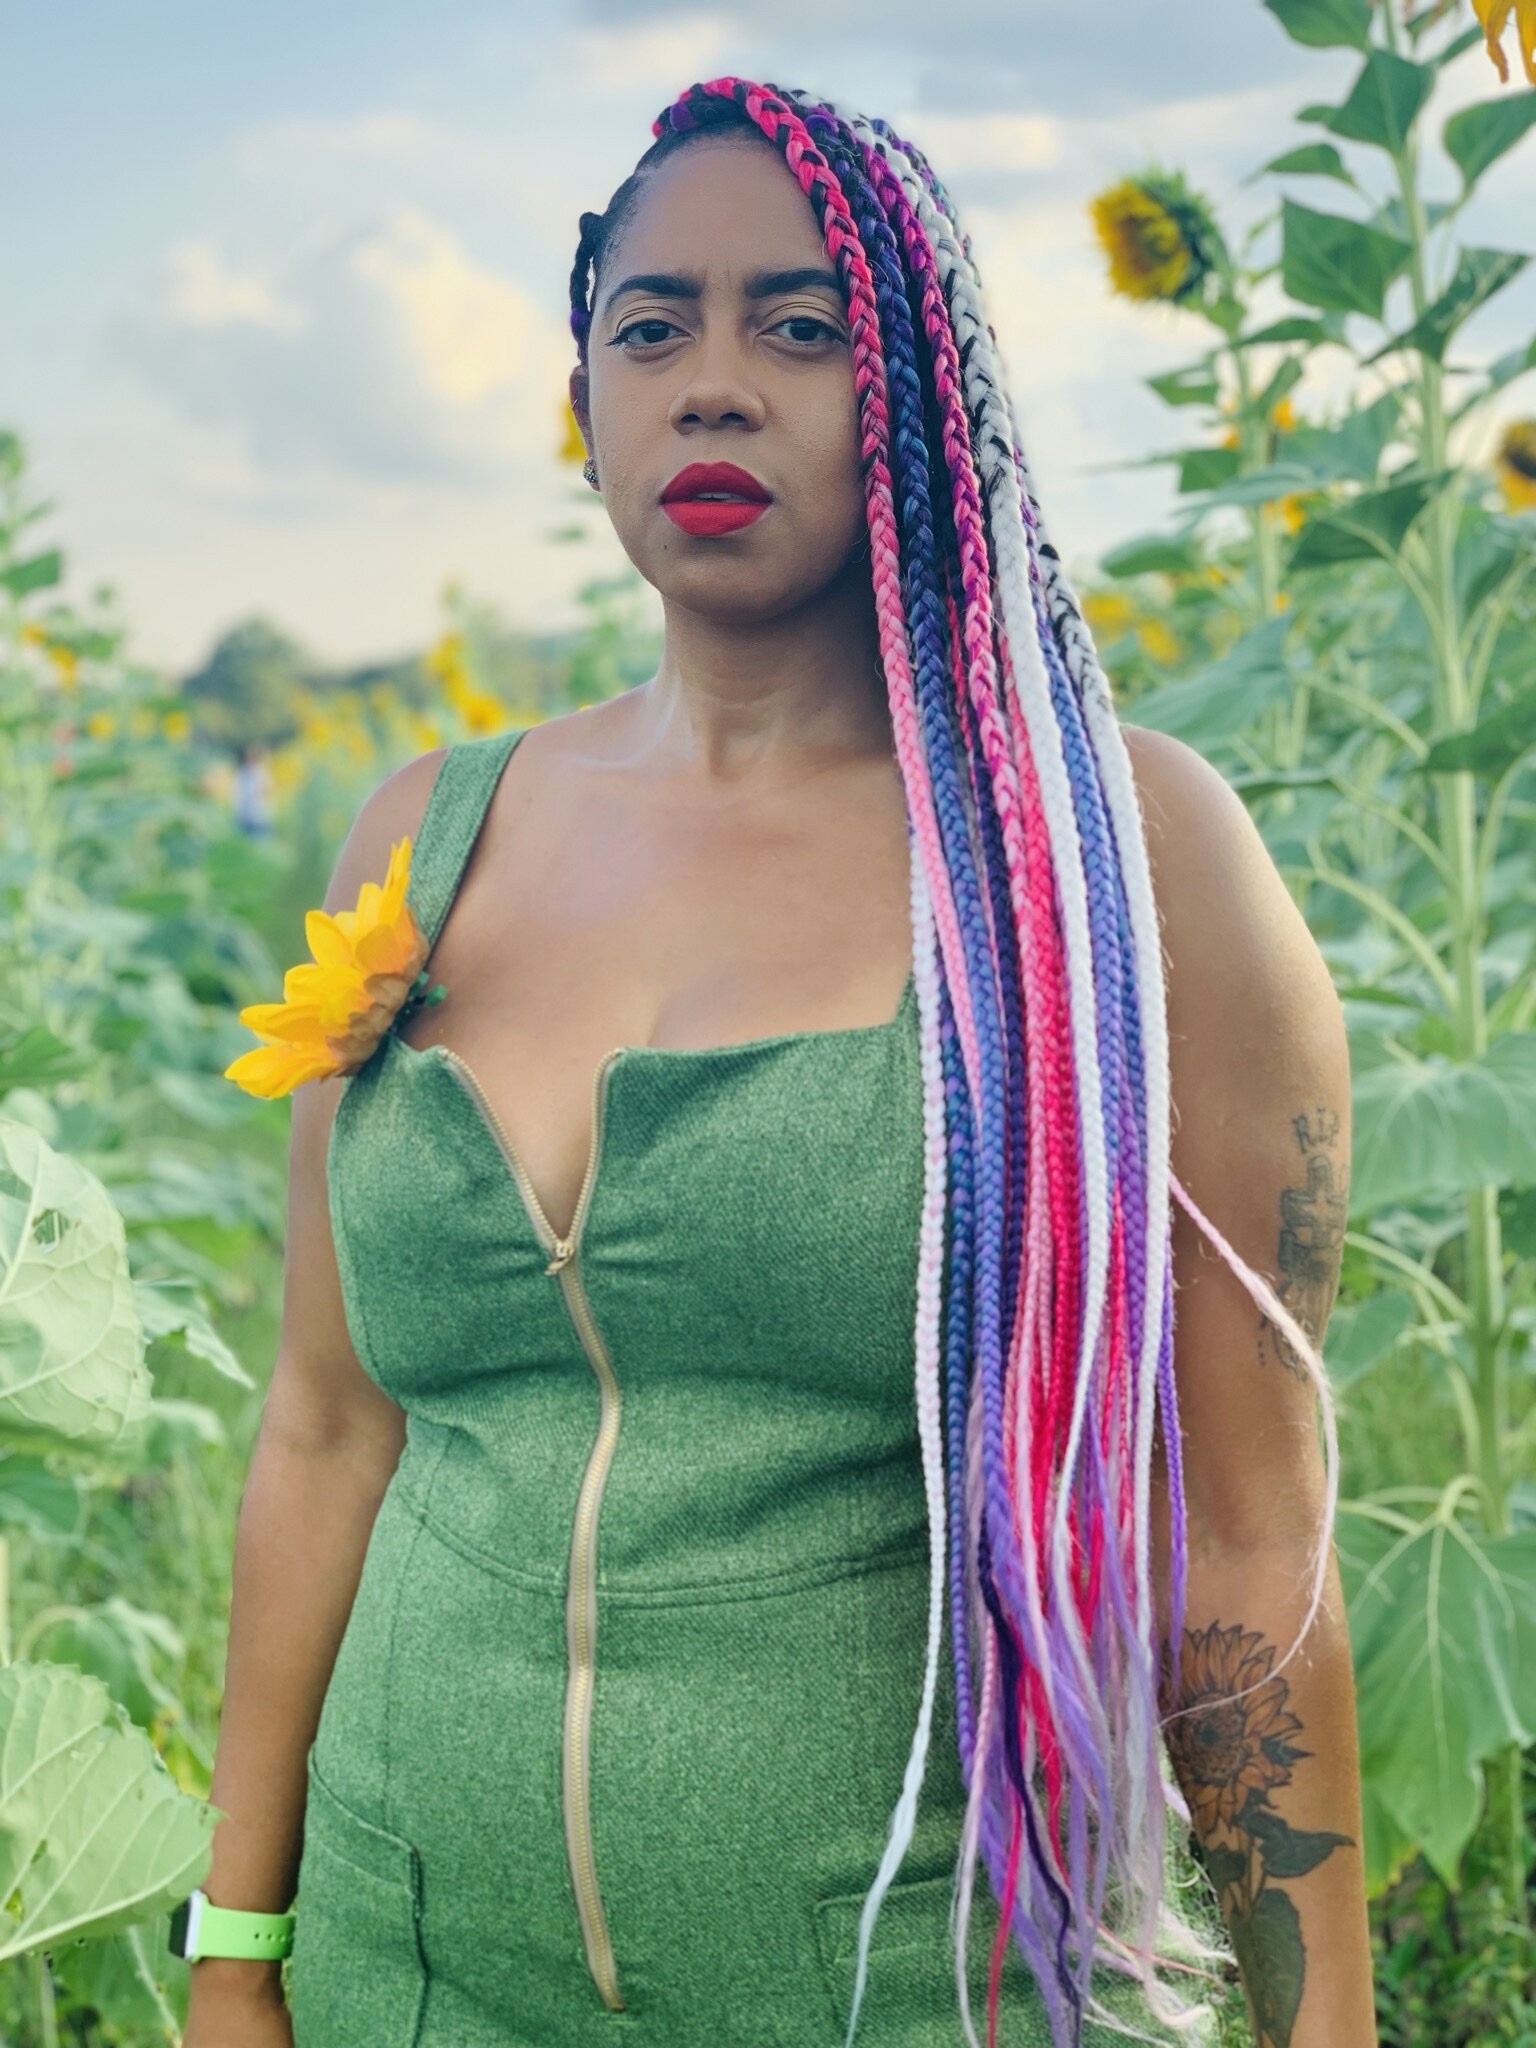
Okay back to the Sloanes. The pattern was very detailed and so easy to read. If you’re nervous about pdf patterns like I once was, this is one you shouldn’t fear. Obviously the Sloanes have an exposed front zipper. This is where you might experience a slight challenge (well I definitely did). Installing the zipper wasn’t the problem. The problem was finding a zipper long enough. For my sizing I needed a 17.5” zipper. I was able to find a 36” zipper in the color I wanted. I did shorten the zipper and replace the ends with the original zipper stops. If you’re not familiar with this process Victory Patterns has a tutorial and you can also find videos on YouTube.
I’d like to think the sewing time for this pattern was about 5-6 hours but I think it also depends on your speed and if you will be adding the topstitching.


Overall I loved creating these overalls and I’m most definitely obsessed with overalls going into Fall and Winter.
As always thanks for stopping by. Drop a comment below and tell me what you think of my Sloanes. If you’re creating Sloane’s or already made a pair, I’d love to hear your thoughts.
Peace and Blessings!

Pastey Pastels
Pastels are my new besties
I have a new love for pastels! This shade in particular has always been my favorite. This fabric has been in my stash for over 5 years. Why? It’s so good! I think the fabric was gifted and I just shoved it in the garage until this past Spring cleaning. I was actually only going to use this fabric as a muslin for more precise makes. Well, let’s say…It’s a little too good and thick to be a muslin.
Now let’s talk about the Lena
This pattern by Tabitha Sewer is named The Lena Horne dress. I had the luxury of snagging this pattern at Tabitha’s meetup this past June. Let me say that this pattern is very versatile and you can really have fun with it. I am absolutely in love with it! I saw this pattern and immediately though about my girls (my ta-tas). They need to be free every now and then lol. So here you have it, BUTTONS!
The dress is already fabulous without any changes. But the ruffles! The ruffles really are the icing on the cake. I love how the ruffles crisscross in the back. The bodice is fitted and the skirt is gathered with pockets. YES, POCKETS! Am I the only one who wants pockets on everything? The pattern offers two lengths and I decided to go with the longer length. I think both views are great for summer.


Tips and tricks
Tabitha has a sew-a-long tutorial for the Lena Horne dress. It is really easy to follow along. Trust me, you will not need the instructions.
Here’s how I added buttons.
Cutting- Do not cut the center bodice pattern piece on the fold. You will need to add an extra 1.5-2” to all four of the center front pieces. If you’re wanting to use bigger buttons you may need to measure the extra width of the center piece extension based on your button sizing. You are basically creating a panel on all four pattern pieces.
Interfacing- I interfaced the extra width only (1.5-2”) for 2 of the 4 center front pieces for added stability of the buttonholes. I ended up with 7 buttons.
My ruffles are a little wider than the patterns finished look because I used my smaller sized rolled hem foot for the finished edge. I can’t speak highly enough about the benefits of using a rolled hem foot. Legit time saver and perfect seams every time.
If you have a healthier bust like I do, you may need to do a bust adjustment or add 1-2” for the length of the entire bodice. For most patterns I automatically make this adjustment but I did not for this dress (only because I forgot).


The packaging is so pretty!!


Okay friends, I had so much fun making and now wearing the heck out of this dress. I’m already thinking of ways to hack my second, third, and fourth Lena! How do you feel about my hack? Have you created a Lena Horne dress? I’d love your feedback.
Thanks for stopping by!
Peace & Love

Canary Watermelon
Watermelon Season is here!
Summer is heating up and all my favorite fruits are accessible. On these hot summer days, I really love a nice cold watermelon (seeded to be exact). I can seriously eat watermelon for breakfast, lunch, and dinner and never get tired. Okay, now that I’ve got you thinking about fruit…let’s taIk about this canary jumper. This McCalls pattern M7910 has been in my queue for a little while. Don’t be intimidated by this one. There are only 4 pattern pieces…YES, 4 pieces. The fabric calls for stretch knit or jersey fabrics only. I’ve already created two jumpsuits with this pattern this summer.


Tips and tricks
When I sew stretch knits and jersey fabrics, I love to serge. If you don’t have a serger a zig-zag stitch is fine. The bodice is lined and you can cut out your lining with the same fabric or you can use a stretch lining. I used a mesh stretch lining (I think I like the same fabric for lining better). Around the calf and knee area I did need to take in a few inches. Other than those minor adjustments, this pattern can be sewn in an hour or less. Because the cut is so low on this neckline, I don’t wear a bra with this jumpsuit (my stickies were still visible through this canary yellow so they were a no go too). I plan on wearing both jumpsuits through the fall and winter seasons with an undershirt (style tip).


And there you have it, a fast and fun summer make that fits all those curves and gives your thighs a break from those summer dresses and that awful rubbing in the heat. I know I’m not the only woman who has this problem…lol. Tell me what you think about this jumpsuit pattern and the many options below. Until next time, I’ll be back. I’m going to cut into my watermelon.
Peace & Love
Nefertiti

Beach Vibes
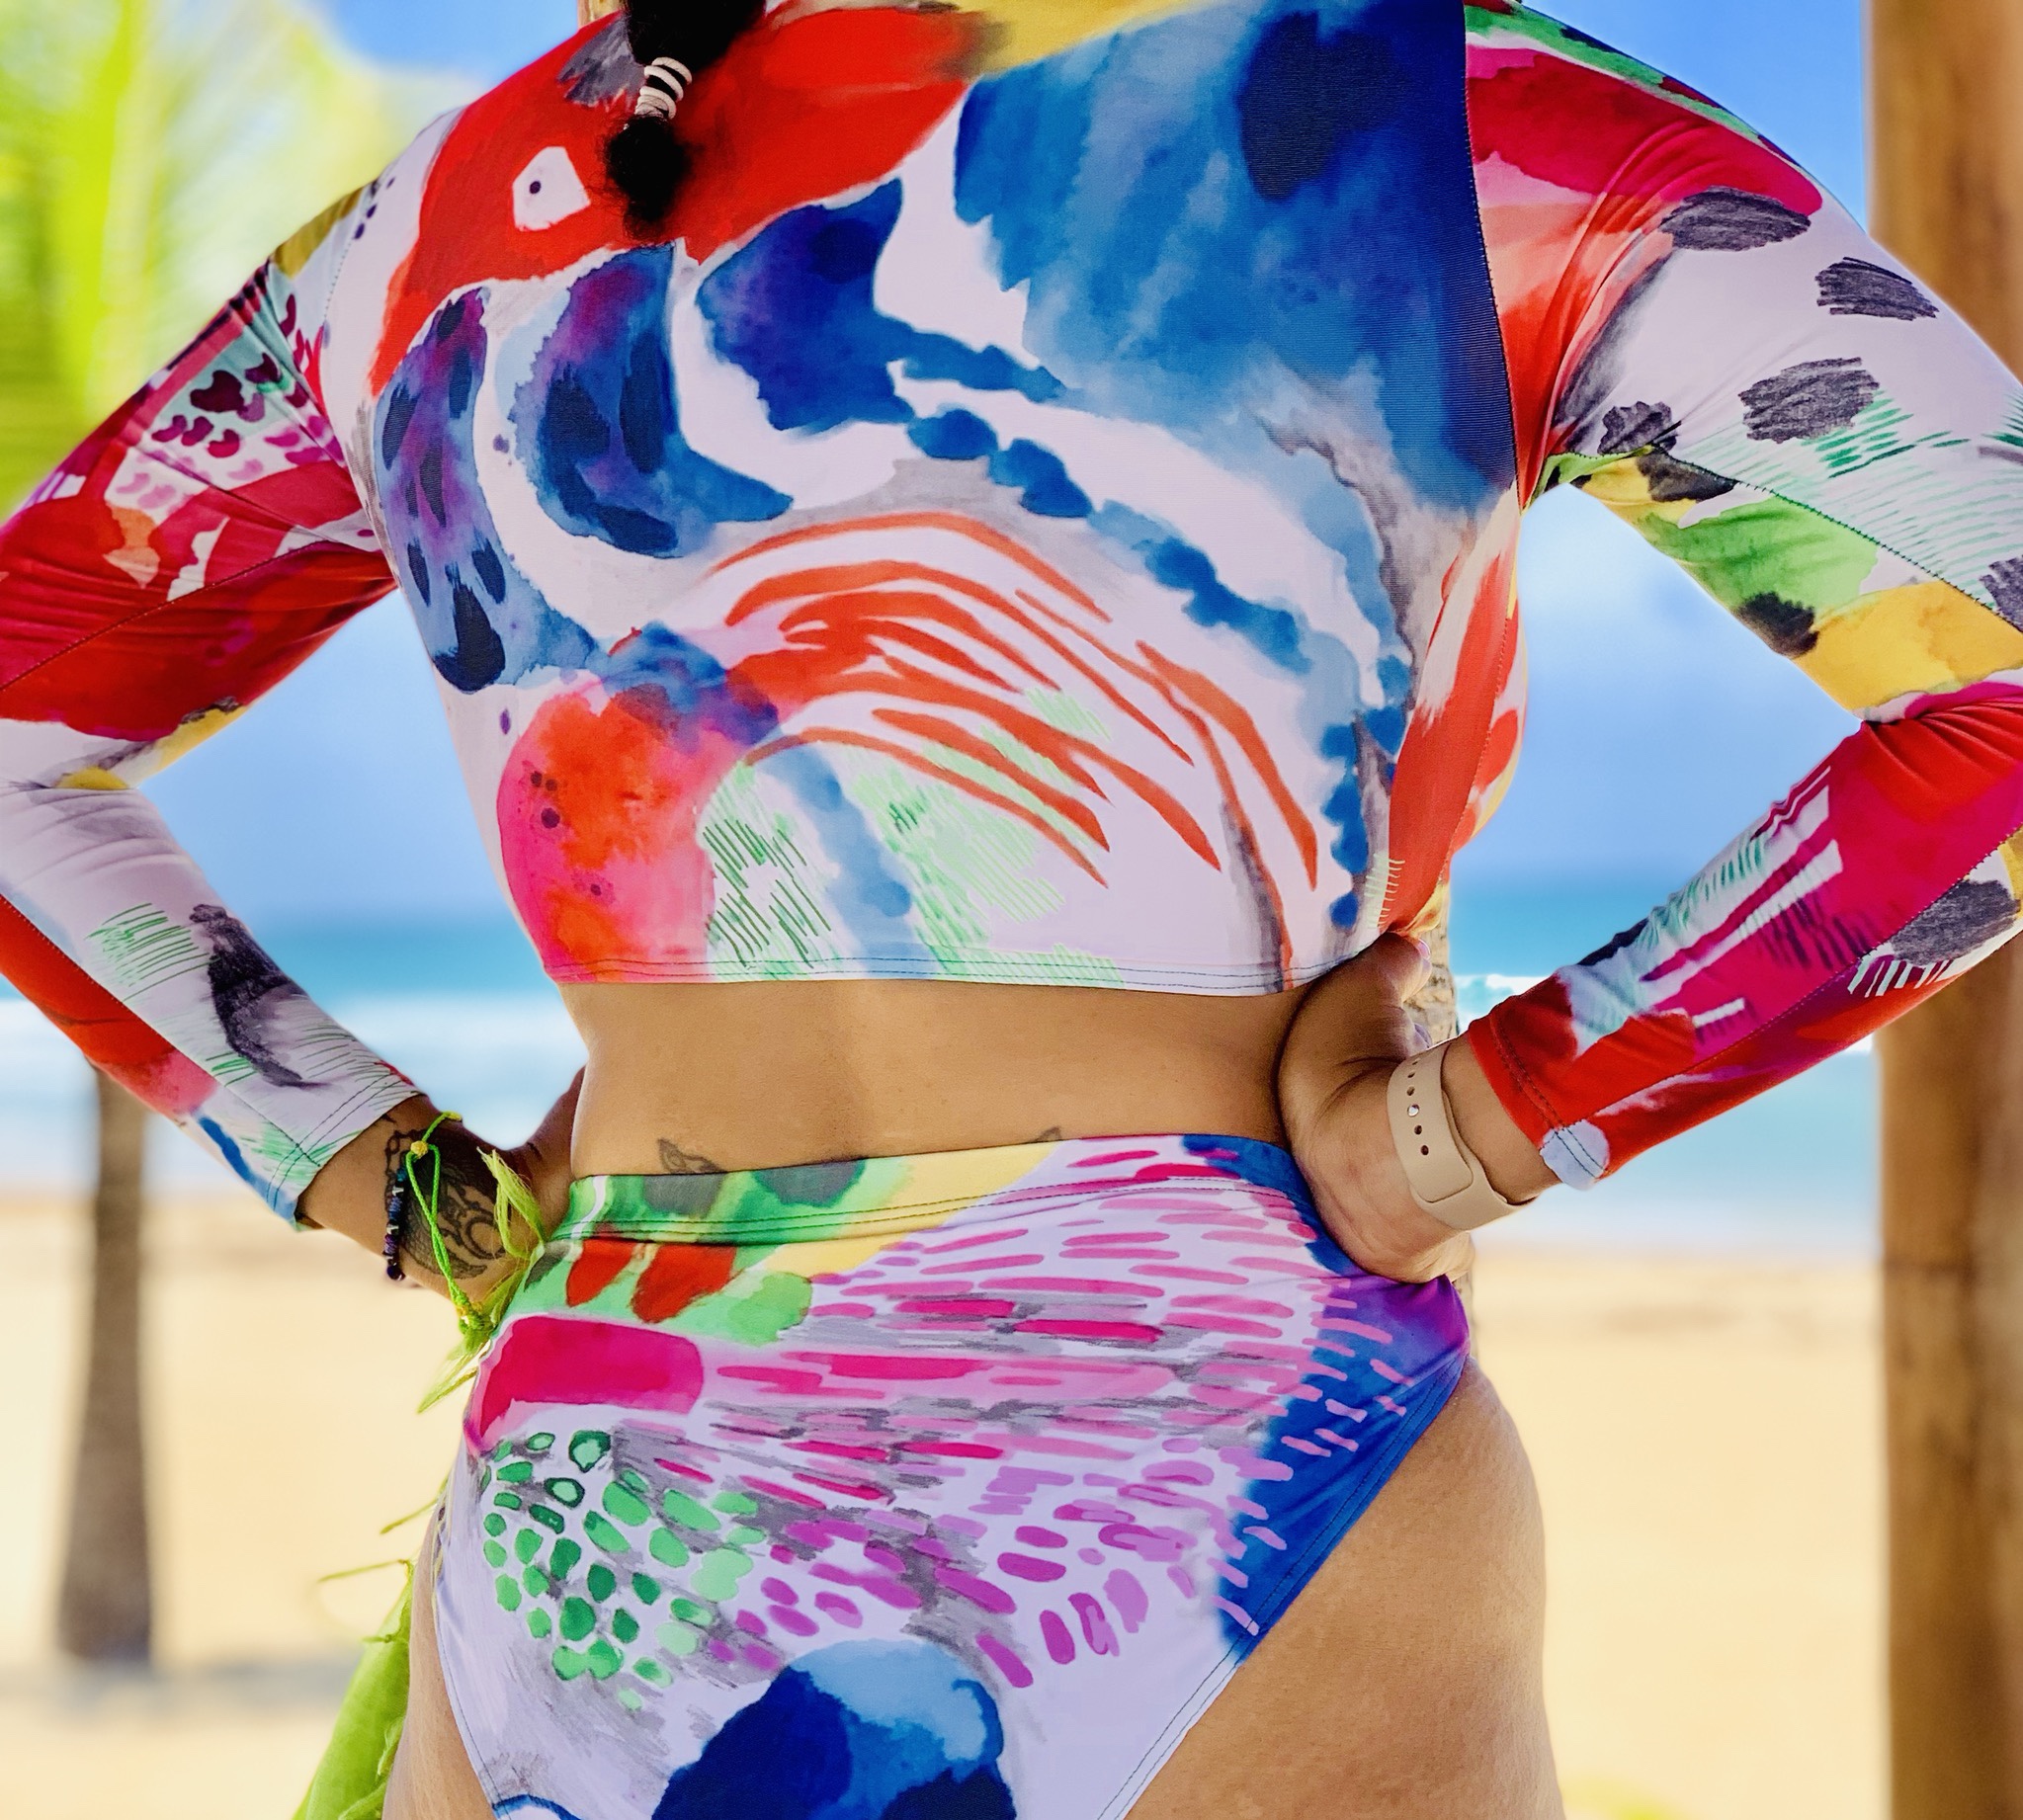
Beach Vibes
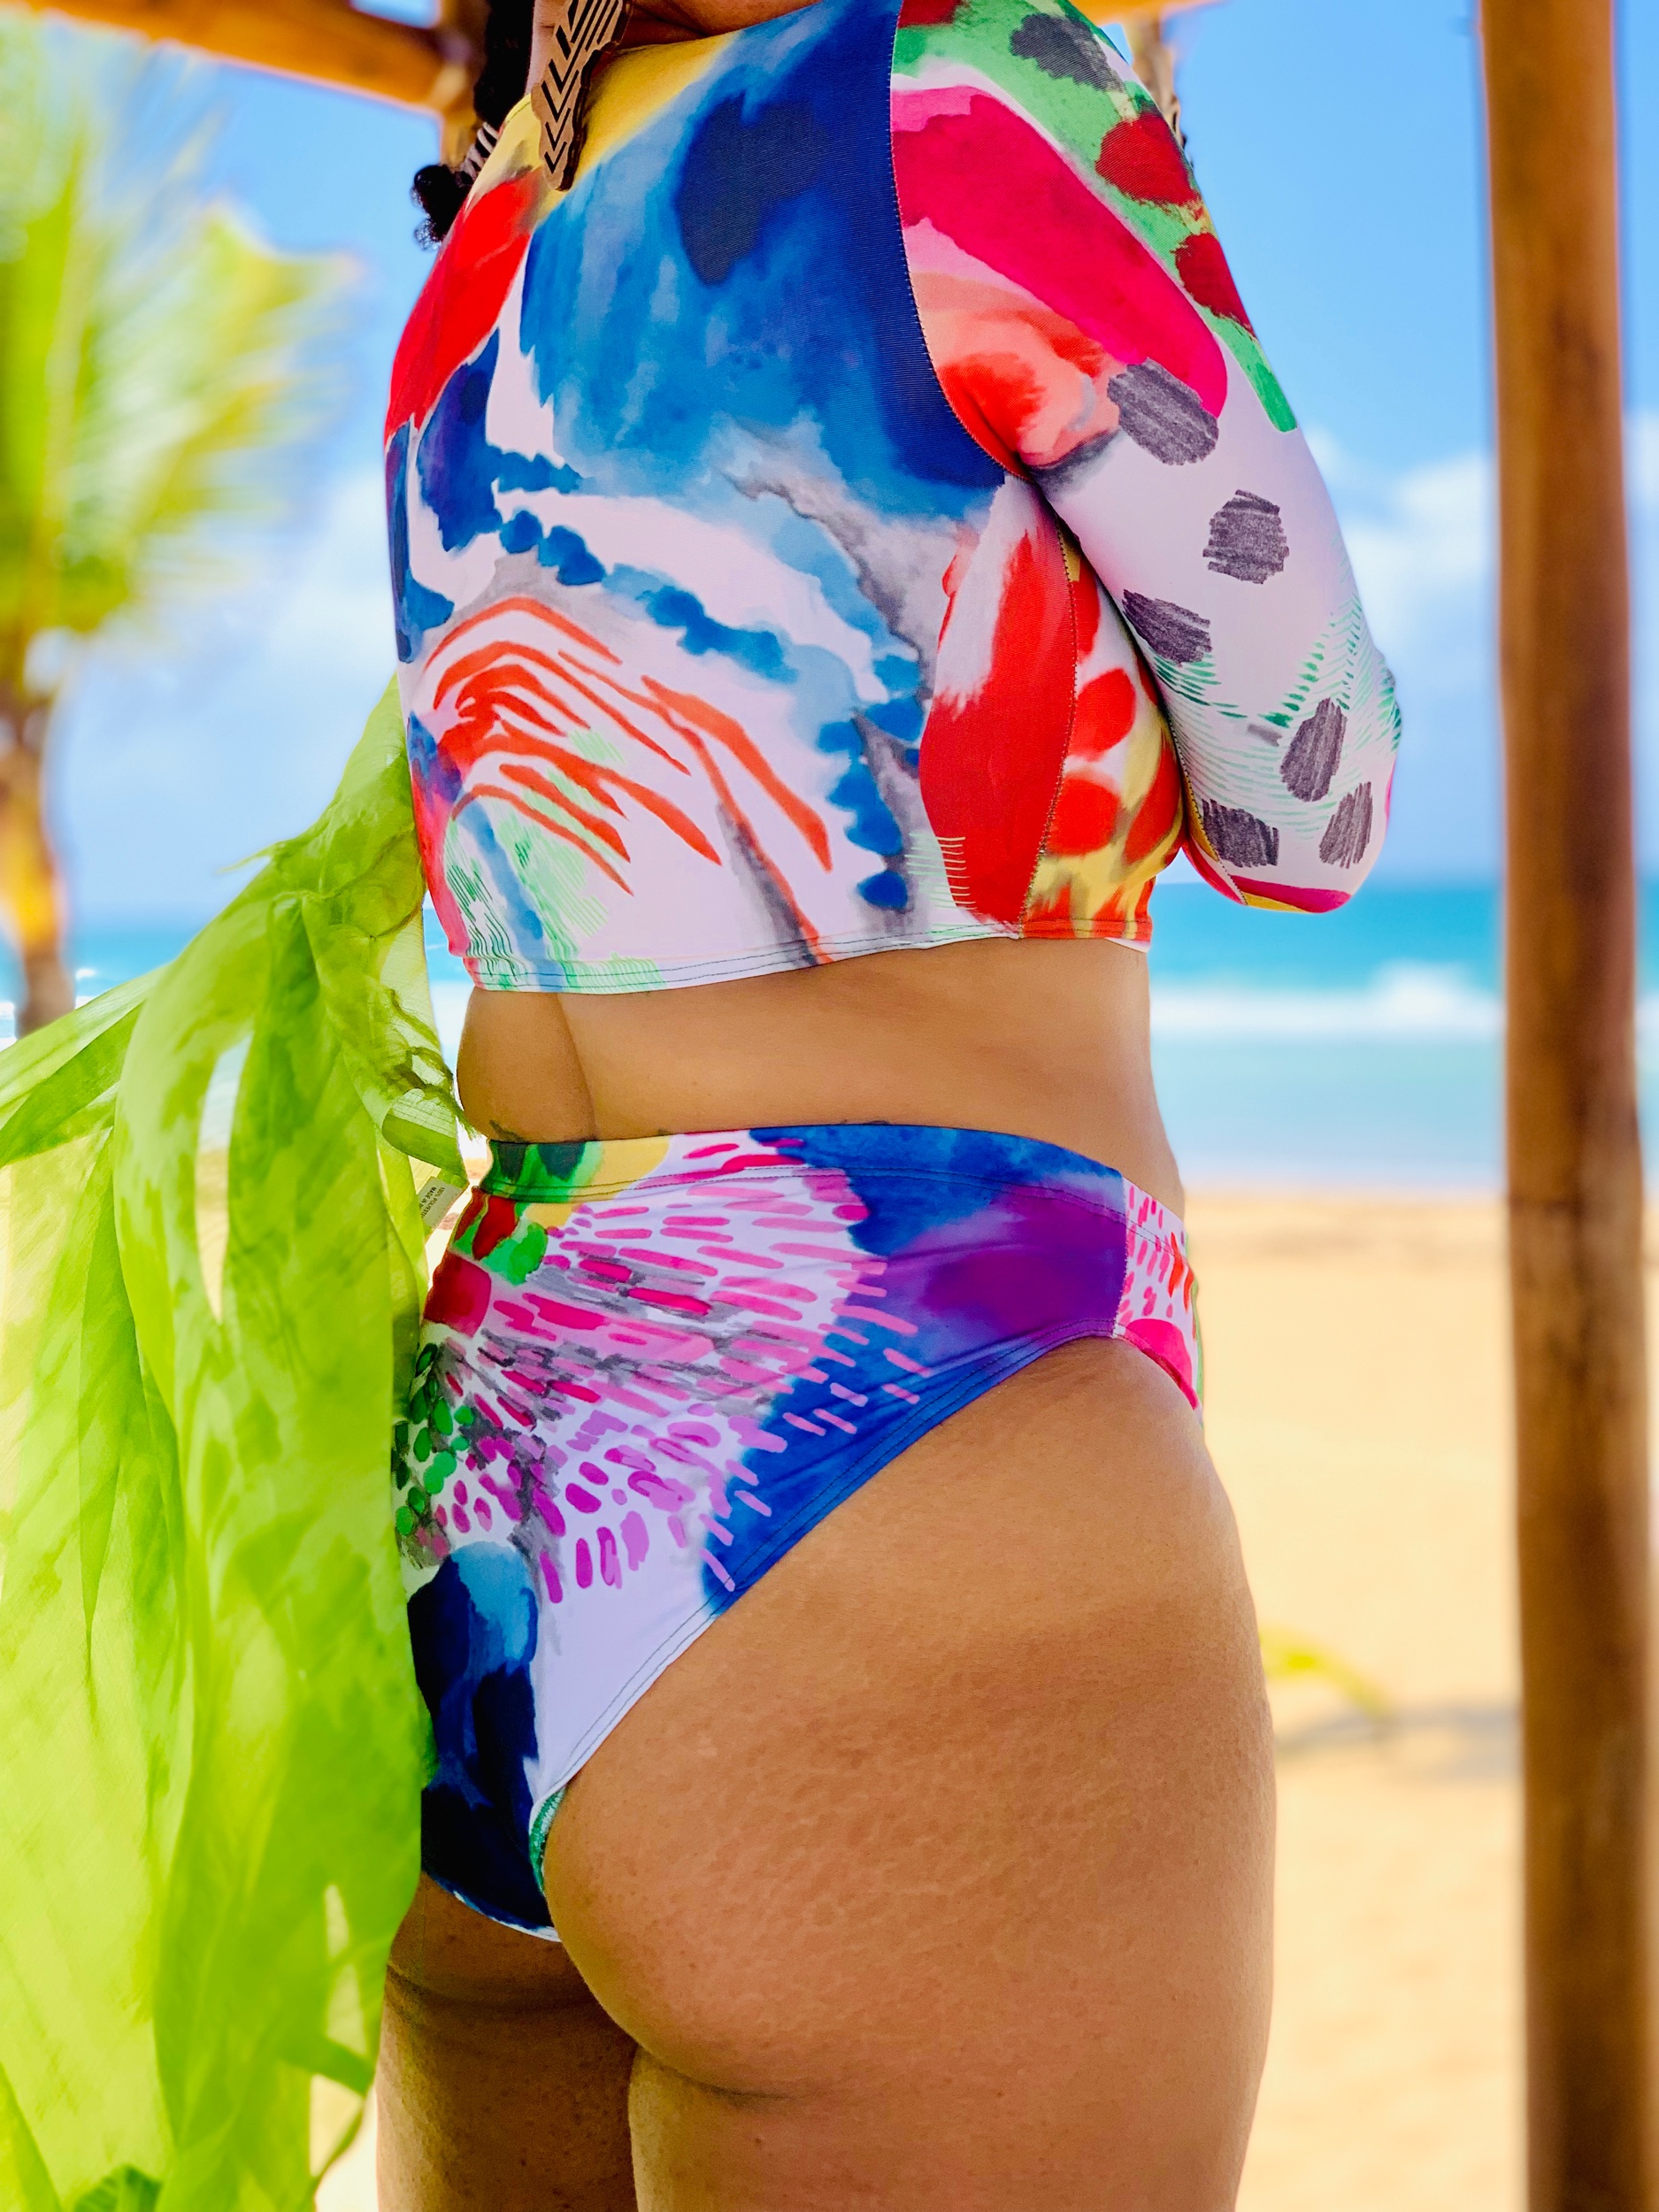
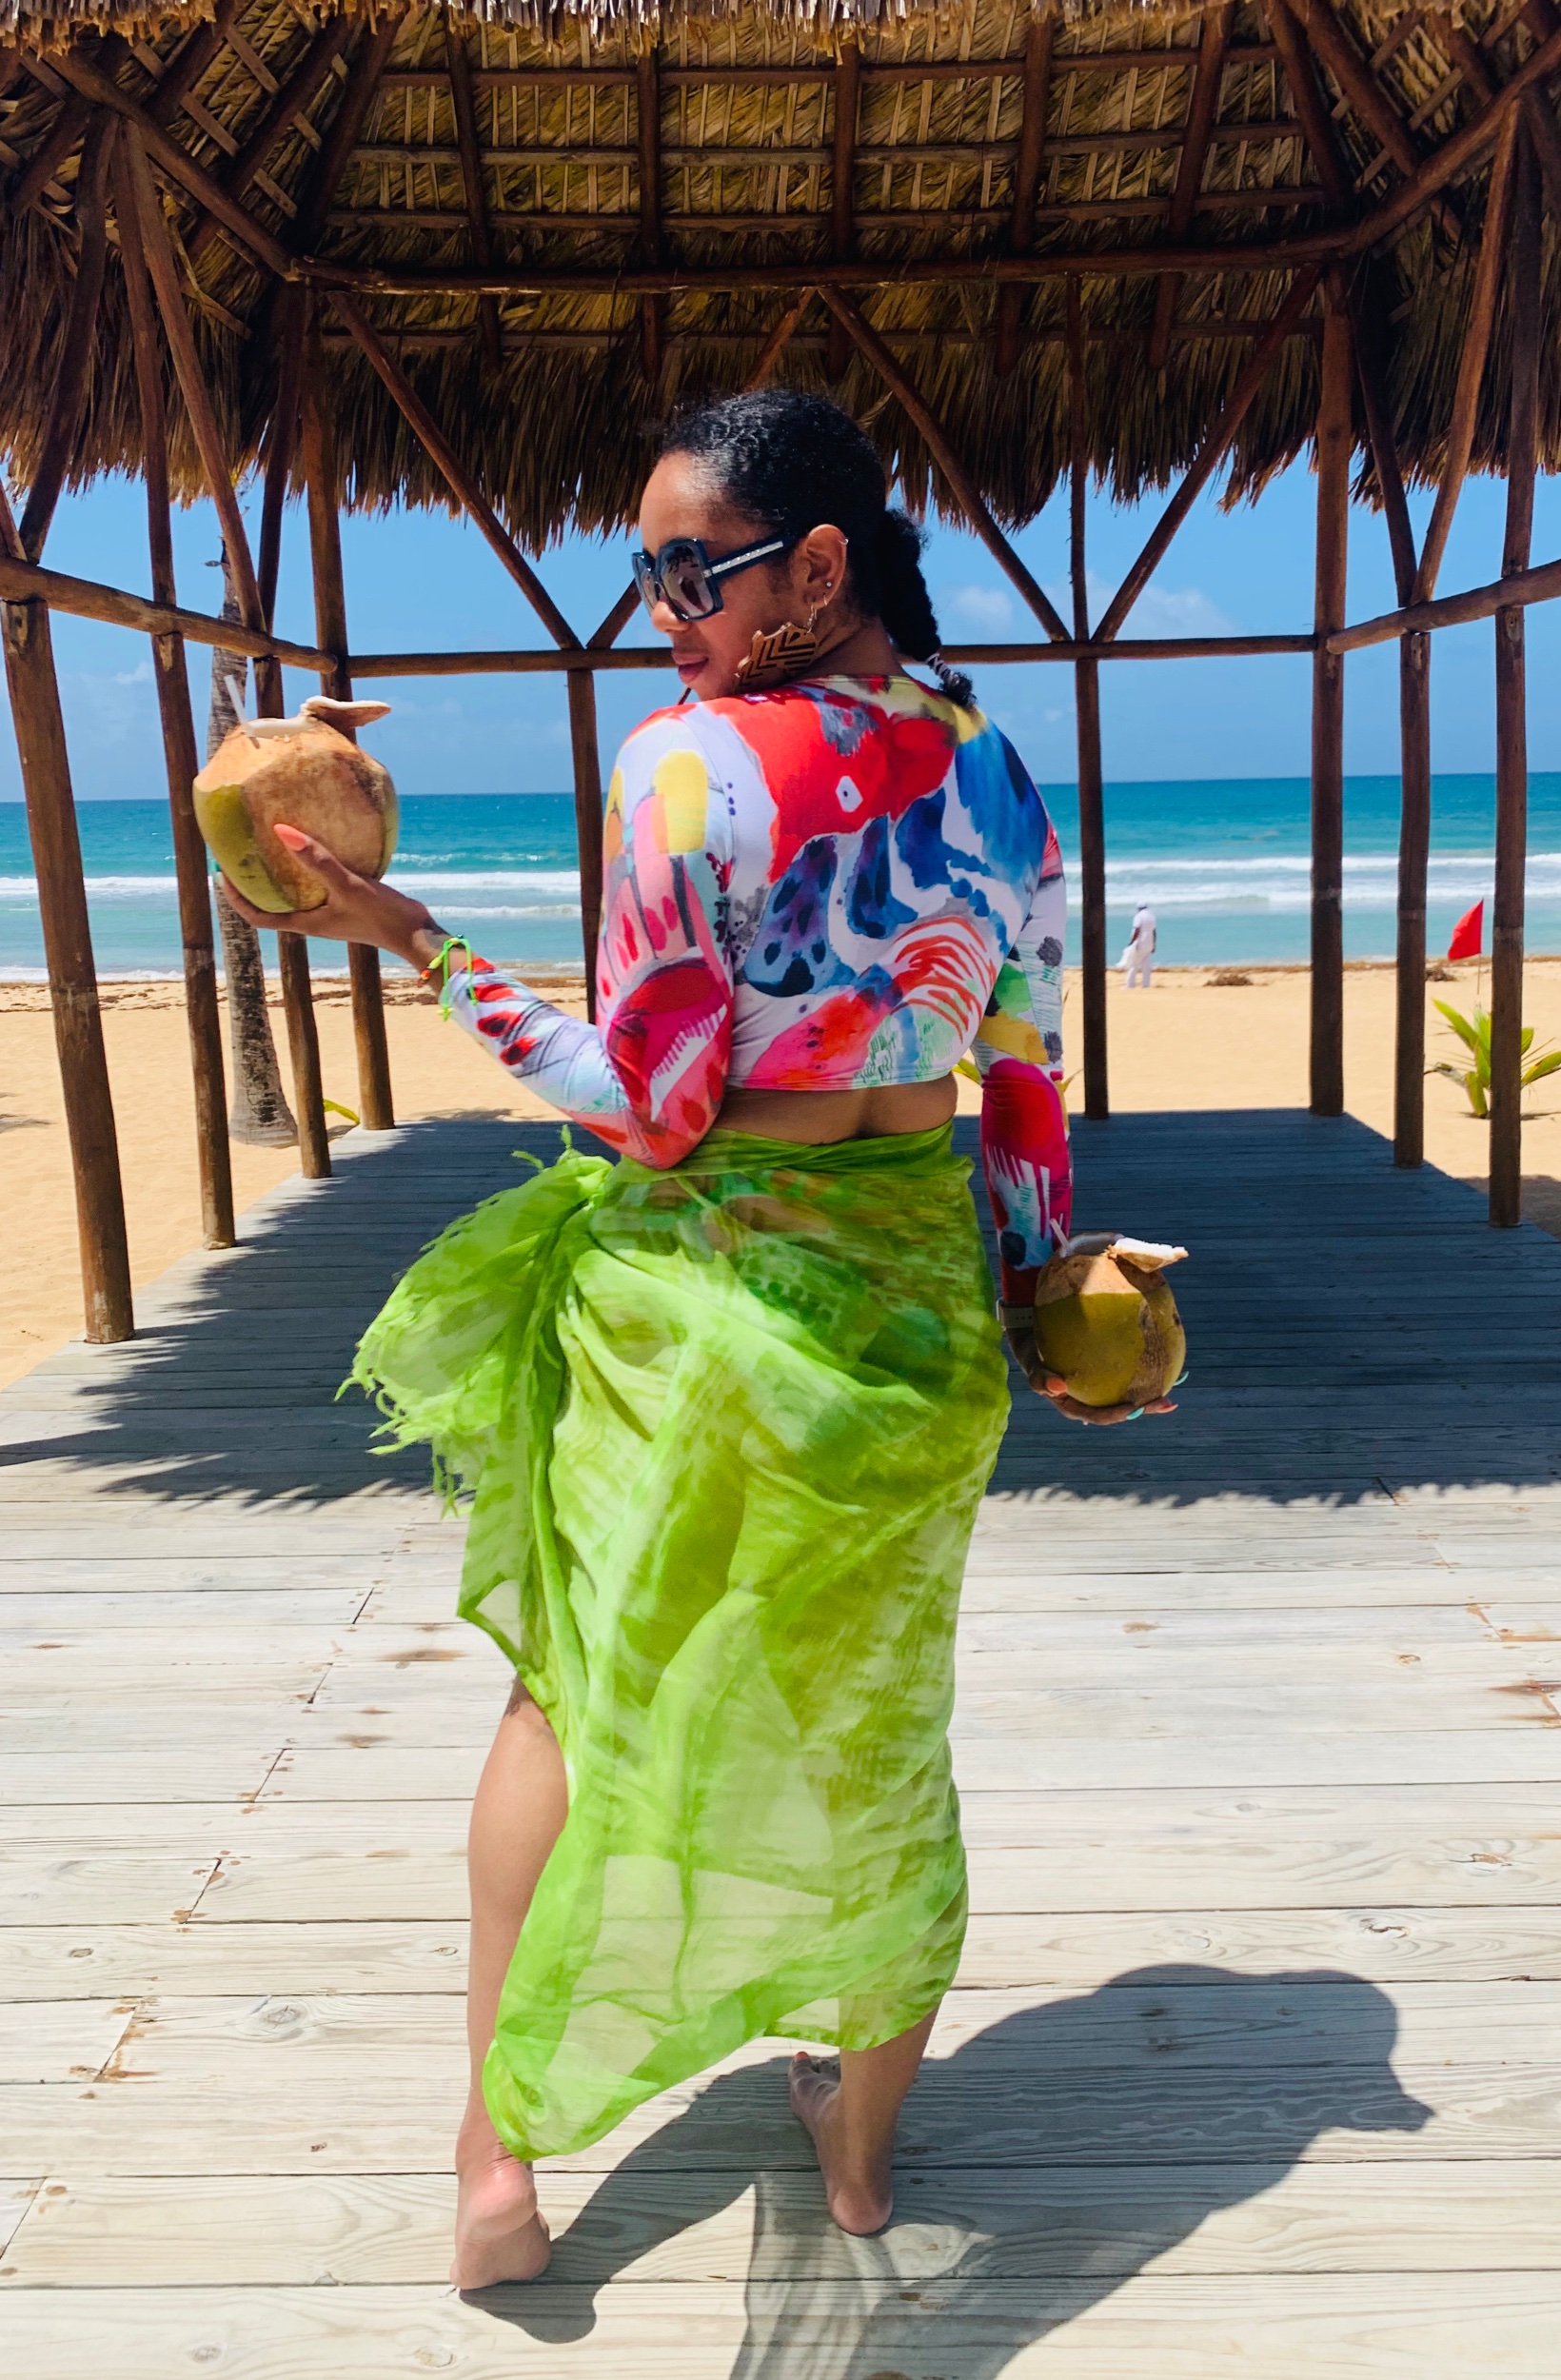
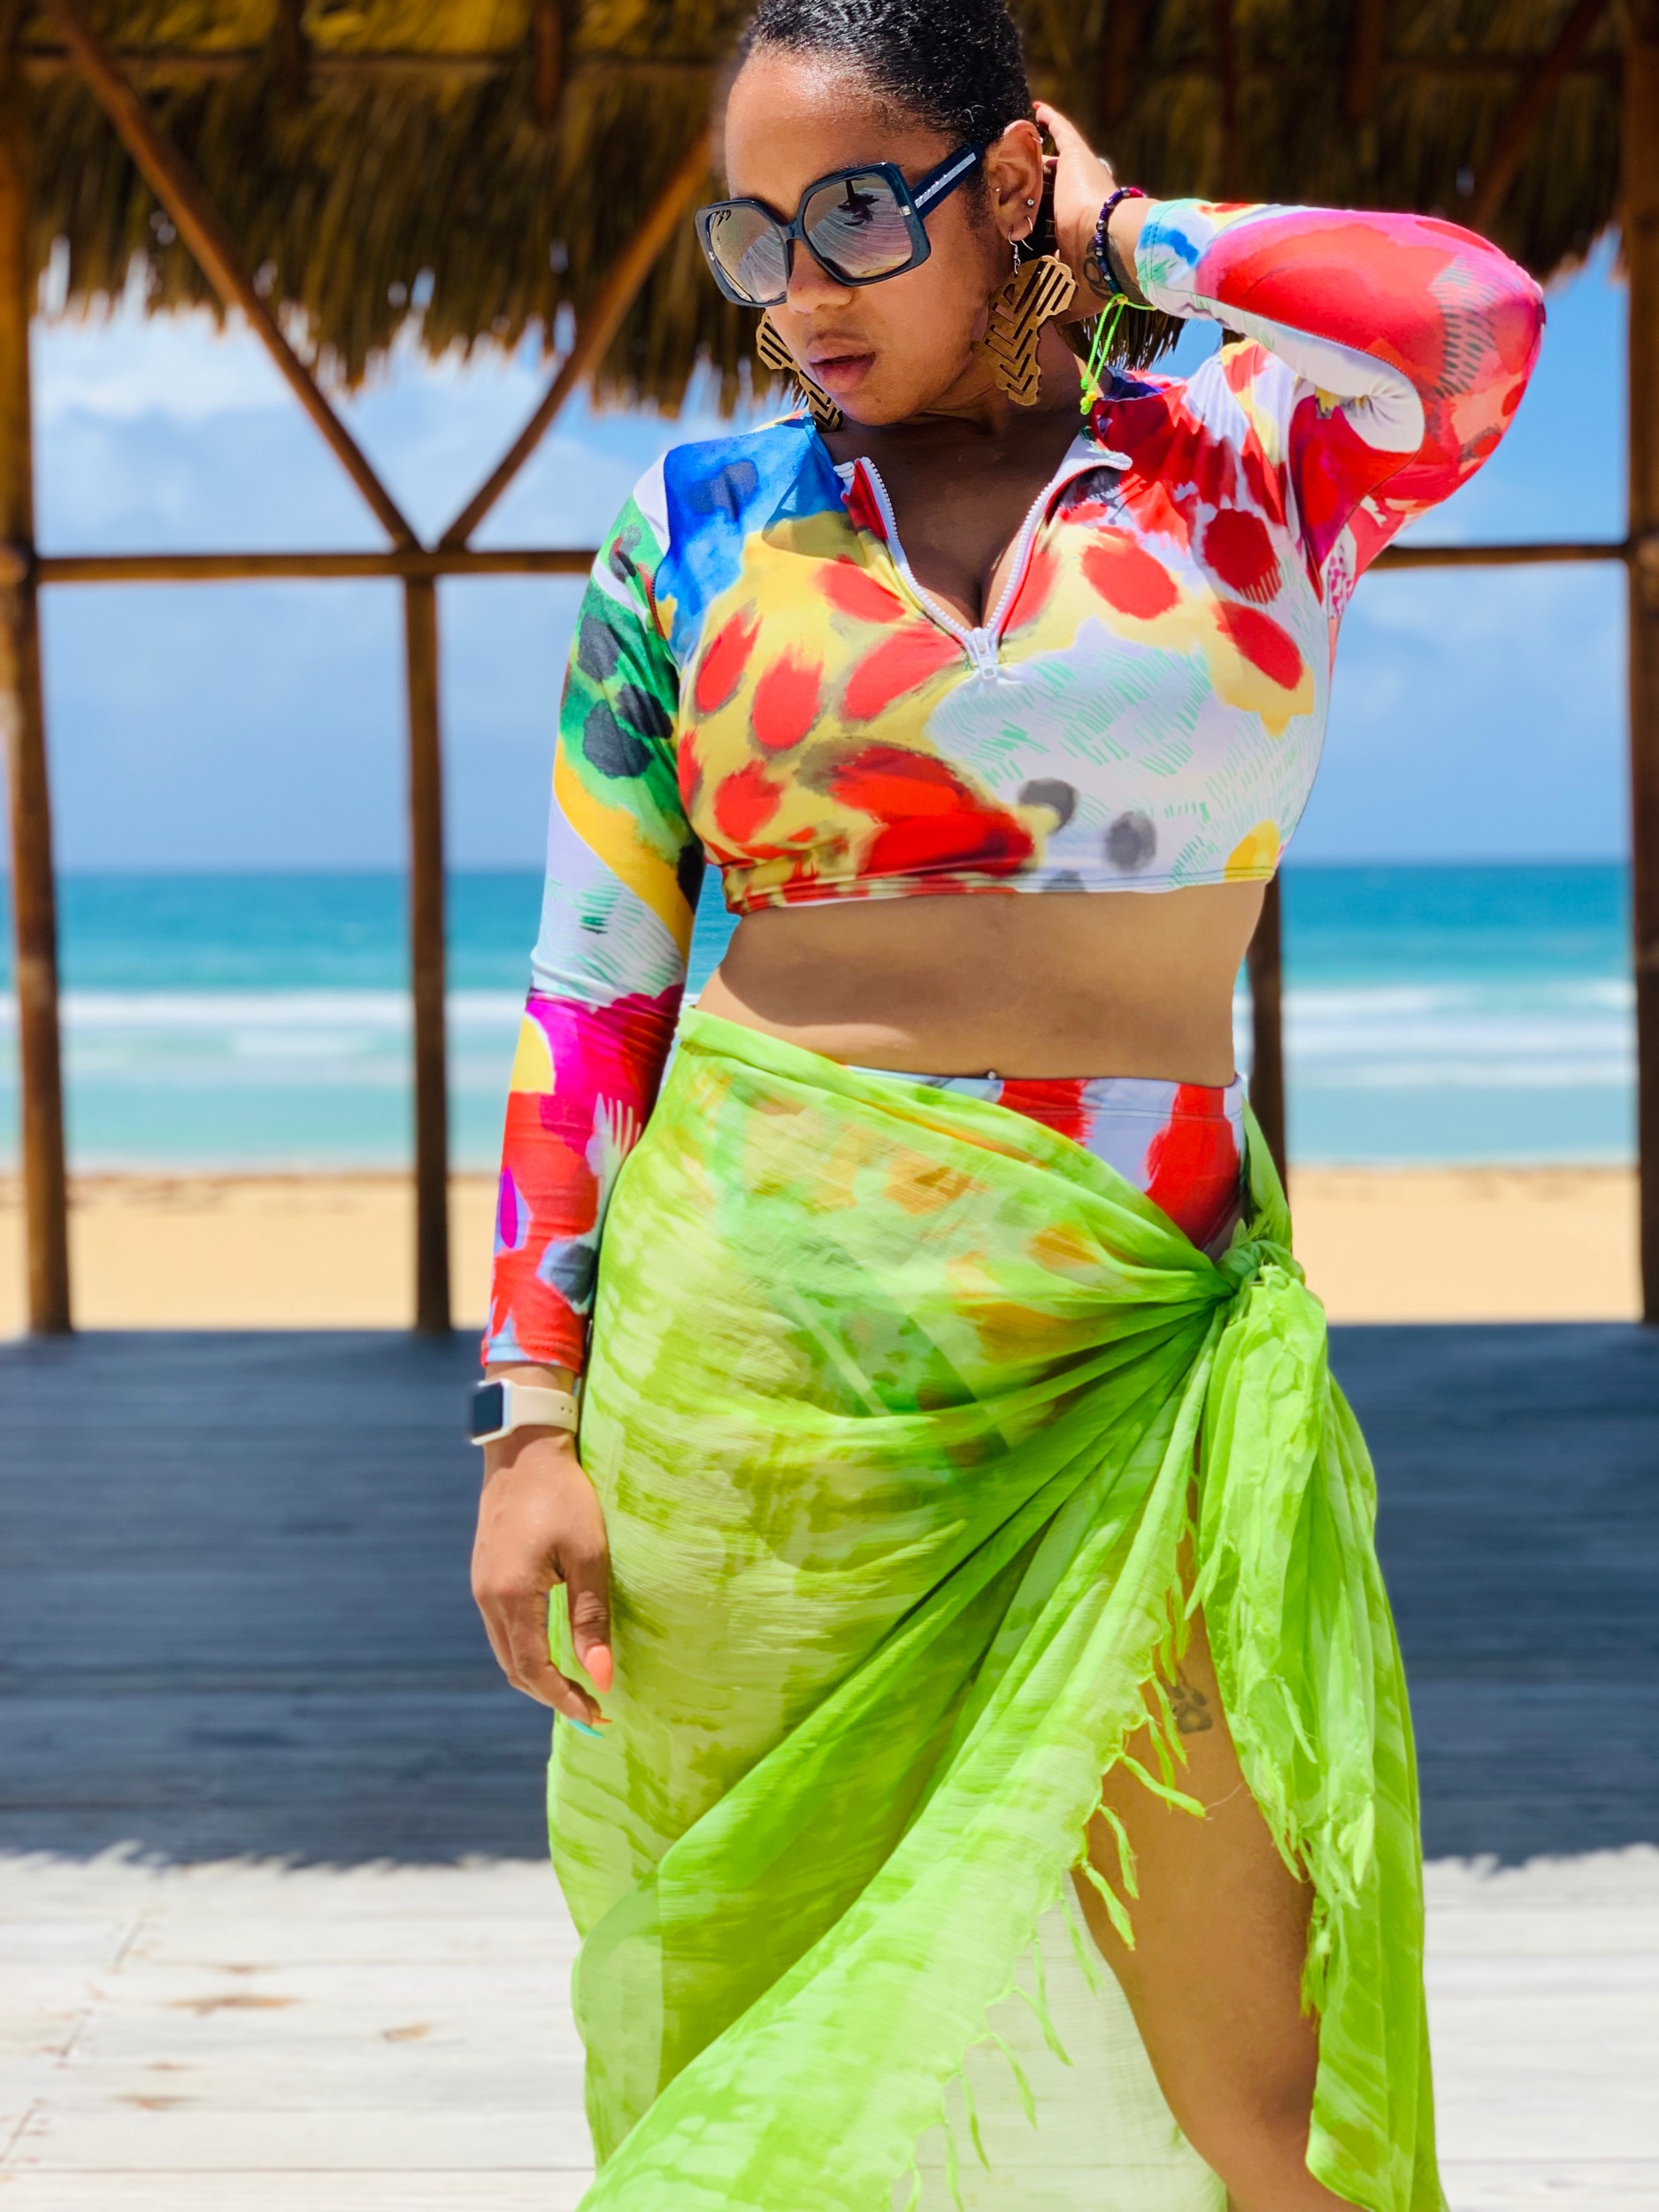
Summer vacations are here and always my favorite time of the year. This year I traveled backed to Punta Cana with my family. For this special vacation my husband and I are celebrating 10 years and renewing our vows! In typical sewist fashion, I had to create most of my clothes for this trip. One of my most favorite handmade items is this two piece swimsuit using my friend Katie Kortman’s Spoonflower fabric. Does this not scream CORNY RAINBOW?


let’s tAlk swimweAr!
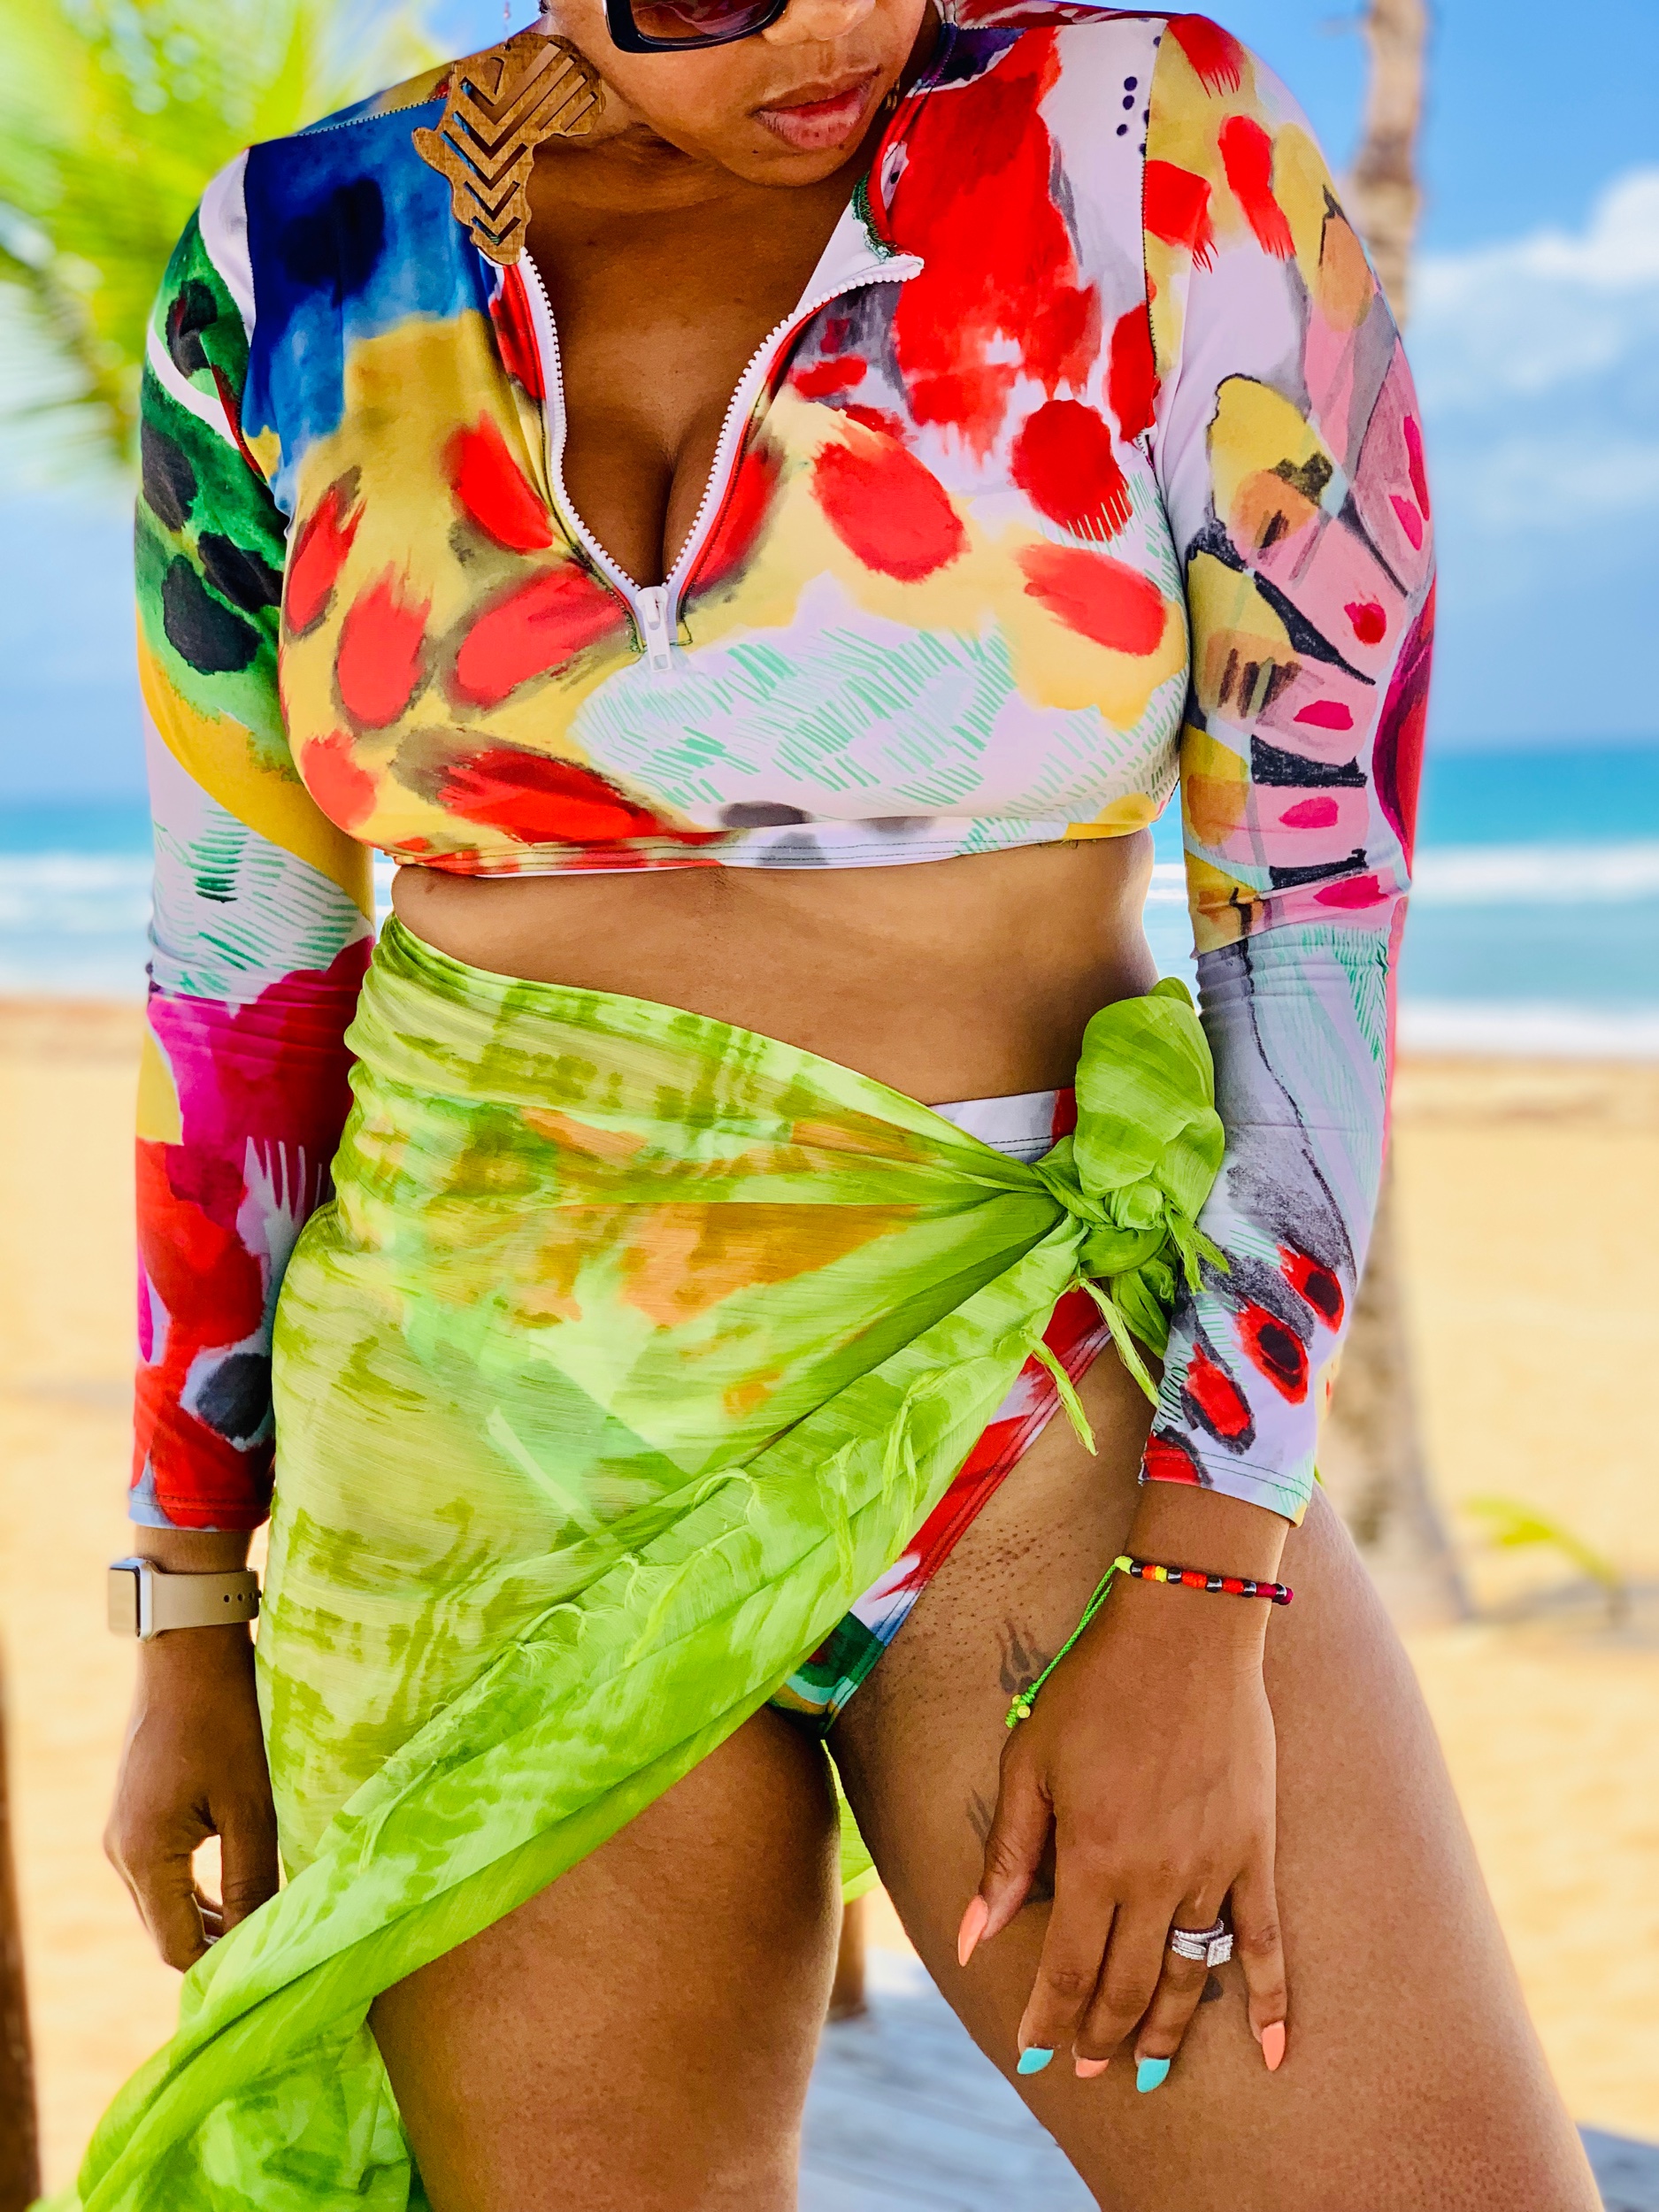
First I have to share that sewing swimwear is not all bad. I will say if you have a serger that is half the battle. Picking your elastic is also very important. Be sure to purchase swimwear elastic. I purchased my elastic from amazon. Another tip for sewing swimwear is to use twin needles for stretch fabrics. The twin needle makes finishing the hems very professional and clean. While not all swimsuits need this finishing stitch, I think the double stitch is perfect for my two piece. I used a two piece swimsuit I purchased last summer for my pattern and added two inches to all edges. My old swimsuit did not have a zipper and the fabric is not as thick as this Sports Lycra so this make was perfect for a zipper. I cut straight down the middle of the front pattern piece and installed the zipper. The front top piece and the entire bottom piece are lined with mesh fabric. For the waistband I used 1 inch elastic. I attached the elastic after finishing my edges with my serger. I attached elastic at leg openings, waist of bottoms, and the edge of the top. An easy way to attach the elastic is with your serger (pull only the elastic while attaching not the fabric).
Where did I go wrong?
You don’t just sew your 2nd swimsuit ever without bumps in the road (well…I didn’t). My first mistake was thinking that since I’m sewing fabric I need to stretch, I also needed to use my stretch thread. Oh God…was I wrong. The stretch thread wasn’t necessary AT ALL! So after my thread broke while sewing for the 37th time I finally said to myself, why don’t you just use an all purpose thread. Well, I finally did and goodness I could’ve saved so much time if I just started with basic thread (talk about learning from your mistakes).
Overall I really enjoyed making this swimsuit and it fits me perfectly. This Spoonflower fabric made making this swimsuit that much more worth the hour plus of seam ripping lol. The time it may take to sew this look is about 1-2 hours. I plan on making more swimwear very soon and even considering a YouTube tutorial (I think I’ll take a poll on that lol). I hope you enjoyed this read.
Thanks for stopping by!
Peace & Love


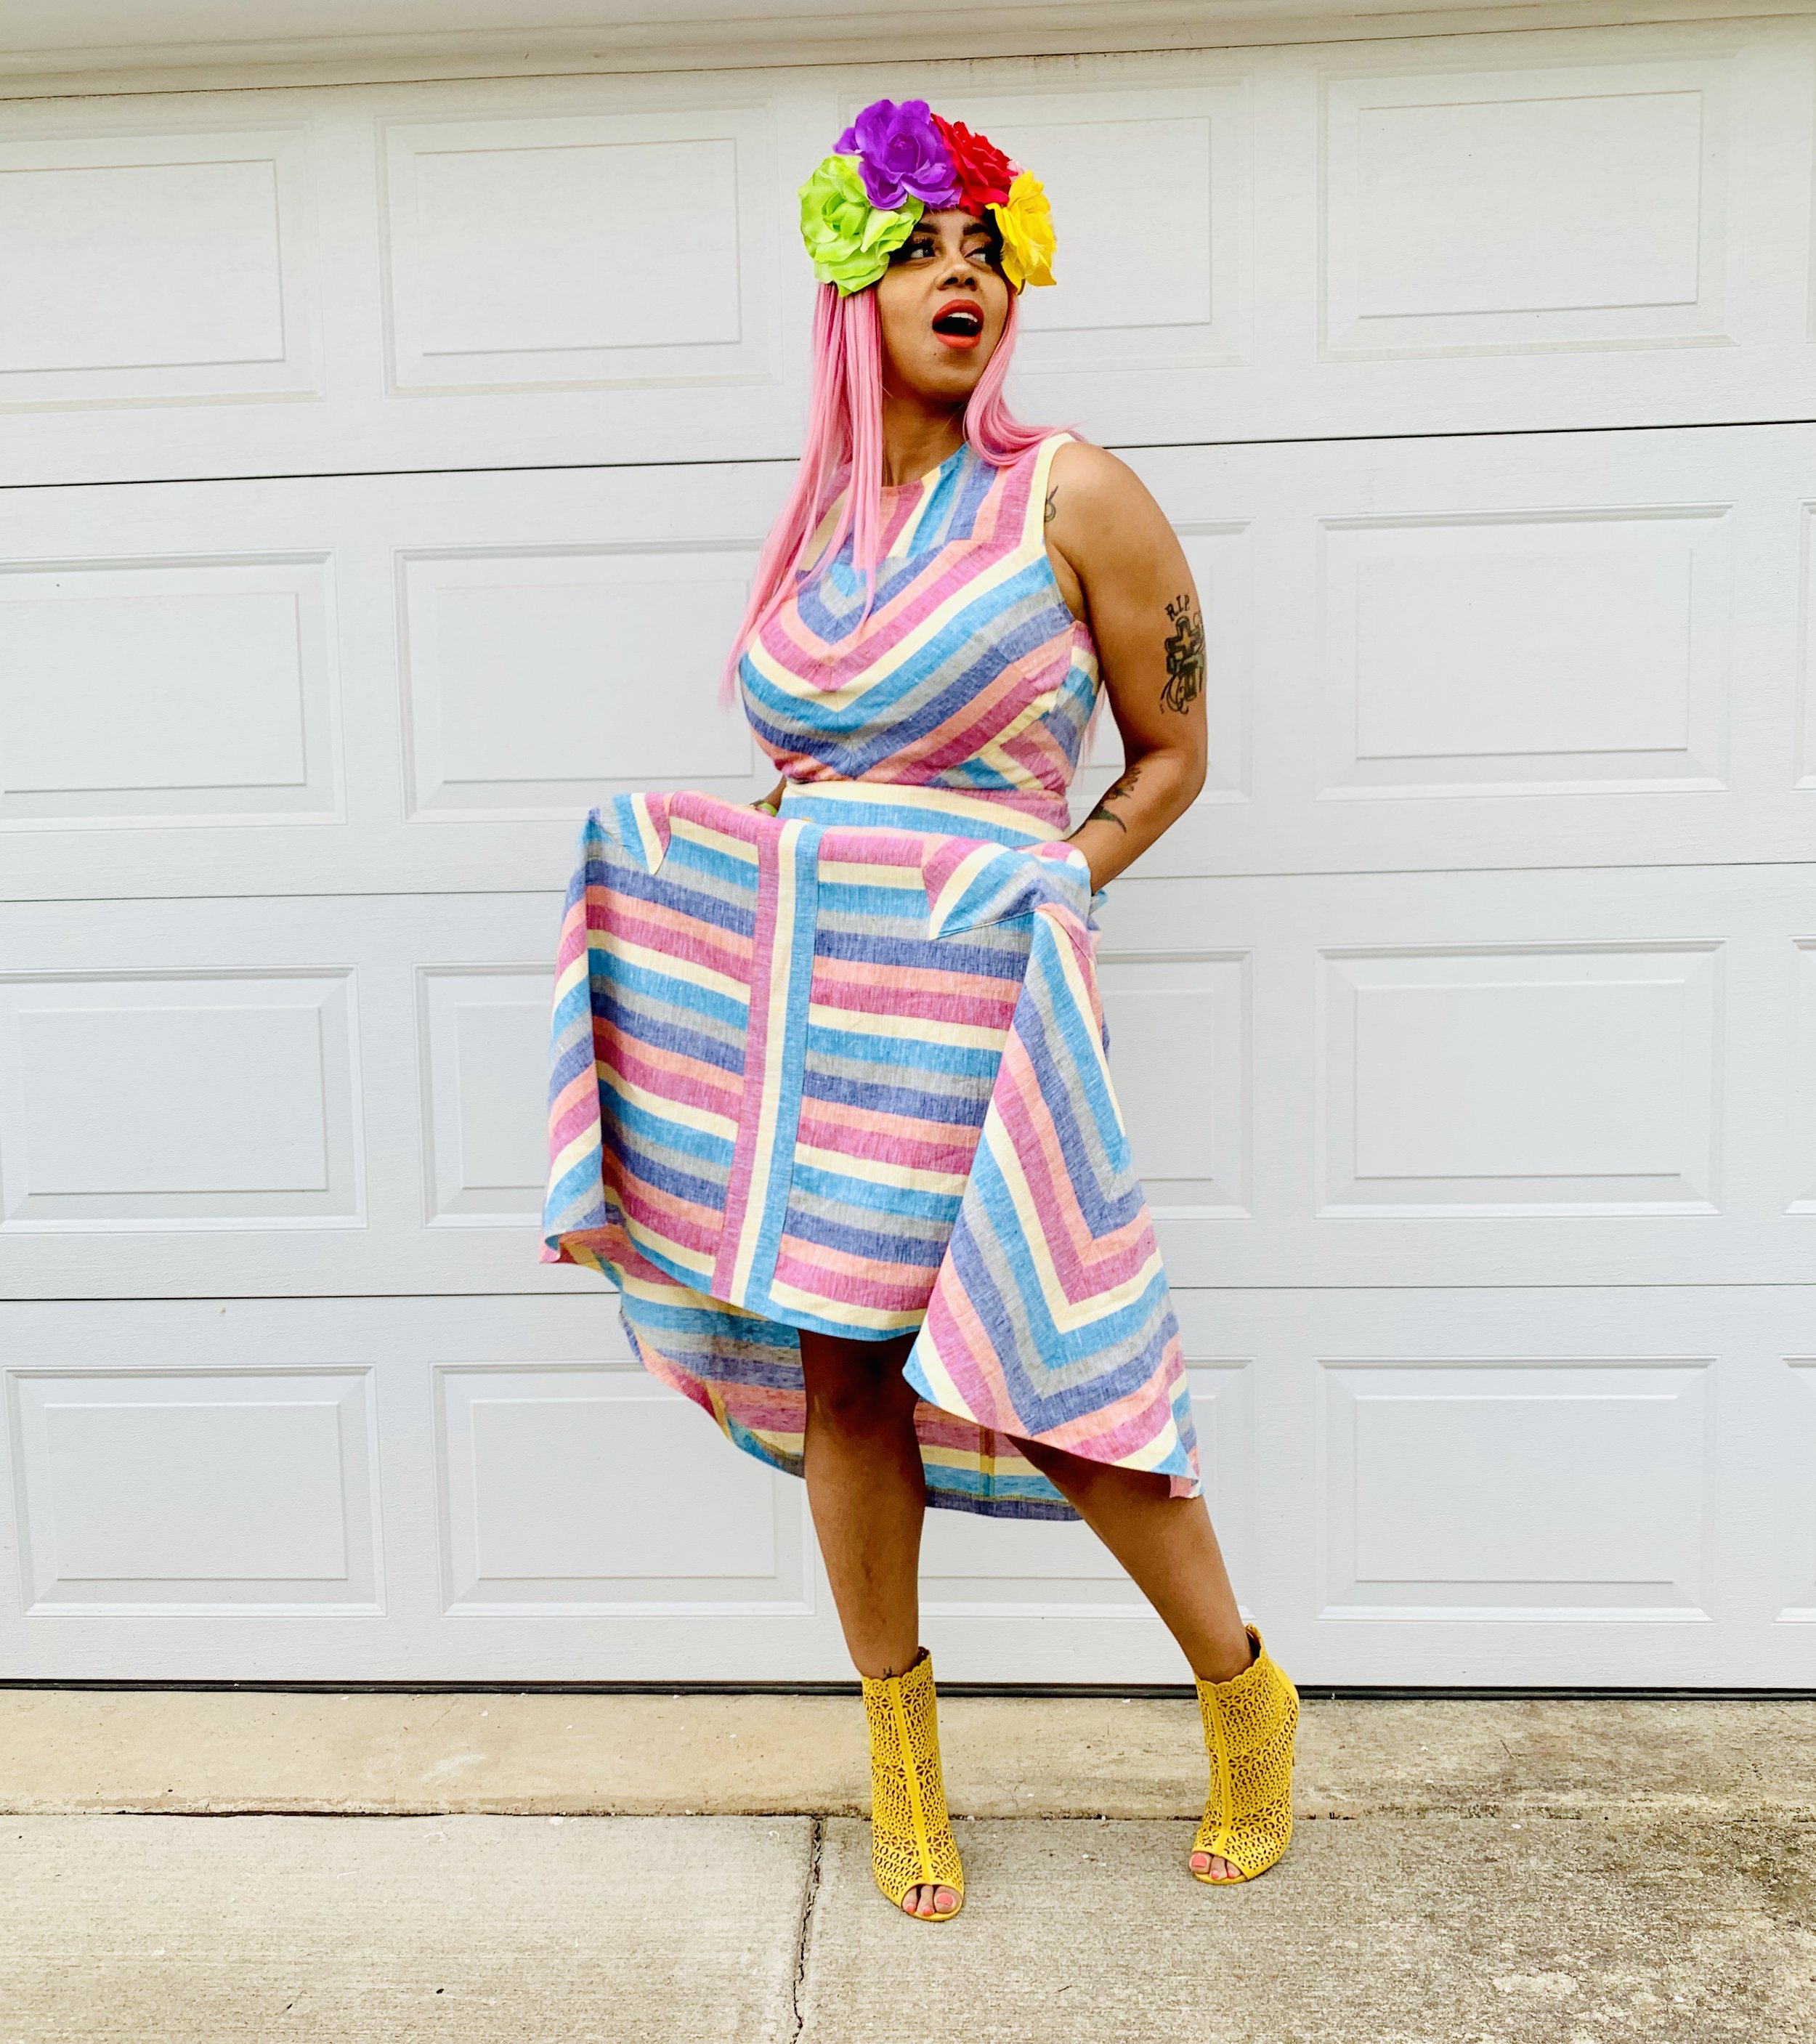
Stripes Galore
Are you obsessed with stripes like I am? This rainbow linen is lightweight and has a beautiful drape.
I can’t get enough of this dress! It’s perfect for Spring/Summer. I was inspired to use this linen after seeing one of my favorite bloggers, Tabitha Sewer, create with it. I added a front panel to the skirt to break the stripes up a little and buttons to give the dress more detail.
Cutting out the fabric was a little tricky. Just make sure to match your notches before cutting and you can achieve this same look. By the time I finished cutting the fabric I was seeing double lol. You can choose different directions to cut out your fabric.

The dress overall was fairly easy to construct. This pattern is beginner friendly. I would definitely make this dress again. If you have used this pattern or are planning to use it please share your looks with me.
Thanks for stopping by and remember
“Sewing is FUN-damental”
Fabric: Joann
Pattern: Vogue 9357
Shoes: Aldo


